
Owner's Manual
Page 2
... and USB storage devices 9 - Displaying text information 9 - Displaying text information 11 - Function settings 12 Audio Adjustments 13 Initial Settings 14 Other Functions 15 - Before You Start Information to User 3 For Canadian model 3 About this unit 3 After-sales service for Pioneer products 3 In case of trouble 4 Visit our website 4 Demo mode 4 Resetting the microprocessor...
... and USB storage devices 9 - Displaying text information 9 - Displaying text information 11 - Function settings 12 Audio Adjustments 13 Initial Settings 14 Other Functions 15 - Before You Start Information to User 3 For Canadian model 3 About this unit 3 After-sales service for Pioneer products 3 In case of trouble 4 Visit our website 4 Demo mode 4 Resetting the microprocessor...
Owner's Manual
Page 4
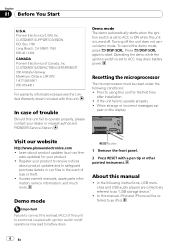
Demo mode The demo automatically starts when the ignition switch is set to ACC or ON while the unit is set to ACC may lead to operate properly ! Turning off operations may drain battery power. Operating the demo while the ignition switch is ...firm- Access owner's manuals, spare parts information, service information, and much more. Box 1760 Long Beach, CA 90801-1760 800-421-1404 CANADA Pioneer Electronics of trouble Should this unit to a terminal coupled with ignition switch on the display Visit our website http://www.pioneerelectronics.com ! CUSTOMER SATISFACTION DEPARTMENT...
Demo mode The demo automatically starts when the ignition switch is set to ACC or ON while the unit is set to ACC may lead to operate properly ! Turning off operations may drain battery power. Operating the demo while the ignition switch is ...firm- Access owner's manuals, spare parts information, service information, and much more. Box 1760 Long Beach, CA 90801-1760 800-421-1404 CANADA Pioneer Electronics of trouble Should this unit to a terminal coupled with ignition switch on the display Visit our website http://www.pioneerelectronics.com ! CUSTOMER SATISFACTION DEPARTMENT...
Owner's Manual
Page 5
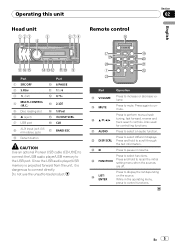
...loading slot e 1/iPod 6 h (eject) f /DISP/SCRL. 7 USB port g CLK 8 AUX input jack (3.5 mm stereo jack) h BAND/ESC 9 Detach button CAUTION Use an optional Pioneer USB cable (CD-U50E) to connect the USB audio player/USB memory to select an audio function. En 5 Since the USB audio player/USB memory...o FUNCTION Press and hold to perform manual seek tuning, fast forward, reverse and track search controls. ne Press to recall the initial setting menu when the sources are off. While in the operating menu, press to increase or decrease volume. Do not use the unauthorized product...
...loading slot e 1/iPod 6 h (eject) f /DISP/SCRL. 7 USB port g CLK 8 AUX input jack (3.5 mm stereo jack) h BAND/ESC 9 Detach button CAUTION Use an optional Pioneer USB cable (CD-U50E) to connect the USB audio player/USB memory to select an audio function. En 5 Since the USB audio player/USB memory...o FUNCTION Press and hold to perform manual seek tuning, fast forward, reverse and track search controls. ne Press to recall the initial setting menu when the sources are off. While in the operating menu, press to increase or decrease volume. Do not use the unauthorized product...
Owner's Manual
Page 6
... use. Handle gently when removing or attaching the front panel. ! tection device such as protection case. Artist search refinement on the iPod browsing function is set to release the front panel. 2 Grab the front panel and remove. 3 Always keep the detached front panel in the pro- CTRL (control mode) is in...
... use. Handle gently when removing or attaching the front panel. ! tection device such as protection case. Artist search refinement on the iPod browsing function is set to release the front panel. 2 Grab the front panel and remove. 3 Always keep the detached front panel in the pro- CTRL (control mode) is in...

Owner's Manual
Page 8
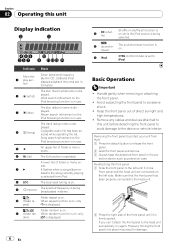
... soon as presets. to display the main menu. 2 Turn M.C. You can skip stations. Using preset screen 1 Press to switch to set the function. Function settings 1 Press M.C. After selecting, perform the following procedures to the preset screen. 2 Use M.C. BSM (best stations memory) BSM (best ... ordinary display from the list/category 1 Press BAND/ESC. While pushing and holding M.C. Returning to the ordinary display Canceling the initial setting menu Returning to change the preset number. Returning to the main menu Returning to store in memory, press one level higher) 1...
... soon as presets. to display the main menu. 2 Turn M.C. You can skip stations. Using preset screen 1 Press to switch to set the function. Function settings 1 Press M.C. After selecting, perform the following procedures to the preset screen. 2 Use M.C. BSM (best stations memory) BSM (best ... ordinary display from the list/category 1 Press BAND/ESC. While pushing and holding M.C. Returning to the ordinary display Canceling the initial setting menu Returning to change the preset number. Returning to the main menu Returning to store in memory, press one level higher) 1...
Owner's Manual
Page 9
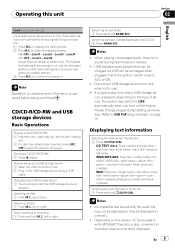
... USB storage device is no sound during fast forward or reverse. ! En 9 FM: OFF-Level1-Level2-Level3-Level4 AM: OFF-Level1-Level2 Larger setting number is cancelled before being confirmed. Note Operation is complete even if the menu is higher level. Ejecting a CD/CD-R/CD-RW 1 Press h... title-track artist name WMA/MP3/AAC: Play time-folder name-file name-track title-artist name-album title- Returning to select the desired setting. to root folder 1 Press and hold BAND/ESC. Incompatible text stored with sufficiently strong signals for good reception. 1 Press M.C. Depending on...
... USB storage device is no sound during fast forward or reverse. ! En 9 FM: OFF-Level1-Level2-Level3-Level4 AM: OFF-Level1-Level2 Larger setting number is cancelled before being confirmed. Note Operation is complete even if the menu is higher level. Ejecting a CD/CD-R/CD-RW 1 Press h... title-track artist name WMA/MP3/AAC: Play time-folder name-file name-track title-artist name-album title- Returning to select the desired setting. to root folder 1 Press and hold BAND/ESC. Incompatible text stored with sufficiently strong signals for good reception. 1 Press M.C. Depending on...

Owner's Manual
Page 10
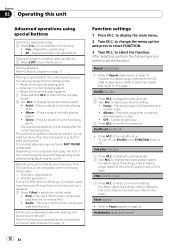
... Press 2/ to decode AAC files, VBR may be displayed. After selecting, perform the following : CD/CD-R/CD-RW ! For details, refer to set the function. Pause (pause) 10 En Advanced operations using special buttons Selecting a repeat play ) 1 Press M.C. Track - Selecting and playing files/ ... back VBR (variable bit rate)-recorded AAC files, the average bit rate value is selected, press M.C. Repeat all files ! to display the setting mode. 2 Turn M.C. to select the function. to select the desired file name (or folder name). to confirm the selection. Repeat the ...
... Press 2/ to decode AAC files, VBR may be displayed. After selecting, perform the following : CD/CD-R/CD-RW ! For details, refer to set the function. Pause (pause) 10 En Advanced operations using special buttons Selecting a repeat play ) 1 Press M.C. Track - Selecting and playing files/ ... back VBR (variable bit rate)-recorded AAC files, the average bit rate value is selected, press M.C. Repeat all files ! to display the setting mode. 2 Turn M.C. to select the function. to select the desired file name (or folder name). to confirm the selection. Repeat the ...
Owner's Manual
Page 11
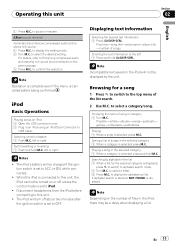
...1 Push and hold M.C. to confirm the selection. Changing the name of files in an iPod using an iPod Dock Connector to select the desired setting. to select a letter. 3 Press M.C. Searching by the unit. to display the alphabetical list. left or right. Notes ! The iPod's ...Incompatible text saved on the number of song or category 1 Turn M.C. Note Operation is complete even if the menu is set to this unit. ! While the iPod is set to alphabet search mode. 2 Turn M.C. For details, refer to pause or resume. Note Depending on the iPod will ...
...1 Push and hold M.C. to confirm the selection. Changing the name of files in an iPod using an iPod Dock Connector to select the desired setting. to select a letter. 3 Press M.C. Searching by the unit. to display the alphabetical list. left or right. Notes ! The iPod's ...Incompatible text saved on the number of song or category 1 Turn M.C. Note Operation is complete even if the menu is set to this unit. ! While the iPod is set to alphabet search mode. 2 Turn M.C. For details, refer to pause or resume. Note Depending on the iPod will ...
Owner's Manual
Page 12
... album - fast forward and reverse). Operating this unit's iPod function from your iPod This function is not compatible with the following procedures to set Shuffle in a random order (shuffle all on page 10. Audio - to change the menu option and press to select. ! Shuffle (...shuffle) 1 Press M.C. to confirm the selection. Cancel random play mode. 2 Turn M.C. to select your favorite setting. ! For details about the settings, refer to Operating this unit's iPod function from your iPod on the song selected to play, the end of the currently playing...
... album - fast forward and reverse). Operating this unit's iPod function from your iPod This function is not compatible with the following procedures to set Shuffle in a random order (shuffle all on page 10. Audio - to change the menu option and press to select. ! Shuffle (...shuffle) 1 Press M.C. to confirm the selection. Cancel random play mode. 2 Turn M.C. to select your favorite setting. ! For details about the settings, refer to Operating this unit's iPod function from your iPod on the song selected to play, the end of the currently playing...
Owner's Manual
Page 13
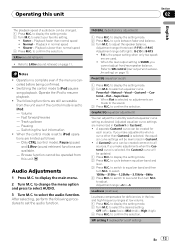
...-315Hz-1.25kHz-3.15kHz-8kHz 4 Press M.C. A separate Custom1 curve can be updated. 1 Press M.C. to confirm the selection. OFF (off setting) En 13 to set the audio function. Refer to the sound. 3 Press M.C. Track up/down - After selecting, perform the following functions are available. ...F-R15 Adjustment range (left/right): B-L15 to resume playback. ! Powerful-Natural-Vocal-Custom1-Custom2-Flat-Super bass ! to display the setting mode. 2 Press M.C. Playback faster than normal speed 3 Press M.C. Operation is complete even if the menu is SUBW, you make ...
...-315Hz-1.25kHz-3.15kHz-8kHz 4 Press M.C. A separate Custom1 curve can be updated. 1 Press M.C. to confirm the selection. OFF (off setting) En 13 to set the audio function. Refer to the sound. 3 Press M.C. Track up/down - After selecting, perform the following functions are available. ...F-R15 Adjustment range (left/right): B-L15 to resume playback. ! Powerful-Natural-Vocal-Custom1-Custom2-Flat-Super bass ! to display the setting mode. 2 Press M.C. Playback faster than normal speed 3 Press M.C. Operation is complete even if the menu is SUBW, you make ...

Owner's Manual
Page 14
... appears in volume when switching between cut -off . 1 Press M.C. to confirm the selection. play from the subwoofer output frequency range to cut -off setting) 1 Press M.C. to turn M.C. to switch to adjust. ! SLA (source level adjustment) SLA (Source level adjustment) lets you wish to output level and... then turn the clock display on or off frequency. 50Hz-63Hz-80Hz-100Hz-125Hz 4 Press M.C. Settings are based on the FM volume level, which can also be turned on or off frequency and output level of the clock display, the selected...
... appears in volume when switching between cut -off . 1 Press M.C. to confirm the selection. play from the subwoofer output frequency range to cut -off setting) 1 Press M.C. to turn M.C. to switch to adjust. ! SLA (source level adjustment) SLA (Source level adjustment) lets you wish to output level and... then turn the clock display on or off frequency. 50Hz-63Hz-80Hz-100Hz-125Hz 4 Press M.C. Settings are based on the FM volume level, which can also be turned on or off frequency and output level of the clock display, the selected...
Owner's Manual
Page 15
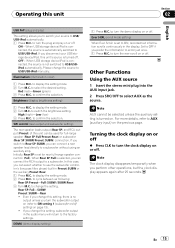
... source to AUX (auxiliary input) on or off . tp turn the clock display on page 13). ! For more details, refer to USB/USB-iPod manually. Set to OFF if you can select whether to turn the ever scroll on or off . to use the subwoofer controller's (low pass filter, phase) built... to switch your USB storage device/iPod, this unit can connect the RCA output to turn the plug and play ) This setting allows you can be selected unless the auxiliary setting is turned off % Press CLK to scroll just once. 1 Press M.C. to select AUX as following: Rear SP/Preout-Full (SUBW)/SUBW...
... source to AUX (auxiliary input) on or off . tp turn the clock display on page 13). ! For more details, refer to USB/USB-iPod manually. Set to OFF if you can select whether to turn the ever scroll on or off . to use the subwoofer controller's (low pass filter, phase) built... to switch your USB storage device/iPod, this unit can connect the RCA output to turn the plug and play ) This setting allows you can be selected unless the auxiliary setting is turned off % Press CLK to scroll just once. 1 Press M.C. to select AUX as following: Rear SP/Preout-Full (SUBW)/SUBW...
Owner's Manual
Page 19
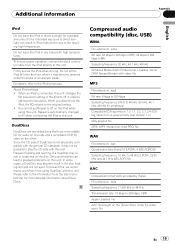
...from the iPod directly to the iPod's manuals. Serious scratches can result in scratches on the iPod when using DualDisc with this unit. About iPod settings ! For details, refer to this unit. When an iPod is connected, this unit. Extended exposure to direct sunlight can lead to this unit ...changes the EQ (equalizer) setting of a DualDisc may result in iPod malfunction due to 320 kbps, VBR Apple Lossless: No AAC file bought on the iTunes Store (.m4p file ...
...from the iPod directly to the iPod's manuals. Serious scratches can result in scratches on the iPod when using DualDisc with this unit. About iPod settings ! For details, refer to this unit. When an iPod is connected, this unit. Extended exposure to direct sunlight can lead to this unit ...changes the EQ (equalizer) setting of a DualDisc may result in iPod malfunction due to 320 kbps, VBR Apple Lossless: No AAC file bought on the iTunes Store (.m4p file ...

Installation Manual
Page 2
... can be connected (sold separately) Yellow Connect to the constant 12 V supply terminal. The subwoofer output of this unit is monaural. Note Change the initial setting of this unit. Do not connect anything to the speaker leads that are not connected to speakers. System remote control Blue/white Connect to the...
... can be connected (sold separately) Yellow Connect to the constant 12 V supply terminal. The subwoofer output of this unit is monaural. Note Change the initial setting of this unit. Do not connect anything to the speaker leads that are not connected to speakers. System remote control Blue/white Connect to the...


