Owner's Manual
Page 4
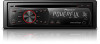
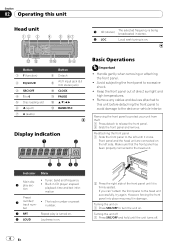
... remove. Make sure that the front panel has been properly connected to 6 5 Disc loading slot 6 h (eject) 7 A (audio) Button 8 Detach 9 AUX input jack (3.5 mm stereo jack) a CLOCK b PAUSE c a/b/c/d d BAND/ESC Display indication Basic Operations Important ! ber 3 RPT Repeat play sec- Button 1 F (function) 2 EQ/LOUD 3 SRC/OFF 4 1 to the head unit. Remove any...
... remove. Make sure that the front panel has been properly connected to 6 5 Disc loading slot 6 h (eject) 7 A (audio) Button 8 Detach 9 AUX input jack (3.5 mm stereo jack) a CLOCK b PAUSE c a/b/c/d d BAND/ESC Display indication Basic Operations Important ! ber 3 RPT Repeat play sec- Button 1 F (function) 2 EQ/LOUD 3 SRC/OFF 4 1 to the head unit. Remove any...
Owner's Manual
Page 7
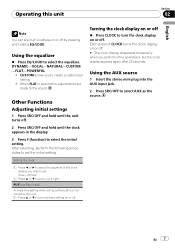
... are made to select AUX as the source. Hour-Minute 2 Press a or b to set . En 7 After selecting, perform the following procedures to put a clock right. Turning the clock display on or off . 2 Press SRC/OFF and hold until the unit turns off by pressing and holding EQ/LOUD. Setting the... English Note You can also turn auxiliary setting on or off . Other Functions Adjusting initial settings 1 Press SRC/OFF and hold until the clock appears in the display. 3 Press F (function) to select the equalizer. Using the equalizer % Press EQ/LOUD to select the initial setting.
... are made to select AUX as the source. Hour-Minute 2 Press a or b to set . En 7 After selecting, perform the following procedures to put a clock right. Turning the clock display on or off . 2 Press SRC/OFF and hold until the unit turns off by pressing and holding EQ/LOUD. Setting the... English Note You can also turn auxiliary setting on or off . Other Functions Adjusting initial settings 1 Press SRC/OFF and hold until the clock appears in the display. 3 Press F (function) to select the equalizer. Using the equalizer % Press EQ/LOUD to select the initial setting.


