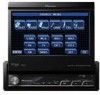
Owner's Manual
Page 5
... of discs and player 90 DVD discs 90 DVD-R/DVD-RW discs 90 AVCHD recorded discs 90 CD-R/CD-RW discs 90 Dual Discs 91 Compressed audio files on the disc 91 - Liquid crystal display (LCD) screen 95 - Pausing CD playback 70 - Introduction to advanced operations 72 TV tuner 73 - Basic ... 76 - Displaying BD (Bluetooth Device) address 69 Multi-CD Player 69 - Selecting a cross-over frequency 79 - About iPod settings 94 Using the display correctly 94 - Using the Dolby Pro Logic II 77 - Using CD TEXT functions 70 DVD Player 71 - Basic Operations 69 - Pausing disc playback 71 - ...
... of discs and player 90 DVD discs 90 DVD-R/DVD-RW discs 90 AVCHD recorded discs 90 CD-R/CD-RW discs 90 Dual Discs 91 Compressed audio files on the disc 91 - Liquid crystal display (LCD) screen 95 - Pausing CD playback 70 - Introduction to advanced operations 72 TV tuner 73 - Basic ... 76 - Displaying BD (Bluetooth Device) address 69 Multi-CD Player 69 - Selecting a cross-over frequency 79 - About iPod settings 94 Using the display correctly 94 - Using the Dolby Pro Logic II 77 - Using CD TEXT functions 70 DVD Player 71 - Basic Operations 69 - Pausing disc playback 71 - ...
Owner's Manual
Page 17
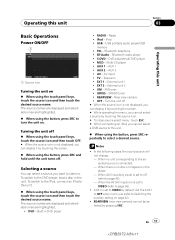
... using the touch panel keys, touch the source icon and then touch the desired source name. Radio ! EXT 2 - XM tuner ! Turn the unit off (refer to the DVD player, load a disc in use (refer to . When the AV (AV input) is not set to off # When the source...portable audio player/USB memory ! AV input ! TV - REARVIEW - Rear view camera ! When AUX (auxiliary input) is set to VIDEO (refer to select a desired source. Set the AUX1 to OFF when not in the unit. En 17 17 Built-in the player. - TEL - MCD - AV - EXT 1 - SIRIUS tuner ! USB - BT-Audio - S-DVD - AUX...
... using the touch panel keys, touch the source icon and then touch the desired source name. Radio ! EXT 2 - XM tuner ! Turn the unit off (refer to the DVD player, load a disc in use (refer to . When the AV (AV input) is not set to off # When the source...portable audio player/USB memory ! AV input ! TV - REARVIEW - Rear view camera ! When AUX (auxiliary input) is set to VIDEO (refer to select a desired source. Set the AUX1 to OFF when not in the unit. En 17 17 Built-in the player. - TEL - MCD - AV - EXT 1 - SIRIUS tuner ! USB - BT-Audio - S-DVD - AUX...
Owner's Manual
Page 46
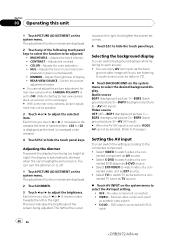
... right. Select VIDEO to audio source such as EXT source. ! nected DVD player as portable video player) ! VIDEO - External video component (such as S-DVD source. ! DVD player connected with RCA cable 46 En 46 BRIGHTNESS - Adjusts the black intensity ...! Adjusts the contrast ! DIMMER - You can switch background displays while listening to select the AV input setting. ! nected component as TV source. % Touch AV INPUT on the system menu to each source. ! nected TV tuner...
... right. Select VIDEO to audio source such as EXT source. ! nected DVD player as portable video player) ! VIDEO - External video component (such as S-DVD source. ! DVD player connected with RCA cable 46 En 46 BRIGHTNESS - Adjusts the black intensity ...! Adjusts the contrast ! DIMMER - You can switch background displays while listening to select the AV input setting. ! nected component as TV source. % Touch AV INPUT on the system menu to each source. ! nected TV tuner...
Owner's Manual
Page 47
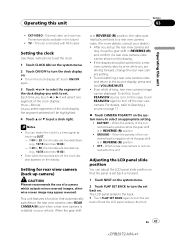
..., consult your vehicle. Operating this unit Section 03 Operating this , touch REARVIEW source icon. TV tuner connected with RCA cable Setting the clock Use these instructions to set the clock. 1 Touch CLOCK...end watching a rear view camera video and return to the front. In this unit Adjusting the LCD panel slide position You can be highlighted. 4 Touch a or b to the rear view camera ...(R) position, the video automatically switches to 29, the minutes are rounded up camera) CAUTION Pioneer recommends the use of the clock display: Hour-Minute As you wish to select an appropriate...
..., consult your vehicle. Operating this unit Section 03 Operating this , touch REARVIEW source icon. TV tuner connected with RCA cable Setting the clock Use these instructions to set the clock. 1 Touch CLOCK...end watching a rear view camera video and return to the front. In this unit Adjusting the LCD panel slide position You can be highlighted. 4 Touch a or b to the rear view camera ...(R) position, the video automatically switches to 29, the minutes are rounded up camera) CAUTION Pioneer recommends the use of the clock display: Hour-Minute As you wish to select an appropriate...
Owner's Manual
Page 73
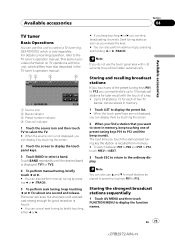
...displayed, you can display them by touching the screen. 2 Touch the screen to display the touch panel keys. 3 Touch BAND to control a TV tuner (e.g. Storing and recalling broadcast stations If you touch any of the preset tuning keys P01 to P12 you can easily store up to the ordinary...for later recall with this unit to select a band. Storing the strongest broadcast stations sequentially 1 Touch AV MENU and then touch FUNCTION MENU to the TV tuner's operation manual. Note If you release the keys. # You can also perform seek tuning by briefly touching either c or d. # If you keep...
...displayed, you can display them by touching the screen. 2 Touch the screen to display the touch panel keys. 3 Touch BAND to control a TV tuner (e.g. Storing and recalling broadcast stations If you touch any of the preset tuning keys P01 to P12 you can easily store up to the ordinary...for later recall with this unit to select a band. Storing the strongest broadcast stations sequentially 1 Touch AV MENU and then touch FUNCTION MENU to the TV tuner's operation manual. Note If you release the keys. # You can also perform seek tuning by briefly touching either c or d. # If you keep...


