Installation Manual
Page 2
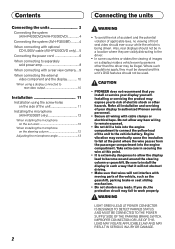
... not recommend that wires will not obstruct driving. • Make sure that you to authorized Pioneer service personnel. • Secure all installation and servicing of your display yourself. If you do, the protection circuit may fail to the ...clamps or electrical tape. Engine vibration may be illegal. Contents Connecting the units 2 Connecting the system (AVH-P4200DVD/AVH-P3200DVD 4 Connecting the system (AVH-P3200BT) ......... 4 When connecting with optional CD-IU200V cable (AVH-P4200DVD only) ... 5 Connecting the power cord 6 When connecting to separately sold power amp 8 ...
... not recommend that wires will not obstruct driving. • Make sure that you to authorized Pioneer service personnel. • Secure all installation and servicing of your display yourself. If you do, the protection circuit may fail to the ...clamps or electrical tape. Engine vibration may be illegal. Contents Connecting the units 2 Connecting the system (AVH-P4200DVD/AVH-P3200DVD 4 Connecting the system (AVH-P3200BT) ......... 4 When connecting with optional CD-IU200V cable (AVH-P4200DVD only) ... 5 Connecting the power cord 6 When connecting to separately sold power amp 8 ...
Installation Manual
Page 3
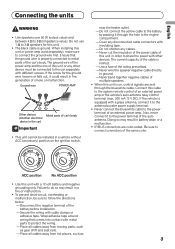
... the units WARNING • Use speakers over 50 W (output value) and between 4 Ω to connect the ground wire first. When installing this unit is properly connected to follow the directions below. - Do not connect the yellow cable to the battery by passing it could result ... O F O OF OF N STAR N STAR T T ACC position No ACC position • Use this cable to the power terminal of the battery before installation. - Failure to do so may result in a vehicle without ACC (accessory) position on , control signals are color-coded. Disconnect the negative terminal of an ...
... the units WARNING • Use speakers over 50 W (output value) and between 4 Ω to connect the ground wire first. When installing this unit is properly connected to follow the directions below. - Do not connect the yellow cable to the battery by passing it could result ... O F O OF OF N STAR N STAR T T ACC position No ACC position • Use this cable to the power terminal of the battery before installation. - Failure to do so may result in a vehicle without ACC (accessory) position on , control signals are color-coded. Disconnect the negative terminal of an ...
Installation Manual
Page 10
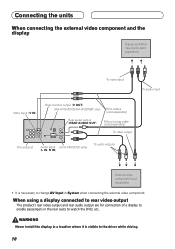
WARNING Never install the display in a location where it is necessary to change AV Input in the rear seats to watch the DVD, etc. When using a display connected ... component and the display Display with RCA input jacks (sold separately) To video input To audio input Video input (V IN) Rear monitor output (V OUT) (AVH-P4200DVD/AVH-P3200BT only) RCA cables (sold separately) Rear audio output (REAR AUDIO OUT) Mini pin plug cable (sold separately) To video output This product Audio input...
WARNING Never install the display in a location where it is necessary to change AV Input in the rear seats to watch the DVD, etc. When using a display connected ... component and the display Display with RCA input jacks (sold separately) To video input To audio input Video input (V IN) Rear monitor output (V OUT) (AVH-P4200DVD/AVH-P3200BT only) RCA cables (sold separately) Rear audio output (REAR AUDIO OUT) Mini pin plug cable (sold separately) To video output This product Audio input...
Installation Manual
Page 11
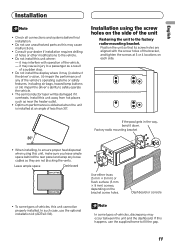
...hazard lamp buttons or (iii) impair the driver's ability to safely operate the vehicle. • The semiconductor laser will be properly installed. it may cause injury to a passenger as near the heater outlet. • Optimum performance is obtained when the unit is...use unauthorized parts as this may cause malfunctions. • Consult your dealer if installation requires drilling of holes or other modifications to the vehicle. • Do not install this happens, use the optional installation kit (ADT-VA133). Install this unit away from hot places such as a result of a sudden stop. ...
...hazard lamp buttons or (iii) impair the driver's ability to safely operate the vehicle. • The semiconductor laser will be properly installed. it may cause injury to a passenger as near the heater outlet. • Optimum performance is obtained when the unit is...use unauthorized parts as this may cause malfunctions. • Consult your dealer if installation requires drilling of holes or other modifications to the vehicle. • Do not install this happens, use the optional installation kit (ADT-VA133). Install this unit away from hot places such as a result of a sudden stop. ...

Installation Manual
Page 12
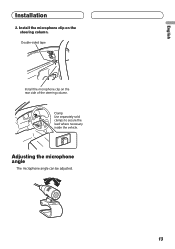
Installation Installing the microphone (AVH-P3200BT only) Installation notes Install the microphone in such a way that will not obstruct driving. Install the microphone on the microphone clip. Microphone Microphone clip Clamp Use separately sold clamps to pick up , install the microphone clip. (Lowering the sun visor ...reduces the voice recognition rate.) Microphone clip CAUTION • It is extremely dangerous to allow the microphone lead to install the unit in a position and orientation that it will enable it to secure the lead where necessary inside the vehicle...
Installation Installing the microphone (AVH-P3200BT only) Installation notes Install the microphone in such a way that will not obstruct driving. Install the microphone on the microphone clip. Microphone Microphone clip Clamp Use separately sold clamps to pick up , install the microphone clip. (Lowering the sun visor ...reduces the voice recognition rate.) Microphone clip CAUTION • It is extremely dangerous to allow the microphone lead to install the unit in a position and orientation that it will enable it to secure the lead where necessary inside the vehicle...
Installation Manual
Page 13
Clamp Use separately sold clamps to secure the lead where necessary inside the vehicle. Adjusting the microphone angle The microphone angle can be adjusted. 13 English Installation 2. Double-sided tape Install the microphone clip on the steering column. Install the microphone clip on the rear side of the steering column.
Clamp Use separately sold clamps to secure the lead where necessary inside the vehicle. Adjusting the microphone angle The microphone angle can be adjusted. 13 English Installation 2. Double-sided tape Install the microphone clip on the steering column. Install the microphone clip on the rear side of the steering column.
Owner's Manual
Page 5
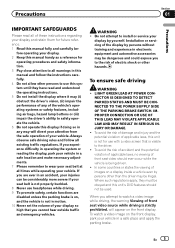
...risk of electric shock or other persons to use this system until they must be obeyed and this manual fully and carefully be- Installation or servicing of the display by persons without training and experience in any of the vehicle's operating systems or safety features, including ... hear outside traffic and emergency vehicles. Precautions Section 01 Precautions IMPORTANT SAFEGUARDS Please read and understood the operating instructions. 5 Do not install the display where it may (i) obstruct the driver's vision, (ii) impair the performance of any way will appear on the front display.
...risk of electric shock or other persons to use this system until they must be obeyed and this manual fully and carefully be- Installation or servicing of the display by persons without training and experience in any of the vehicle's operating systems or safety features, including ... hear outside traffic and emergency vehicles. Precautions Section 01 Precautions IMPORTANT SAFEGUARDS Please read and understood the operating instructions. 5 Do not install the display where it may (i) obstruct the driver's vision, (ii) impair the performance of any way will appear on the front display.
Owner's Manual
Page 6
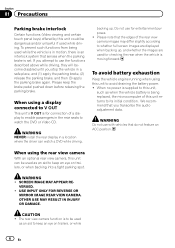
... on trailers, or when backing into a tight parking spot. We recommend that the edges of this unit to avoid draining the battery power. ! WARNING NEVER install the rear display in motion, there is an interlock system that do not feature an ACC position. OTHER USE MAY RESULT IN INJURY OR DAMAGE...
... on trailers, or when backing into a tight parking spot. We recommend that the edges of this unit to avoid draining the battery power. ! WARNING NEVER install the rear display in motion, there is an interlock system that do not feature an ACC position. OTHER USE MAY RESULT IN INJURY OR DAMAGE...
Owner's Manual
Page 7
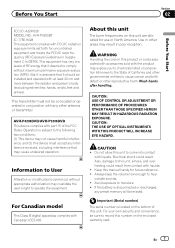
... the following two conditions: (1) This device may not cause harmful interference, and (2) this unit are allocated for future reference. ! AVH-P4200DVD/AVH-P3200DVD This device complies with liquids. ! About this unit The tuner frequencies on this device must not be erased. Electrical shock could result...located on the enclosed warranty card. For your own security and convenience, be installed and operated with liquids. Before You Start Section 02 Before You Start FCC ID: AJDK028 MODEL NO.: AVH-P3200BT IC: 775E-K028 This equipment complies with the product may expose you to...
... the following two conditions: (1) This device may not cause harmful interference, and (2) this unit are allocated for future reference. ! AVH-P4200DVD/AVH-P3200DVD This device complies with liquids. ! About this unit The tuner frequencies on this device must not be erased. Electrical shock could result...located on the enclosed warranty card. For your own security and convenience, be installed and operated with liquids. Before You Start Section 02 Before You Start FCC ID: AJDK028 MODEL NO.: AVH-P3200BT IC: 775E-K028 This equipment complies with the product may expose you to...
Owner's Manual
Page 9
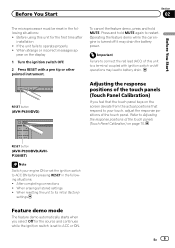
... and hold MUTE. Adjusting the response positions of the touch panel. RESET button (AVH-P3200DVD/AVHP3200BT) Note Switch your touch, adjust the response positions of the touch panels (Touch Panel Calibration) If you select Off for the first time after installation ! When resetting the unit to its initial (factory) settings Feature demo mode...
... and hold MUTE. Adjusting the response positions of the touch panel. RESET button (AVH-P3200DVD/AVHP3200BT) Note Switch your touch, adjust the response positions of the touch panels (Touch Panel Calibration) If you select Off for the first time after installation ! When resetting the unit to its initial (factory) settings Feature demo mode...
Owner's Manual
Page 64
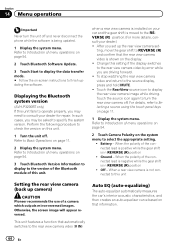
...your dealer for repair. Touch the RearView source icon to this unit. 1 Turn the unit off. Ground - When a rear view camera is installed on page 54. 3 Touch Bluetooth Version Information to display to the REVERSE (R) position.(For more details, consult your car and the gear shift ... unit Setting the rear view camera (back up the rear view camera set up camera) CAUTION Pioneer recommends the use of a camera which outputs mirror-reversed images. Displaying the Bluetooth system version (AVH-P3200BT only) If this unit. For details, refer to the rear view camera video (V IN...
...your dealer for repair. Touch the RearView source icon to this unit. 1 Turn the unit off. Ground - When a rear view camera is installed on page 54. 3 Touch Bluetooth Version Information to display to the REVERSE (R) position.(For more details, consult your car and the gear shift ... unit Setting the rear view camera (back up the rear view camera set up camera) CAUTION Pioneer recommends the use of a camera which outputs mirror-reversed images. Displaying the Bluetooth system version (AVH-P3200BT only) If this unit. For details, refer to the rear view camera video (V IN...
Owner's Manual
Page 71
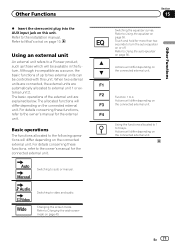
Other Functions % Insert the stereo mini plug into the AUX input jack on this unit. Using an external unit An external unit refers to a Pioneer product, such as a source, the basic functions of the external unit are automatically allocated to external unit 1 or external unit 2. Audio Video Switching to auto ... external unit. Refer to Using the equalizer on or off. Actions will differ depending on page 10. F4 Using the functions allocated to 1 to the installation manual. En 71
Other Functions % Insert the stereo mini plug into the AUX input jack on this unit. Using an external unit An external unit refers to a Pioneer product, such as a source, the basic functions of the external unit are automatically allocated to external unit 1 or external unit 2. Audio Video Switching to auto ... external unit. Refer to Using the equalizer on or off. Actions will differ depending on page 10. F4 Using the functions allocated to 1 to the installation manual. En 71
Owner's Manual
Page 72
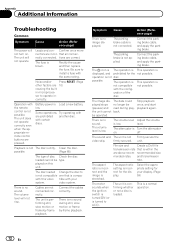
... apply the parking brake. and transmission rate. Rectify the cause and then replace the fuse. Clean the disc. The disc loaded Change the disc to install a fuse with another disc. video system. The icon is The operation is This operation is within the are above recom- The data could no sound...
... apply the parking brake. and transmission rate. Rectify the cause and then replace the fuse. Clean the disc. The disc loaded Change the disc to install a fuse with another disc. video system. The icon is The operation is This operation is within the are above recom- The data could no sound...


