User Guide
Page 17
... operate correctly if your computer. - Refer to turn off the sound and picture. Press A/V Mute again to the computer's operation manual for switching the projector and the Remote Control unit to temporarily turn the sound and picture back on /off ) before the lamp turns on the local...Menu Volume 30˚ 4m (13'8) 45˚ 30˚ Using the remote control in red. - Make the necessary connections before operating the projector. Wait until the indicator stops flashing before proceeding. Notes: - For one-button mouse systems, use . If the power is not correctly set up...
... operate correctly if your computer. - Refer to turn off the sound and picture. Press A/V Mute again to the computer's operation manual for switching the projector and the Remote Control unit to temporarily turn the sound and picture back on /off ) before the lamp turns on the local...Menu Volume 30˚ 4m (13'8) 45˚ 30˚ Using the remote control in red. - Make the necessary connections before operating the projector. Wait until the indicator stops flashing before proceeding. Notes: - For one-button mouse systems, use . If the power is not correctly set up...

User Guide
Page 20
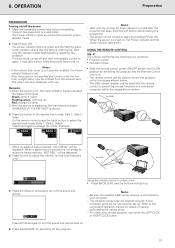
.... Used to 'ON': - Auto Sync adjustment can be achieved with Auto Sync adjustment, use manual adjustments. (See 'Data display Fine Sync adjustment'). When 'Auto Sync' is automatically made manually by setting 'Auto Sync' to 'ON' in portions of the computer connected to a computer ...Sync adjustment setting previously made by moving it up or down Note: Auto Sync adjustment may occur between the LCD pixels, causing flickering, vertical stripes, or contrast irregularities in the projector's GUI menu. During Auto Sync adjustment, the On-Screen Display changes: 5. Press 1 / 2 to ...
.... Used to 'ON': - Auto Sync adjustment can be achieved with Auto Sync adjustment, use manual adjustments. (See 'Data display Fine Sync adjustment'). When 'Auto Sync' is automatically made manually by setting 'Auto Sync' to 'ON' in portions of the computer connected to a computer ...Sync adjustment setting previously made by moving it up or down Note: Auto Sync adjustment may occur between the LCD pixels, causing flickering, vertical stripes, or contrast irregularities in the projector's GUI menu. During Auto Sync adjustment, the On-Screen Display changes: 5. Press 1 / 2 to ...

User Guide
Page 31
...for use . Please refer to the operation manual of DIN-D-sub RS-232C cable and to clean it is no longer possible to the serial port on setting up/installing the correct mouse driver. - AIR FILTER MAINTENANCE • This projector is equipped with two air filters to ensure ... . Insert the tab on specification of the use of the arrow. 4. The wireless mouse or RS-232C function may damage your nearest Philips Authorised LCD projector Dealer or Service Centre. Contact your fingers and lift it is not correctly set up red. Cleaning the side air filter (not removable)...
...for use . Please refer to the operation manual of DIN-D-sub RS-232C cable and to clean it is no longer possible to the serial port on setting up/installing the correct mouse driver. - AIR FILTER MAINTENANCE • This projector is equipped with two air filters to ensure ... . Insert the tab on specification of the use of the arrow. 4. The wireless mouse or RS-232C function may damage your nearest Philips Authorised LCD projector Dealer or Service Centre. Contact your fingers and lift it is not correctly set up red. Cleaning the side air filter (not removable)...


