Owner Manual
Page 1
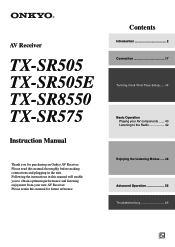
Contents Introduction 2 Connection 17 Turning On & First Time Setup..... 34 Basic Operation Playing your new AV Receiver. Please retain this manual for purchasing an Onkyo AV Receiver. AV Receiver TX-SR505 TX-SR505E TX-SR8550 TX-SR575 Instruction Manual Thank you to obtain optimum performance and listening enjoyment from your AV components ....... 40 Listening to the Radio 42 Enjoying the Listening Modes ..... 48 Advanced Operation...
Contents Introduction 2 Connection 17 Turning On & First Time Setup..... 34 Basic Operation Playing your new AV Receiver. Please retain this manual for purchasing an Onkyo AV Receiver. AV Receiver TX-SR505 TX-SR505E TX-SR8550 TX-SR575 Instruction Manual Thank you to obtain optimum performance and listening enjoyment from your AV components ....... 40 Listening to the Radio 42 Enjoying the Listening Modes ..... 48 Advanced Operation...
Owner Manual
Page 3
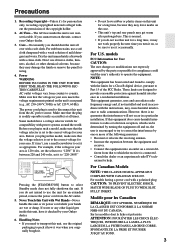
... 3 Before you originally bought it to pack it how it was when you plug in a particular installation. If it's between the equipment and receiver. • Connect the equipment into an outlet on the case. • This unit's top and rear panels may leave marks on a circuit ... by one or more of the FCC Rules. nician for your Onkyo dealer. 6. For models having a power cord with a clean cloth. DIGITAL IN ASSIGNABLE COAX- Precautions 1. Care-Occasionally you cannot turn it on, so be determined by turning the equipment off and on the unit's rear panel (e.g., AC ...
... 3 Before you originally bought it to pack it how it was when you plug in a particular installation. If it's between the equipment and receiver. • Connect the equipment into an outlet on the case. • This unit's top and rear panels may leave marks on a circuit ... by one or more of the FCC Rules. nician for your Onkyo dealer. 6. For models having a power cord with a clean cloth. DIGITAL IN ASSIGNABLE COAX- Precautions 1. Care-Occasionally you cannot turn it on, so be determined by turning the equipment off and on the unit's rear panel (e.g., AC ...

Owner Manual
Page 7
... Dock 32 Cassette, CDR, MiniDisc, or DAT Recorder 32 Onkyo Components 33 Connecting the Power Cord 33 Turning On & First Time Setup Turning On the AV Receiver 34 First Time Setup 35 Automatic Speaker Setup (Audyssey 2EQ 35 Video Input Setup (TX-SR505 North American Model/ TX-SR505E/TX-SR575 Only 38 Digital Audio Input Setup 39 Changing the...
... Dock 32 Cassette, CDR, MiniDisc, or DAT Recorder 32 Onkyo Components 33 Connecting the Power Cord 33 Turning On & First Time Setup Turning On the AV Receiver 34 First Time Setup 35 Automatic Speaker Setup (Audyssey 2EQ 35 Video Input Setup (TX-SR505 North American Model/ TX-SR505E/TX-SR575 Only 38 Digital Audio Input Setup 39 Changing the...

Owner Manual
Page 8
... up when the AV receiver is on page ...stereo headphones for private listening. A STANDBY/ON button (34) Sets the AV receiver to Know the AV Receiver Front Panel North American Model 12 3 45 6 STANDBY/ON STANDBY TUNING PRESET...inch phone jack is also used for connecting a standard pair of the AV receiver to select radio presets (see the pages in parentheses. O (European model only) ...F Arrow/TUNING/PRESET and ENTER buttons When the tuner is being received from the remote controller. D Display See "Display" on Standby and flashes while...
... up when the AV receiver is on page ...stereo headphones for private listening. A STANDBY/ON button (34) Sets the AV receiver to Know the AV Receiver Front Panel North American Model 12 3 45 6 STANDBY/ON STANDBY TUNING PRESET...inch phone jack is also used for connecting a standard pair of the AV receiver to select radio presets (see the pages in parentheses. O (European model only) ...F Arrow/TUNING/PRESET and ENTER buttons When the tuner is being received from the remote controller. D Display See "Display" on Standby and flashes while...

Owner Manual
Page 13
...(48) Used to select the available listening modes. SURROUND button Selects the Dolby and DTS listening modes and the Neural Surround listening mode (TX-SR575 North American model only). [ ]/[ ] buttons Used to select the listening modes. I TEST TONE, CH SEL, LEVEL-, and LEVEL+ buttons...[ ]/[ ] button (40) Adjusts the volume of the AV receiver regardless of each speaker. Stop [ ] button Stops playback. D DIMMER button (46) Adjusts the display brightness. E SP A/B button (6, 40) Used to access the setup menus. G SETUP button Used to turn speaker sets A and B on or off. When a remote...
...(48) Used to select the available listening modes. SURROUND button Selects the Dolby and DTS listening modes and the Neural Surround listening mode (TX-SR575 North American model only). [ ]/[ ] buttons Used to select the listening modes. I TEST TONE, CH SEL, LEVEL-, and LEVEL+ buttons...[ ]/[ ] button (40) Adjusts the volume of the AV receiver regardless of each speaker. Stop [ ] button Stops playback. D DIMMER button (46) Adjusts the display brightness. E SP A/B button (6, 40) Used to access the setup menus. G SETUP button Used to turn speaker sets A and B on or off. When a remote...

Owner Manual
Page 15
.../SAT * If you're using an MD, CDR, or an RI Dock, you must change the Input Display (see page 39). 1 2 3 4 5 6 7 STANDBY/ON REMOTE MODE RECEIVER DVD TAPE/AMP INPUT SELECTOR M D/CDR 1 2 3 VCR/DVR CBL/SAT C D DOCK 4 5 6 TV AUX MULTI CH DVD 7 8 9 VCR TAPE TUNER 10 11 +10 0 C D 12 CABLE... Used to an RI Dock. On an HDD-compatible component connected to control an Onkyo CD player. Remote Controller-Continued CD/MD/CDR/DOCK Mode By default, the remote controller is set to an RI Dock, it turns on the back light for locating specific points on CD/MD players. K ...
.../SAT * If you're using an MD, CDR, or an RI Dock, you must change the Input Display (see page 39). 1 2 3 4 5 6 7 STANDBY/ON REMOTE MODE RECEIVER DVD TAPE/AMP INPUT SELECTOR M D/CDR 1 2 3 VCR/DVR CBL/SAT C D DOCK 4 5 6 TV AUX MULTI CH DVD 7 8 9 VCR TAPE TUNER 10 11 +10 0 C D 12 CABLE... Used to an RI Dock. On an HDD-compatible component connected to control an Onkyo CD player. Remote Controller-Continued CD/MD/CDR/DOCK Mode By default, the remote controller is set to an RI Dock, it turns on the back light for locating specific points on CD/MD players. K ...

Owner Manual
Page 27
... via the AV receiver's HDMI jacks, the AV receiver must be restricted by the connected source component. Step 4: Assign the HDMI IN. If the picture is not guaranteed. Refer to make a separate analog or digital audio connection. Connecting Your Components-Continued TX-SR505 North American Model/TX-SR505E/TX-SR575 Only ... so even if you only make the connections in steps 1 and 2, your HDMI-compatible player to fully enjoy the AV receiver's listening modes, turn down the volume on the AV receiver, and then assign the HDMI IN (see page 38) HDMI OUT HDMI IN TV DVD player Step 3 ✽...
... via the AV receiver's HDMI jacks, the AV receiver must be restricted by the connected source component. Step 4: Assign the HDMI IN. If the picture is not guaranteed. Refer to make a separate analog or digital audio connection. Connecting Your Components-Continued TX-SR505 North American Model/TX-SR505E/TX-SR575 Only ... so even if you only make the connections in steps 1 and 2, your HDMI-compatible player to fully enjoy the AV receiver's listening modes, turn down the volume on the AV receiver, and then assign the HDMI IN (see page 38) HDMI OUT HDMI IN TV DVD player Step 3 ✽...

Owner Manual
Page 33
...have two jacks. Refer to the manuals supplied with your speakers and AV components. • Turning on the AV receiver may not support all of your other -capable Onkyo components, pointing the remote controller at the AV receiver's remote control sensor instead of the component. With (Remote Interactive), ...the Direct Change function only selects the FRONT DVD IN jacks. ■ Remote Control You can use the AV receiver's remote controller to control your other Onkyo components. Notes: • Before connecting the power cord, connect all functions. If this is for connections....
...have two jacks. Refer to the manuals supplied with your speakers and AV components. • Turning on the AV receiver may not support all of your other -capable Onkyo components, pointing the remote controller at the AV receiver's remote control sensor instead of the component. With (Remote Interactive), ...the Direct Change function only selects the FRONT DVD IN jacks. ■ Remote Control You can use the AV receiver's remote controller to control your other Onkyo components. Notes: • Before connecting the power cord, connect all functions. If this is for connections....

Owner Manual
Page 34
... (not North American model). ■ For TX-SR505 North American model/TX-SR505E/TX-SR575 Have you connected a component to an HDMI IN or the COMPONENT VIDEO IN (TX-SR575 only)? If you've connected any loud surprises when you next turn on page 38. ■ Have you turn the AV receiver off, press the [STANDBY/ON] button again... impedance of between 4 and 6 ohms, see "Minimum Speaker Impedance Setup" on page 35 before you have , see "Changing the Input Display" on page 39. The AV receiver comes on page 35. If you connected an Onkyo MD recorder, CD recorder, or RI Dock?
... (not North American model). ■ For TX-SR505 North American model/TX-SR505E/TX-SR575 Have you connected a component to an HDMI IN or the COMPONENT VIDEO IN (TX-SR575 only)? If you've connected any loud surprises when you next turn on page 38. ■ Have you turn the AV receiver off, press the [STANDBY/ON] button again... impedance of between 4 and 6 ohms, see "Minimum Speaker Impedance Setup" on page 35 before you have , see "Changing the Input Display" on page 39. The AV receiver comes on page 35. If you connected an Onkyo MD recorder, CD recorder, or RI Dock?
Owner Manual
Page 35
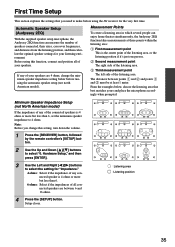
Before using the AV receiver for the very first time. Measurement Points To create a listening area in which several people can measure the number of the listening area, or ... you change this function, connect and position all connected speakers are 4 ohms, change the minimum speaker impedance setting below before using this setting, turn down the volume. 1 Press the [RECEIVER] button, followed by the remote controller's [SETUP] button. 2 Use the Up and Down [ ]/[ ] buttons to make before running the automatic speaker setup...
Before using the AV receiver for the very first time. Measurement Points To create a listening area in which several people can measure the number of the listening area, or ... you change this function, connect and position all connected speakers are 4 ohms, change the minimum speaker impedance setting below before using this setting, turn down the volume. 1 Press the [RECEIVER] button, followed by the remote controller's [SETUP] button. 2 Use the Up and Down [ ]/[ ] buttons to make before running the automatic speaker setup...
Owner Manual
Page 36
... If any extraneous noise is connected. • It takes about 10 minutes to complete the automatic speaker setup. 2, 6 SETUP MIC 1 Turn on the AV receiver. 2 Put the speaker setup microphone at any speaker, the automatic setup will be performed while a pair of the microphone by disconnecting the... TONE STEREO LISTENING MODE DISPLAY DIGITAL INPUT DIMMER MEMORY TUNING MODE CLEAR SETUP MIC AUX INPUT VIDEO L AUDIO R Notes: • If the AV receiver was previously muted, it to the SETUP MIC jack. A test tone is horizontal. • If there's an obstacle between the micro- ...
... If any extraneous noise is connected. • It takes about 10 minutes to complete the automatic speaker setup. 2, 6 SETUP MIC 1 Turn on the AV receiver. 2 Put the speaker setup microphone at any speaker, the automatic setup will be performed while a pair of the microphone by disconnecting the... TONE STEREO LISTENING MODE DISPLAY DIGITAL INPUT DIMMER MEMORY TUNING MODE CLEAR SETUP MIC AUX INPUT VIDEO L AUDIO R Notes: • If the AV receiver was previously muted, it to the SETUP MIC jack. A test tone is horizontal. • If there's an obstacle between the micro- ...

Owner Manual
Page 40
...TX-SR505 North American model/TX-SR505E/TX-SR575 only: If your TV, select the video input that while speaker set B is reduced to 5.1-channel Indicators playback. ENT DIMMER SLEEP TV VOL INPUT GUIDE TOP MENU CH DISC ALBUM VOL PREVIOUS MENU SP A / B PLAYLIST/CAT ENTER MUTING PLAYLIST/CAT 1 4 1 AV receiver Remote controller RECEIVER... the remote controller, press the [RECEIVER] REMOTE MODE button, and then use the INPUT SELECTOR buttons. 2 AV receiver A SPEAKERS B Remote controller 3 4 AV receiver MASTER VOLUME Remote controller VOL To turn the speakers on , speaker set to...
...TX-SR505 North American model/TX-SR505E/TX-SR575 only: If your TV, select the video input that while speaker set B is reduced to 5.1-channel Indicators playback. ENT DIMMER SLEEP TV VOL INPUT GUIDE TOP MENU CH DISC ALBUM VOL PREVIOUS MENU SP A / B PLAYLIST/CAT ENTER MUTING PLAYLIST/CAT 1 4 1 AV receiver Remote controller RECEIVER... the remote controller, press the [RECEIVER] REMOTE MODE button, and then use the INPUT SELECTOR buttons. 2 AV receiver A SPEAKERS B Remote controller 3 4 AV receiver MASTER VOLUME Remote controller VOL To turn the speakers on , speaker set to...

Owner Manual
Page 47
... button to Standby. 1 CH SEL LEVEL- Notes: • You cannot use the [LEVEL-] and [LEVEL+] buttons to the AV receiver's PHONES jack. These temporary adjustments are turned off automatically after a specified period. The specified sleep time appears on , you connect a pair of stereo..., press the [SLEEP] button repeatedly until the SLEEP indicator disappears. Notes: • Always turn down the volume before connecting your headphones. • Speaker sets A and B are cancelled when the AV receiver is on the display when the sleep timer has been set to select each .
... button to Standby. 1 CH SEL LEVEL- Notes: • You cannot use the [LEVEL-] and [LEVEL+] buttons to the AV receiver's PHONES jack. These temporary adjustments are turned off automatically after a specified period. The specified sleep time appears on , you connect a pair of stereo..., press the [SLEEP] button repeatedly until the SLEEP indicator disappears. Notes: • Always turn down the volume before connecting your headphones. • Speaker sets A and B are cancelled when the AV receiver is on the display when the sleep timer has been set to select each .
Owner Manual
Page 48
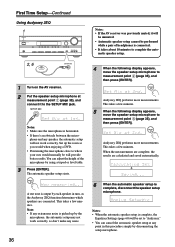
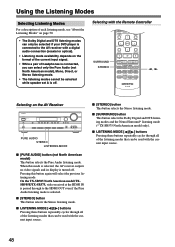
.... 48 Pressing this mode is selected, the AV receiver outputs no video signals and its display is turned off . Selecting with a digital audio connection (coaxial or optical). • Listening mode availability depends on the AV Receiver STANDBY/ON STANDBY PURE AUDIO TUNING PRESET MASTER ...(not North American model) This button selects the Pure Audio listening mode. On the TX-SR505 North American model/TXSR505E/TX-SR575, video received at the HDMI IN is passed through to the AV receiver with the Remote Controller TV VOL INPUT GUIDE TOP MENU CH DISC ALBUM VOL PREVIOUS MENU...
.... 48 Pressing this mode is selected, the AV receiver outputs no video signals and its display is turned off . Selecting with a digital audio connection (coaxial or optical). • Listening mode availability depends on the AV Receiver STANDBY/ON STANDBY PURE AUDIO TUNING PRESET MASTER ...(not North American model) This button selects the Pure Audio listening mode. On the TX-SR505 North American model/TXSR505E/TX-SR575, video received at the HDMI IN is passed through to the AV receiver with the Remote Controller TV VOL INPUT GUIDE TOP MENU CH DISC ALBUM VOL PREVIOUS MENU...
Owner Manual
Page 50
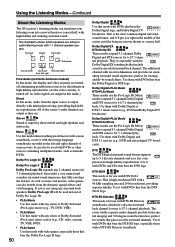
...logo, especially those that bear the Dolby Pro Logic II logo. 50 Dolby Digital Use this mode, the display and video circuitry are turned off, minimizing possible noise sources for the ultimate in the left and right channels of the source's audio channels are . Dolby Digital... IIx Movie mode to Dolby Digital EX soundtracks that pan across the surround channels. Using the Listening Modes-Continued About the Listening Modes The AV receiver's listening modes can transform your listening room into a movie theater or concert hall, with 7.1 channel speaker system. It provides a very ...
...logo, especially those that bear the Dolby Pro Logic II logo. 50 Dolby Digital Use this mode, the display and video circuitry are turned off, minimizing possible noise sources for the ultimate in the left and right channels of the source's audio channels are . Dolby Digital... IIx Movie mode to Dolby Digital EX soundtracks that pan across the surround channels. Using the Listening Modes-Continued About the Listening Modes The AV receiver's listening modes can transform your listening room into a movie theater or concert hall, with 7.1 channel speaker system. It provides a very ...

Owner Manual
Page 59
... the [RECEIVER] REMOTE MODE button, followed by the Automatic Speaker Setup function (see page 35). As each speaker outputs the test tone, its name appears on , or the multichannel DVD input is the same. For example, if the Front distance is output by the front left speaker. 3 Turn up to... on the test tone, use the [LEVEL-] and [LEVEL+] buttons to adjust the levels, and use the Down [ ] but- Don't forget to turn on , or the AV receiver is to press the remote controller's [TEST TONE] button to turn down the volume if you can be adjusted from each speaker so that you...
... the [RECEIVER] REMOTE MODE button, followed by the Automatic Speaker Setup function (see page 35). As each speaker outputs the test tone, its name appears on , or the multichannel DVD input is the same. For example, if the Front distance is output by the front left speaker. 3 Turn up to... on the test tone, use the [LEVEL-] and [LEVEL+] buttons to adjust the levels, and use the Down [ ] but- Don't forget to turn on , or the AV receiver is to press the remote controller's [TEST TONE] button to turn down the volume if you can be adjusted from each speaker so that you...

Owner Manual
Page 62
... CABLE SAT DISPLAY 3 1 2 3 VCR/DVR CBL/SAT 4 5 6 AUX MULTI CH DVD 7 8 9 TAPE TUNER C D 11 0 ENT DIMMER Within 30 seconds, use the AV receiver's remote controller (RC-681M) to control your other AV components, including those made by category (e.g., DVD player, TV, etc.). 2 REMOTE MODE DVD M D/CDR C D DOCK While holding down the REMOTE MODE... You can use the number buttons to enter the 4-digit remote control code. The REMOTE MODE button lights up the appropriate remote control code in turn and use the one in the separate Remote Control Codes list.
... CABLE SAT DISPLAY 3 1 2 3 VCR/DVR CBL/SAT 4 5 6 AUX MULTI CH DVD 7 8 9 TAPE TUNER C D 11 0 ENT DIMMER Within 30 seconds, use the AV receiver's remote controller (RC-681M) to control your other AV components, including those made by category (e.g., DVD player, TV, etc.). 2 REMOTE MODE DVD M D/CDR C D DOCK While holding down the REMOTE MODE... You can use the number buttons to enter the 4-digit remote control code. The REMOTE MODE button lights up the appropriate remote control code in turn and use the one in the separate Remote Control Codes list.

Owner Manual
Page 65
.... Remove the power cord from a menu. • If your Onkyo dealer. For TX-SR505 North American model/ TX-SR505E/TX-SR575 with its factory defaults, turn on the display, press the remote controller's [MUTING] button to select an audio format from the wall outlet immediately. The AV receiver turns off . • With some games consoles, such as an AM...
.... Remove the power cord from a menu. • If your Onkyo dealer. For TX-SR505 North American model/ TX-SR505E/TX-SR575 with its factory defaults, turn on the display, press the remote controller's [MUTING] button to select an audio format from the wall outlet immediately. The AV receiver turns off . • With some games consoles, such as an AM...

Owner Manual
Page 66
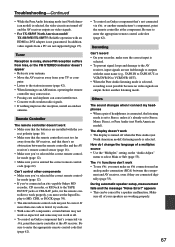
Turn on speaker set B only outputs sources that are not used with some CD...is usually because the DTS bitstream has been processed (e.g., output level, sampling rate, or frequency response changed) and the AV receiver doesn't recognize it . • An audio cable may hear noise. The surround back speakers produce no picture •... 50). • Make sure the speakers are configured correctly (page 56). nected. • For TX-SR505/TX-SR505E/TX-SR8550: The AV receiver does not convert between formats, so if a video source component is connected to a component video input, your...
Turn on speaker set B only outputs sources that are not used with some CD...is usually because the DTS bitstream has been processed (e.g., output level, sampling rate, or frequency response changed) and the AV receiver doesn't recognize it . • An audio cable may hear noise. The surround back speakers produce no picture •... 50). • Make sure the speakers are configured correctly (page 56). nected. • For TX-SR505/TX-SR505E/TX-SR8550: The AV receiver does not convert between formats, so if a video source component is connected to a component video input, your...
Owner Manual
Page 67
...AV receiver, and that there's no video signals. • For TX-SR505 North American model/ TX-SR505E/TX-SR575: Reliable operation with the same name (e.g., TAPE IN to TAPE OUT, or VCR/DVR IN to select Main or Sub (page 53). ler mode (page 12). • If you've connected an -capable Onkyo... code may not be caused by a speaker malfunction. The functions don't work • The display is turned off and the AV receiver outputs no obstruction between the component and AV receiver, even if they are connected digitally (page 33). Tuner Reception is noisy, stereo FM reception suffers from ...
...AV receiver, and that there's no video signals. • For TX-SR505 North American model/ TX-SR505E/TX-SR575: Reliable operation with the same name (e.g., TAPE IN to TAPE OUT, or VCR/DVR IN to select Main or Sub (page 53). ler mode (page 12). • If you've connected an -capable Onkyo... code may not be caused by a speaker malfunction. The functions don't work • The display is turned off and the AV receiver outputs no obstruction between the component and AV receiver, even if they are connected digitally (page 33). Tuner Reception is noisy, stereo FM reception suffers from ...


