
IR-300 Advanced Manual (English)
Page 2
...Dock&Done printer, see "i functions" in this document). Advanced Manual This manual introduces you to the camera's many functions after you easy-tofollow explanations on how to the camera. It will help you get the most out of operations that will help you get used in this ...manual Below is divided into two parts: the Basic Manual and the Advanced Manual (this manual. Please read the ...
...Dock&Done printer, see "i functions" in this document). Advanced Manual This manual introduces you to the camera's many functions after you easy-tofollow explanations on how to the camera. It will help you get the most out of operations that will help you get used in this ...manual Below is divided into two parts: the Basic Manual and the Advanced Manual (this manual. Please read the ...

IR-300 Advanced Manual (English)
Page 3
... P. 9 1 P. 21 2 P. 31 3 P. 44 4 P. 55 5 P. 81 6 Using voice recording P. 88 7 Settings i functions P. 92 8 P. 104 9 Printing pictures Connecting the camera to use OLYMPUS Master. To enjoy the pictures you have taken. Basic operation Tips before taking pictures. To view, edit and sort the pictures you want to...names of parts, see a list of menus, or find important points for . Why not take a look at the world of the contents. Composition of the manual You'll find what you are looking for getting more enjoyment out of your camera. Read this part before you...
... P. 9 1 P. 21 2 P. 31 3 P. 44 4 P. 55 5 P. 81 6 Using voice recording P. 88 7 Settings i functions P. 92 8 P. 104 9 Printing pictures Connecting the camera to use OLYMPUS Master. To enjoy the pictures you have taken. Basic operation Tips before taking pictures. To view, edit and sort the pictures you want to...names of parts, see a list of menus, or find important points for . Why not take a look at the world of the contents. Composition of the manual You'll find what you are looking for getting more enjoyment out of your camera. Read this part before you...

IR-300 Advanced Manual (English)
Page 8
Table of Contents Glossary of terms 159 13 Miscellaneous 161 Menu list 162 List of factory default settings 169 Modes and shooting functions 171 Names of parts 173 Camera 173 Cradle 175 Monitor indications 176 Index 179 8
Table of Contents Glossary of terms 159 13 Miscellaneous 161 Menu list 162 List of factory default settings 169 Modes and shooting functions 171 Names of parts 173 Camera 173 Cradle 175 Monitor indications 176 Index 179 8

IR-300 Advanced Manual (English)
Page 26
... you 2 set the picture to 1× when the monitor setting is over 1,024 × 768 (such as 1,280 × 1,024), the picture only takes up part of the picture on the computer screen varies depending on the computer's monitor setting. However, if the monitor setting is 1,024 × 768. For instance...
... you 2 set the picture to 1× when the monitor setting is over 1,024 × 768 (such as 1,280 × 1,024), the picture only takes up part of the picture on the computer screen varies depending on the computer's monitor setting. However, if the monitor setting is 1,024 × 768. For instance...

IR-300 Advanced Manual (English)
Page 29
... erased on the camera or processed using a computer. Before use this camera. The number of the card. 2 Contact area The part where the data transferred from the camera 1 enters the card. 2 Compatible cards xD-Picture Card (16 - 512 MB) Note • This camera may not recognize a non-OLYMPUS card or a ...memory card Card basics The card is closed. g"Formatting the internal memory or a card" (P. 80) Inserting and removing the card 1 Make sure the camera is turned off. • The power lamp is off. • The monitor is off. • The lens barrier is a medium for one...
... erased on the camera or processed using a computer. Before use this camera. The number of the card. 2 Contact area The part where the data transferred from the camera 1 enters the card. 2 Compatible cards xD-Picture Card (16 - 512 MB) Note • This camera may not recognize a non-OLYMPUS card or a ...memory card Card basics The card is closed. g"Formatting the internal memory or a card" (P. 80) Inserting and removing the card 1 Make sure the camera is turned off. • The power lamp is off. • The monitor is off. • The lens barrier is a medium for one...

IR-300 Advanced Manual (English)
Page 50
... where it overlaps. Compose your shots so that the right edge of the previous picture overlaps with overlapping edges into a single panoramic picture, using the OLYMPUS Master software. Panorama shooting lets you want to top 50 Top menu [MODE MENU] [PANORAMA] g"Using the menus" (P. 18) 1 Use the ...the right edge. ^ : The next picture is connected at the left ). You have to remember what the part in the frame on the edge of panorama shooting with an Olympus xDPicture Card. Connects pictures from left to right Connects pictures from right to the next picture does not remain ...
... where it overlaps. Compose your shots so that the right edge of the previous picture overlaps with overlapping edges into a single panoramic picture, using the OLYMPUS Master software. Panorama shooting lets you want to top 50 Top menu [MODE MENU] [PANORAMA] g"Using the menus" (P. 18) 1 Use the ...the right edge. ^ : The next picture is connected at the left ). You have to remember what the part in the frame on the edge of panorama shooting with an Olympus xDPicture Card. Connects pictures from left to right Connects pictures from right to the next picture does not remain ...

IR-300 Advanced Manual (English)
Page 65
... [320 × 240], and press i. Additional playback functions Top menu [MODE MENU] [EDIT] g"Using the menus" (P. 18) 5 1 Select [BLACK & WHITE], [SEPIA], [Q] or [P], and press i. Crops part of a picture and saves it as a new file. BLACK & WHITE BLACK & WHITE CANCEL (When [Q] is selected Select [BLACK & WHITE] or [SEPIA], and press i. Changes the...
... [320 × 240], and press i. Additional playback functions Top menu [MODE MENU] [EDIT] g"Using the menus" (P. 18) 5 1 Select [BLACK & WHITE], [SEPIA], [Q] or [P], and press i. Crops part of a picture and saves it as a new file. BLACK & WHITE BLACK & WHITE CANCEL (When [Q] is selected Select [BLACK & WHITE] or [SEPIA], and press i. Changes the...

IR-300 Advanced Manual (English)
Page 67
... to adjust the brightness or saturation. 2 Press i. 3 Select [BRIGHTNESS] or [SATURATION], and press i. Note • Correcting pictures with another camera. 67 Correcting pictures (REDEYE FIX / BRIGHTNESS / SATURATION) 1 Select [REDEYE FIX], [BRIGHTNESS] or [SATURATION], and press i. 2 (When [REDEYE FIX] is ...space in the internal memory or the card, or for correction framed in blue. • The picture is not corrected when there are no parts framed in blue. 1 Select [REDEYE FIX], and press i. y R EDIT REDEYE FIX FIX IMAGE BRIGHTNESS COMPOSE IMAGE SATURATION 5 CANCEL GO REDEYE...
... to adjust the brightness or saturation. 2 Press i. 3 Select [BRIGHTNESS] or [SATURATION], and press i. Note • Correcting pictures with another camera. 67 Correcting pictures (REDEYE FIX / BRIGHTNESS / SATURATION) 1 Select [REDEYE FIX], [BRIGHTNESS] or [SATURATION], and press i. 2 (When [REDEYE FIX] is ...space in the internal memory or the card, or for correction framed in blue. • The picture is not corrected when there are no parts framed in blue. 1 Select [REDEYE FIX], and press i. y R EDIT REDEYE FIX FIX IMAGE BRIGHTNESS COMPOSE IMAGE SATURATION 5 CANCEL GO REDEYE...

IR-300 Advanced Manual (English)
Page 73
... pressed. ^ : Displays the previous frame. Editing a movie Top menu [MODE MENU] [EDIT] g"Using the menus" (P. 18) 1 Select the first frame of the part you want to keep , and GO press i. 10:26:03/12:56:34 Additional playback functions 73 Editing movies EDIT INDEX This function lets you... extract parts of the movie that you want to edit and display the top menu. g"Editing a movie" (P. 73) 9 frames extracted from a movie are displayed...
... pressed. ^ : Displays the previous frame. Editing a movie Top menu [MODE MENU] [EDIT] g"Using the menus" (P. 18) 1 Select the first frame of the part you want to keep , and GO press i. 10:26:03/12:56:34 Additional playback functions 73 Editing movies EDIT INDEX This function lets you... extract parts of the movie that you want to edit and display the top menu. g"Editing a movie" (P. 73) 9 frames extracted from a movie are displayed...

IR-300 Advanced Manual (English)
Page 89
... movies, but also sound. END]. Recorded sound is saved as a WAV file, which is displayed in single-frame or index format in use this digital camera to record. g"Using the menus" (P. 18) Microphone 2 Press the shutter button fully. Self-timer/ card access lamp • The self-timer...starts. • The bar displayed during sound 7 recording indicates the following: Bar length : The internal memory or card capacity White part : Used memory space Yellow part : Memory space currently in the same manner as still pictures and movies. Using voice recording 89 Recording sound (VOICE REC) You ...
... movies, but also sound. END]. Recorded sound is saved as a WAV file, which is displayed in single-frame or index format in use this digital camera to record. g"Using the menus" (P. 18) Microphone 2 Press the shutter button fully. Self-timer/ card access lamp • The self-timer...starts. • The bar displayed during sound 7 recording indicates the following: Bar length : The internal memory or card capacity White part : Used memory space Yellow part : Memory space currently in the same manner as still pictures and movies. Using voice recording 89 Recording sound (VOICE REC) You ...

IR-300 Advanced Manual (English)
Page 141
...window. • The camera switches to view mode and the first frame of the movie is displayed. 2 To play back the movie, click playback button at the bottom of the controller parts are shown below uses the photo menu. 11 1 Click "Print Images" on the OLYMPUS Master main menu. •...; The print menu is displayed. 141 Connecting the camera to the first frame. 7 Repeat button Plays the movie repeatedly....
...window. • The camera switches to view mode and the first frame of the movie is displayed. 2 To play back the movie, click playback button at the bottom of the controller parts are shown below uses the photo menu. 11 1 Click "Print Images" on the OLYMPUS Master main menu. •...; The print menu is displayed. 141 Connecting the camera to the first frame. 7 Repeat button Plays the movie repeatedly....

IR-300 Advanced Manual (English)
Page 151
... to a TV. page The colors of the picture is in [NO PICTURE] is exposed Block the sunlight with See "Error messages". P. 46 Part of pictures look unnatural. Pictures you have taken do not appear on the card. on the monitor. P. 76 Single-frame erase and all-frame erase... cannot be performed. The lens was partly Hold the camera correctly, keeping your finger or fingers and the strap away from the lens. The camera is dark. There is hard to q. The monitor is a problem with your hand. shooting mode. ...
... to a TV. page The colors of the picture is in [NO PICTURE] is exposed Block the sunlight with See "Error messages". P. 46 Part of pictures look unnatural. Pictures you have taken do not appear on the card. on the monitor. P. 76 Single-frame erase and all-frame erase... cannot be performed. The lens was partly Hold the camera correctly, keeping your finger or fingers and the strap away from the lens. The camera is dark. There is hard to q. The monitor is a problem with your hand. shooting mode. ...

IR-300 Advanced Manual (English)
Page 157
...storage and retrieval system, without obligation or advance notice. 12 157 Appendix No part of these written materials or this publication or software without the prior written permission of Olympus. No liability is assumed with respect to the use of the information contained in..., so the above limitations may violate applicable copyright laws. Copyright Notice All rights reserved. Safety Precautions Disclaimer of Warranty • Olympus makes no representations or warranties, either expressed or implied, by any means, electronic or mechanical, including photocopying and recording or the...
...storage and retrieval system, without obligation or advance notice. 12 157 Appendix No part of these written materials or this publication or software without the prior written permission of Olympus. No liability is assumed with respect to the use of the information contained in..., so the above limitations may violate applicable copyright laws. Copyright Notice All rights reserved. Safety Precautions Disclaimer of Warranty • Olympus makes no representations or warranties, either expressed or implied, by any means, electronic or mechanical, including photocopying and recording or the...

IR-300 Advanced Manual (English)
Page 158
...frequency energy and, if not installed and used to connect the camera to USB enabled personal computers (PC). Consult your dealer or an experienced radio/TV technician for a Class B digital device, pursuant to Part 15 of the following measures: - Any unauthorized changes or modifications...the user's authority to provide reasonable protection against harmful interference in a particular installation. Increase the distance between the camera and receiver. - Only the OLYMPUS-supplied USB cable should be determined by one or more of the FCC Rules. These limits are designed to ...
...frequency energy and, if not installed and used to connect the camera to USB enabled personal computers (PC). Consult your dealer or an experienced radio/TV technician for a Class B digital device, pursuant to Part 15 of the following measures: - Any unauthorized changes or modifications...the user's authority to provide reasonable protection against harmful interference in a particular installation. Increase the distance between the camera and receiver. - Only the OLYMPUS-supplied USB cable should be determined by one or more of the FCC Rules. These limits are designed to ...

IR-300 Advanced Manual (English)
Page 159
...exposure by the level of contrast in the center and other areas of the image separately. The camera determines if the image is less light focused on digital cameras. When noise reduction works, the camera automatically reduces the noise to when the image seen through the viewfinder does not exactly match the...in the corners of the image. EV (Exposure Value) A system for measuring exposure. Appendix Images size The size of an image expressed by parts of the CCD where no light is focused and are generated by the number of 640 × 480 fills the computer screen when the ...
...exposure by the level of contrast in the center and other areas of the image separately. The camera determines if the image is less light focused on digital cameras. When noise reduction works, the camera automatically reduces the noise to when the image seen through the viewfinder does not exactly match the...in the corners of the image. EV (Exposure Value) A system for measuring exposure. Appendix Images size The size of an image expressed by parts of the CCD where no light is focused and are generated by the number of 640 × 480 fills the computer screen when the ...

IR-300 Advanced Manual (English)
Page 161
Refer here for appears. An index also helps you find the pages where a function or item that you are looking for the names of the camera parts and buttons, the names and meanings of the icons that are listed next to the names of the top menus and mode menus. 13 Miscellaneous 13 Miscellaneous This chapter contains all the camera functions described in the menu lists. 161 For effective use of the manual, reference page numbers are displayed on the monitor, and the lists of the camera parts and in Chapters 1 to 11.
Refer here for appears. An index also helps you find the pages where a function or item that you are looking for the names of the camera parts and buttons, the names and meanings of the icons that are listed next to the names of the top menus and mode menus. 13 Miscellaneous 13 Miscellaneous This chapter contains all the camera functions described in the menu lists. 161 For effective use of the manual, reference page numbers are displayed on the monitor, and the lists of the camera parts and in Chapters 1 to 11.

IR-300 Advanced Manual (English)
Page 173
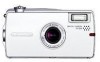
... Flash gP. 38 Names of parts Lens Zoom lever gP. 35, 56, 57 Microphone gP. 54, 89 Self-timer/card access lamp gP. 49, 89, 139 Battery compartment/card cover gP. 29 Tripod socket Cradle connector gP. 104 Status Power lamp Status Power lamp Camera on Lit (green) Voice playback... paused Blinking (purple) Camera off or sleep mode Off Connected to or printing with PictBridge printer Lit (light blue) Charging...
... Flash gP. 38 Names of parts Lens Zoom lever gP. 35, 56, 57 Microphone gP. 54, 89 Self-timer/card access lamp gP. 49, 89, 139 Battery compartment/card cover gP. 29 Tripod socket Cradle connector gP. 104 Status Power lamp Status Power lamp Camera on Lit (green) Voice playback... paused Blinking (purple) Camera off or sleep mode Off Connected to or printing with PictBridge printer Lit (light blue) Charging...

IR-300 Advanced Manual (English)
Page 174
Names of parts MENU button gP. 15 Mode switch gP. 10 Power lamp gP. 173 Names of parts Monitor gP. 176 Arrow pad Remote control receiver gP. 76 Strap eyelet Speaker Arrow pad ([\^]) gP. 14, 15 Custom button (z) gP. 97 Print button (
Names of parts MENU button gP. 15 Mode switch gP. 10 Power lamp gP. 173 Names of parts Monitor gP. 176 Arrow pad Remote control receiver gP. 76 Strap eyelet Speaker Arrow pad ([\^]) gP. 14, 15 Custom button (z) gP. 97 Print button (

IR-300 Advanced Manual (English)
Page 176
...49 176 page P. 32 - e, f 3 Memory indicator IN, xD 4 Exposure compensation -2.0 - +2.0 5 Green lamp 6 Flash stand-by Flash charge { # (Lights) # (Blinks) 7 Camera movement A warning Miscellaneous 8 Macro mode & Super macro mode % 9 Flash mode (#), !, #, $ 10 Sequential shooting (For j still pictures) 13 Image stabilizer (For h movies) 11 Self-... 13 14 Movie Item 1 Shooting mode 2 Battery check Indications d, N, I, J, K, L, h, etc. Names of parts Names of parts Monitor indications Information regarding shooting or playback mode is displayed on the monitor.
...49 176 page P. 32 - e, f 3 Memory indicator IN, xD 4 Exposure compensation -2.0 - +2.0 5 Green lamp 6 Flash stand-by Flash charge { # (Lights) # (Blinks) 7 Camera movement A warning Miscellaneous 8 Macro mode & Super macro mode % 9 Flash mode (#), !, #, $ 10 Sequential shooting (For j still pictures) 13 Image stabilizer (For h movies) 11 Self-... 13 14 Movie Item 1 Shooting mode 2 Battery check Indications d, N, I, J, K, L, h, etc. Names of parts Names of parts Monitor indications Information regarding shooting or playback mode is displayed on the monitor.

IR-300 Advanced Manual (English)
Page 177
Names of parts Names of parts Item 12 Sound record R Indications 13 Record mode B5M, e3M, f2M, L1M, E(for still pictures), F, M(for movies) 14 Number of storable still 5 pictures Remaining recording time 00:30 15 Spot metering n 16 White balance 5, 3, 1, > 17 AF target mark 18 Memory gauge [] a, b, c, d Ref. page P. 42, 54, 64 P. 24 P. 25 P. 40 P. 47 P. 46 P. 22 - Miscellaneous 13 177
Names of parts Names of parts Item 12 Sound record R Indications 13 Record mode B5M, e3M, f2M, L1M, E(for still pictures), F, M(for movies) 14 Number of storable still 5 pictures Remaining recording time 00:30 15 Spot metering n 16 White balance 5, 3, 1, > 17 AF target mark 18 Memory gauge [] a, b, c, d Ref. page P. 42, 54, 64 P. 24 P. 25 P. 40 P. 47 P. 46 P. 22 - Miscellaneous 13 177


