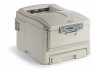
Memory DIMM Installation Instructions
Page 1
Memory DIMM Installation Instructions DIMM PART NUMBERS C5100/ C5150n/ C5200ne/C5200n 64 MB: 70042801 256 MB: 70042901 C5300/ C5400/C5400n 64 MB: 70043001 128 MB: 70043101 256 MB: 70043201
Memory DIMM Installation Instructions
Page 3
Model C5100, C5150n, C5200ne, C5200n C5300, C5400, C5400n Memory Provided Maximum Memory 32 MB 288 MB (256 + 32) 64 MB 320 MB (256 + 64) Caution! To avoid damage by adding up to install it 1 Getting Started The printers have one socket for an optional memory DIMM board. You can expand the printer's memory by static electricity or rough handling, keep the DIMM board in its packaging until you're ready to 256 MB of additional memory.
Memory DIMM Installation Instructions
Page 12
... + one or more times until INFORMATION MENU appears on the display. 2. Check the top of the MenuMap printout to verify that the Total Memory Size indicated matches the combined total of the DIMM you just installed, remove the printer's side panel and reinstall the DIMM, making sure it ...is firmly in place, then replace the side panel and print the MenuMap again. 10 C5300, C5400, C5400n = 64 MB) and the memory of the printer's standard memory (C5100, C5150n, C5200ne, C5200n = 32 MB; Press ENTER twice. The MenuMap prints. 3. If the Total...
Memory DIMM Installation Instructions
Page 13
..., then click Properties. Windows XP, 2000 and NT 4.0: a. Scroll down to Installable Options and click Memory Configuration. Select the new total memory installed* from the drop-down list. Windows 98: a. Windows Me: a. b. Scroll down to Installable Options and click... Memory Configuration. Scroll down list. 3. Click the Device Options tab. Select the new total memory installed* from the drop-down list. b. Click OK, then close the Printers (Printers and Faxes...
Memory DIMM Installation Instructions
Page 14
Select LaserWriter 8. 3. Select the installed available memory to X.1 No activation is required. 12 Mac OS X to enable the option. 6. Activate Chooser from the Apple menu. 2. Select Memory Configuration in the Hiper-C driver. Macintosh®, C5300/C5400n Mac OS 9.1+ 1. Close Chooser. Click Printer → Setup. 4. Click Configure. 5. Hiper-C Driver, C5100/C5150n/C5200ne/C5200n No changes are necessary in the PCL driver. PCL Driver, C5300/C5400/C5400n No changes are necessary in the Change drop down menu. Click OK twice. 7.
Memory DIMM Installation Instructions
Page 15
...name and select from Local Hard Drive → Applications → Utilities → Print Center. 2. Next to Memory Configuration, click on the drop drown menu to select the total installed available memory (new DIMM + 64 MB resident) to the desktop. Click Apply Changes and exit to enable the option....Printers → Show Info. 3. Click Apply Changes and exit to enable the option. 4. Next to Memory Configuration, click on the drop drown menu to select the total installed available memory (new DIMM + 64 MB resident) to the desktop. 13 Highlight the printer name and select from Local...
DIMM Installation Instructions, (Am English)
Page 1
Memory DIMM Installation Instructions c51_03_dimm.jpg For DIMM Part Numbers 64 MB: 70043001 128 MB: 70043101 256 MB: 70043201 59382901, Am Eng
DIMM Installation Instructions, (Am English)
Page 2
... Memory DIMM Installation Instructions P/N 59382901 October, 2005 Disclaimer Every effort has been made by other companies does not necessarily constitute endorsement by Oki Data Americas, Inc. The manufacturer assumes no responsibility for the results of Microsoft Corporation in the U.S. Mention of Oki ... special offers, etc., go to ensure that changes in software and equipment made to www.okiprintingsolutions.com Trademark Information OKI is a registered trademark of software products manufactured by other manufacturers and referred to in this guide will not affect the...
DIMM Installation Instructions, (Am English)
Page 11
Look at the top of the current menu settings. Verify the Installation Print the MenuMap Note: The MenuMap is wrong Repeat the installation steps (page 3) until INFORMATION MENU appears on the MenuMap is correct. 11 Press ENTER twice. The MenuMap prints. 3. Keypad.eps 1. Press + one or more times until the Total Memory Size on the display. 2. Total Memory Size = Standard Memory + Additional Memory. If the number on the MenuMap is a list of the printout. Find the Total Memory Size.
DIMM Installation Instructions, (Am English)
Page 12
Right click the appropriate printer icon. Windows XP, 2000 and NT 4.0 a. Click the Device Settings tab. Total Memory Size = Standard Memory + Additional Memory. Total Memory Size = Standard Memory + Additional Memory. 12 b. Click Memory Configura- Click the Device Options tab. c. Select the new total memory installed from the drop-down to Installable Options. b. Click Start → Settings → Printers [Printers...
DIMM Installation Instructions, (Am English)
Page 13
b. Click VMOptions. PCL Driver No changes are necessary in the PCL driver. 13 Click the Device Options tab. Select the new total memory installed from the drop-down to Installable Options. Close the Printers (Printers and Faxes) dialog box. Scroll down list. c. Click OK. Total Memory Size = Standard Memory + Additional Memory. 4. Windows 98: a.
DIMM Installation Instructions, (Am English)
Page 14
Click Printer → Setup. 4. Click Configure. 5. Close Chooser. Select LaserWriter 8. 3. Change the Driver Setting Macintosh® Mac OS 9.1+ 1. Select Memory Configuration in the Change drop down menu. Activate Chooser from the Apple menu. 2. Click OK twice. 7. Mac OS X to enable the option. Select the new total memory installed to X.1 No activation is required. 14 Total Memory Size = Standard Memory + Additional Memory. 6.
DIMM Installation Instructions, (Am English)
Page 15
... Utility from the menu Printers → Show Info. 3. Total Memory Size = Standard Memory + Additional Memory. 4. Next to Memory Configuration, click on the drop drown menu. Select the new total memory installed to the desktop. 15 Total Memory Size = Standard Memory + Additional Memory. 4. Exit to enable the option. Next to Memory Configuration, click on the drop drown menu. Highlight the...
Memory DIMM Installation Instructions
Page 1
Memory DIMM Installation Instructions For DIMM Part Numbers 64 MB: 70043001 128 MB: 70043101 256 MB: 70043201 59382902
Memory DIMM Installation Instructions
Page 16
Look at the top of the current menu settings. The MenuMap prints. 3. Verify the Installation Print the MenuMap Note: The MenuMap is a list of the printout. If the number on the MenuMap is wrong Repeat the installation steps (page 2) until INFORMATION MENU displays. 2. Press one or more times until the Total Memory Size on the MenuMap is correct. 16 Press ENTER twice. Total Memory Size = Standard Memory + Additional Memory. Keypad.eps + 1. Find the Total Memory Size.
Memory DIMM Installation Instructions
Page 17
... from the drop-down to Installable Options. Change the Driver Setting Windows® Postscript Emulation Driver 1. b. Click Memory Configuration. Total Memory Size = Standard Memory + Additional Memory. Windows Me a. Scroll down list. Windows XP, 2000 and NT 4.0 a. b. Right click the appropriate printer icon. c. Click the Device Options tab. Scroll down list. PCL ...
Memory DIMM Installation Instructions
Page 18
... from the menu Printers → Show Info. 3. Select Memory Configuration in the Change drop down menu. Click Configure. 5. Mac OS X to enable the option. Total Memory Size = Standard Memory + Additional Memory. 4. Exit to Memory Configuration, click on the drop drown menu. Click OK twice... Local Hard Drive → Applications → Utilities → Print Center. 2. Select the new total memory installed to enable the option. Mac OS X.2 1. Total Memory Size = Standard Memory + Additional Memory. 6. Change the Driver Setting Macintosh® Mac OS 9.1+ 1.
Memory DIMM Installation Instructions
Page 19
Click Apply Changes. Exit to Memory Configuration, click on the drop drown menu. Change the Driver Setting Mac OS X.3+ 1. Highlight the printer name. Activate the Printer Setup Utility from the menu Printers → Show Info. 3. Next to the desktop. 19 Select from Local Hard Drive → Applications → Utilities → Printer Setup Utility. 2. Select the new total memory installed to enable the option. Total Memory Size = Standard Memory + Additional Memory. 4.
Guide: Handy Reference C5400 Series (American English)
Page 20
...Idea! Overlays (Forms) Note: Overlay elements must be used. ᮣ Great for printing confidential documents on the printer's hard drive using OKI Storage Device Manager before printing multiple copies. Ideas! For the latest information visit my.okidata.com. 19 When printing special media, use ... create forms from printing on your media: • Create your document before they can be created in your document, in the printer's memory. • Load the special media. • Start printing the document by other clients on the network from pre-stored modular pieces. User...
Guide: Handy Reference C5400 Series (American English)
Page 28
ENTER On Line ON LINE Press ON LINE to recover and place the printer back on line and off line). If there is a memory overflow, press ON LINE to switch the printer between on line. Cancel Press CANCEL to start a manual print job from the MP Tray. CANCEL 27 ...