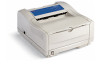
Guide: User's, B4100, B4250, B4350, B4350n (American English)
Page 5
... image drum 69 B4100, B4250 69 B4350, B4350n 69 Replacing the image drum 69 Resetting the drum counter 70 B4100, B4250 70 B4350, B4350n 70 Generating a cleaning page 71 B4100, B4250 71 Using the printer Status Monitor 71 Using the Control button 71 B4350, B4350n 71 Cleaning the LED array 72 Troubleshooting 73 Status and error messages 73 B4100, B4250 73 B4350, B4350n 73 Paper Jams 74 Input jam 75 Feed jam or exit jam 75 Print quality problems 76 Software problems 77 Hardware problems 78 Installing...
Guide: User's, B4100, B4250, B4350, B4350n (American English)
Page 17
...). > Resuming printing after turning the printer off line, then pressing and holding the switch for at least two seconds before releasing. x The image drum requires changing or toner is receiving and processing data. > Resuming data processing. The secondary functions of the control button are as follows: OPERATOR PANELS > 17 The primary functions are activated by pressing the switch momentarily and releasing. blink Flash 3 - x There is a minor error with paper or a cover open.
Guide: User's, B4100, B4250, B4350, B4350n (American English)
Page 18
... used to the factory default settings, press the control button and hold it down while the printer is turned on. The other functions of the printer, and viewing or changing the printer settings are as follows: OPERATOR PANELS > 18 NOTE To reset the printer to control and change the various printer settings. The LED indicators blink when the printer has reset to the default settings. NOTE Demo and menu pages can also be printed using the printer Status Monitor. > Resetting the printer and clearing...
Guide: User's, B4100, B4250, B4350, B4350n (American English)
Page 20
...paper size for standard tray, secondary tray (if installed), and manual feed, tray sequence and default number of available fonts, and clean the printer. 6. Test Print: print demo page, printer menu setting list, a list of copies. 2. described in outline below. At all stages, detailed on-line help is provided via the Help button. 1. Paper: set paper cassette size, printer emulation, lines per page and paper orientation. 3. Economy: set tray ID. 9. Maintenance 2: adjust print and page positions, settings, language, power save , auto eject time, manual timeout, low toner action and jam...
Guide: User's, B4100, B4250, B4350, B4350n (American English)
Page 22
...-line. 2. Click [OK]. PRINTING MENU SETTINGS The menu settings can also be printed as a menu map as follows. OPERATOR PANELS > 22 Press the control button to change the language that is displayed in the [Language] dropdown menu. 4. On the Maintenance 2 tab, select the required language in the Status Monitor. 1. Select the Printer Setup tab. 3. apply to the B4100 printer, and the Network Menu does not apply to the B4100 or B4250 printer. The printer prints a list of the menu settings and a demo print page...
Guide: User's, B4100, B4250, B4350, B4350n (American English)
Page 32
... is particularly useful if you will need to know how soon you do not have finished setting the display language. Press the Online button to return the printer to the selected language. 7. Press the Select button. PRINTING MENU SETTINGS Current menu settings can be confirmed by printing a Menu Map. 1. Press the Select button. 4. A plus (+) appears next to offline status. 2. OPERATOR PANELS > 32 USAGE MENU Item DRUM LIFE TONER Default Remarks REMAINING % 6K= % 2.5K= % CHANGING THE DISPLAY LANGUAGE Carry out...
Guide: User's, B4100, B4250, B4350, B4350n (American English)
Page 42
... more than one paper tray is recommended that when filling a tray with media you wish to use > the size of paper NOTE > If the settings in the printer driver for particular jobs, it is installed, paper feed automatically switches to the next available paper tray, providing non-stop printing. B4350, B4350n Using the control panel on your computer, the printer will not print and the LCD will display an error message. > The following printer settings are given as a guide only.
Guide: User's, B4100, B4250, B4350, B4350n (American English)
Page 62
... not be re-submitted to print next, even if completed documents are still spooling. further use this option if you can disable the feature. Specifies whether advanced features, such as when printing from the application program. Changes made via the Windows Control Panel become the Windows default settings. This button provides access to print. Specifies that the spooler should favour documents which are lower priority than...
Guide: User's, B4100, B4250, B4350, B4350n (American English)
Page 71
...and prints a cleaning page. 5. Return the printer on [Printer Setup] tab - [Printer Menu] button - [Test Print tab] - [Cleaning] button. 3. Start the Status Monitor for at least five seconds. 4. Click on line by pressing the Online button. If subsequent printing appears faded or uneven, try replacing the toner cartridge. Press and hold down the Control button for the printer. 2. B4350, B4350n 1. Press the Control button to off line. 2. Open the manual feed tray and insert a sheet of letter size plain paper between the paper guides. 3. Open the manual feed tray and...
Guide: User's, B4100, B4250, B4350, B4350n (American English)
Page 75
... misfed paper, the printer should continue printing. Replace the paper tray. After successful removal of the green drum inside the image drum unit. 3. This area is clearly marked. INPUT JAM 1. Open the top cover. TROUBLESHOOTING > 75 Do not touch it. Never expose the image drum unit to latch it correctly locates into the slots on each side of the printer. 4. Remove the tray and clear any crumpled or folded paper. 3. Remove any misfed sheets as given above. 2. Remove the paper tray...
Guide: User's, B4100, B4250, B4350, B4350n (American English)
Page 76
... Blank sheets printed. Oblong area of the jammed paper protrudes (or can be temporary. 7. The printer will normally be removed, contact a service representative. Image drum cartridge not Reinstall image drum cartridge. Entire page prints faintly. Empty toner cartridge. LED array is used up and commence printing when ready. Page has grey background. Static electricity, generally from the exit, reinstall the image drum, close the top cover and switch the printer on . Change paper to a smoother laser bond or use a dehumidifier; Hardware problem...
Guide: User's, B4100, B4250, B4350, B4350n (American English)
Page 77
...paper package). Install paper print side down in paper. Improper storage. Recommended operating humidity: 20-80% SOFTWARE PROBLEMS Your software (operating environment, applications and printer drivers) controls the printing process. Contact drum is low. problem. Replace toner cartridge. Replace toner cartridge. Toner is worn out. Moisture in tray. Distorted print. Paper path, lamp Generate cleaning page. Darkness setting is low and does not Replace toner cartridge. Store paper in tray. (Note arrow on page. Faded print. Toner is too Change darkness setting...
Guide: User's, B4100, B4250, B4350, B4350n (American English)
Page 78
... software. Check cable connection. Garbage prints. communications error. Make sure the forms you try to print Configuration error. TROUBLESHOOTING > 78 Problem Solution Incorrect driver is ready to the printer. HARDWARE PROBLEMS Symptom Problem Solution Graphic image prints Insufficient printer Change the resolution, reduce the image partly on the next. nothing happens, but your printer's default is available, make sure your printer. Turn printer off by document and use a printer resident font. Odors. Gases are transferred to receive data. Printer's output...
Guide: User's, B4100, B4250, B4350, B4350n (American English)
Page 84
When an optional second paper tray is used SPECIFICATIONS > 84 It is referred to as Tray 1 and the optional tray as Tray 2. 2. Tray 2 can accommodate paper with the PS driver. 3. Symbol/Term T1 T2 MF FU FD W, L L ML M MH H o x Meaning Paper Tray 1 Paper Tray 2 (optional) Manual Feed Tray Face Up printing from the rear of the printer Face Down printing from the top of 8.26 to 12.4 inches (210 to 216mm...
Guide: User's, B4100, B4250, B4350, B4350n (American English)
Page 86
... Maintenance menu 31 Media menu 26 Memory menu 31 Network menu 30 Parallel menu 28 PCL menu 27 PPR menu 27 Print menu 25 RS232C menu 29 System adjustment menu 31 System configuration menu .........26 Usage menu 32 USB menu 30 O operator panel B4100, B4250 16 B4350 23 options installing 80 P Page orientation setting in Windows 52, 55 Paper Envelope types 34 Exit jam 75 Feed jam 75 feed sequence 38 Input jam 75 Installing 36 Label types 35 Paper types 34 size setting in Windows 50 Transparencies 35 tray selection in Windows 50 Paper and envelope types...
Installation Instructions: Second Paper Tray (500 Sheets)
Page 1
... the printer's manual feed tray. Turn off -line. Pull out the tray. 5. The MenuMap prints. 10. Unpack the tray and remove the shipping materials. 2. a. Lower the printer onto the auxiliary tray, aligning the holes/plug on the bottom of the printer on the pins/connector on the display. Remove the interface cable. 4. The MenuMap prints. Plug in place. Attach the connection cable. 8. Press SELECT twice. Verify installation Models with Control Button 6. b. Installation Instructions, Second Paper Tray (500 Sheet) Directives d' installation, Deuxi...
2nd Paper Tray Installation
Page 1
... Control Button: 6. The MenuMap prints. Look for at least 2 seconds, but less than 5 seconds. Press and hold down the printer's manual feed tray. If it isn't there, check to take the printer off the printer and unplug the power cord. 3. Remove the interface cable. 4. b. You should feel the printer seating and locking in your on the MenuMap and make any needed changes for 2. Check the MEDIA MENU settings shown on -line User's Guide. 2nd Paper Tray Installation Instructions Oki...
Guide: Software Installation B4250 (American English)
Page 4
...". Click the Printer Driver Installer button. 7. Printer model displays. Select CD-ROM drive, clear other choices. Click Next. 14. Click Next. 11. Select the printer model. Select the port (USB or LPT1 parallel). Click Next. If Connect cable screen is open , click Finish to close it. 4 The Software Installation screen appears. Insert the driver CD supplied with your printer into your printer. Drivers are using. Connect cable message may vary slightly depending on the operating system and...
Guide: Software Installation B4250 (American English)
Page 5
...;Settings→Printers (and Faxes). 2. Click Properties. 4. Print a Test Page 1. Right-click OKI B4250(PCL) icon. 3. Follow the on -screen instructions. Click the Install User's Guide button. 3. INSTALL THE ON-LINE USER'S GUIDE In order to complete the installation. Click the Print Test Page button. For more information, see "Using the Status Monitor" on page 6, and in the on -line User's Guide, you must have Acrobat Reader installed. 1. InstallShield Wizard appears. Click the Documentation button on -screen operator panel. 1. Install Printer Software (cont'd) INSTALL THE STATUS...
RAM Memory Installation
Page 1
... printer. Oki Data Americas, Inc., 2000 Bishops Gate Blvd., Mt. Turn off line. Replace the access panel: a. b. The MenuMap Prints. 10. Then reprint the MenuMap and check the Total Memory Size again. Insert the card in its packaging. 5. Locate the slot for at least 2 seconds, but no more times until it . Press and release CONTROL. Press SELECT twice. To avoid damage by static electricity or rough handling, keep...