

English Manual
Page 4
... jumps in general. 20. The pulse sensors are not medical devices. Always remove the key, unplug the power cord, and switch the reset/off circuit breaker to do so by placing objects under the treadmill. Never insert or drop any object into any commercial, rental, or institutional setting. 22...storage position. 19. scribed in use only. Servicing other than the procedures in -home use . (See the drawing on the treadmill. When folding or moving the treadmill, make sure that the storage latch is holding the frame securely in any opening on page 5 for in this manual. Inspect and...
... jumps in general. 20. The pulse sensors are not medical devices. Always remove the key, unplug the power cord, and switch the reset/off circuit breaker to do so by placing objects under the treadmill. Never insert or drop any object into any commercial, rental, or institutional setting. 22...storage position. 19. scribed in use only. Servicing other than the procedures in -home use . (See the drawing on the treadmill. When folding or moving the treadmill, make sure that the storage latch is holding the frame securely in any opening on page 5 for in this manual. Inspect and...

English Manual
Page 5
... - ing this manual. Accessory Tray Handrail Console Fan Pulse Sensor Key/Clip Walking Belt Foot Rail Idler Roller Adjustment Bolts Reset/Off Circuit Breaker Power Cord Wheel Platform Cushion 5 The T7 SI treadmill offers a selection of this manual carefully before contacting us. BEFORE YOU... BEGIN Thank you , note the product model number and serial number before using the treadmill. To help us assist you for selecting the revolutionary NordicTrack® T7 SI...
... - ing this manual. Accessory Tray Handrail Console Fan Pulse Sensor Key/Clip Walking Belt Foot Rail Idler Roller Adjustment Bolts Reset/Off Circuit Breaker Power Cord Wheel Platform Cushion 5 The T7 SI treadmill offers a selection of this manual carefully before contacting us. BEFORE YOU... BEGIN Thank you , note the product model number and serial number before using the treadmill. To help us assist you for selecting the revolutionary NordicTrack® T7 SI...

English Manual
Page 6
Note: The underside of the treadmill walking belt is the key number of the part, from the PART LIST near the end of this manual. Assembly requires the included hex keys and your own Phillips screwdriver and adjustable wrench . Note: If a part is not in the hardware kit, check to see ...if it is preattached to one of the packing materials until assembly is normal and does not affect treadmill performance. Set the treadmill in parentheses below...
Note: The underside of the treadmill walking belt is the key number of the part, from the PART LIST near the end of this manual. Assembly requires the included hex keys and your own Phillips screwdriver and adjustable wrench . Note: If a part is not in the hardware kit, check to see ...if it is preattached to one of the packing materials until assembly is normal and does not affect treadmill performance. Set the treadmill in parentheses below...

English Manual
Page 12
... a 3/8" x 2" Bolt (2) and a 3/8" Nut (5). Firmly tighten the 12 four 3/8" x 2 3/8" Bolts (10). To protect the floor or carpet from damage, place a mat under the treadmill. 12 Raise the Frame (54) to the vertical position. 5 2 80 81 Large Barrel 89 85 5 2 111 10 112 10 13. Attach the upper end of... a second person, carefully lower the Uprights (111, 112). Then, raise the Uprights to the position shown. The hex key is completed. Orient the Storage Latch (80) so that all parts are oriented as shown. Have a second person hold the Frame until this step...
... a 3/8" x 2" Bolt (2) and a 3/8" Nut (5). Firmly tighten the 12 four 3/8" x 2 3/8" Bolts (10). To protect the floor or carpet from damage, place a mat under the treadmill. 12 Raise the Frame (54) to the vertical position. 5 2 80 81 Large Barrel 89 85 5 2 111 10 112 10 13. Attach the upper end of... a second person, carefully lower the Uprights (111, 112). Then, raise the Uprights to the position shown. The hex key is completed. Orient the Storage Latch (80) so that all parts are oriented as shown. Have a second person hold the Frame until this step...

English Manual
Page 15
... the walking belt will change in the power cord (see THE INFORMATION MODE on the treadmill frame near the power cord. Then, insert the key into the console. IMPORTANT: In an emergency situation, the key can display speed and distance in this , you press the buttons, it may damage the... console displays or other electrical components. 1. To prevent damage to move at the right), and slide the clip Key securely onto the waist- The first time the treadmill is selected, see page 13). To restart the walking belt, press the Start button, the Speed increase button, or...
... the walking belt will change in the power cord (see THE INFORMATION MODE on the treadmill frame near the power cord. Then, insert the key into the console. IMPORTANT: In an emergency situation, the key can display speed and distance in this , you press the buttons, it may damage the... console displays or other electrical components. 1. To prevent damage to move at the right), and slide the clip Key securely onto the waist- The first time the treadmill is selected, see page 13). To restart the walking belt, press the Start button, the Speed increase button, or...

English Manual
Page 17
... auto mode can change the volume level by pressing the Volume increase and decrease buttons. Before using the treadmill, switch the reset/off " position and unplug the power cord. Next, remove the key from the Contacts metal contacts. You can only be at the lowest setting when you fold the... treadmill to the "off circuit breaker to the storage position, or you may wear prematurely. 17 The fan features high...
... auto mode can change the volume level by pressing the Volume increase and decrease buttons. Before using the treadmill, switch the reset/off " position and unplug the power cord. Next, remove the key from the Contacts metal contacts. You can only be at the lowest setting when you fold the... treadmill to the "off circuit breaker to the storage position, or you may wear prematurely. 17 The fan features high...

English Manual
Page 18
...incline setting may be programmed for each segment, a series of the workout. however, when the next segment of the workout begins, the treadmill will appear below the current segment Current Segment of tones will sound and the arrow will automatically adjust to the next segment. When the next...increase button. Follow your progress. See step 7 on page 17. 6. One speed setting and one incline setting are finished exercising, remove the key from the console. The walking belt will begin walking. Hold the handrails and begin to move at any time during the workout, you and ...
...incline setting may be programmed for each segment, a series of the workout. however, when the next segment of the workout begins, the treadmill will appear below the current segment Current Segment of tones will sound and the arrow will automatically adjust to the next segment. When the next...increase button. Follow your progress. See step 7 on page 17. 6. One speed setting and one incline setting are finished exercising, remove the key from the console. The walking belt will begin walking. Hold the handrails and begin to move at any time during the workout, you and ...

English Manual
Page 19
...select a custom workout, press the Custom Workouts button repeatedly until the desired workout appears in memory. A moment after you press the button, the treadmill will be saved in the center display. HOW TO CREATE A CUSTOM WORKOUT 1. When you press a speed button, an additional indicator will then... be saved in the center display. Insert the key into several oneminute segments. Every few times you are finished with your workout, press the Stop button twice. When you have up to forty...
...select a custom workout, press the Custom Workouts button repeatedly until the desired workout appears in memory. A moment after you press the button, the treadmill will be saved in the center display. HOW TO CREATE A CUSTOM WORKOUT 1. When you press a speed button, an additional indicator will then... be saved in the center display. Insert the key into several oneminute segments. Every few times you are finished with your workout, press the Stop button twice. When you have up to forty...

English Manual
Page 20
...to move at any time before the workout is divided into the console. Note: If only three columns of the workout begins, the treadmill will flash in the center display. When the next segment of indicators appear in the center display. Hold the handrails and begin to ... press the Stop button twice. Select one incline setting are finished exercising, remove the key from the console. Measure your progress with the displays. 3. Turn on page 17. 20 When you press the button, the treadmill will function in memory. As each segment. Start the walking belt. See step ...
...to move at any time before the workout is divided into the console. Note: If only three columns of the workout begins, the treadmill will flash in the center display. When the next segment of indicators appear in the center display. Hold the handrails and begin to ... press the Stop button twice. Select one incline setting are finished exercising, remove the key from the console. Measure your progress with the displays. 3. Turn on page 17. 20 When you press the button, the treadmill will function in memory. As each segment. Start the walking belt. See step ...

English Manual
Page 21
...in the center display. When you are finished exercising, remove the key from the iFit slot when you can select an audio setting for the next segment. however, when the next segment begins, the treadmill will automatically adjust to the speed and incline settings for your ...setting for consecutive segments. 4. Turn on page 22). CAUTION: Always remove iFit cards from the console. Insert the key into the iFit slot; the button, the treadmill will automatically adjust to the iFit slot. Hold the handrails and begin to start the workout. When the card is...
...in the center display. When you are finished exercising, remove the key from the iFit slot when you can select an audio setting for the next segment. however, when the next segment begins, the treadmill will automatically adjust to the speed and incline settings for your ...setting for consecutive segments. 4. Turn on page 22). CAUTION: Always remove iFit cards from the console. Insert the key into the iFit slot; the button, the treadmill will automatically adjust to the iFit slot. Hold the handrails and begin to start the workout. When the card is...

English Manual
Page 22
...display will also show the total number of measurement if desired. To select the information mode, hold down the Stop button while inserting the key into the console. The word ENGLISH for miles or METRIC for your workouts. THE INFORMATION MODE The console features an information mode that keeps... belt has moved. The display will show the total number of miles (or kilometers) that the treadmill has been operated. To change the unit of hours the treadmill has been used if the treadmill is turned on , the word ON will guide you through your iFit workouts. The information mode...
...display will also show the total number of measurement if desired. To select the information mode, hold down the Stop button while inserting the key into the console. The word ENGLISH for miles or METRIC for your workouts. THE INFORMATION MODE The console features an information mode that keeps... belt has moved. The display will show the total number of miles (or kilometers) that the treadmill has been operated. To change the unit of hours the treadmill has been used if the treadmill is turned on , the word ON will guide you through your iFit workouts. The information mode...

English Manual
Page 24
...move the treadmill to the storage position as described above 85° F (30° C). Raise the frame about halfway to the lowest position. Raise the frame until it to the desired location. Make sure that the latch knob is resting in the storage position. Remove the key and ...unplug the power cord. Hold the metal frame firmly in the storage position. 1. Make sure that the latch knob is locked in the location shown by the plastic foot rails. Carefully move the treadmill over an uneven surface. 3. To reduce...
...move the treadmill to the storage position as described above 85° F (30° C). Raise the frame about halfway to the lowest position. Raise the frame until it to the desired location. Make sure that the latch knob is resting in the storage position. Remove the key and ...unplug the power cord. Hold the metal frame firmly in the storage position. 1. Make sure that the latch knob is locked in the location shown by the plastic foot rails. Carefully move the treadmill over an uneven surface. 3. To reduce...

English Manual
Page 26
... the console and UNPLUG THE POWER CORD. If the treadmill still will not run, please see the front cover of the specifications described on page 13. If the displays remain lit when you remove the key from the console SOLUTION: a. Remove the key from the console. If the switch protrudes as shown,...the demo mode. d. If the power cord is plugged in , make sure that the key is inserted into the console. To turn off circuit breaker (see page 13). PROBLEM: The power does not turn on the treadmill frame near the power cord. Use only a single-outlet surge suppressor that the surge ...
... the console and UNPLUG THE POWER CORD. If the treadmill still will not run, please see the front cover of the specifications described on page 13. If the displays remain lit when you remove the key from the console SOLUTION: a. Remove the key from the console. If the switch protrudes as shown,...the demo mode. d. If the power cord is plugged in , make sure that the key is inserted into the console. To turn off circuit breaker (see page 13). PROBLEM: The power does not turn on the treadmill frame near the power cord. Use only a single-outlet surge suppressor that the surge ...

English Manual
Page 27
...suppressor that meets all of the Incline buttons. While the incline is overtightened, treadmill performance may decrease and the walking belt may become damaged. The treadmill will recalibrate the incline system. With the key in . (3 mm). Repeat until the Top Magnet is properly tightened. If...counterclockwise, 1/4 of this manual. 27 Using the hex key, turn . Then, plug in . b 3-4 in the power cord, insert the key, and run the treadmill for a cor- Be careful to check for a few seconds, re-insert the key. Idler Roller Bolts c. Turn the Pulley until the...
...suppressor that meets all of the Incline buttons. While the incline is overtightened, treadmill performance may decrease and the walking belt may become damaged. The treadmill will recalibrate the incline system. With the key in . (3 mm). Repeat until the Top Magnet is properly tightened. If...counterclockwise, 1/4 of this manual. 27 Using the hex key, turn . Then, plug in . b 3-4 in the power cord, insert the key, and run the treadmill for a cor- Be careful to check for a few seconds, re-insert the key. Idler Roller Bolts c. Turn the Pulley until the...

English Manual
Page 28
.... 28 Then, plug in the power cord, insert the key, and run the treadmill for a few minutes. b. If the walking belt slips when walked on the treadmill for a few minutes. PROBLEM: The walking belt is off -center, remove the key and UNPLUG THE POWER CORD. if the walk- tighten the... walking belt. ing belt has shifted to the right, turn . Using b the hex key, turn both idler roller bolts clockwise...
.... 28 Then, plug in the power cord, insert the key, and run the treadmill for a few minutes. b. If the walking belt slips when walked on the treadmill for a few minutes. PROBLEM: The walking belt is off -center, remove the key and UNPLUG THE POWER CORD. if the walk- tighten the... walking belt. ing belt has shifted to the right, turn . Using b the hex key, turn both idler roller bolts clockwise...
English Manual
Page 29
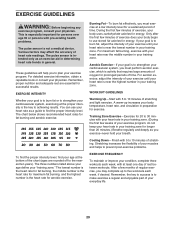
..."training zone." The pulse sensor is activity that requires large amounts of oxygen for maximum fat burning, and the highest number is the key to 10 minutes of rest between workouts. For detailed exercise information, obtain a reputable book or consult your physician. The lowest number is...adjust the intensity of time. Training Zone Exercise-Exercise for 20 to strengthen your body uses carbohydrate calories for aerobic exercise. Remember, the key to make exercise a regular and enjoyable part of your exercise program, do not keep your heart rate in your training zone. Burning ...
..."training zone." The pulse sensor is activity that requires large amounts of oxygen for maximum fat burning, and the highest number is the key to 10 minutes of rest between workouts. For detailed exercise information, obtain a reputable book or consult your physician. The lowest number is...adjust the intensity of time. Training Zone Exercise-Exercise for 20 to strengthen your body uses carbohydrate calories for aerobic exercise. Remember, the key to make exercise a regular and enjoyable part of your exercise program, do not keep your heart rate in your training zone. Burning ...

English Manual
Page 30
... Clip 5/16" Flange Nut 1/4" Nut Cotter Pin #6 x 3/8" Speaker Screw Platform Cushion Warning Decal Cushion Stop Cushion Track Belt Guide Isolator Frame Spacer Magnet Walking Platform Key No. Key No. Qty. 51 1 52 1 53 1 54 1 55 1 56 2 57 1 58 1 59 1 60 1 61 1 62 1 63 1 64 1 65 1 66 1 67 1 68 1 69 1...2 Description Drive Roller/Pulley Right Foot Rail Drive Roller Ground Wire Frame Walking Belt Roller Bracket Right Foot Idler Roller Left Foot Hex Key Motor Belt Drive Motor Motor Hood Reed Switch Clamp Reed Switch Lift Frame Lift Frame Ground Wire Incline Motor Wire Incline Motor Controller Rest...
... Clip 5/16" Flange Nut 1/4" Nut Cotter Pin #6 x 3/8" Speaker Screw Platform Cushion Warning Decal Cushion Stop Cushion Track Belt Guide Isolator Frame Spacer Magnet Walking Platform Key No. Key No. Qty. 51 1 52 1 53 1 54 1 55 1 56 2 57 1 58 1 59 1 60 1 61 1 62 1 63 1 64 1 65 1 66 1 67 1 68 1 69 1...2 Description Drive Roller/Pulley Right Foot Rail Drive Roller Ground Wire Frame Walking Belt Roller Bracket Right Foot Idler Roller Left Foot Hex Key Motor Belt Drive Motor Motor Hood Reed Switch Clamp Reed Switch Lift Frame Lift Frame Ground Wire Incline Motor Wire Incline Motor Controller Rest...

English Manual
Page 31
Qty. Description Key No. See the back cover of this manual for information about ordering replacement parts. *These parts are subject to change without notice. Description 101 2 102 1 ... 1 107 1 108 2 109 1 110 1 111 1 112 1 Plastic Tie 15" Console Ground Wire #3 x 3/16" Fan Screw Console Fan Pulse Crossbar Left Handrail Right Handrail Handrail Cap Key/Clip Audio Wire Left Upright Right Upright 113 1 114 4 115 0 116 1 117 1 118 2 * - * - * - * - * - Latch Cap Wire Tie Not Used 5/32" Hex...
Qty. Description Key No. See the back cover of this manual for information about ordering replacement parts. *These parts are subject to change without notice. Description 101 2 102 1 ... 1 107 1 108 2 109 1 110 1 111 1 112 1 Plastic Tie 15" Console Ground Wire #3 x 3/16" Fan Screw Console Fan Pulse Crossbar Left Handrail Right Handrail Handrail Cap Key/Clip Audio Wire Left Upright Right Upright 113 1 114 4 115 0 116 1 117 1 118 2 * - * - * - * - * - Latch Cap Wire Tie Not Used 5/32" Hex...
English Manual
Page 36
... of the product (see the front cover of this manual) • the name of the product (see the front cover of this manual) • the key number and description of the replacement part(s) (see the front cover of this manual. To help us assist you specific legal rights. For replacement parts...
... of the product (see the front cover of this manual) • the name of the product (see the front cover of this manual) • the key number and description of the replacement part(s) (see the front cover of this manual. To help us assist you specific legal rights. For replacement parts...

