D2H User's Manual
Page 4
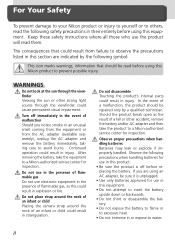
...to water. After removing the battery, take the product to a Nikon-authorized service center for inspection. The consequences that should be read before using this equipment. Continued operation could result in injury. Observe proper precautions when handling batteries Batteries may leak or explode if ...(available separately), unplug the AC adapter and remove the battery immediately, taking care to a Nikon-authorized service center for inspection. Do not place strap around the neck of an infant or child Placing the camera strap around the neck of flammable gas, as...
...to water. After removing the battery, take the product to a Nikon-authorized service center for inspection. The consequences that should be read before using this equipment. Continued operation could result in injury. Observe proper precautions when handling batteries Batteries may leak or explode if ...(available separately), unplug the AC adapter and remove the battery immediately, taking care to a Nikon-authorized service center for inspection. Do not place strap around the neck of an infant or child Placing the camera strap around the neck of flammable gas, as...

D2H User's Manual
Page 5
...• Discontinue use immediately should you notice any changes in the battery, such as necklaces or hairpins. • Batteries are distributed should be taken to remove the battery when no less than one meter (39˝) from the camera. Do not transport or store with product regulations. To avoid damage...cables When connecting cables to the input and output jacks, use only the cables provided or sold by Nikon for an extended period, the battery may become hot. CD-ROMs The CD-ROMs on battery power for the purpose, to put your finger in a cool place. • Immediately ...
...• Discontinue use immediately should you notice any changes in the battery, such as necklaces or hairpins. • Batteries are distributed should be taken to remove the battery when no less than one meter (39˝) from the camera. Do not transport or store with product regulations. To avoid damage...cables When connecting cables to the input and output jacks, use only the cables provided or sold by Nikon for an extended period, the battery may become hot. CD-ROMs The CD-ROMs on battery power for the purpose, to put your finger in a cool place. • Immediately ...

D2H User's Manual
Page 6
... do get a fingerprint or other strong light sources for the Camera and Battery Do not drop The product may malfunction if subjected to the battery-chamber, card-slot, or connector covers. Cleaning • When cleaning the camera body, use or store this may cause deterioration in the image sensor... a desiccant. Rusting of lens cleaner to a soft cloth and wipe the lens carefully. • See "Technical Notes: Caring for Your Camera" for long periods, remove the battery to damage. Note that these elements are especially susceptible to prevent leakage and store the...
... do get a fingerprint or other strong light sources for the Camera and Battery Do not drop The product may malfunction if subjected to the battery-chamber, card-slot, or connector covers. Cleaning • When cleaning the camera body, use or store this may cause deterioration in the image sensor... a desiccant. Rusting of lens cleaner to a soft cloth and wipe the lens carefully. • See "Technical Notes: Caring for Your Camera" for long periods, remove the battery to damage. Note that these elements are especially susceptible to prevent leakage and store the...

D2H User's Manual
Page 7
...or chamois leather. • Should the monitor break, care should be removed with a blower. Keep a spare battery in a warm place and exchange the two as shown in these circumstances could damage the camera or the card. Inserting cards upside down or backwards could result in damage to the monitor; • Do... the liquid crystal from the monitor touching the skin or entering the eyes or mouth. • Replace the monitor cover when transporting the camera or leaving it unattended. Batteries • When you may recover some of data or in loss of its charge. • Should the...
...or chamois leather. • Should the monitor break, care should be removed with a blower. Keep a spare battery in a warm place and exchange the two as shown in these circumstances could damage the camera or the card. Inserting cards upside down or backwards could result in damage to the monitor; • Do... the liquid crystal from the monitor touching the skin or entering the eyes or mouth. • Replace the monitor cover when transporting the camera or leaving it unattended. Batteries • When you may recover some of data or in loss of its charge. • Should the...

D2H User's Manual
Page 10
Table of Contents For Your Safety ii Caring for the Camera and Battery iv Notices ...vi Introduction...1 Overview ...2 Getting to Know the Camera 3 First Steps ...15 Step 1-Attach the Camera Strap 16 Step 2-Insert the Battery 17 Step 3-Choose a Language 18 Step 4-Set the Time and Date 19 Step 5-Attach a Lens 20 Step 6-Insert a Memory Card...
Table of Contents For Your Safety ii Caring for the Camera and Battery iv Notices ...vi Introduction...1 Overview ...2 Getting to Know the Camera 3 First Steps ...15 Step 1-Attach the Camera Strap 16 Step 2-Insert the Battery 17 Step 3-Choose a Language 18 Step 4-Set the Time and Date 19 Step 5-Attach a Lens 20 Step 6-Insert a Memory Card...

D2H User's Manual
Page 12
... Auto Image Rotation 211 Voice Memo ...212 Voice Memo Protect 212 Voice Memo Button 212 Audio Output 212 USB ...213 Dust Off Ref Photo 214 Battery Info ...216 Wireless LAN...217 Firmware Version 219 Connections...221 Television Playback 222 Connecting to a Computer 223 Technical Notes 227 Optional Accessories 228 Lenses for...
... Auto Image Rotation 211 Voice Memo ...212 Voice Memo Protect 212 Voice Memo Button 212 Audio Output 212 USB ...213 Dust Off Ref Photo 214 Battery Info ...216 Wireless LAN...217 Firmware Version 219 Connections...221 Television Playback 222 Connecting to a Computer 223 Technical Notes 227 Optional Accessories 228 Lenses for...

D2H User's Manual
Page 13
... 15-24 1 Introduction Getting Started Overview 2 Getting to Know the Camera 3-14 This chapter is organized and for information on the names and functions of the symbols and conventions used. Getting to Know the Camera Bookmark this manual is divided into the following sections: Overview Read this... section for a description of how this section and refer to ready the camera for use: inserting the battery and memory card, attaching a lens and camera strap, and setting the date, time, and language. First Steps This section details the steps required ...
... 15-24 1 Introduction Getting Started Overview 2 Getting to Know the Camera 3-14 This chapter is organized and for information on the names and functions of the symbols and conventions used. Getting to Know the Camera Bookmark this manual is divided into the following sections: Overview Read this... section for a description of how this section and refer to ready the camera for use: inserting the battery and memory card, attaching a lens and camera strap, and setting the date, time, and language. First Steps This section details the steps required ...

D2H User's Manual
Page 16
... 10-pin remote terminal caps (on inside of -field preview button: 85 Sub-command dial: 12 FUNC. Introduction-Getting to Know the Camera Camera Body (continued) Depth-of cover) DC-in connector (under cover): 231 USB connector (under cover): 224 Lens release button: 21 Focus-mode selector...: 72 Battery cover latch: 17 Connector for optional WT-1/ WT-1A wireless LAN adapter (under cover): 222 Housings for vertical shooting: 31 Vertical shooting shutterrelease button...
... 10-pin remote terminal caps (on inside of -field preview button: 85 Sub-command dial: 12 FUNC. Introduction-Getting to Know the Camera Camera Body (continued) Depth-of cover) DC-in connector (under cover): 231 USB connector (under cover): 224 Lens release button: 21 Focus-mode selector...: 72 Battery cover latch: 17 Connector for optional WT-1/ WT-1A wireless LAN adapter (under cover): 222 Housings for vertical shooting: 31 Vertical shooting shutterrelease button...

D2H User's Manual
Page 19
Introduction-Getting to Know the Camera 1 Shutter speed 85, 93, 94 Exposure compensation value ....... 97 Number of shots in ..., 103 Number of shots per interval....... 120 Maximum aperture (non-CPU lens 127 PC mode indicator 225 11 Battery indicator 27 12 Frame count 23 13 "K" (appears when memory remains for over 1000 exposures 47 14 FV lock... indicator 108 15 Sync indicator 115, 194 16 Clock battery indicator.......... 19, 239 17 Exposure compensation indicator.. 97 18 Interval timer indicator 120 19 Aperture lock icon 94 20...
Introduction-Getting to Know the Camera 1 Shutter speed 85, 93, 94 Exposure compensation value ....... 97 Number of shots in ..., 103 Number of shots per interval....... 120 Maximum aperture (non-CPU lens 127 PC mode indicator 225 11 Battery indicator 27 12 Frame count 23 13 "K" (appears when memory remains for over 1000 exposures 47 14 FV lock... indicator 108 15 Sync indicator 115, 194 16 Clock battery indicator.......... 19, 239 17 Exposure compensation indicator.. 97 18 Interval timer indicator 120 19 Aperture lock icon 94 20...

D2H User's Manual
Page 23
Introduction-Getting to Know the Camera 1 8-mm (0.31˝) reference circle for center-weighted metering 84 2 Focus brackets (focus areas 74 Spot metering targets 84 3 Focus indicator 32 4 Metering 84 5 Bracketing ... 71 Exposure compensation value ....... 97 PC mode indicator 225 14 "K" (appears when memory remains for over 1000 exposures 47 15 Flash-ready indicator 117 16 Battery indicator 27 17 FV lock indicator 108 18 Sync indicator 115, 194 19 Aperture stop indicator 85 20 Electronic analog exposure display 92 Exposure compensation...
Introduction-Getting to Know the Camera 1 8-mm (0.31˝) reference circle for center-weighted metering 84 2 Focus brackets (focus areas 74 Spot metering targets 84 3 Focus indicator 32 4 Metering 84 5 Bracketing ... 71 Exposure compensation value ....... 97 PC mode indicator 225 14 "K" (appears when memory remains for over 1000 exposures 47 15 Flash-ready indicator 117 16 Battery indicator 27 17 FV lock indicator 108 18 Sync indicator 115, 194 19 Aperture stop indicator 85 20 Electronic analog exposure display 92 Exposure compensation...

D2H User's Manual
Page 27
...STEP 2 STEP 3 STEP 4 STEP 5 STEP 6 Attach the Camera Strap 16 Insert the Battery 17 To learn more about batteries and alternative power sources, see: • Technical Notes: Optional Accessories 231 • Caring for the Camera and Battery iv-v Choose a Language 18 Set the Time and Date 19 For... information on changing the clock battery, see: • Technical Notes: Caring for your camera 239 Attach a Lens To learn more about the lenses available for the D2H, see: • Technical Notes: Optional Accessories 20-21 228-230 Insert...
...STEP 2 STEP 3 STEP 4 STEP 5 STEP 6 Attach the Camera Strap 16 Insert the Battery 17 To learn more about batteries and alternative power sources, see: • Technical Notes: Optional Accessories 231 • Caring for the Camera and Battery iv-v Choose a Language 18 Set the Time and Date 19 For... information on changing the clock battery, see: • Technical Notes: Caring for your camera 239 Attach a Lens To learn more about the lenses available for the D2H, see: • Technical Notes: Optional Accessories 20-21 228-230 Insert...

D2H User's Manual
Page 28
...OAU/VT DC IN OAU/VT DC IN EN-EL4 Batteries ( 17) EN-EL4 rechargeable Li-ion batteries can be viewed using the Battery info option in use or when you are transporting the camera. 1 Step 1-Attach the Camera Strap Attach the camera strap securely to display the current charge level and charge...is shown in six levels. When the EN-EL4 is inserted in the camera, the battery charge state is provided with information on battery charge state, enabling the MH-21 Quick Charger to the two eyelets on battery charge, battery life, and the number of the cover gently outwards as shown (ᕄ)....
...OAU/VT DC IN OAU/VT DC IN EN-EL4 Batteries ( 17) EN-EL4 rechargeable Li-ion batteries can be viewed using the Battery info option in use or when you are transporting the camera. 1 Step 1-Attach the Camera Strap Attach the camera strap securely to display the current charge level and charge...is shown in six levels. When the EN-EL4 is inserted in the camera, the battery charge state is provided with information on battery charge state, enabling the MH-21 Quick Charger to the two eyelets on battery charge, battery life, and the number of the cover gently outwards as shown (ᕄ)....

D2H User's Manual
Page 29
... camera off Turn the camera off and rotate the battery-chamber cover latch to the open position ( ) and remove the batterychamber cover. 2.4 Attach the battery cover to the battery The battery can be necessary to the open position ( ). Introduction-First Steps 2 Step 2-Insert the Battery The D2H is powered by a rechargeable Nikon EN-EL4 Li-ion battery (provided). 2.1 Charge the battery...
... camera off Turn the camera off and rotate the battery-chamber cover latch to the open position ( ) and remove the batterychamber cover. 2.4 Attach the battery cover to the battery The battery can be necessary to the open position ( ). Introduction-First Steps 2 Step 2-Insert the Battery The D2H is powered by a rechargeable Nikon EN-EL4 Li-ion battery (provided). 2.1 Charge the battery...

D2H User's Manual
Page 31
... powered by a separate, non-rechargeable CR1616 lithium bat- mation on . To ensure that your pictures are on replacing the clock battery, see "Technical Notes: Caring for Your Camera" ( 239). The Clock Battery The clock-calendar is less accurate than most watches and household clocks. Check the clock regularly against more accurate time pieces...
... powered by a separate, non-rechargeable CR1616 lithium bat- mation on . To ensure that your pictures are on replacing the clock battery, see "Technical Notes: Caring for Your Camera" ( 239). The Clock Battery The clock-calendar is less accurate than most watches and household clocks. Check the clock regularly against more accurate time pieces...

D2H User's Manual
Page 34
... powered by an AC adapter, will pop up (ᕄ). No Memory Card If no memory card is inserted in the camera when a charged EN-EL4 battery is inserted or the camera is in the control panel and view- finder. 22 Close the card slot cover. 2 Inserting Memory Cards 1... will appear in the exposure-count displays in the correct orientation. 6 Introduction-First Steps Step 6-Insert a Memory Card In place of film, the D2H uses CompactFlash memory cards or microdrive cards to open the card slot (ᕅ). 3 2 1 6.3 Insert a memory card Insert the memory card with the...
... powered by an AC adapter, will pop up (ᕄ). No Memory Card If no memory card is inserted in the camera when a charged EN-EL4 battery is inserted or the camera is in the control panel and view- finder. 22 Close the card slot cover. 2 Inserting Memory Cards 1... will appear in the exposure-count displays in the correct orientation. 6 Introduction-First Steps Step 6-Insert a Memory Card In place of film, the D2H uses CompactFlash memory cards or microdrive cards to open the card slot (ᕅ). 3 2 1 6.3 Insert a memory card Insert the memory card with the...

D2H User's Manual
Page 35
... cards can be recorded at current settings. Press any other data you wish to keep to exit without formatting. To format the card, turn the camera on and hold the ( and ) buttons down simultaneously for approximately two seconds. Formatting Memory Cards Formatting memory cards permanently deletes any photographs and other button...-count display will format the memory card. A blink- Be sure to copy any data they may contain. During Formatting Do not remove the card or battery or unplug the AC adapter (available separately) during formatting.
... cards can be recorded at current settings. Press any other data you wish to keep to exit without formatting. To format the card, turn the camera on and hold the ( and ) buttons down simultaneously for approximately two seconds. Formatting Memory Cards Formatting memory cards permanently deletes any photographs and other button...-count display will format the memory card. A blink- Be sure to copy any data they may contain. During Formatting Do not remove the card or battery or unplug the AC adapter (available separately) during formatting.

D2H User's Manual
Page 38
... First Photographs There are six basic steps to taking photographs: Tutorial-Basic Photography STEP 1 STEP 2 STEP 3 STEP 4 STEP 5 STEP 6 Ready the Camera 27-28 To learn more about the battery level display, see: • Introduction: First Steps 15-24 To learn how to restore settings to their default values, see: • Taking...
... First Photographs There are six basic steps to taking photographs: Tutorial-Basic Photography STEP 1 STEP 2 STEP 3 STEP 4 STEP 5 STEP 6 Ready the Camera 27-28 To learn more about the battery level display, see: • Introduction: First Steps 15-24 To learn how to restore settings to their default values, see: • Taking...

D2H User's Manual
Page 39
... icon displayed when camera powered by optional AC adapter. Battery fully Aperture and shutter-speed indicators in top charged control panel and all indicators in about three seconds. Contact a Nikon-authorized service representative. 27 Tutorial-Basic Photography 1 Step 1-Ready the Camera Before taking photographs, ready the camera as described below. 1.1 Turn the camera on The control...
... icon displayed when camera powered by optional AC adapter. Battery fully Aperture and shutter-speed indicators in top charged control panel and all indicators in about three seconds. Contact a Nikon-authorized service representative. 27 Tutorial-Basic Photography 1 Step 1-Ready the Camera Before taking photographs, ready the camera as described below. 1.1 Turn the camera on The control...

D2H User's Manual
Page 83
...that can be stored in the memory buffer at least one and forty. 71 If the battery is equipped with a memory buffer for temporary storage, allowing shooting to any amount between one second after turning the camera off). The approximate time required to write the entire buffer to a 512 MB Lexar Media...the shutter-release button is switched off until the access lamp has gone out. When the buffer is full, the shutter is pressed. If the camera is held down, although the frame rate will drop once the buffer has filled. To turn off while data remain in the buffer ...
...that can be stored in the memory buffer at least one and forty. 71 If the battery is equipped with a memory buffer for temporary storage, allowing shooting to any amount between one second after turning the camera off). The approximate time required to write the entire buffer to a 512 MB Lexar Media...the shutter-release button is switched off until the access lamp has gone out. When the buffer is full, the shutter is pressed. If the camera is held down, although the frame rate will drop once the buffer has filled. To turn off while data remain in the buffer ...

D2H User's Manual
Page 104
... when the lens aperture ring is used to adjust shutter speed and aperture until M is open indefinitely for the lens. Nikon recommends using a fully-charged EN-EL4 battery or an optional EH-6 AC adapter to shooting conditions and the task at any setting, "noise" in the form of randomly-spaced...
... when the lens aperture ring is used to adjust shutter speed and aperture until M is open indefinitely for the lens. Nikon recommends using a fully-charged EN-EL4 battery or an optional EH-6 AC adapter to shooting conditions and the task at any setting, "noise" in the form of randomly-spaced...


