
Reference Manual - English
Page 115
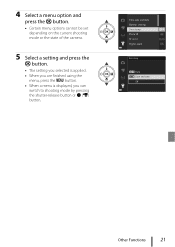
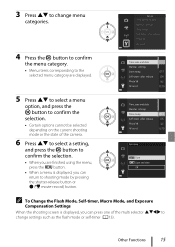
Time zone and date Monitor settings Date stamp Photo VR AF assist Digital zoom Date stamp Date Date and time O ff 99 Using the Menu Menu Operations 4 Select a menu option and press the k button. • Certain menu options cannot be set depending on the current shooting mode or the state of the camera. 5 Select a setting and press the k button. • The setting you selected is applied. • When you are finished using the menu, press the d button. • When a menu is displayed, you can switch to shooting mode by pressing the shutter-release button or b (e) button.
Time zone and date Monitor settings Date stamp Photo VR AF assist Digital zoom Date stamp Date Date and time O ff 99 Using the Menu Menu Operations 4 Select a menu option and press the k button. • Certain menu options cannot be set depending on the current shooting mode or the state of the camera. 5 Select a setting and press the k button. • The setting you selected is applied. • When you are finished using the menu, press the d button. • When a menu is displayed, you can switch to shooting mode by pressing the shutter-release button or b (e) button.
Reference Manual - English
Page 173
... removed. Set the correct time and date for Time zone and date in the setup menu. 131 Date not stamped on the shooting screen, and images and movies saved before the clock is set to Full-time AF or while in playback mode, press the c button, shutter-release button, or b (e) button. • ...When menus are displayed, press the d button. • The flash is charging while the flash lamp is flashing. • The batteries are dated "00/00/0000 00:00" and "01/01/ 2016 00:00" ...
... removed. Set the correct time and date for Time zone and date in the setup menu. 131 Date not stamped on the shooting screen, and images and movies saved before the clock is set to Full-time AF or while in playback mode, press the c button, shutter-release button, or b (e) button. • ...When menus are displayed, press the d button. • The flash is charging while the flash lamp is flashing. • The batteries are dated "00/00/0000 00:00" and "01/01/ 2016 00:00" ...

Reference Manual - English
Page 189
... 98, 105, 106 Shooting mode 28 Short movie show menu 80 Short movie show mode 28, 80 Shutter sound 115, 136 Shutter speed 55 Shutter-release button 2, 22 Side zoom control 2, 22, 53 Single AF 121 Single-frame shooting 108 Skin softening 43 Slide show 102, 125 Slow sync 48 Small... with smart device 131 T Target finding AF 55, 112 Telephoto 53 Thumbnail playback 24, 65 Time difference 132 Time zone 17, 131 Time zone and date 14, 104, 131 Tone level 8 Tone level information 4, 8 Tripod socket 3, 166 TV 87, 88 U USB cable 87, 90, 94 USB/audio/video output connector 3, 87...
... 98, 105, 106 Shooting mode 28 Short movie show menu 80 Short movie show mode 28, 80 Shutter sound 115, 136 Shutter speed 55 Shutter-release button 2, 22 Side zoom control 2, 22, 53 Single AF 121 Single-frame shooting 108 Skin softening 43 Slide show 102, 125 Slow sync 48 Small... with smart device 131 T Target finding AF 55, 112 Telephoto 53 Thumbnail playback 24, 65 Time difference 132 Time zone 17, 131 Time zone and date 14, 104, 131 Tone level 8 Tone level information 4, 8 Tripod socket 3, 166 TV 87, 88 U USB cable 87, 90, 94 USB/audio/video output connector 3, 87...
Quick Start Guide - English for customers in Europe
Page 33
Time zone and date Monitor settings Date stamp Photo VR AF assist Digital zoom Date stamp Date Date and time O ff Other Functions 21 4 Select a menu option and press the k button. • Certain menu options cannot be set depending on the current shooting mode or the state of the camera. 5 Select a setting and press the k button. • The setting you selected is applied. • When you are finished using the menu, press the d button. • When a menu is displayed, you can switch to shooting mode by pressing the shutter-release button or b (e) button.
Time zone and date Monitor settings Date stamp Photo VR AF assist Digital zoom Date stamp Date Date and time O ff Other Functions 21 4 Select a menu option and press the k button. • Certain menu options cannot be set depending on the current shooting mode or the state of the camera. 5 Select a setting and press the k button. • The setting you selected is applied. • When you are finished using the menu, press the d button. • When a menu is displayed, you can switch to shooting mode by pressing the shutter-release button or b (e) button.

Quick Start Guide - English for customers in India
Page 33
Time zone and date Monitor settings Date stamp Photo VR AF assist Digital zoom Date stamp Date Date and time O ff Other Functions 21 4 Select a menu option and press the k button. • Certain menu options cannot be set depending on the current shooting mode or the state of the camera. 5 Select a setting and press the k button. • The setting you selected is applied. • When you are finished using the menu, press the d button. • When a menu is displayed, you can switch to shooting mode by pressing the shutter-release button or b (e) button.
Time zone and date Monitor settings Date stamp Photo VR AF assist Digital zoom Date stamp Date Date and time O ff Other Functions 21 4 Select a menu option and press the k button. • Certain menu options cannot be set depending on the current shooting mode or the state of the camera. 5 Select a setting and press the k button. • The setting you selected is applied. • When you are finished using the menu, press the d button. • When a menu is displayed, you can switch to shooting mode by pressing the shutter-release button or b (e) button.

Quick Start Guide - English for customers in the Americas
Page 33
Time zone and date Monitor settings Date stamp Photo VR AF assist Digital zoom Date stamp Date Date and time O ff Other Functions 21 4 Select a menu option and press the k button. • Certain menu options cannot be set depending on the current shooting mode or the state of the camera. 5 Select a setting and press the k button. • The setting you selected is applied. • When you are finished using the menu, press the d button. • When a menu is displayed, you can switch to shooting mode by pressing the shutter-release button or b (e) button.
Time zone and date Monitor settings Date stamp Photo VR AF assist Digital zoom Date stamp Date Date and time O ff Other Functions 21 4 Select a menu option and press the k button. • Certain menu options cannot be set depending on the current shooting mode or the state of the camera. 5 Select a setting and press the k button. • The setting you selected is applied. • When you are finished using the menu, press the d button. • When a menu is displayed, you can switch to shooting mode by pressing the shutter-release button or b (e) button.

Quick Start Guide - English for customers in Asia Oceania the Middle East and Africa
Page 33
Time zone and date Monitor settings Date stamp Photo VR AF assist Digital zoom Date stamp Date Date and time O ff Other Functions 21 4 Select a menu option and press the k button. • Certain menu options cannot be set depending on the current shooting mode or the state of the camera. 5 Select a setting and press the k button. • The setting you selected is applied. • When you are finished using the menu, press the d button. • When a menu is displayed, you can switch to shooting mode by pressing the shutter-release button or b (e) button.
Time zone and date Monitor settings Date stamp Photo VR AF assist Digital zoom Date stamp Date Date and time O ff Other Functions 21 4 Select a menu option and press the k button. • Certain menu options cannot be set depending on the current shooting mode or the state of the camera. 5 Select a setting and press the k button. • The setting you selected is applied. • When you are finished using the menu, press the d button. • When a menu is displayed, you can switch to shooting mode by pressing the shutter-release button or b (e) button.
Reference Manual
Page 11
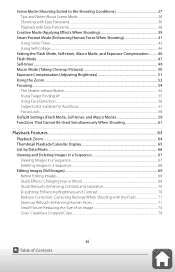
...timer ...49 Macro Mode (Taking Close-up Pictures 50 Exposure Compensation (Adjusting Brightness 51 Using the Zoom...52 Focusing...54 The Shutter-release Button...54 Using Target Finding AF ...55 Using Face Detection ...56 Subjects Not Suitable for Autofocus ...57 Focus Lock...58 Default Settings... 59 Functions That Cannot Be Used Simultaneously When Shooting 61 Playback Features...63 Playback Zoom ...64 Thumbnail Playback/Calendar Display 65 List by Date Mode...66 Viewing and Deleting Images in a Sequence 67 Viewing Images in a Sequence...67 Deleting Images in a Sequence ...68 Editing ...
...timer ...49 Macro Mode (Taking Close-up Pictures 50 Exposure Compensation (Adjusting Brightness 51 Using the Zoom...52 Focusing...54 The Shutter-release Button...54 Using Target Finding AF ...55 Using Face Detection ...56 Subjects Not Suitable for Autofocus ...57 Focus Lock...58 Default Settings... 59 Functions That Cannot Be Used Simultaneously When Shooting 61 Playback Features...63 Playback Zoom ...64 Thumbnail Playback/Calendar Display 65 List by Date Mode...66 Viewing and Deleting Images in a Sequence 67 Viewing Images in a Sequence...67 Deleting Images in a Sequence ...68 Editing ...
Reference Manual
Page 13
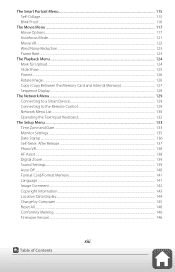
... the Remote Control...129 Network Menu List ...130 Operating the Text Input Keyboard...132 The Setup Menu...133 Time Zone and Date ...133 Monitor Settings ...135 Date Stamp ...136 Self-timer: After Release ...137 Photo VR ...138 AF Assist ...138 Digital Zoom ...139 Sound Settings...139 Auto Off...140 Format Card/Format Memory...
... the Remote Control...129 Network Menu List ...130 Operating the Text Input Keyboard...132 The Setup Menu...133 Time Zone and Date ...133 Monitor Settings ...135 Date Stamp ...136 Self-timer: After Release ...137 Photo VR ...138 AF Assist ...138 Digital Zoom ...139 Sound Settings...139 Auto Off...140 Format Card/Format Memory...
Reference Manual
Page 59
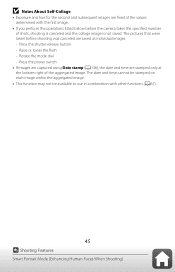
...the flash - Rotate the mode dial - The pictures that were taken before the camera takes the specified number of the aggregated image. The date and time cannot be stamped on each image within the aggregated image. • This function may not be available to use in combination with the...bottom right of shots, shooting is canceled and the collage image is not saved. Press the shutter-release button - Press the power switch • If images are captured using Date stamp (A136), the date and time are stamped only at the values determined with other functions (A61). 45 Shooting Features Smart...
...the flash - Rotate the mode dial - The pictures that were taken before the camera takes the specified number of the aggregated image. The date and time cannot be stamped on each image within the aggregated image. • This function may not be available to use in combination with the...bottom right of shots, shooting is canceled and the collage image is not saved. Press the shutter-release button - Press the power switch • If images are captured using Date stamp (A136), the date and time are stamped only at the values determined with other functions (A61). 45 Shooting Features Smart...

Reference Manual
Page 112
...the current shooting mode or the state of the multi selector HIJK to change menu categories. Time zone and date Monitor settings Date stamp Self-timer: after release Photo VR AF assist Date stamp Date Date and time O ff C To Change the Flash Mode, Self-timer, Macro Mode, and Exposure Compensation Settings...to change settings such as the flash mode or self-timer (A46). 98 Using the Menu Menu Operations Time zone and date Monitor settings Date stamp Self-timer: after release Photo VR AF assist 4 Press the k button to confirm the menu category. • Menu items corresponding to the ...
...the current shooting mode or the state of the multi selector HIJK to change menu categories. Time zone and date Monitor settings Date stamp Self-timer: after release Photo VR AF assist Date stamp Date Date and time O ff C To Change the Flash Mode, Self-timer, Macro Mode, and Exposure Compensation Settings...to change settings such as the flash mode or self-timer (A46). 98 Using the Menu Menu Operations Time zone and date Monitor settings Date stamp Self-timer: after release Photo VR AF assist 4 Press the k button to confirm the menu category. • Menu items corresponding to the ...
Reference Manual
Page 117
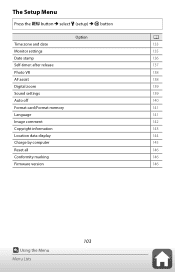
The Setup Menu Press the d button M select z (setup) M k button Option A Time zone and date 133 Monitor settings 135 Date stamp 136 Self-timer: after release 137 Photo VR 138 AF assist 138 Digital zoom 139 Sound settings 139 Auto off 140 Format card/Format memory 141 Language 141 Image comment 142 Copyright information 143 Location data display 144 Charge by computer 145 Reset all 146 Conformity marking 146 Firmware version 146 103 Using the Menu Menu Lists
The Setup Menu Press the d button M select z (setup) M k button Option A Time zone and date 133 Monitor settings 135 Date stamp 136 Self-timer: after release 137 Photo VR 138 AF assist 138 Digital zoom 139 Sound settings 139 Auto off 140 Format card/Format memory 141 Language 141 Image comment 142 Copyright information 143 Location data display 144 Charge by computer 145 Reset all 146 Conformity marking 146 Firmware version 146 103 Using the Menu Menu Lists
Reference Manual
Page 164
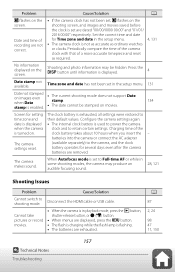
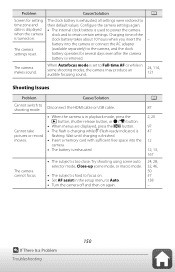
...12, 13, 167 24, 28, 32, 46, 50 57 138 - 150 If There Is a Problem Troubleshooting all settings were restored to retain certain settings. date is displayed • The internal clock battery is used to the camera, and the clock settings reset. Charging time of the clock battery takes about...Solution Cannot switch to Auto. • Turn the camera off and then on . • Set AF assist in playback mode, press the c button, shutter-release button, or b (e) button. • When menus are displayed, press the d button. • The flash is charging while Q (flash-ready indicator) is too close...
...12, 13, 167 24, 28, 32, 46, 50 57 138 - 150 If There Is a Problem Troubleshooting all settings were restored to retain certain settings. date is displayed • The internal clock battery is used to the camera, and the clock settings reset. Charging time of the clock battery takes about...Solution Cannot switch to Auto. • Turn the camera off and then on . • Set AF assist in playback mode, press the c button, shutter-release button, or b (e) button. • When menus are displayed, press the d button. • The flash is charging while Q (flash-ready indicator) is too close...
Reference Manual
Page 199
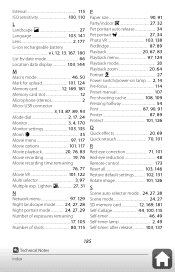
... mode 24, 27 SD memory card 12, 169, 181 Self-Collage 44, 100, 115 Self-timer 46, 49 Self-timer lamp 2, 49 Self-timer: after release 103, 137 185 Technical Notes Index Interval 115 ISO sensitivity 100, 110 L Landscape c 27 Language 103, 141 Lens 2, 177 Li-ion rechargeable battery vi, 12..., 13, 167, 180 List by date mode 66 Location data display 103, 144 M Macro mode 46, 50 Mark for upload 101, 124 Memory card 12, 169, 181 Memory card slot 12...
... mode 24, 27 SD memory card 12, 169, 181 Self-Collage 44, 100, 115 Self-timer 46, 49 Self-timer lamp 2, 49 Self-timer: after release 103, 137 185 Technical Notes Index Interval 115 ISO sensitivity 100, 110 L Landscape c 27 Language 103, 141 Lens 2, 177 Li-ion rechargeable battery vi, 12..., 13, 167, 180 List by date mode 66 Location data display 103, 144 M Macro mode 46, 50 Mark for upload 101, 124 Memory card 12, 169, 181 Memory card slot 12...
Reference Manual
Page 200
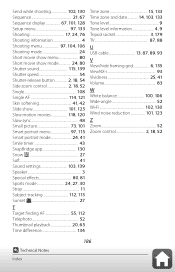
... 97, 104, 106 Shooting mode 24 Short movie show menu 80 Short movie show mode 24, 80 Shutter sound 115, 139 Shutter speed 54 Shutter-release button 2, 18, 54 Side zoom control 2, 18, 52 Single 108 Single AF 114, 121 Skin softening 41, 42 Slide show 101, 125 Slow motion movies... 112, 113 Sunset h 27 T Target finding AF 55, 112 Telephoto 52 Thumbnail playback 20, 65 Time difference 134 Time zone 15, 133 Time zone and date 14, 103, 133 Tone level 9 Tone level information 4, 9 Tripod socket 3, 179 TV 87, 88 U USB cable 13, 87, 89, 93 V View/hide framing grid 6, 135...
... 97, 104, 106 Shooting mode 24 Short movie show menu 80 Short movie show mode 24, 80 Shutter sound 115, 139 Shutter speed 54 Shutter-release button 2, 18, 54 Side zoom control 2, 18, 52 Single 108 Single AF 114, 121 Skin softening 41, 42 Slide show 101, 125 Slow motion movies... 112, 113 Sunset h 27 T Target finding AF 55, 112 Telephoto 52 Thumbnail playback 20, 65 Time difference 134 Time zone 15, 133 Time zone and date 14, 103, 133 Tone level 9 Tone level information 4, 9 Tripod socket 3, 179 TV 87, 88 U USB cable 13, 87, 89, 93 V View/hide framing grid 6, 135...

Quick Start Guide for customers in the Americas
Page 25
..., you can return to the selected menu category are displayed. 3 Press HI to change menu categories. Time zone and date Monitor settings Date stamp Self-timer: after release Photo VR AF assist 4 Press the k button to confirm the menu category. • Menu items corresponding to shooting ...mode by pressing the shutter-release button or b (e movie-record) button. Set up Time zone and date Monitor settings Date stamp Self-timer: after release Photo VR AF assist 5 Press HI to select a menu option, and press the k ...
..., you can return to the selected menu category are displayed. 3 Press HI to change menu categories. Time zone and date Monitor settings Date stamp Self-timer: after release Photo VR AF assist 4 Press the k button to confirm the menu category. • Menu items corresponding to shooting ...mode by pressing the shutter-release button or b (e movie-record) button. Set up Time zone and date Monitor settings Date stamp Self-timer: after release Photo VR AF assist 5 Press HI to select a menu option, and press the k ...
Quick Start Guide for customers in Asia Oceania the Middle East and Africa
Page 25
...the selection. • When you can return to shooting mode by pressing the shutter-release button or b (e movie-record) button. Other Functions 15 Set up Time zone and date Monitor settings Date stamp Self-timer: after release Photo VR AF assist 5 Press HI to select a menu option, and press ...depending on the current shooting mode or the state of the multi selector HIJK to change menu categories. Time zone and date Monitor settings Date stamp Self-timer: after release Photo VR AF assist 4 Press the k button to confirm the menu category. • Menu items corresponding to the...
...the selection. • When you can return to shooting mode by pressing the shutter-release button or b (e movie-record) button. Other Functions 15 Set up Time zone and date Monitor settings Date stamp Self-timer: after release Photo VR AF assist 5 Press HI to select a menu option, and press ...depending on the current shooting mode or the state of the multi selector HIJK to change menu categories. Time zone and date Monitor settings Date stamp Self-timer: after release Photo VR AF assist 4 Press the k button to confirm the menu category. • Menu items corresponding to the...

Quick Start Guide for customers in Europe
Page 25
...menu, press the d button. • When a menu is displayed, you are displayed. Time zone and date Monitor settings Date stamp Self-timer: after release Photo VR AF assist Date stamp Date Date and time O ff C To Change the Flash Mode, Self-timer, Macro Mode, and Exposure Compensation Settings ... the selection. • When you can return to shooting mode by pressing the shutter-release button or b (e movie-record) button. Other Functions 15 Time zone and date Monitor settings Date stamp Self-timer: after release Photo VR AF assist 5 Press HI to select a menu option, and press the...
...menu, press the d button. • When a menu is displayed, you are displayed. Time zone and date Monitor settings Date stamp Self-timer: after release Photo VR AF assist Date stamp Date Date and time O ff C To Change the Flash Mode, Self-timer, Macro Mode, and Exposure Compensation Settings ... the selection. • When you can return to shooting mode by pressing the shutter-release button or b (e movie-record) button. Other Functions 15 Time zone and date Monitor settings Date stamp Self-timer: after release Photo VR AF assist 5 Press HI to select a menu option, and press the...
Reference Manual
Page 33
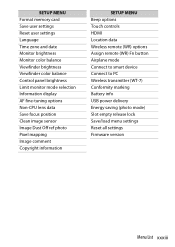
SETUP MENU Format memory card Save user settings Reset user settings Language Time zone and date Monitor brightness Monitor color balance Viewfinder brightness Viewfinder color balance Control panel brightness Limit monitor mode selection Information display AF fine-tuning options Non-CPU ... Airplane mode Connect to smart device Connect to PC Wireless transmitter (WT-7) Conformity marking Battery info USB power delivery Energy saving (photo mode) Slot empty release lock Save/load menu settings Reset all settings Firmware version Menu List xxxiii
SETUP MENU Format memory card Save user settings Reset user settings Language Time zone and date Monitor brightness Monitor color balance Viewfinder brightness Viewfinder color balance Control panel brightness Limit monitor mode selection Information display AF fine-tuning options Non-CPU ... Airplane mode Connect to smart device Connect to PC Wireless transmitter (WT-7) Conformity marking Battery info USB power delivery Energy saving (photo mode) Slot empty release lock Save/load menu settings Reset all settings Firmware version Menu List xxxiii
Reference Manual
Page 97
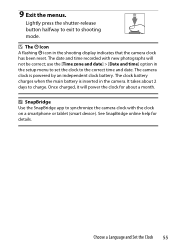
... time recorded with the clock on a smartphone or tablet (smart device). Choose a Language and Set the Clock 55 use the [Time zone and date] > [Date and time] option in the camera. The clock battery charges when the main battery is powered by an independent clock battery. See SnapBridge online help ... the setup menu to set the clock to synchronize the camera clock with new photographs will power the clock for details. Lightly press the shutter-release button halfway to exit to charge. A SnapBridge Use the SnapBridge app to the correct time and...
... time recorded with the clock on a smartphone or tablet (smart device). Choose a Language and Set the Clock 55 use the [Time zone and date] > [Date and time] option in the camera. The clock battery charges when the main battery is powered by an independent clock battery. See SnapBridge online help ... the setup menu to set the clock to synchronize the camera clock with new photographs will power the clock for details. Lightly press the shutter-release button halfway to exit to charge. A SnapBridge Use the SnapBridge app to the correct time and...


