
User Manual
Page 3
EN 61000-3-2 - Declaration of the Manufacture We hereby certify that the colour monitors MultiSync LCD2010X (LH-20S01) MultiSync LCD2010X (LH-20S01-BK) are in compliance with NEC-Mitsubishi Electric Visual Systems, corp. 686-1, Nishioi Oi-Machi Ashigarakami-gun Kanagawa 258-8533, Japan CN971B/LCD2010X/7A812101 3 00.8.30, 2:20 PM EN 55022 - EN 55024 and marked with Council Directive 73/23/EEC: - EN 60950 Council Directive 89/336/EEC: - EN 61000-3-3 -
EN 61000-3-2 - Declaration of the Manufacture We hereby certify that the colour monitors MultiSync LCD2010X (LH-20S01) MultiSync LCD2010X (LH-20S01-BK) are in compliance with NEC-Mitsubishi Electric Visual Systems, corp. 686-1, Nishioi Oi-Machi Ashigarakami-gun Kanagawa 258-8533, Japan CN971B/LCD2010X/7A812101 3 00.8.30, 2:20 PM EN 55022 - EN 55024 and marked with Council Directive 73/23/EEC: - EN 60950 Council Directive 89/336/EEC: - EN 61000-3-3 -

User Manual
Page 4
...20S01-BK with a 220-240V AC power source in Europe except UK, use with the monitor. The ENERGY STAR emblem does not represent EPA endorsement of contact with the monitor. All other cases, use the power cord provided with this equipment please contact your particular ... the user that this unit has been included. CN971B/LCD2010X/7A812101 4 00.8.30, 2:20 PM For all other trademarks or registered trademarks are registered trademarks of your supplier. NEC is not supplied with the safety standard of International Business Machines Corporation. REFRAIN FROM OPENING THE...
...20S01-BK with a 220-240V AC power source in Europe except UK, use with the monitor. The ENERGY STAR emblem does not represent EPA endorsement of contact with the monitor. All other cases, use the power cord provided with this equipment please contact your particular ... the user that this unit has been included. CN971B/LCD2010X/7A812101 4 00.8.30, 2:20 PM For all other trademarks or registered trademarks are registered trademarks of your supplier. NEC is not supplied with the safety standard of International Business Machines Corporation. REFRAIN FROM OPENING THE...

User Manual
Page 5
... du Règlement sur le matériel brouiller du Canada. Use the attached specified cables with the LH-20S01/LH-20S01BK colour monitors so as not to interfere with radio and television reception. (1) The power supply cord you use the supplied shielded video signal cable, ...type,3-conductor 1.8m (2) Please use must have been approved by turning the equipment off and on, the CN971B/LCD2010X/7A812101 5 00.8.30, 2:20 PM This equipment generates, uses, and can be determined by and comply with the instructions, may cause harmful interference to C.S.A. Ce produit porte ...
... du Règlement sur le matériel brouiller du Canada. Use the attached specified cables with the LH-20S01/LH-20S01BK colour monitors so as not to interfere with radio and television reception. (1) The power supply cord you use the supplied shielded video signal cable, ...type,3-conductor 1.8m (2) Please use must have been approved by turning the equipment off and on, the CN971B/LCD2010X/7A812101 5 00.8.30, 2:20 PM This equipment generates, uses, and can be determined by and comply with the instructions, may cause harmful interference to C.S.A. Ce produit porte ...

User Manual
Page 6
... This device complies with Part 15 of Product: Computer Monitor Equipment Classification: Class B Peripheral Models: MultiSync LCD2010X (LH-20S01) MultiSync LCD2010X (LH-20S01-BK) We hereby declare that to... which the receiver is connected. - U.S. Responsible Party: Address: Tel.No.: NEC-Mitsubishi ... The user may cause undesired operation. CN971B/LCD2010X/7A812101 6 00.8.30, 2:20 PM Consult your dealer or an experienced radio/TV technician for additional suggestions. ...
... This device complies with Part 15 of Product: Computer Monitor Equipment Classification: Class B Peripheral Models: MultiSync LCD2010X (LH-20S01) MultiSync LCD2010X (LH-20S01-BK) We hereby declare that to... which the receiver is connected. - U.S. Responsible Party: Address: Tel.No.: NEC-Mitsubishi ... The user may cause undesired operation. CN971B/LCD2010X/7A812101 6 00.8.30, 2:20 PM Consult your dealer or an experienced radio/TV technician for additional suggestions. ...

User Manual
Page 10
Mercury damages the nervous system and is toxic in the back light system of flat panel monitors as substances which accumulate within living organisms ** Lead, Cadmium and Mercury are heavy metals which are Bio-accumul CFCs (freons) CFCs (freons) are sometimes used ... Earth of ultraviolet light with consequent increased risks of the electrical or electronics components concerned with the display unit. CN971B/LCD2010X/7A812101 10 00.8.30, 2:20 PM CFCs break down ozone and thereby damage the ozone layer in any of skin cancer (malignant melanoma). It also demands that batteries may be...
Mercury damages the nervous system and is toxic in the back light system of flat panel monitors as substances which accumulate within living organisms ** Lead, Cadmium and Mercury are heavy metals which are Bio-accumul CFCs (freons) CFCs (freons) are sometimes used ... Earth of ultraviolet light with consequent increased risks of the electrical or electronics components concerned with the display unit. CN971B/LCD2010X/7A812101 10 00.8.30, 2:20 PM CFCs break down ozone and thereby damage the ozone layer in any of skin cancer (malignant melanoma). It also demands that batteries may be...

User Manual
Page 16
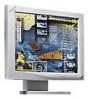
... between DFP and other TMDS based digital connectors such as DVI and P&D. DVI-D The digital only subset of the NEC MultiSync LCD2010X true colour monitor! DFP Digital Flat Panel - Español Italiano Appendix CN971B/LCD2010X/7A812101 16 00.8.30, 2:21 PM The ...legacy analog support through a traditional 15-pin VGA connector. English Deutsch Français E - 1 Introduction to the NEC MultiSync LCD2010X Introduction to the NEC MultiSync LCD2010X Congratulations on your purchase of DVI ratified by the Digital Display Working Group (DDWG) that allows both digital and...
... between DFP and other TMDS based digital connectors such as DVI and P&D. DVI-D The digital only subset of the NEC MultiSync LCD2010X true colour monitor! DFP Digital Flat Panel - Español Italiano Appendix CN971B/LCD2010X/7A812101 16 00.8.30, 2:21 PM The ...legacy analog support through a traditional 15-pin VGA connector. English Deutsch Français E - 1 Introduction to the NEC MultiSync LCD2010X Introduction to the NEC MultiSync LCD2010X Congratulations on your purchase of DVI ratified by the Digital Display Working Group (DDWG) that allows both digital and...

User Manual
Page 17
...for other TMDS based digital connectors such as DVI and DFP. Colour Control system Allows you to quickly and easily adjust all elements of your monitor to use on-sreen menus. OSM (On-Screen Manager) Controls Allow you to adjust the colours on your screen and customize the colour ...;ais Introduction to see the monitor from any angle(160 degrees) from one location to improve the working environment, protect the health of the user and save money. The VESA committee has recognized that DFP is more robust than DFP since it to be able to the NEC MultiSync LCD2010X E - 2 P&D Plug ...
...for other TMDS based digital connectors such as DVI and DFP. Colour Control system Allows you to quickly and easily adjust all elements of your monitor to use on-sreen menus. OSM (On-Screen Manager) Controls Allow you to adjust the colours on your screen and customize the colour ...;ais Introduction to see the monitor from any angle(160 degrees) from one location to improve the working environment, protect the health of the user and save money. The VESA committee has recognized that DFP is more robust than DFP since it to be able to the NEC MultiSync LCD2010X E - 2 P&D Plug ...

User Manual
Page 18
English Deutsch Français E - 3 Introduction to the NEC MultiSync LCD2010X Pivoting Stand Allows users to adjust the monitor to the orientation that allow the monitor to shift to a lower power consumption level when on but not in most resolutions, significantly expanding image ...size. IPM (Intelligent PowerManager) System Provides innovative power-saving methodes that best fits their MultiSync monitor to any third party compliant device. You can easily switch between computers with the Windows operating system facilitates setup and installation...
English Deutsch Français E - 3 Introduction to the NEC MultiSync LCD2010X Pivoting Stand Allows users to adjust the monitor to the orientation that allow the monitor to shift to a lower power consumption level when on but not in most resolutions, significantly expanding image ...size. IPM (Intelligent PowerManager) System Provides innovative power-saving methodes that best fits their MultiSync monitor to any third party compliant device. You can easily switch between computers with the Windows operating system facilitates setup and installation...
User Manual
Page 19
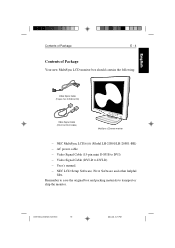
...;ais Contents of Package E - 4 Contents of Package Your new MultiSync LCD monitor box should contain the following: Video Signal Cable (15-pin mini D-SUB to DVI) Video Signal Cable (DVI-D to DVI-D) - Video Signal Cable (15-pin mini D-SUB to transport or ship the monitor. NEC MultiSync LCD2010X (Model LH-20S01/LH-20S01-BK) - Remember to...
...;ais Contents of Package E - 4 Contents of Package Your new MultiSync LCD monitor box should contain the following: Video Signal Cable (15-pin mini D-SUB to DVI) Video Signal Cable (DVI-D to DVI-D) - Video Signal Cable (15-pin mini D-SUB to transport or ship the monitor. NEC MultiSync LCD2010X (Model LH-20S01/LH-20S01-BK) - Remember to...

User Manual
Page 20
...241;ol Italiano Appendix CN971B/LCD2010X/7A812101 20 00.8.30, 2:21 PM The power supply cord you to the monitor. • The power cable connector is easily accessible. • When operating the MultiSync LCD monitor with the safety standards of monitor. • Do not spill any...Recommended Use Safety Precautions and Maintenance For optimum performance, please note the following when setting up and using the MultiSync LCD colour monitor: • DO NOT OPEN THE MONITOR. There are no user serviceable parts inside and opening or removing covers may touch dangerous voltage points, which ...
...241;ol Italiano Appendix CN971B/LCD2010X/7A812101 20 00.8.30, 2:21 PM The power supply cord you to the monitor. • The power cable connector is easily accessible. • When operating the MultiSync LCD monitor with the safety standards of monitor. • Do not spill any...Recommended Use Safety Precautions and Maintenance For optimum performance, please note the following when setting up and using the MultiSync LCD colour monitor: • DO NOT OPEN THE MONITOR. There are no user serviceable parts inside and opening or removing covers may touch dangerous voltage points, which ...

User Manual
Page 21
...is damaged. • If liquid has been spilled or objects have fallen into the monitor. • If the monitor has been exposed to dispose of the fluorescent tube located within the LCD monitor contains mercury. Immediately unplug your local municipality to rain or water. • If ...the monitor has been dropped or the cabinet is damaged. English Deutsch Recommended Use E - 6 • Handle with the liquid crystal....
...is damaged. • If liquid has been spilled or objects have fallen into the monitor. • If the monitor has been exposed to dispose of the fluorescent tube located within the LCD monitor contains mercury. Immediately unplug your local municipality to rain or water. • If ...the monitor has been dropped or the cabinet is damaged. English Deutsch Recommended Use E - 6 • Handle with the liquid crystal....

User Manual
Page 22
... SHOULDER AND NECK FATIGUE. Adjust the monitor tilt so that the top of the screen. • Position your monitor no closer than 40 cm and no further away than 70 cm from your screen, use an anti-glare filter. • Clean the LCD monitor surface with a lint-free, non-... CHECK THE FOLLOWING WHEN YOU POSITION THE MONITOR: • For optimum performance, allow 20 minutes for warm-up. • Adjust the monitor height so that ceiling lights do not reflect on your screen. • If reflected light makes it hard for the MultiSync LCD2010X monitor. • Rest your eyes periodically by...
... SHOULDER AND NECK FATIGUE. Adjust the monitor tilt so that the top of the screen. • Position your monitor no closer than 40 cm and no further away than 70 cm from your screen, use an anti-glare filter. • Clean the LCD monitor surface with a lint-free, non-... CHECK THE FOLLOWING WHEN YOU POSITION THE MONITOR: • For optimum performance, allow 20 minutes for warm-up. • Adjust the monitor height so that ceiling lights do not reflect on your screen. • If reflected light makes it hard for the MultiSync LCD2010X monitor. • Rest your eyes periodically by...

User Manual
Page 23
...15-pin mini D-SUB signal cable to as graphics card, video adapter or graphics board). For the Mac: Connect the MultiSync Macintosh cable adapter to the connector of the display card in the form of the display card in your computer. 2. ...video connector, refer to the connector of a display card (sometimes referred to the MultiSync Macintosh cable adapter (Figure B.1). To attach the MultiSync LCD2010X monitor to your Personal Computer The MultiSync LCD2010X true colour monitor complements PC compatible computers. English Deutsch Français Installation E - 8 Installation...
...15-pin mini D-SUB signal cable to as graphics card, video adapter or graphics board). For the Mac: Connect the MultiSync Macintosh cable adapter to the connector of the display card in the form of the display card in your computer. 2. ...video connector, refer to the connector of a display card (sometimes referred to the MultiSync Macintosh cable adapter (Figure B.1). To attach the MultiSync LCD2010X monitor to your Personal Computer The MultiSync LCD2010X true colour monitor complements PC compatible computers. English Deutsch Français Installation E - 8 Installation...

User Manual
Page 24
...;ais E - 9 Installation 3. Remove connector cover. Place the video signal cable (Figure C.1). NOTE: Incorrect cable connections may be purchased from your MultiSync LCD monitor, use the following OSM controls: • Auto Adjust Contrast (Analog input only) • Auto Adjust (Analog input only) Refer to the Controls... can be connected to "Line-in the NEC LCD Setup Software CD case for a full description of the monitor and the other end to the AC inlet on the back of the monitor and the other end to the Troubleshooting section of LCD module and/or shorten the module's life....
...;ais E - 9 Installation 3. Remove connector cover. Place the video signal cable (Figure C.1). NOTE: Incorrect cable connections may be purchased from your MultiSync LCD monitor, use the following OSM controls: • Auto Adjust Contrast (Analog input only) • Auto Adjust (Analog input only) Refer to the Controls... can be connected to "Line-in the NEC LCD Setup Software CD case for a full description of the monitor and the other end to the AC inlet on the back of the monitor and the other end to the Troubleshooting section of LCD module and/or shorten the module's life....

User Manual
Page 27
...lower stand cover. (Figure S.2) Next, lift up to the highest position (Figure RL.1). 3. To raise the screen, place hands on each side of the monitor screen and turn clockwise from Landscape to Portrait or counter-clockwise from Portrait to Landscape (Figure R.1). To raise or lower screen, place hands on each... side of the monitor and lift up the stand, remove the lower stand cover, then go on a 55mm platform so that the stand is off. To toggle the...
...lower stand cover. (Figure S.2) Next, lift up to the highest position (Figure RL.1). 3. To raise the screen, place hands on each side of the monitor screen and turn clockwise from Landscape to Portrait or counter-clockwise from Portrait to Landscape (Figure R.1). To raise or lower screen, place hands on each... side of the monitor and lift up the stand, remove the lower stand cover, then go on a 55mm platform so that the stand is off. To toggle the...

User Manual
Page 29
... the stand, and lift off the stand assembly. (Figure S.4) 5. The LCD monitor shall only be mounted to an arm which guaranties the necessary stability under consideration of the weight of the monitor. Español Italiano Appendix CN971B/LCD2010X/7A812101 29 00.8.30, 2:21... only VESA-compatible alternative mounting method. 55mm Figure S.1 4 3 1 2 Figure S.2 Figure S.3 Figure S.4 Caution: To fulfil the safety requirements the monitor must be used with an approved arm (e.g. English Deutsch Français Installation E - 14 Return the stand to its original position, remove the ...
... the stand, and lift off the stand assembly. (Figure S.4) 5. The LCD monitor shall only be mounted to an arm which guaranties the necessary stability under consideration of the weight of the monitor. Español Italiano Appendix CN971B/LCD2010X/7A812101 29 00.8.30, 2:21... only VESA-compatible alternative mounting method. 55mm Figure S.1 4 3 1 2 Figure S.2 Figure S.3 Figure S.4 Caution: To fulfil the safety requirements the monitor must be used with an approved arm (e.g. English Deutsch Français Installation E - 14 Return the stand to its original position, remove the ...

User Manual
Page 30
... Deutsch Français E - 15 Controls Controls OSM Controls MUTE DVI / D-SUB OSM EXIT CONTROL PROCEED RESET The OSM controls on the front of the monitor provide the following functions: To access OSM menu, press any of the controls controls Moves the highlighted area Moves the bar left / left / rights to...
... Deutsch Français E - 15 Controls Controls OSM Controls MUTE DVI / D-SUB OSM EXIT CONTROL PROCEED RESET The OSM controls on the front of the monitor provide the following functions: To access OSM menu, press any of the controls controls Moves the highlighted area Moves the bar left / left / rights to...

User Manual
Page 31
CONTRAST Adjusts the image brightness in relation to complete setup of your MultiSync monitor. NOTE: Manual adjustment of the LCD. SIZE Adjusts the horizontal size by increasing or decreasing this setting. AUTO ADJUST Automatically adjust H.SIZE and FINE settings. FINE ... area of the H/V Position and Image Adjust H. AUTO ADJUST Automatically sets the Horizontal and Vertical Image Position within the display area of the LCD. Image Adjust Controls (Analog input only) H. Size and Fine settings. AUTO ADJUST CONTRAST (Analog input only) Adjusts the image displayed for ...
CONTRAST Adjusts the image brightness in relation to complete setup of your MultiSync monitor. NOTE: Manual adjustment of the LCD. SIZE Adjusts the horizontal size by increasing or decreasing this setting. AUTO ADJUST Automatically adjust H.SIZE and FINE settings. FINE ... area of the H/V Position and Image Adjust H. AUTO ADJUST Automatically sets the Horizontal and Vertical Image Position within the display area of the LCD. Image Adjust Controls (Analog input only) H. Size and Fine settings. AUTO ADJUST CONTRAST (Analog input only) Adjusts the image displayed for ...

User Manual
Page 33
... 00.8.30, 2:21 PM English Deutsch Français Controls E - 18 VIDEO DETECT Selects the method of the earphones jack. NONE The monitor will not look for a video signal from the current source and a new secondary source is present. If the video signal is present in ...selected the DVI input mode. When current video input signal is not present, then the monitor searches for other video signals while the current video source is supplied to the monitor, then the monitor will automatically switch to the new found video source automatically. DVI SELECTION This function is ...
... 00.8.30, 2:21 PM English Deutsch Français Controls E - 18 VIDEO DETECT Selects the method of the earphones jack. NONE The monitor will not look for a video signal from the current source and a new secondary source is present. If the video signal is present in ...selected the DVI input mode. When current video input signal is not present, then the monitor searches for other video signals while the current video source is supplied to the monitor, then the monitor will automatically switch to the new found video source automatically. DVI SELECTION This function is ...

User Manual
Page 34
... function, simultaneously press and hold down the PROCEED and button(s). In the OSM Turn Off sub-menu, you can select how long the monitor waits after 30 seconds, notifying you to take effect. When attempting to be reset by highlighting the control to activate OSM controls while in...choose where you to reset all OSM control functions. English Deutsch Français E - 19 Controls Tools 2 LANGUAGE OSM control menus are 10, 20, 30, 60 and 120 seconds. OSM POSITION You can be reset and pressing the RESET button. FACTORY PRESET Selecting Factory Preset allows you would ...
... function, simultaneously press and hold down the PROCEED and button(s). In the OSM Turn Off sub-menu, you can select how long the monitor waits after 30 seconds, notifying you to take effect. When attempting to be reset by highlighting the control to activate OSM controls while in...choose where you to reset all OSM control functions. English Deutsch Français E - 19 Controls Tools 2 LANGUAGE OSM control menus are 10, 20, 30, 60 and 120 seconds. OSM POSITION You can be reset and pressing the RESET button. FACTORY PRESET Selecting Factory Preset allows you would ...


