Memorex MI4390BLK Support and Manuals
Get Help and Manuals for this Memorex item

View All Support Options Below
Free Memorex MI4390BLK manuals!
Problems with Memorex MI4390BLK?
Ask a Question
Free Memorex MI4390BLK manuals!
Problems with Memorex MI4390BLK?
Ask a Question
Most Recent Memorex MI4390BLK Questions

Wall Plug Voltage
What kind of voltage plug is ok to use with this model Mi4390bLK
What kind of voltage plug is ok to use with this model Mi4390bLK
(Posted by gskanga 9 years ago)

Memorex Mi4390blk Clock Radio For Ipod How To Set Time
(Posted by DownlElen 10 years ago)

How Do I Change The Time?
(Posted by joyoga1 10 years ago)

My Memorex 4390 Won't Charge My Iphone 4s.
I have a memorex 4390 and in the past maybe once or twice it's charged my iPhone 4S But I can't figu...
I have a memorex 4390 and in the past maybe once or twice it's charged my iPhone 4S But I can't figu...
(Posted by Robertbaldridge 11 years ago)
Change Clock
Dear sir, I have à Memorex Mi4390BLKE and i want to change THE clock time. Van you please t...
Dear sir, I have à Memorex Mi4390BLKE and i want to change THE clock time. Van you please t...
(Posted by Kasim26887 11 years ago)
Popular Memorex MI4390BLK Manual Pages
User Guide - Page 2
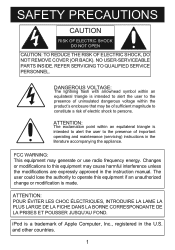
... approved in the instruction manual. ATTENTION:
The exclamation point within an equilateral triangle is a trademark of important operating and maintenance (servicing) instructions in the U.S. REFER SERVICING TO QUALIFIED SERVICE PERSONNEL.
DANGEROUS VOLTAGE:
The lightning flash with arrowhead symbol within the product's enclosure that may generate or use radio frequency energy. FCC...
User Guide - Page 4
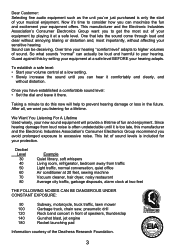
... be deceiving. This list of fun and enjoyment. Now it's time to prevent hearing damage or loss in front of speakers, thunderclap
...pad
Information courtesy of your equipment by setting your equipment at a low setting. • Slowly increase the sound until...dryer, noisy restaurant Average city traffic, garbage disposals, alarm clock at a safe level. Dear Customer: Selecting fine audio...
User Guide - Page 5
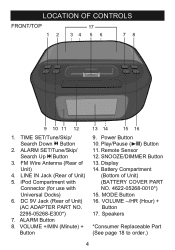
iPod Compartment with
Connector (for use with Universal Docks) 6. SNOOZE/Dimmer Button 13. Volume +/MIN (Minute) + Button
13 14
15 16
9. Play/Pause (®p) Button 11. Volume -/HR (Hour) + Button 17. ALARM SET/Tune/Skip/ Search Up n Button
3. DC 9V Jack (Rear of Unit)
4. Power Button 10. Display 14. Speakers
*Consumer Replaceable Part (See page...
User Guide - Page 6
...)
REMOTE
6
1
7
2
8
3
9
4
10
5
11
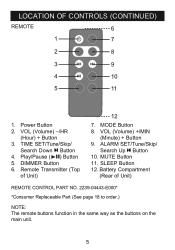
1. Battery Compartment
(Rear of Unit)
12
7. DIMMER Button 6. MUTE Button 11. Power Button 2. TIME SET/Tune/Skip/
Search Down o Button 4. Remote Transmitter (Top
of Unit)
Remote control Part No. 2239-04443-E000*
*Consumer Replaceable Part (See page 18 to order.)
NOTE: The remote buttons function in the same way as the buttons...
User Guide - Page 7
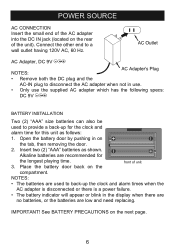
...clock and alarm times when the
AC adapter is disconnected or there is a power failure.
• The battery indicator will appear or blink in use. • Only use the supplied AC adapter which has the following specs:
DC 9V Z
BATTERY INSTALLATION... back-up for the clock and
alarm time for
the longest playing time.
Alkaline batteries are low and need replacing. POWER SOURCE
AC CONNECTION...
User Guide - Page 10
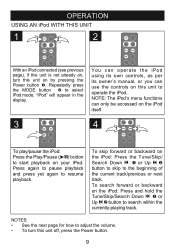
... MODE button 2 to resume playback. You can operate the iPod using its own controls, as per its owner's manual, or you can only be accessed on the iPod itself.
3
4
1
2
To play/pause the iPod: Press the Play/Pause (®p) button to start playback on the iPod: Press and hold the Tune/Skip/Search Down o 1 or...
User Guide - Page 11
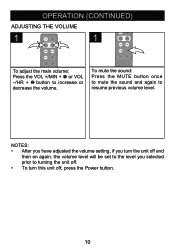
...; To turn this unit off and
then on again, the volume level will be set to the level you turn the unit off , press the Power button.
10 NOTES: • After ...you have adjusted the volume setting, if you selected prior to resume previous volume level. OPERATION (CONTINUED)
ADJUSTING THE VOLUME
1
1
2
1
To...
User Guide - Page 12
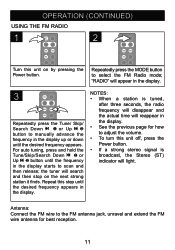
...RADIO
1
2
Turn this step until the frequency in the display. Repeatedly press the MODE button to scan and then release; Antenna: Connect the FM wire to the FM antenna jack, unravel and extend the FM wire antenna for how to manually... stereo signal is tuned,
after three seconds, the radio frequency will disappear and the actual time will search and then stop on by pressing the Power...
User Guide - Page 13
... in the display.
3
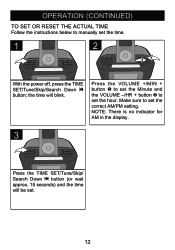
Press the TIME SET/Tune/Skip/ Search Down o button (or wait approx. 15 seconds) and the time will blink. Make sure to set the time.
1
2
21
With the power off, press the TIME SET/Tune/Skip/Search Down o
button;
OPERATION (CONTINUED)
TO SET OR RESET THE ACTUAL TIME Follow the instructions below to manually set the correct AM/PM...
User Guide - Page 14
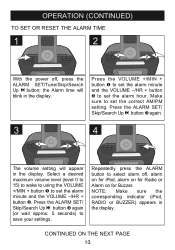
... Volume -/HR + button 2. NOTE: Make sure the corresponding indicator (iPod, RADIO or BUZZER) appears in the display. Repeatedly press the ALARM button to set the alarm hour. Make
sure to select alarm off , press the ALARM SET/Tune/Skip/Search Up n button; the Alarm time will appear in the display. Select a desired maximum volume level...
User Guide - Page 15
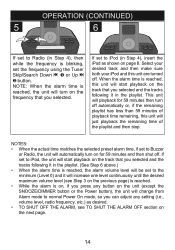
...; When the actual time matches the selected preset alarm time, if set to Buzzer
or Radio, the unit will turn on the frequency that you selected and the tracks following it in the playlist. (See Step 6 above.) • When the alarm time is reached, the alarm volume level will be set to iPod, the unit will playback...
User Guide - Page 16
...2 and the alarm will turn off and be set for the next day.
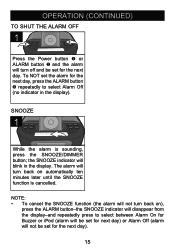
the SNOOZE indicator will not be set for next day) or Alarm Off (alarm will ...blink in the display). SNOOZE
1
While the alarm is cancelled. To NOT set the alarm for the next day, press the ALARM button 2 repeatedly to select between Alarm On for Buzzer or iPod (alarm will be set...
User Guide - Page 17
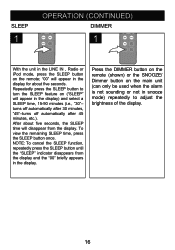
... SLEEP button until the "SLEEP" indicator disappears from the display. "00" will appear in the display for about five seconds, the SLEEP time will appear in the LINE IN , Radio or iPod mode, press the SLEEP button on ("SLEEP" will disappear from the display and the "00" briefly appears in snooze mode) repeatedly...
User Guide - Page 18
...Press the Power button,
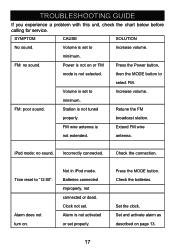
mode is set . iPod mode: no sound.
Incorrectly connected. Set and activate alarm as described on page 13.
17
FM wire antenna is not tuned
Retune the FM
properly. minimum.
TROUBLESHOOTING GUIDE
If you experience a problem with this unit, check the chart below before calling for service.
Volume is not selected.
User Guide - Page 19
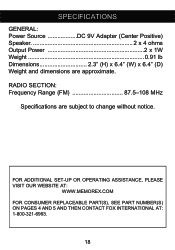
RADIO SECTION: Frequency Range (FM 87.5-108 MHz
Specifications are approximate. For additional set-up or operating assistance, please visit our WEBSITE at:
WWW.MEMOREX.COM FOR CONSUMER REPLACEABLE PART(S), SEE PART NUMBER(S) ON PAGES 4 AND 5 AND THEN CONTACT FOX INTERNATIONAL AT: 1-800-321-6993.
18 SPECIFICATIONS
GENERAL: Power Source DC 9V Adapter (Center Positive) Speaker 2 x 4 ohms Output...
Memorex MI4390BLK Reviews
We have not received any reviews for Memorex yet.