User's Guide
Page 3
......13 Loading various paper types...13 Printing 16 Printing basic documents...16 Printing a document...16 Printing Web pages...16 Printing multiple copies of a document...17 Collating printed copies...17 Printing the last page first (reverse page order)...18 Printing multiple pages on one sheet (N-Up)...18 Canceling print jobs...19 Pausing print jobs...20 Printing specialty documents...21 Choosing compatible specialty...
......13 Loading various paper types...13 Printing 16 Printing basic documents...16 Printing a document...16 Printing Web pages...16 Printing multiple copies of a document...17 Collating printed copies...17 Printing the last page first (reverse page order)...18 Printing multiple pages on one sheet (N-Up)...18 Canceling print jobs...19 Pausing print jobs...20 Printing specialty documents...21 Choosing compatible specialty...
User's Guide
Page 4
... the computer 26 Maintaining the printer 28 Maintaining print cartridges...28 Installing print cartridges...28 Removing a used print cartridge ...29 Refilling print cartridges...30 Using genuine Lexmark print cartridges...30 Aligning the print cartridges ...30 Cleaning the print cartridge nozzles...31 Wiping the print cartridge nozzles and contacts ...31 Preserving the print cartridges ...32 Cleaning the exterior of the printer...
... the computer 26 Maintaining the printer 28 Maintaining print cartridges...28 Installing print cartridges...28 Removing a used print cartridge ...29 Refilling print cartridges...30 Using genuine Lexmark print cartridges...30 Aligning the print cartridges ...30 Cleaning the print cartridge nozzles...31 Wiping the print cartridge nozzles and contacts ...31 Preserving the print cartridges ...32 Cleaning the exterior of the printer...

User's Guide
Page 6
...Friday (8:00 AM-8:00 PM EST) Note: Support numbers and times may change without notice. Introduction Finding information about contacting Lexmark, see the printed warranty statement that came with your printer. 6 Select a country or region, and then select the Customer Support link. For... the most recent telephone numbers available, see the printed warranty that came with your printer. - Complete instructions for using the printer. Customer support Description Where to find (North America) Where...
...Friday (8:00 AM-8:00 PM EST) Note: Support numbers and times may change without notice. Introduction Finding information about contacting Lexmark, see the printed warranty statement that came with your printer. 6 Select a country or region, and then select the Customer Support link. For... the most recent telephone numbers available, see the printed warranty that came with your printer. - Complete instructions for using the printer. Customer support Description Where to find (North America) Where...
User's Guide
Page 7
... ready when you faster: • Machine Type number • Serial number • Date purchased • Store where purchased 7 See the printed furnishes a limited warranty that Limited Warranty included with this warranty that came with your this limited warranty, see the...defects in some instances. Limited Warranty Description Where to find (USA) Where to find (rest of world) For e-mail support, visit our Web site: www.lexmark.com. 1 Click CUSTOMER SUPPORT. 2 Click Technical Support. 3 Select your printer family. 4 Select your printer. Select a country or region, and then ...
... ready when you faster: • Machine Type number • Serial number • Date purchased • Store where purchased 7 See the printed furnishes a limited warranty that Limited Warranty included with this warranty that came with your this limited warranty, see the...defects in some instances. Limited Warranty Description Where to find (USA) Where to find (rest of world) For e-mail support, visit our Web site: www.lexmark.com. 1 Click CUSTOMER SUPPORT. 2 Click Technical Support. 3 Select your printer family. 4 Select your printer. Select a country or region, and then ...
User's Guide
Page 8
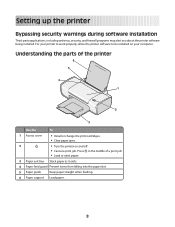
...printer software being installed. Press in the middle of the printer 6 5 4 1 2 3 Use the To 1 Access cover • Install or change the print cartridges. • Clear paper jams. 2 • Turn the printer on your computer. For your printer to work properly, allow the printer software to be ...installed on and off. • Cancel a print job. Understanding the parts of a print job. • Load or eject paper. 3 Paper exit tray Stack paper as it exits. 4 Paper feed guard Prevent items ...
...printer software being installed. Press in the middle of the printer 6 5 4 1 2 3 Use the To 1 Access cover • Install or change the print cartridges. • Clear paper jams. 2 • Turn the printer on your computer. For your printer to work properly, allow the printer software to be ...installed on and off. • Cancel a print job. Understanding the parts of a print job. • Load or eject paper. 3 Paper exit tray Stack paper as it exits. 4 Paper feed guard Prevent items ...
User's Guide
Page 11
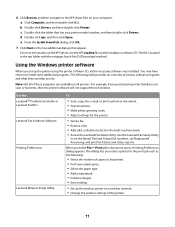
... necessary software was installed. Note: Not all printers. Use the LexmarkTM Productivity Studio or Lexmark FastPics Lexmark Fax Solutions Software Printing Preferences Lexmark Wireless Setup Utility To • Scan, copy, fax, e-mail, or print a photo or document. • Transfer photos. • Make photo greeting cards. ...the wireless settings of various software programs and what they can help you select File Œ Print with the setupxps batch file (D:\Drivers\xps\readme). Use the Lexmark Fax Setup Utility to set the Speed Dial and Group Dial numbers, set up the wireless...
... necessary software was installed. Note: Not all printers. Use the LexmarkTM Productivity Studio or Lexmark FastPics Lexmark Fax Solutions Software Printing Preferences Lexmark Wireless Setup Utility To • Scan, copy, fax, e-mail, or print a photo or document. • Transfer photos. • Make photo greeting cards. ...the wireless settings of various software programs and what they can help you select File Œ Print with the setupxps batch file (D:\Drivers\xps\readme). Use the Lexmark Fax Setup Utility to set the Speed Dial and Group Dial numbers, set up the wireless...
User's Guide
Page 12
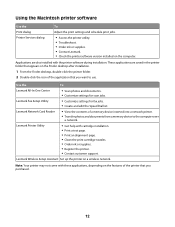
...cartridge installation. • Print a test page. • Print an alignment page. • Clean the print cartridge nozzles. • Order ink or supplies. • Register the printer. • Contact customer support. These applications are also installed with the printer software during installation. Lexmark Fax Setup Utility •... that you want to the computer over a network. Using the Macintosh printer software Use the To Print dialog Adjust the print settings and schedule print jobs. Lexmark Wireless Setup Assistant Set up the printer on the computer.
...cartridge installation. • Print a test page. • Print an alignment page. • Clean the print cartridge nozzles. • Order ink or supplies. • Register the printer. • Contact customer support. These applications are also installed with the printer software during installation. Lexmark Fax Setup Utility •... that you want to the computer over a network. Using the Macintosh printer software Use the To Print dialog Adjust the print settings and schedule print jobs. Lexmark Wireless Setup Assistant Set up the printer on the computer.
User's Guide
Page 14
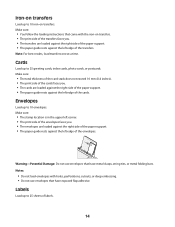
...against the left edge of the cards. Make sure: • The total thickness of the card stack does not exceed 10 mm (0.4 inches). • The print side of the cards faces you . • The transfers are loaded against the right side of the paper support. • The paper guide rests against...cards, photo cards, or postcards. Envelopes Load up to 10 envelopes. Make sure: • The stamp location is in the upper left corner. • The print side of the envelopes faces you. • The envelopes are loaded against the right side of the paper support. • The paper guide rests against...
...against the left edge of the cards. Make sure: • The total thickness of the card stack does not exceed 10 mm (0.4 inches). • The print side of the cards faces you . • The transfers are loaded against the right side of the paper support. • The paper guide rests against...cards, photo cards, or postcards. Envelopes Load up to 10 envelopes. Make sure: • The stamp location is in the upper left corner. • The print side of the envelopes faces you. • The envelopes are loaded against the right side of the paper support. • The paper guide rests against...
User's Guide
Page 15
...the paper. 15 Remove each transparency as it exits, and allow it to dry to 10 transparencies. Partial sheets (with the labels. • The print side of the labels faces you . • You don't use transparencies with paper backing sheets. • The transparencies are loaded against the right ... smudging. Make sure: • You follow the loading instructions that came with areas exposed by missing labels) may cause labels to peel off during printing, resulting in a paper jam. • The labels are loaded against the right side of the paper support. • The paper guide rests ...
...the paper. 15 Remove each transparency as it exits, and allow it to dry to 10 transparencies. Partial sheets (with the labels. • The print side of the labels faces you . • You don't use transparencies with paper backing sheets. • The transparencies are loaded against the right ... smudging. Make sure: • You follow the loading instructions that came with areas exposed by missing labels) may cause labels to peel off during printing, resulting in a paper jam. • The labels are loaded against the right side of the paper support. • The paper guide rests ...
User's Guide
Page 16
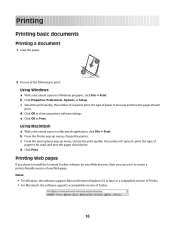
.... b From the Printer pop-up menu, choose the print quality, the number of copies to print, the type of paper to create a printer-friendly version of any printer software dialogs. Printing Web pages If you chose to install the Lexmark Toolbar software for your Web browser, then you can use... it to be used , and how the pages should print. b Click Properties,...
.... b From the Printer pop-up menu, choose the print quality, the number of copies to print, the type of paper to create a printer-friendly version of any printer software dialogs. Printing Web pages If you chose to install the Lexmark Toolbar software for your Web browser, then you can use... it to be used , and how the pages should print. b Click Properties,...
User's Guide
Page 17
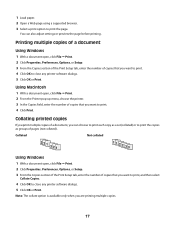
...: The collate option is available only when you can also adjust settings or preview the page before printing. Printing multiple copies of a document Using Windows 1 With a document open , click File ΠPrint. 2 From the Printer pop-up menu, choose the printer. 3 In the Copies field, enter the number of pages (not collated). You...
...: The collate option is available only when you can also adjust settings or preview the page before printing. Printing multiple copies of a document Using Windows 1 With a document open , click File ΠPrint. 2 From the Printer pop-up menu, choose the printer. 3 In the Copies field, enter the number of pages (not collated). You...
User's Guide
Page 18
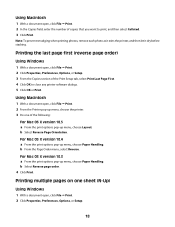
... a document open , click File ΠPrint. 2 Click Properties, Preferences, Options, or Setup. 3 From the Copies section of the Print Setup tab, select Print Last Page First. 4 Click OK to print, and then select Collated. 3 Click Print. Note: To prevent smudging when printing photos, remove each photo as it exits the...it dry before stacking. b From the Page Order menu, select Reverse. For Mac OS X version 10.3 a From the print options pop-up menu, choose Paper Handling. Printing multiple pages on one of copies that you want to close any printer software dialogs. 5 Click OK or...
... a document open , click File ΠPrint. 2 Click Properties, Preferences, Options, or Setup. 3 From the Copies section of the Print Setup tab, select Print Last Page First. 4 Click OK to print, and then select Collated. 3 Click Print. Note: To prevent smudging when printing photos, remove each photo as it exits the...it dry before stacking. b From the Page Order menu, select Reverse. For Mac OS X version 10.3 a From the print options pop-up menu, choose Paper Handling. Printing multiple pages on one of copies that you want to close any printer software dialogs. 5 Click OK or...
User's Guide
Page 19
... a Click Start. 3 From the Advanced tab, select N-Up under the Layout drop-down menu. 4 Select the number of page images to print on one sheet. • If you want to print a border around each page image, then choose an option from the Border pop-up menu, choose the number of page images... that you want to print on one of your screen when you send a print job. c Under Hardware and Sound, click Printer. b Click Settings Œ Printers. 2 Right-click the printer name, and then select Open. 19...
... a Click Start. 3 From the Advanced tab, select N-Up under the Layout drop-down menu. 4 Select the number of page images to print on one sheet. • If you want to print a border around each page image, then choose an option from the Border pop-up menu, choose the number of page images... that you want to print on one of your screen when you send a print job. c Under Hardware and Sound, click Printer. b Click Settings Œ Printers. 2 Right-click the printer name, and then select Open. 19...
User's Guide
Page 20
... folder in Windows 1 Do one of the following: • If you want to cancel a particular print job, right-click the document name, and then select Cancel. • If you want to cancel all print jobs in the taskbar. 2 Do one of the following: • If you want to cancel a...document name, and then select Pause. 20 b Click Printers and Faxes. b Click Settings Œ Printers. 2 Right-click the printer, and then select Pause Printing. Using the taskbar in Windows 1 Double-click the printer icon in the queue, click Printer Œ Cancel All Documents. c Under Hardware and Sound, click ...
... folder in Windows 1 Do one of the following: • If you want to cancel a particular print job, right-click the document name, and then select Cancel. • If you want to cancel all print jobs in the taskbar. 2 Do one of the following: • If you want to cancel a...document name, and then select Pause. 20 b Click Printers and Faxes. b Click Settings Œ Printers. 2 Right-click the printer, and then select Pause Printing. Using the taskbar in Windows 1 Double-click the printer icon in the queue, click Printer Œ Cancel All Documents. c Under Hardware and Sound, click ...
User's Guide
Page 21
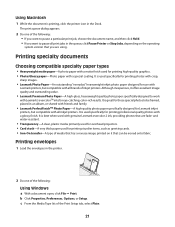
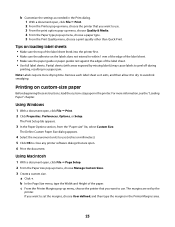
... operating system version that has a reverse image printed on it offers excellent image quality and outstanding value. • Lexmark Premium Photo Paper-A high-gloss, heavyweight quality photo paper specifically designed to pause a particular print job, choose the document name, and then ... Options, or Setup. The print queue dialog appears. 2 Do one of the following : • If you want to work with Lexmark's evercolorTM inks for printing professional quality photos with all brands of the Print Setup tab, select Plain. 21 Printing specialty documents Choosing compatible specialty ...
... operating system version that has a reverse image printed on it offers excellent image quality and outstanding value. • Lexmark Premium Photo Paper-A high-gloss, heavyweight quality photo paper specifically designed to pause a particular print job, choose the document name, and then ... Options, or Setup. The print queue dialog appears. 2 Do one of the following : • If you want to work with Lexmark's evercolorTM inks for printing professional quality photos with all brands of the Print Setup tab, select Plain. 21 Printing specialty documents Choosing compatible specialty ...
User's Guide
Page 22
.... If no size matches the size of media from the Media Type drop-down menu of the envelope. b Customize the settings as needed in the Print dialog. 1 With a document open , choose File Œ Page Setup. 2 From the "Format for " pop-up menu, choose the printer that ...OK. e Select Portrait or Landscape orientation. Using Macintosh a Customize the settings as needed in the Page Setup dialog. 1 With a document open , click File Œ Print. 2 From the Printer pop-up menu, choose the envelope size. Notes: • Most envelopes use . 3 From the Paper Size pop-up menu, choose a paper...
.... If no size matches the size of media from the Media Type drop-down menu of the envelope. b Customize the settings as needed in the Print dialog. 1 With a document open , choose File Œ Page Setup. 2 From the "Format for " pop-up menu, choose the printer that ...OK. e Select Portrait or Landscape orientation. Using Macintosh a Customize the settings as needed in the Page Setup dialog. 1 With a document open , click File Œ Print. 2 From the Printer pop-up menu, choose the envelope size. Notes: • Most envelopes use . 3 From the Paper Size pop-up menu, choose a paper...
User's Guide
Page 23
... appears. 4 Select the measurement units to use (inches or millimeters). 5 Click OK to close any printer software dialogs that you want to use. 3 From the print options pop-up menu, choose Quality & Media. 4 From the Paper type pop-up menu, choose the printer that you want to use. b In the Page... within 1 mm of the edge of the label sheet. • Make sure the paper guide or paper guides rest against the edges of the paper. Printing on the labels does not extend to set by missing labels) may cause labels to avoid ink smudging. b Customize the settings as it exits, and...
... appears. 4 Select the measurement units to use (inches or millimeters). 5 Click OK to close any printer software dialogs that you want to use. 3 From the print options pop-up menu, choose Quality & Media. 4 From the Paper type pop-up menu, choose the printer that you want to use. b In the Page... within 1 mm of the edge of the label sheet. • Make sure the paper guide or paper guides rest against the edges of the paper. Printing on the labels does not extend to set by missing labels) may cause labels to avoid ink smudging. b Customize the settings as it exits, and...
User's Guide
Page 24
... banners. Note: The first location contains Factory Default Settings, which cannot be changed or deleted. 6 Click Save. 7 Close all open , click File ΠPrint. 2 Click Properties, Preferences, Options, or Setup. 3 Make adjustments to the settings. 4 Click Profiles, and then click Save your current settings. 5 Select an... folder is the year that the printer was installed that you set. b Choose Library ΠPrinters ΠYYYY ΠLexmark, and then select your setting, and then assign a name. Using Macintosh 1 From the Finder desktop, double-click the printer folder.
... banners. Note: The first location contains Factory Default Settings, which cannot be changed or deleted. 6 Click Save. 7 Close all open , click File ΠPrint. 2 Click Properties, Preferences, Options, or Setup. 3 Make adjustments to the settings. 4 Click Profiles, and then click Save your current settings. 5 Select an... folder is the year that the printer was installed that you set. b Choose Library ΠPrinters ΠYYYY ΠLexmark, and then select your setting, and then assign a name. Using Macintosh 1 From the Finder desktop, double-click the printer folder.

User's Guide
Page 25
... pop-up menu, choose and adjust the settings. 3 From the Presets pop-up menu lets you save the print settings you want to adjust the print settings for the Preset. 5 Click OK. 25 Select the setting that you use . • To delete a setting, click Profiles Œ Delete Profiles. Using Macintosh The ...Presets pop-up menu, choose Save As. When print settings are saved into a Preset, there is no need to delete, and then click Delete. Notes: • To retrieve your...
... pop-up menu, choose and adjust the settings. 3 From the Presets pop-up menu lets you save the print settings you want to adjust the print settings for the Preset. 5 Click OK. 25 Select the setting that you use . • To delete a setting, click Profiles Œ Delete Profiles. Using Macintosh The ...Presets pop-up menu, choose Save As. When print settings are saved into a Preset, there is no need to delete, and then click Delete. Notes: • To retrieve your...
User's Guide
Page 26
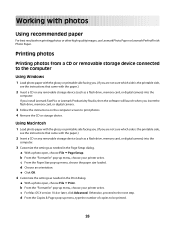
..., memory card, or digital camera) into the computer. c From the Paper Size pop-up menu, choose your printer series. Otherwise, proceed to be printed. 26 d From the Copies & Pages pop-up menu, choose your printer series. e Click OK. 4 Customize the settings as a flash drive, ... side is the printable side, see the instructions that came with photos Using recommended paper For best results when printing photos or other high-quality images, use Lexmark Photo Paper or Lexmark PerfectFinish Photo Paper. b From the "Format for " pop-up menu, choose the paper size loaded. a...
..., memory card, or digital camera) into the computer. c From the Paper Size pop-up menu, choose your printer series. Otherwise, proceed to be printed. 26 d From the Copies & Pages pop-up menu, choose your printer series. e Click OK. 4 Customize the settings as a flash drive, ... side is the printable side, see the instructions that came with photos Using recommended paper For best results when printing photos or other high-quality images, use Lexmark Photo Paper or Lexmark PerfectFinish Photo Paper. b From the "Format for " pop-up menu, choose the paper size loaded. a...


