
User Guide
Page 2
Contents 2 Contents Safety information 6 Conventions...6 Learning about the printer 9 Finding information about the printer...9 Selecting a location for the printer...10 Printer configurations...11 Attaching cables...12 Using the control panel...14 Understanding the status of the power button and indicator light 15 Using the ...
Contents 2 Contents Safety information 6 Conventions...6 Learning about the printer 9 Finding information about the printer...9 Selecting a location for the printer...10 Printer configurations...11 Attaching cables...12 Using the control panel...14 Understanding the status of the power button and indicator light 15 Using the ...

User Guide
Page 4
Contents 4 Sending an e-mail...39 Creating an e-mail shortcut...40 Faxing...41 Setting up the printer to fax...41 Sending a fax...53 Scheduling a fax...54 Creating a fax destination shortcut...54 Changing the fax resolution...54 Adjusting the fax darkness...56 Creating an FTP shortcut...56 Scanning to a flash drive...56 Sending scanned documents to a computer 57 Securing the printer 58 Erasing printer memory...58 Erasing printer hard disk memory...58 Configuring printer hard disk encryption...58 Restoring factory default settings...58 Statement of Volatility...59 Maintaining the...
Contents 4 Sending an e-mail...39 Creating an e-mail shortcut...40 Faxing...41 Setting up the printer to fax...41 Sending a fax...53 Scheduling a fax...54 Creating a fax destination shortcut...54 Changing the fax resolution...54 Adjusting the fax darkness...56 Creating an FTP shortcut...56 Scanning to a flash drive...56 Sending scanned documents to a computer 57 Securing the printer 58 Erasing printer memory...58 Erasing printer hard disk memory...58 Configuring printer hard disk encryption...58 Restoring factory default settings...58 Statement of Volatility...59 Maintaining the...

User Guide
Page 6
... CAUTION-TIPPING HAZARD: Indicates a crush hazard. CAUTION-POTENTIAL INJURY: Do not use of non-Lexmark surge protection devices may result in a risk of fire, property damage, or poor printer performance. CAUTION-POTENTIAL INJURY: Do not cut, twist, bind, crush, or place heavy objects... the power cord provided with the printer may be easily overloaded by a laser printer and may result in a risk of laceration from the electrical outlet before inspecting it. CAUTION-POTENTIAL INJURY: Only a Lexmark Inline Surge Protector that could damage the product hardware or software. Safety ...
... CAUTION-TIPPING HAZARD: Indicates a crush hazard. CAUTION-POTENTIAL INJURY: Do not use of non-Lexmark surge protection devices may result in a risk of fire, property damage, or poor printer performance. CAUTION-POTENTIAL INJURY: Do not cut, twist, bind, crush, or place heavy objects... the power cord provided with the printer may be easily overloaded by a laser printer and may result in a risk of laceration from the electrical outlet before inspecting it. CAUTION-POTENTIAL INJURY: Only a Lexmark Inline Surge Protector that could damage the product hardware or software. Safety ...

User Guide
Page 7
...new location. CAUTION-POTENTIAL INJURY: The printer weight is greater than 18 kg (40 lb) and requires two or more options on supported configurations, see www.lexmark.com/multifunctionprinters. For more information on your fingers are not under the printer when you have a surface able ...to support the full footprint of the printer might be hot. If you set it . • Any ...
...new location. CAUTION-POTENTIAL INJURY: The printer weight is greater than 18 kg (40 lb) and requires two or more options on supported configurations, see www.lexmark.com/multifunctionprinters. For more information on your fingers are not under the printer when you have a surface able ...to support the full footprint of the printer might be hot. If you set it . • Any ...

User Guide
Page 9
... documentation that came with the printer software. • The printer software is located in the printer program folder or on the desktop, depending on the printer firmware or go to http://support.lexmark.com. Click to http://support.lexmark.com. Learning about the printer 9 Learning about the printer Finding information about the printer What are you looking for...
... documentation that came with the printer software. • The printer software is located in the printer program folder or on the desktop, depending on the printer firmware or go to http://support.lexmark.com. Click to http://support.lexmark.com. Learning about the printer 9 Learning about the printer Finding information about the printer What are you looking for...

User Guide
Page 10
...or wet locations. • Make sure that came with the printer or go to http://support.lexmark.com. Selecting a location for the printer When selecting a location for your product to install hardware options. • Set up the printer near an electrical outlet. Note: Select your country or region,... the latest revision of fire or electrical shock, connect the power cord to http://support.lexmark.com. Product Information Guide-See the documentation that came with the printer. CAUTION-POTENTIAL INJURY: To avoid the risk of the ASHRAE 62 standard or the CEN Technical ...
...or wet locations. • Make sure that came with the printer or go to http://support.lexmark.com. Selecting a location for the printer When selecting a location for your product to install hardware options. • Set up the printer near an electrical outlet. Note: Select your country or region,... the latest revision of fire or electrical shock, connect the power cord to http://support.lexmark.com. Product Information Guide-See the documentation that came with the printer. CAUTION-POTENTIAL INJURY: To avoid the risk of the ASHRAE 62 standard or the CEN Technical ...

User Guide
Page 11
...figurations CAUTION-TIPPING HAZARD: Installing one or more information on your printer by adding three optional 550‑sheet trays. CAUTION-TIPPING HAZARD: To reduce the risk of dust. - For more options on supported configurations, see www.lexmark.com/multifunctionprinters. Free from direct sunlight and humidity extremes. • Observe...
...figurations CAUTION-TIPPING HAZARD: Installing one or more information on your printer by adding three optional 550‑sheet trays. CAUTION-TIPPING HAZARD: To reduce the risk of dust. - For more options on supported configurations, see www.lexmark.com/multifunctionprinters. Free from direct sunlight and humidity extremes. • Observe...

User Guide
Page 12
Learning about the printer 12 1 Automatic document feeder (ADF) 2 ADF tray 3 ADF bin 4 Control panel 5 650‑sheet duo tray 6 Optional 550‑sheet trays 7 Standard bin Attaching cables CAUTION-SHOCK HAZARD: To avoid the risk of electrical shock, do not set up this product or make any electrical or cabling connections, such as the power cord, fax feature, or telephone, during a lightning storm.
Learning about the printer 12 1 Automatic document feeder (ADF) 2 ADF tray 3 ADF bin 4 Control panel 5 650‑sheet duo tray 6 Optional 550‑sheet trays 7 Standard bin Attaching cables CAUTION-SHOCK HAZARD: To avoid the risk of electrical shock, do not set up this product or make any electrical or cabling connections, such as the power cord, fax feature, or telephone, during a lightning storm.

User Guide
Page 13
... cord when connecting this product to the public switched telephone network. For users in the areas shown while actively printing. Learning about the printer 13 CAUTION-POTENTIAL INJURY: To avoid the risk of fire or electrical shock, connect the power cord to an appropriately rated and... devices (telephone or answering machine) to a properly grounded electrical outlet. Note: Remove the plug to access the port. 2 LINE port Connect the printer to an active telephone line through a standard wall jack (RJ‑11), DSL filter, or VoIP adapter, or any wireless network adapter,...
... cord when connecting this product to the public switched telephone network. For users in the areas shown while actively printing. Learning about the printer 13 CAUTION-POTENTIAL INJURY: To avoid the risk of fire or electrical shock, connect the power cord to an appropriately rated and... devices (telephone or answering machine) to a properly grounded electrical outlet. Note: Remove the plug to access the port. 2 LINE port Connect the printer to an active telephone line through a standard wall jack (RJ‑11), DSL filter, or VoIP adapter, or any wireless network adapter,...

User Guide
Page 14
... Using the control panel Use the To 1 Display • View the printer messages and supply status. • Set up and operate the printer. 2 Home button Go to Sleep or Hibernate mode. • Wake the printer from Sleep or Hibernate mode. 4 Keypad Enter numbers or symbols in an input field.... 5 Pause button Place a dial pause in an input field. 10 Indicator light Check the status of the printer. 11 Volume buttons Adjust the volume of a function such as copying, faxing, or scanning. 8 Stop or Cancel button Stop the current job. 9 ...
... Using the control panel Use the To 1 Display • View the printer messages and supply status. • Set up and operate the printer. 2 Home button Go to Sleep or Hibernate mode. • Wake the printer from Sleep or Hibernate mode. 4 Keypad Enter numbers or symbols in an input field.... 5 Pause button Place a dial pause in an input field. 10 Indicator light Check the status of the printer. 11 Volume buttons Adjust the volume of a function such as copying, faxing, or scanning. 8 Stop or Cancel button Stop the current job. 9 ...

User Guide
Page 15
... Faxes appears. 7 Shortcut Center Organize all the current held fax jobs. Power button light Off Solid amber Blinking amber Printer status The printer is off or in Hibernate mode. The printer requires user intervention. The printer is ready or processing data. Using the home screen Note: Your home screen may vary depending on the...
... Faxes appears. 7 Shortcut Center Organize all the current held fax jobs. Power button light Off Solid amber Blinking amber Printer status The printer is off or in Hibernate mode. The printer requires user intervention. The printer is ready or processing data. Using the home screen Note: Your home screen may vary depending on the...

User Guide
Page 16
... access this setting by touching the top section of the home screen. Lock Device Prevent users from accessing any printer functions from a flash drive. These settings may also appear on how to Lexmark Print • Layout • Finishing • Setup • Quality • Job Accounting • XPS • Accessibility • Restore...
... access this setting by touching the top section of the home screen. Lock Device Prevent users from accessing any printer functions from a flash drive. These settings may also appear on how to Lexmark Print • Layout • Finishing • Setup • Quality • Job Accounting • XPS • Accessibility • Restore...

User Guide
Page 17
Learning about the printer 17 Paper • Tray Configuration • Media Configuration • Bin Configuration Copy Copy Defaults Fax • Fax Mode • ...
Learning about the printer 17 Paper • Tray Configuration • Media Configuration • Bin Configuration Copy Copy Defaults Fax • Fax Mode • ...
User Guide
Page 18
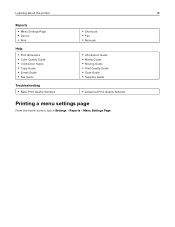
Learning about the printer 18 Reports • Menu Settings Page • Device • Print Help • Print All Guides • Color Quality Guide • Connection Guide • Copy Guide &#...
Learning about the printer 18 Reports • Menu Settings Page • Device • Print Help • Print All Guides • Color Quality Guide • Connection Guide • Copy Guide &#...

User Guide
Page 19
.... 3 Apply the changes. Setting up and using the home screen applications Customizing the home screen 1 Open a Web browser, and then type the printer IP address in the address field. Setting up and using the home screen applications 19 Setting up Forms and Favorites 1 Open a Web browser..., and then type the printer IP address in the address field. For more information, see the documentation that you are using a proxy server, then temporarily disable it ...
.... 3 Apply the changes. Setting up and using the home screen applications Customizing the home screen 1 Open a Web browser, and then type the printer IP address in the address field. Setting up and using the home screen applications 19 Setting up Forms and Favorites 1 Open a Web browser..., and then type the printer IP address in the address field. For more information, see the documentation that you are using a proxy server, then temporarily disable it ...

User Guide
Page 20
... settings. 3 Touch Save, and then type a unique shortcut name. 4 Apply the changes. Setting up Card Copy 1 Open a Web browser, and then type the printer IP address in the address field. Notes: • When scanning a card, make sure that the scan resolution does not exceed 200 dpi for color... location settings of the bookmark are correct, type the IP address of the host computer where the bookmark is located. • Make sure that the printer network and e‑mail settings are configured. 4 Apply the changes. Setting up and using a proxy server, then temporarily disable it to ...
... settings. 3 Touch Save, and then type a unique shortcut name. 4 Apply the changes. Setting up Card Copy 1 Open a Web browser, and then type the printer IP address in the address field. Notes: • When scanning a card, make sure that the scan resolution does not exceed 200 dpi for color... location settings of the bookmark are correct, type the IP address of the host computer where the bookmark is located. • Make sure that the printer network and e‑mail settings are configured. 4 Apply the changes. Setting up and using a proxy server, then temporarily disable it to ...
User Guide
Page 21
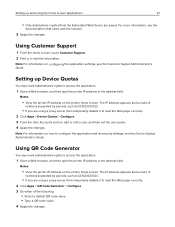
...saved. Setting up Device Quotas You may need administrative rights to access the application. 1 Open a Web browser, and then type the printer IP address in the address field. Setting up and using the home screen applications 21 • Only destinations created from the Embedded... set the user quota. 4 Apply the changes. For more information, see the Customer Support Administrator's Guide. Notes: • View the printer IP address on configuring the application settings, see the documentation that came with the solution. 3 Apply the changes. The IP address...
...saved. Setting up Device Quotas You may need administrative rights to access the application. 1 Open a Web browser, and then type the printer IP address in the address field. Setting up and using the home screen applications 21 • Only destinations created from the Embedded... set the user quota. 4 Apply the changes. For more information, see the Customer Support Administrator's Guide. Notes: • View the printer IP address on configuring the application settings, see the documentation that came with the solution. 3 Apply the changes. The IP address...

User Guide
Page 22
... Eco‑Settings. 2 Configure the Eco‑Mode settings or schedule a power-saving mode. 3 Apply the changes. Notes: • View the printer IP address on how to your Google account. 1 From the home screen, touch Google Drive. 2 If prompted, type your user credentials. 4 Select a destination...display. Setting up and using the home screen applications 22 Using Google Drive Scanning a document Notes: • Make sure that you have installed a printer hard disk. 1 Load an original document into the ADF tray or on the scanner glass. 2 From the home screen, touch Google Drive. 3...
... Eco‑Settings. 2 Configure the Eco‑Mode settings or schedule a power-saving mode. 3 Apply the changes. Notes: • View the printer IP address on how to your Google account. 1 From the home screen, touch Google Drive. 2 If prompted, type your user credentials. 4 Select a destination...display. Setting up and using the home screen applications 22 Using Google Drive Scanning a document Notes: • Make sure that you have installed a printer hard disk. 1 Load an original document into the ADF tray or on the scanner glass. 2 From the home screen, touch Google Drive. 3...

User Guide
Page 23
... name. The IP address appears as four sets of numbers separated by periods, such as 123.123.123.123. Notes: • View the printer IP address on the printer home screen. Note: You can assign one or more contacts to the group. 4 Apply the changes. Deleting contacts or groups 1 Open a... web browser, and then type the printer IP address in the address field. Note: You can assign the contact to one or more groups. 4 If necessary, specify a login method to ...
... name. The IP address appears as four sets of numbers separated by periods, such as 123.123.123.123. Notes: • View the printer IP address on the printer home screen. Note: You can assign one or more contacts to the group. 4 Apply the changes. Deleting contacts or groups 1 Open a... web browser, and then type the printer IP address in the address field. Note: You can assign the contact to one or more groups. 4 If necessary, specify a login method to ...

User Guide
Page 27
... detect the size of equipment instability, load each tray separately. For specialty media like labels, card stock, or envelopes, do not remove trays while the printer is busy. 2 Adjust the guides to match the size of the specialty media. Note: To avoid jams, do the following: 1 From the home screen, navigate...
... detect the size of equipment instability, load each tray separately. For specialty media like labels, card stock, or envelopes, do not remove trays while the printer is busy. 2 Adjust the guides to match the size of the specialty media. Note: To avoid jams, do the following: 1 From the home screen, navigate...


