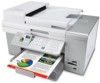
User's Guide
Page 4
... Print Files menu...48 Using Fax and the Fax Mode menu...50 Using Scan and the Scan Mode menu 51 Using the Setup menu...52 Using the Setup menu and submenus ...52 Using the Paper Handling submenu ...54 Using the Change Printer Default Settings submenu 54 Using the Change... the Change Bluetooth Default Settings submenu 59 Using the Change PictBridge Default Settings submenu 59 Printing the Print Settings List ...60 Using the Network Setup submenu...60 Using the Maintenance menu...62 Learning about the software 64 Using the printer software...64 Using the Productivity Suite...64 Using the...
... Print Files menu...48 Using Fax and the Fax Mode menu...50 Using Scan and the Scan Mode menu 51 Using the Setup menu...52 Using the Setup menu and submenus ...52 Using the Paper Handling submenu ...54 Using the Change Printer Default Settings submenu 54 Using the Change... the Change Bluetooth Default Settings submenu 59 Using the Change PictBridge Default Settings submenu 59 Printing the Print Settings List ...60 Using the Network Setup submenu...60 Using the Maintenance menu...62 Learning about the software 64 Using the printer software...64 Using the Productivity Suite...64 Using the...
User's Guide
Page 12
... and then type D:\setup, where D is not on the Lexmark Web site at www.lexmark.com. Where to a computer. The installation screen appears. Help Description The Help gives you instructions for using the software, if your printer connects to find While in any Lexmark software program, click Help...) • Troubleshooting problems with the other software, if your printer 1 Click Start ª Programs or All Programs ª Lexmark connects to a network (if supported by your printer) • Maintaining the printer • Connecting the printer to a computer. 9300 Series. 2 Select...
... and then type D:\setup, where D is not on the Lexmark Web site at www.lexmark.com. Where to a computer. The installation screen appears. Help Description The Help gives you instructions for using the software, if your printer connects to find While in any Lexmark software program, click Help...) • Troubleshooting problems with the other software, if your printer 1 Click Start ª Programs or All Programs ª Lexmark connects to a network (if supported by your printer) • Maintaining the printer • Connecting the printer to a computer. 9300 Series. 2 Select...

User's Guide
Page 14
...the printer. Setting up the printer for Windows and Macintosh operating systems. Instructions are connecting the printer using a wired network setup, you use a network cable that you are included for faxing. For more information about connecting this cord, see "Choosing a fax connection... for three connection methods: Wireless, USB, and Wired. 7 User's Guide or Setup Solutions Printed booklet that shipped with the printer. 14 A network cable is sometimes called an Ethernet cable. 6 Setup Guides Instructions on the installation software CD that serves as a guide. Your telephone cord...
...the printer. Setting up the printer for Windows and Macintosh operating systems. Instructions are connecting the printer using a wired network setup, you use a network cable that you are included for faxing. For more information about connecting this cord, see "Choosing a fax connection... for three connection methods: Wireless, USB, and Wired. 7 User's Guide or Setup Solutions Printed booklet that shipped with the printer. 14 A network cable is sometimes called an Ethernet cable. 6 Setup Guides Instructions on the installation software CD that serves as a guide. Your telephone cord...
User's Guide
Page 18
...the fax feature during a lightning storm. If problems occur, see "Setup troubleshooting" on page 24 Send faxes using the computer or the printer...desktop, double-click the Productivity Suite icon. Note: The printer is connected to a computer or to a network. 1 Open the Productivity Suite software using a computer. See the following connection methods may not be successfully...an answering machine, or a computer modem. Method 2 a Click Start ª Programs or All Programs ª Lexmark 9300 Series. If you do not need to connect it to a telephone line to a telephone wall jack" on ...
...the fax feature during a lightning storm. If problems occur, see "Setup troubleshooting" on page 24 Send faxes using the computer or the printer...desktop, double-click the Productivity Suite icon. Note: The printer is connected to a computer or to a network. 1 Open the Productivity Suite software using a computer. See the following connection methods may not be successfully...an answering machine, or a computer modem. Method 2 a Click Start ª Programs or All Programs ª Lexmark 9300 Series. If you do not need to connect it to a telephone line to a telephone wall jack" on ...

User's Guide
Page 19
...name using the numbers associated with each letter as a standalone fax machine. 1 Turn the printer on a telephone or cell phone. 11 Press to a network. The Dialing and Sending menu appears. 8 In the Your Fax Number field, enter your fax number using a splitter because the fax feature may look ...you reach Your Fax Name. 10 Use the keypad to set up your name. The Fax Mode menu appears. 4 Press or repeatedly until the Fax Setup submenu is highlighted. 5 Press . 6 Press or repeatedly until Fax is highlighted. 7 Press . This method is used in your printer to an answering...
...name using the numbers associated with each letter as a standalone fax machine. 1 Turn the printer on a telephone or cell phone. 11 Press to a network. The Dialing and Sending menu appears. 8 In the Your Fax Number field, enter your fax number using a splitter because the fax feature may look ...you reach Your Fax Name. 10 Use the keypad to set up your name. The Fax Mode menu appears. 4 Press or repeatedly until the Fax Setup submenu is highlighted. 5 Press . 6 Press or repeatedly until Fax is highlighted. 7 Press . This method is used in your printer to an answering...

User's Guide
Page 28
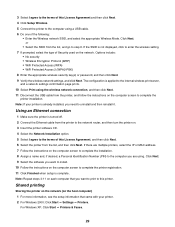
... address. Repeat the steps for "Using an Ethernet connection" on page 29, "Using a wireless network connection" on page 28, or "Shared printing" on page 29 depending on the networking method you want to the printer. For wireless setup purposes, the printer must repeat the connection steps for each successive installation. • The printer...
... address. Repeat the steps for "Using an Ethernet connection" on page 29, "Using a wireless network connection" on page 28, or "Shared printing" on page 29 depending on the networking method you want to the printer. For wireless setup purposes, the printer must repeat the connection steps for each successive installation. • The printer...
User's Guide
Page 29
... the list, and then click Next. If there are using a USB cable. 6 Do one of this License Agreement and then click Next. 4 Click Setup Wireless. 5 Connect the printer to the computer using . If the SSID is complete. Note: If your printer. 2 For Windows 2000: Click Start ...WPA) • WiFi Protected Access 2 (WPA2-PSK) 8 Enter the appropriate wireless security key(s) or password, and then click Next. 9 Verify the wireless network settings, and click Next. 3 Select I agree to the terms of this printer. Using an Ethernet connection 1 Make sure the printer is already installed, ...
... the list, and then click Next. If there are using a USB cable. 6 Do one of this License Agreement and then click Next. 4 Click Setup Wireless. 5 Connect the printer to the computer using . If the SSID is complete. Note: If your printer. 2 For Windows 2000: Click Start ...WPA) • WiFi Protected Access 2 (WPA2-PSK) 8 Enter the appropriate wireless security key(s) or password, and then click Next. 9 Verify the wireless network settings, and click Next. 3 Select I agree to the terms of this printer. Using an Ethernet connection 1 Make sure the printer is already installed, ...
User's Guide
Page 30
...object will copy a subset of the printer as , and then assign a name to a network computer that you exit Properties. i Follow the instructions on any screens shown until installation is complete, click Finished. When setup is complete. m Click the Ports tab. o From the list, click Local Port. p ...to the client computer. The print object, created at the end of the USB cable to the printer, and then connect the other network computers (on other end to complete installation. j From the computer, access the Printers folder. Installing the shared printer on the client ...
...object will copy a subset of the printer as , and then assign a name to a network computer that you exit Properties. i Follow the instructions on any screens shown until installation is complete, click Finished. When setup is complete. m Click the Ports tab. o From the list, click Local Port. p ...to the client computer. The print object, created at the end of the USB cable to the printer, and then connect the other network computers (on other end to complete installation. j From the computer, access the Printers folder. Installing the shared printer on the client ...

User's Guide
Page 31
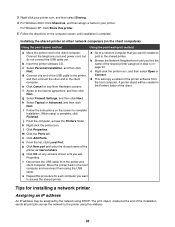
...control (MAC) address of letters and numbers. 1 From the control panel, press repeatedly until Setup appears, and then press . 2 Press repeatedly until Network Setup appears, and then press . 3 Press repeatedly until Print Network Setup Page appears, and then press . 4 The MAC address is not automatically assigned, you ... Hexadecimal characters (using A-F and 0-9) • WPA-PSK key-Between 8 and 63 ASCII characters Printer is within range of the wireless network. • The printer is created in the printer list only as it is the ability for the printer to assign themselves a unique ...
...control (MAC) address of letters and numbers. 1 From the control panel, press repeatedly until Setup appears, and then press . 2 Press repeatedly until Network Setup appears, and then press . 3 Press repeatedly until Print Network Setup Page appears, and then press . 4 The MAC address is not automatically assigned, you ... Hexadecimal characters (using A-F and 0-9) • WPA-PSK key-Between 8 and 63 ASCII characters Printer is within range of the wireless network. • The printer is created in the printer list only as it is the ability for the printer to assign themselves a unique ...

User's Guide
Page 53
... from the printer. Notes: • This menu appears only if a media device, such as the new user default settings. Network Setup Print a network setup page, which you want for the printer settings and save the values as the new user default settings. Change Copy Default Settings ...Specify the values you want for each of installed network options. Change Bluetooth Default Settings Specify the values you want for ...
... from the printer. Notes: • This menu appears only if a media device, such as the new user default settings. Network Setup Print a network setup page, which you want for the printer settings and save the values as the new user default settings. Change Copy Default Settings ...Specify the values you want for each of installed network options. Change Bluetooth Default Settings Specify the values you want for ...
User's Guide
Page 60
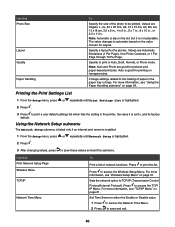
...print jobs. Auto is not selectable. For more information, see "Wireless Setup Menu" on page 61. Using the Network Setup submenu The Network Setup submenu is listed only if an internal print server is installed. 1 From the Setup menu, press or repeatedly until Print Settings List is highlighted. 2 Press... in., or 8.5 x 11 in the printer, the value it is good for Layout. Printing the Print Settings List 1 From the Setup menu, press or repeatedly until Network Setup is set to access the TCP/ IP Menu. Press to , and its factory default. Values are good for the photos. Values are...
...print jobs. Auto is not selectable. For more information, see "Wireless Setup Menu" on page 61. Using the Network Setup submenu The Network Setup submenu is listed only if an internal print server is installed. 1 From the Setup menu, press or repeatedly until Print Settings List is highlighted. 2 Press... in., or 8.5 x 11 in the printer, the value it is good for Layout. Printing the Print Settings List 1 From the Setup menu, press or repeatedly until Network Setup is set to access the TCP/ IP Menu. Press to , and its factory default. Values are good for the photos. Values are...

User's Guide
Page 61
...the value. Note: This menu item is unavailable if DHCP is set to Enabled. 1 Press to save and exit. Wireless Setup Menu Use this Active Network To Set the named network to establish a connection and exchange streams of data and also guarantees that packets are : • Gradient-with a higher-level.... TCP/IP Menu Internet Protocol (IP) specifies the format of Auto, Ethernet 10/100, or Wireless 802.11b/g. Use this Print Wireless Setup Page Network Name Wireless Signal Quality To Print the Wireless Network Setup page. The network automatically assigns a number for the...
...the value. Note: This menu item is unavailable if DHCP is set to Enabled. 1 Press to save and exit. Wireless Setup Menu Use this Active Network To Set the named network to establish a connection and exchange streams of data and also guarantees that packets are : • Gradient-with a higher-level.... TCP/IP Menu Internet Protocol (IP) specifies the format of Auto, Ethernet 10/100, or Wireless 802.11b/g. Use this Print Wireless Setup Page Network Name Wireless Signal Quality To Print the Wireless Network Setup page. The network automatically assigns a number for the...

User's Guide
Page 123
... you want to scan is highlighted. 4 Press . Canceling a scan job Once a scan job is sent, if you want to cancel it, you set a PIN during network setup, enter it using the numeric keypad, and then press . 7 Press . Note: Do not load postcards, photos, small items, transparencies, photo paper, or thin media (such...
... you want to scan is highlighted. 4 Press . Canceling a scan job Once a scan job is sent, if you want to cancel it, you set a PIN during network setup, enter it using the numeric keypad, and then press . 7 Press . Note: Do not load postcards, photos, small items, transparencies, photo paper, or thin media (such...
User's Guide
Page 195
...removing from Tray 2 base 147 N Name Search using when faxing 126 network printer installing 28, 30 installing on additional computers 28 network scanning 122 Network Setup submenu 60 network troubleshooting cannot print to network printer 32 printer to be configured does not appear in list of ...printers found on network 32 networking 28 installing printer 28 methods for 28 using ...
...removing from Tray 2 base 147 N Name Search using when faxing 126 network printer installing 28, 30 installing on additional computers 28 network scanning 122 Network Setup submenu 60 network troubleshooting cannot print to network printer 32 printer to be configured does not appear in list of ...printers found on network 32 networking 28 installing printer 28 methods for 28 using ...
User's Guide
Page 197
... fax has poor print quality 165 receiving a fax automatically 130 fax forwarding 131 manually 130 using an answering machine 130 recycling Lexmark products 148 WEEE statement 190 reducing an image 117 red-eye reducing 70 remote fax error 184 removing print cartridges 142 removing ... File Default Settings submenu 56 Change Printer Default Settings submenu 54 Change Scan Default Settings submenu 59 Network Setup submenu 60 Paper Handling submenu 54 Print Settings List 60 setup troubleshooting cannot print from digital camera using PictBridge 153 duplex unit does not operate correctly 153 incorrect...
... fax has poor print quality 165 receiving a fax automatically 130 fax forwarding 131 manually 130 using an answering machine 130 recycling Lexmark products 148 WEEE statement 190 reducing an image 117 red-eye reducing 70 remote fax error 184 removing print cartridges 142 removing ... File Default Settings submenu 56 Change Printer Default Settings submenu 54 Change Scan Default Settings submenu 59 Network Setup submenu 60 Paper Handling submenu 54 Print Settings List 60 setup troubleshooting cannot print from digital camera using PictBridge 153 duplex unit does not operate correctly 153 incorrect...

Setup Guide
Page 7
To print from other computers on the screen to complete installation. 24 To use the fax feature, move the printer near a telephone wall jack, and connect the telephone cord to both the printer and the wall jack. Wireless 21 Assign a name to the computer, select an optional PIN for security, and then click Next. 22 Click Next. 23 Follow the instructions on the network, complete steps 25-31, and repeat until all computers are networked. If this is the only computer on the wireless network, setup is complete. 25 Make sure the next computer is on, and then insert the CD.
To print from other computers on the screen to complete installation. 24 To use the fax feature, move the printer near a telephone wall jack, and connect the telephone cord to both the printer and the wall jack. Wireless 21 Assign a name to the computer, select an optional PIN for security, and then click Next. 22 Click Next. 23 Follow the instructions on the network, complete steps 25-31, and repeat until all computers are networked. If this is the only computer on the wireless network, setup is complete. 25 Make sure the next computer is on, and then insert the CD.

Setup Guide
Page 15
Wired Setup and Connection 1 You need the following items to complete Wired Network Setup: Power cord Network cable (not included) Print cartridges Installation CD Telephone cord 3 Load paper. 2 Move the printer near the router. Wired
Wired Setup and Connection 1 You need the following items to complete Wired Network Setup: Power cord Network cable (not included) Print cartridges Installation CD Telephone cord 3 Load paper. 2 Move the printer near the router. Wired

Setup Guide
Page 19
15 Click Next. 16 Follow the instructions on the network, complete steps 17-24, and repeat as needed until all computers are networked. 18 1 Select Network Installation. 2 Click Next. 3 Read and accept the license agreement. 19 Click Next. To print from other computers on the screen to complete installation. Network Installation Wired If this is the only computer on the wired network, setup is complete. 17 Make sure the next computer is on, and then insert the CD.
15 Click Next. 16 Follow the instructions on the network, complete steps 17-24, and repeat as needed until all computers are networked. 18 1 Select Network Installation. 2 Click Next. 3 Read and accept the license agreement. 19 Click Next. To print from other computers on the screen to complete installation. Network Installation Wired If this is the only computer on the wired network, setup is complete. 17 Make sure the next computer is on, and then insert the CD.

Setup Guide
Page 2
Telephone cord Print cartridges r Wireless Setup and Connection Wireless 1 You need the following items to complete Wireless Network Setup: Power cord Installation CD 2 Move the printer near the computer. 3 Load paper.
Telephone cord Print cartridges r Wireless Setup and Connection Wireless 1 You need the following items to complete Wireless Network Setup: Power cord Installation CD 2 Move the printer near the computer. 3 Load paper.

Setup Guide
Page 14
Wired Wired Setup and Connection 1 You need the following items to complete Wired Network Setup: Power cord Print cartridges Installation CD Network cable (not included) Telephone cord 2 Move the printer near the router. 3 Load paper.
Wired Wired Setup and Connection 1 You need the following items to complete Wired Network Setup: Power cord Print cartridges Installation CD Network cable (not included) Telephone cord 2 Move the printer near the router. 3 Load paper.


