Common Criteria Installation Supplement and Administrator Guide
Page 3
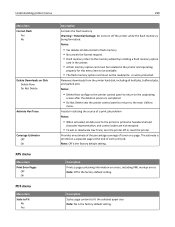
...Supported devices ...5 Operating environment ...6 Before configuring the device (required 6 Verifying physical interfaces and installed firmware 6 Attaching a lock ...7 Encrypting the hard disk ...7 Disabling the USB buffer ...8 Installing the minimum configuration 9 Configuring the device...9 Configuration checklist ...9 Configuring disk wiping...9 Enabling the backup...Time Protocol...19 Kerberos...19 Security audit logging ...20 E-mail ...22 Fax...24 Configuring security reset jumper behavior ...25 User access...25 Creating user accounts through the EWS ...25 Configuring LDAP+GSSAPI...27 ...
...Supported devices ...5 Operating environment ...6 Before configuring the device (required 6 Verifying physical interfaces and installed firmware 6 Attaching a lock ...7 Encrypting the hard disk ...7 Disabling the USB buffer ...8 Installing the minimum configuration 9 Configuring the device...9 Configuration checklist ...9 Configuring disk wiping...9 Enabling the backup...Time Protocol...19 Kerberos...19 Security audit logging ...20 E-mail ...22 Fax...24 Configuring security reset jumper behavior ...25 User access...25 Creating user accounts through the EWS ...25 Configuring LDAP+GSSAPI...27 ...
Common Criteria Installation Supplement and Administrator Guide
Page 8
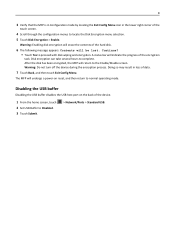
...to the Enable/Disable screen. A status bar will be lost. Disabling the USB buffer Disabling the USB buffer disables the USB host port on reset, and then return to locate the Disk Encryption menu selection. 5 Touch Disk Encryption > Enable. Doing so may result in the lower right ... Yes to complete. Warning: Do not turn off the device during the encryption process. Warning: Enabling disk encryption will erase the contents of the hard disk. 6 The following message appears: Contents will indicate the progress of the encryption task. 8 3 Verify that the MFP is in Configuration mode...
...to the Enable/Disable screen. A status bar will be lost. Disabling the USB buffer Disabling the USB buffer disables the USB host port on reset, and then return to locate the Disk Encryption menu selection. 5 Touch Disk Encryption > Enable. Doing so may result in the lower right ... Yes to complete. Warning: Do not turn off the device during the encryption process. Warning: Enabling disk encryption will erase the contents of the hard disk. 6 The following message appears: Contents will indicate the progress of the encryption task. 8 3 Verify that the MFP is in Configuration mode...

Common Criteria Installation Supplement and Administrator Guide
Page 54
... and modifying 15 disk encryption 7 disk wiping configuring at the device 9 E E-mail configuring 22 Embedded Web Server using 15 encrypting network data 17 encrypting the hard disk 7 encryption IPSec 17 environment operating 6 EWS using 15 F fax forwarding 24 fax settings Driver to fax 24 fax forwarding 24 held faxes 24 fax... a lock 7 PKI Authentication configuring 30 PKI Held Jobs configuring 33 port access shutting down 18 pre‑configuration tasks verifying firmware 6 verifying physical interfaces 6 S security reset jumper on motherboard 25 security audit log 20
... and modifying 15 disk encryption 7 disk wiping configuring at the device 9 E E-mail configuring 22 Embedded Web Server using 15 encrypting network data 17 encrypting the hard disk 7 encryption IPSec 17 environment operating 6 EWS using 15 F fax forwarding 24 fax settings Driver to fax 24 fax forwarding 24 held faxes 24 fax... a lock 7 PKI Authentication configuring 30 PKI Held Jobs configuring 33 port access shutting down 18 pre‑configuration tasks verifying firmware 6 verifying physical interfaces 6 S security reset jumper on motherboard 25 security audit log 20
User's Guide
Page 222
...the printer to retain downloads only until memory is needed. Storing downloads in RAM is temporary. • Storing downloads in alphabetical order on the printer hard disk even when the printer is turned off. • This menu item appears only if a flash and/or disk option is installed. Off ... Page fits the page content into the selected paper size. • Whole Page allows the image to retain downloads during language changes and printer resets. If the printer runs out of memory, 38 Memory Full appears, but the printer clips the image at the Normal setting boundary. When attempting...
...the printer to retain downloads only until memory is needed. Storing downloads in RAM is temporary. • Storing downloads in alphabetical order on the printer hard disk even when the printer is turned off. • This menu item appears only if a flash and/or disk option is installed. Off ... Page fits the page content into the selected paper size. • Whole Page allows the image to retain downloads during language changes and printer resets. If the printer runs out of memory, 38 Memory Full appears, but the printer clips the image at the Normal setting boundary. When attempting...
User's Guide
Page 230
... Format Flash Yes No Delete Downloads on errors, including XML markup errors Note: Off is the factory default setting. Removes downloads from the printer hard disk, including all data stored in flash memory. • No cancels the format request. • Flash memory refers to Fit No Yes...The estimate is printed in hexadecimal and character representation, and control codes are not executed. • To exit or deactivate Hex Trace, turn off or reset the printer. Note: Off is the factory default setting. Notes: • Yes deletes all held jobs, buffered jobs, and parked jobs Notes: &#...
... Format Flash Yes No Delete Downloads on errors, including XML markup errors Note: Off is the factory default setting. Removes downloads from the printer hard disk, including all data stored in flash memory. • No cancels the format request. • Flash memory refers to Fit No Yes...The estimate is printed in hexadecimal and character representation, and control codes are not executed. • To exit or deactivate Hex Trace, turn off or reset the printer. Note: Off is the factory default setting. Notes: • Yes deletes all held jobs, buffered jobs, and parked jobs Notes: &#...
User's Guide
Page 238
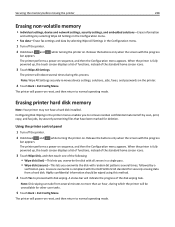
The printer performs a power-on reset, and then return to proceed with the DoD 5220.22‑M standard for securely erasing data from a hard disk. The printer will be wiped using this process. When the printer is fully powered up , the touch screen displays a list of functions, ... only when the screen with random bit patterns several times, followed by a verification pass. When the printer is compliant with disk wiping. Erasing printer hard disk memory Note: Your printer may not have been marked for other user tasks. 5 Touch Back > Exit Config Menu. Configuring Disk Wiping in ...
The printer performs a power-on reset, and then return to proceed with the DoD 5220.22‑M standard for securely erasing data from a hard disk. The printer will be wiped using this process. When the printer is fully powered up , the touch screen displays a list of functions, ... only when the screen with random bit patterns several times, followed by a verification pass. When the printer is compliant with disk wiping. Erasing printer hard disk memory Note: Your printer may not have been marked for other user tasks. 5 Touch Back > Exit Config Menu. Configuring Disk Wiping in ...
User's Guide
Page 239
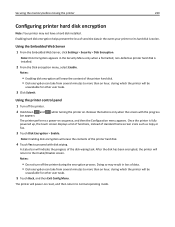
...be unavailable for other user tasks. 3 Click Submit. The printer performs a power-on . Securing the memory before moving the printer 239 Configuring printer hard disk encryption Note: Your printer may result in loss of data. • Disk encryption can take from several minutes to more than an hour, during... is stolen. Once the printer is installed. 2 From the Disk encryption menu, select Enable. A status bar will power‑on reset, and then return to proceed with the progress bar appears. The printer will indicate the progress of sensitive data in the Security Menu ...
...be unavailable for other user tasks. 3 Click Submit. The printer performs a power-on . Securing the memory before moving the printer 239 Configuring printer hard disk encryption Note: Your printer may result in loss of data. • Disk encryption can take from several minutes to more than an hour, during... is stolen. Once the printer is installed. 2 From the Disk encryption menu, select Enable. A status bar will power‑on reset, and then return to proceed with the progress bar appears. The printer will indicate the progress of sensitive data in the Security Menu ...


