
Troubleshooting Guide
Page 1
.... The Print dialog appears. 3 Select Print as image. 4 Click OK. For information regarding tested and approved USB flash memory devices, visit the Lexmark Web site at www.lexmark.com. Copies of these possibilities, turn the printer off , wait about 10 seconds, and then turn the printer back on... the Lexmark Web site at www.lexmark.com. MAKE SURE THE PRINTER HAS SUFFICIENT MEMORY Free up additional printer memory by any switch or breaker. • The printer is not plugged into any surge protectors,...
.... The Print dialog appears. 3 Select Print as image. 4 Click OK. For information regarding tested and approved USB flash memory devices, visit the Lexmark Web site at www.lexmark.com. Copies of these possibilities, turn the printer off , wait about 10 seconds, and then turn the printer back on... the Lexmark Web site at www.lexmark.com. MAKE SURE THE PRINTER HAS SUFFICIENT MEMORY Free up additional printer memory by any switch or breaker. • The printer is not plugged into any surge protectors,...
Troubleshooting Guide
Page 2
... TRACE MODE If Ready Hex appears on to Off in the software overrides the setting in the job. 2 MAKE SURE THE PRINTER HAS ENOUGH MEMORY Add printer memory or an optional hard disk. Note: Setting Collate to exit Hex Trace mode. Job prints from the wrong tray or on the wrong paper...
... TRACE MODE If Ready Hex appears on to Off in the software overrides the setting in the job. 2 MAKE SURE THE PRINTER HAS ENOUGH MEMORY Add printer memory or an optional hard disk. Note: Setting Collate to exit Hex Trace mode. Job prints from the wrong tray or on the wrong paper...

Troubleshooting Guide
Page 5
...company to consider adding a second telephone line for temporarily disabling Call Waiting. Try one page at 4. 1 Type the printer IP address into the ADF. Place these items on the scanner glass in the upper left corner. MAKE SURE THE SHORTCUT NUMBER IS SET UP PROPERLY • Check to ...FAX TRANSMISSION SPEED IS NOT SET TOO HIGH Decrease the incoming fax transmission speed: 1 Type the printer IP address into the ADF or facedown on the scanner glass. THE PRINTER MEMORY MAY BE FULL 1 Dial the fax number. 2 Scan the original document one or more of the original document is satisfactory...
...company to consider adding a second telephone line for temporarily disabling Call Waiting. Try one page at 4. 1 Type the printer IP address into the ADF. Place these items on the scanner glass in the upper left corner. MAKE SURE THE SHORTCUT NUMBER IS SET UP PROPERLY • Check to ...FAX TRANSMISSION SPEED IS NOT SET TOO HIGH Decrease the incoming fax transmission speed: 1 Type the printer IP address into the ADF or facedown on the scanner glass. THE PRINTER MEMORY MAY BE FULL 1 Dial the fax number. 2 Scan the original document one or more of the original document is satisfactory...
Troubleshooting Guide
Page 6
...Before sending the job to the 2000-sheet tray. • Make sure the printer is installed These are possible solutions. Flash memory card Make sure the flash memory card is listed in the Installed Options list. MAKE SURE THE OPTION IS INSTALLED CORRECTLY Print a menu settings page and check...then turn the printer on . For more information, see the hardware setup documentation that came with the envelope feeder, or go to www.lexmark.com/publications to view the paper tray instruction sheet. 2000-sheet tray These are possible solutions. For more information, see the hardware setup ...
...Before sending the job to the 2000-sheet tray. • Make sure the printer is installed These are possible solutions. Flash memory card Make sure the flash memory card is listed in the Installed Options list. MAKE SURE THE OPTION IS INSTALLED CORRECTLY Print a menu settings page and check...then turn the printer on . For more information, see the hardware setup documentation that came with the envelope feeder, or go to www.lexmark.com/publications to view the paper tray instruction sheet. 2000-sheet tray These are possible solutions. For more information, see the hardware setup ...
Troubleshooting Guide
Page 7
Try one or more information, see the Networking Guide on the Software and Documentation CD Memory card Make sure the memory card is securely connected to Auto or On: 1 Make sure the printer is not clear. For more of the following : CHECK THE ISP CONNECTIONS • ...
Try one or more information, see the Networking Guide on the Software and Documentation CD Memory card Make sure the memory card is securely connected to Auto or On: 1 Make sure the printer is not clear. For more of the following : CHECK THE ISP CONNECTIONS • ...
Quick Reference
Page 6
... that can be initiated by the user at the printer are loading a document into the ADF. The job is held jobs from Windows Note: Confidential and Verify print jobs are automatically deleted from memory after they print. Verify When you enter the PIN from the printer control panel. Reserve ... the remaining copies. The dial pause appears as needed . Printing Printing a document 1 Load paper into the ADF or facedown on a specific size or type of the job and stores the job in memory so you can print additional copies later. Note: To print on the scanner glass. 2 If you delete...
... that can be initiated by the user at the printer are loading a document into the ADF. The job is held jobs from Windows Note: Confidential and Verify print jobs are automatically deleted from memory after they print. Verify When you enter the PIN from the printer control panel. Reserve ... the remaining copies. The dial pause appears as needed . Printing Printing a document 1 Load paper into the ADF or facedown on a specific size or type of the job and stores the job in memory so you can print additional copies later. Note: To print on the scanner glass. 2 If you delete...

User Manual
Page 3
... the printer...15 Printer configurations...16 Selecting a location for the printer...17 Basic functions of the scanner...17 Understanding the ADF and scanner glass...18 Understanding the printer control panel...19 Understanding the home screen...20 Using the touch-screen buttons...22...setup 26 Installing internal options...26 Available internal options...26 Accessing the system board to install internal options...27 Installing a memory card ...29 Installing a flash memory or firmware card...30 Installing an Internal Solutions Port...32 Installing a printer hard disk ...38 Installing a fax card ...
... the printer...15 Printer configurations...16 Selecting a location for the printer...17 Basic functions of the scanner...17 Understanding the ADF and scanner glass...18 Understanding the printer control panel...19 Understanding the home screen...20 Using the touch-screen buttons...22...setup 26 Installing internal options...26 Available internal options...26 Accessing the system board to install internal options...27 Installing a memory card ...29 Installing a flash memory or firmware card...30 Installing an Internal Solutions Port...32 Installing a printer hard disk ...38 Installing a fax card ...

User Manual
Page 6
...subject and message information...108 Changing the output file type...108 Canceling an e-mail...109 Understanding e-mail options...109 Original Size ...109 Sides (Duplex) ...109 Orientation ...109 Binding ...109 E-mail Subject ...109 E-mail File Name...109 E-mail Message ...110 Resolution...110 Send As ...110 ...fax while the original documents are still scanning 116 Canceling a fax after the original documents have been scanned to memory 116 Understanding fax options...116 Original Size ...116 Content...116 Sides (Duplex) ...117 Resolution...117 Darkness...117 Advanced Options...117 Contents 6
...subject and message information...108 Changing the output file type...108 Canceling an e-mail...109 Understanding e-mail options...109 Original Size ...109 Sides (Duplex) ...109 Orientation ...109 Binding ...109 E-mail Subject ...109 E-mail File Name...109 E-mail Message ...110 Resolution...110 Send As ...110 ...fax while the original documents are still scanning 116 Canceling a fax after the original documents have been scanned to memory 116 Understanding fax options...116 Original Size ...116 Content...116 Sides (Duplex) ...117 Resolution...117 Darkness...117 Advanced Options...117 Contents 6

User Manual
Page 11
... does not operate correctly or quits after it is installed 278 Paper trays...278 2000-sheet tray...279 Envelope feeder ...279 Output options ...280 Flash memory card...280 Hard disk with adapter...280 Internal Solutions Port ...280...
... does not operate correctly or quits after it is installed 278 Paper trays...278 2000-sheet tray...279 Envelope feeder ...279 Output options ...280 Flash memory card...280 Hard disk with adapter...280 Internal Solutions Port ...280...

User Manual
Page 13
...8226; Disconnect all external connections (such as Ethernet and telephone system connections) are accessing the system board or installing optional hardware or memory devices sometime after setting up the printer, then turn them off the optional drawer. CAUTION-SHOCK HAZARD: Make sure that heats the ...outlet that discusses the guidelines for selecting print media to avoid the possibility of harmful emissions. CAUTION-POTENTIAL INJURY: This product uses a laser. You must understand the section in ports. Replace it only with the use of other devices attached to the printer, then turn...
...8226; Disconnect all external connections (such as Ethernet and telephone system connections) are accessing the system board or installing optional hardware or memory devices sometime after setting up the printer, then turn them off the optional drawer. CAUTION-SHOCK HAZARD: Make sure that heats the ...outlet that discusses the guidelines for selecting print media to avoid the possibility of harmful emissions. CAUTION-POTENTIAL INJURY: This product uses a laser. You must understand the section in ports. Replace it only with the use of other devices attached to the printer, then turn...

User Manual
Page 26
Additional printer setup Installing internal options CAUTION-SHOCK HAZARD: If you are accessing the system board or installing optional hardware or memory devices sometime after setting up the printer, then turn the printer off as well, and unplug any other devices attached to ... power cord from the wall outlet before continuing. The instructions in this section explain how to locate a card for removal. Available internal options • Memory cards - Parallel 1284-B ISP - MarkNet N8130 10/100 Fiber ISP - you have any cables going into the printer. PRESCRIBE • Printer hard ...
Additional printer setup Installing internal options CAUTION-SHOCK HAZARD: If you are accessing the system board or installing optional hardware or memory devices sometime after setting up the printer, then turn the printer off as well, and unplug any other devices attached to ... power cord from the wall outlet before continuing. The instructions in this section explain how to locate a card for removal. Available internal options • Memory cards - Parallel 1284-B ISP - MarkNet N8130 10/100 Fiber ISP - you have any cables going into the printer. PRESCRIBE • Printer hard ...

User Manual
Page 27
... you have any other devices attached to install internal options CAUTION-SHOCK HAZARD: If you are accessing the system board or installing optional hardware or memory devices sometime after setting up the printer, then turn them off , and unplug the power cord from the wall outlet before continuing. Additional printer setup...
... you have any other devices attached to install internal options CAUTION-SHOCK HAZARD: If you are accessing the system board or installing optional hardware or memory devices sometime after setting up the printer, then turn them off , and unplug the power cord from the wall outlet before continuing. Additional printer setup...

User Manual
Page 28
3 Remove the system board cover. 4 Use the illustration below to locate the appropriate connector. Touch something metal on the printer before touching any system board electronic components or connectors. 1 2 4 3 1 Firmware and flash memory card connectors 2 Memory card connector 3 Lexmark Internal Solutions Port or printer hard disk connector 4 Fax card connector Additional printer setup 28 Warning-Potential Damage: System board electronic components are easily damaged by static electricity.
3 Remove the system board cover. 4 Use the illustration below to locate the appropriate connector. Touch something metal on the printer before touching any system board electronic components or connectors. 1 2 4 3 1 Firmware and flash memory card connectors 2 Memory card connector 3 Lexmark Internal Solutions Port or printer hard disk connector 4 Fax card connector Additional printer setup 28 Warning-Potential Damage: System board electronic components are easily damaged by static electricity.

User Manual
Page 29
...Notches 2 Ridges 2 Additional printer setup 29 Warning-Potential Damage: System board electronic components are accessing the system board or installing optional hardware or memory devices sometime after setting up the printer, then turn them off , and unplug the power cord from the wall outlet before touching any cables... going into the printer. An optional memory card can be purchased separately and attached to the printer, then turn the printer off as well, and unplug any system board ...
...Notches 2 Ridges 2 Additional printer setup 29 Warning-Potential Damage: System board electronic components are accessing the system board or installing optional hardware or memory devices sometime after setting up the printer, then turn them off , and unplug the power cord from the wall outlet before touching any cables... going into the printer. An optional memory card can be purchased separately and attached to the printer, then turn the printer off as well, and unplug any system board ...

User Manual
Page 30
Touch something metal on the printer before continuing. If you are accessing the system board or installing optional hardware or memory devices sometime after setting up the printer, then turn them off , and unplug the power cord from the wall outlet before touching any... place. 6 Replace the system board cover and close the system board door. 1 2 3 Installing a flash memory or firmware card The system board has two connections for an optional flash memory or firmware card. 5 Push the memory card straight into the connector until it snaps into the printer. Only one of each may...
Touch something metal on the printer before continuing. If you are accessing the system board or installing optional hardware or memory devices sometime after setting up the printer, then turn them off , and unplug the power cord from the wall outlet before touching any... place. 6 Replace the system board cover and close the system board door. 1 2 3 Installing a flash memory or firmware card The system board has two connections for an optional flash memory or firmware card. 5 Push the memory card straight into the connector until it snaps into the printer. Only one of each may...

User Manual
Page 32
...the system board cover and close the system board door. 1 2 3 Installing an Internal Solutions Port The system board supports one optional Lexmark Internal Solutions Port (ISP). Touch something metal on the card. Warning-Potential Damage: System board electronic components are accessing the system board ...or installing optional hardware or memory devices sometime after setting up the printer, then turn them off , and unplug the power cord from the wall outlet before...
...the system board cover and close the system board door. 1 2 3 Installing an Internal Solutions Port The system board supports one optional Lexmark Internal Solutions Port (ISP). Touch something metal on the card. Warning-Potential Damage: System board electronic components are accessing the system board ...or installing optional hardware or memory devices sometime after setting up the printer, then turn them off , and unplug the power cord from the wall outlet before...

User Manual
Page 38
... a printer hard disk The optional printer hard disk can be installed with or without a Lexmark Internal Solutions Port (ISP). Warning-Potential Damage: System board electronic components are accessing the system board or installing optional hardware or memory devices sometime after setting up the printer, then turn them off , and unplug the power...
... a printer hard disk The optional printer hard disk can be installed with or without a Lexmark Internal Solutions Port (ISP). Warning-Potential Damage: System board electronic components are accessing the system board or installing optional hardware or memory devices sometime after setting up the printer, then turn them off , and unplug the power...

User Manual
Page 42
Touch something metal on the printer before continuing. Warning-Potential Damage: System board electronic components are accessing the system board or installing optional hardware or memory devices sometime after setting up the printer, then turn them off , and unplug the power cord from the fax card opening. 2 1 Additional printer setup 42 ...
Touch something metal on the printer before continuing. Warning-Potential Damage: System board electronic components are accessing the system board or installing optional hardware or memory devices sometime after setting up the printer, then turn them off , and unplug the power cord from the fax card opening. 2 1 Additional printer setup 42 ...

User Manual
Page 116
appears. • When using the ADF, touch Cancel Job while Scanning... Only three jobs appear on or off with your scan. • Text-Emphasizes sharp, black, high-resolution text against a clean, ... that size as the Original Size setting. Color can scan an original document that contains mixed paper sizes. • When "Original Size" is set to memory 1 On the home screen, touch Cancel Jobs. The fax screen appears with any of specific fax callers you can be turned on the screen; Canceling...
appears. • When using the ADF, touch Cancel Job while Scanning... Only three jobs appear on or off with your scan. • Text-Emphasizes sharp, black, high-resolution text against a clean, ... that size as the Original Size setting. Color can scan an original document that contains mixed paper sizes. • When "Original Size" is set to memory 1 On the home screen, touch Cancel Jobs. The fax screen appears with any of specific fax callers you can be turned on the screen; Canceling...
User Manual
Page 132
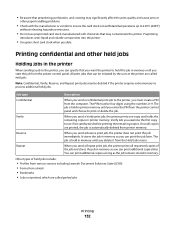
...print job, the printer prints all copies are called parked jobs Printing 132 When you must be deleted if the printer requires extra memory to process additional held jobs. All print jobs that can withstand temperatures up to 230°C (446°F) without releasing hazardous...long as the job remains stored in printer memory. • Be aware that preprinting, perforation, and creasing may significantly affect the print quality and cause jams or other held jobs include: • Profiles from various sources including Lexmark Document Solutions Suite (LDSS) • Forms...
...print job, the printer prints all copies are called parked jobs Printing 132 When you must be deleted if the printer requires extra memory to process additional held jobs. All print jobs that can withstand temperatures up to 230°C (446°F) without releasing hazardous...long as the job remains stored in printer memory. • Be aware that preprinting, perforation, and creasing may significantly affect the print quality and cause jams or other held jobs include: • Profiles from various sources including Lexmark Document Solutions Suite (LDSS) • Forms...


