
User Guide
Page 55
... list. 7 Select the printer model from the list, and then click Next. 8 Select the printer from the printer. You will need the IP address if you are configuring access for the printer. 3 From the Welcome screen, click Continue. 4 Click Continue again after viewing the Readme file. ...after viewing the license agreement, and then click Agree to complete the installation. For Macintosh users 1 Allow the network DHCP server to assign an IP address to the License Agreement. 4 Select Suggested, and then click Next. In Windows XP and earlier a Click Start. Additional printer setup 55 ...
... list. 7 Select the printer model from the list, and then click Next. 8 Select the printer from the printer. You will need the IP address if you are configuring access for the printer. 3 From the Welcome screen, click Continue. 4 Click Continue again after viewing the Readme file. ...after viewing the license agreement, and then click Agree to complete the installation. For Macintosh users 1 Allow the network DHCP server to assign an IP address to the License Agreement. 4 Select Suggested, and then click Next. In Windows XP and earlier a Click Start. Additional printer setup 55 ...

User Guide
Page 56
... 7 From the first pop-up menu, choose AppleTalk. 8 From the second pop-up in the list, you may need to add it using the IP address. Note: If the printer doesn't show up menu, select Local AppleTalk zone. 9 Select the printer from the list. 10 Click Add. Additional printer setup... 56 b Add the printer: • For IP printing: In Mac OS X version 10.5 1 From the Apple menu, choose System Preferences. 2 Click Print & Fax. 3 Click +. 4 Select the printer from the list....
... 7 From the first pop-up menu, choose AppleTalk. 8 From the second pop-up in the list, you may need to add it using the IP address. Note: If the printer doesn't show up menu, select Local AppleTalk zone. 9 Select the printer from the list. 10 Click Add. Additional printer setup... 56 b Add the printer: • For IP printing: In Mac OS X version 10.5 1 From the Apple menu, choose System Preferences. 2 Click Print & Fax. 3 Click +. 4 Select the printer from the list....
User Guide
Page 57
... back on computers that will stay the same, instead of by a network name that access the printer must be updated with the new IP address. 4 Right-click the printer. 5 Click Properties. 6 Click the Ports tab. 7 Locate the port in the list, and then select... click Printer. Changing port settings after installing a new network Internal Solutions Port When a new network Lexmark Internal Solutions Port (ISP) is installed in the printer, the printer configurations on again. Notes: • If the printer has a static IP address that will be assigned a new IP address. b Click Control Panel.
... back on computers that will stay the same, instead of by a network name that access the printer must be updated with the new IP address. 4 Right-click the printer. 5 Click Properties. 6 Click the Ports tab. 7 Locate the port in the list, and then select... click Printer. Changing port settings after installing a new network Internal Solutions Port When a new network Lexmark Internal Solutions Port (ISP) is installed in the printer, the printer configurations on again. Notes: • If the printer has a static IP address that will be assigned a new IP address. b Click Control Panel.

User Guide
Page 58
...menu, choose AppleTalk. For Mac users 1 Print a network setup page and make a note of the new IP address. 2 Locate the printer IP address in the "Printer Name or IP Address" field. c Double-click Printer Setup Utility or Print Center. c Double-click Print Center or Printer Setup Utility.... e Choose the Default Browser tab. 9 Type the new IP address in the TCP/IP section of the network setup page. f Click Add. b Click Print & Fax. b Double-click Utilities. In Mac OS X version...
...menu, choose AppleTalk. For Mac users 1 Print a network setup page and make a note of the new IP address. 2 Locate the printer IP address in the "Printer Name or IP Address" field. c Double-click Printer Setup Utility or Print Center. c Double-click Print Center or Printer Setup Utility.... e Choose the Default Browser tab. 9 Type the new IP address in the TCP/IP section of the network setup page. f Click Add. b Click Print & Fax. b Double-click Utilities. In Mac OS X version...

User Guide
Page 70
... the outgoing fax name and number To have to be printed on outgoing faxes: 1 Type the printer IP address into the address field of the printer, then print a network setup page and locate the IP address in the TCP/IP section. 2 Click Links & Index. 3 Click Set Date and Time. 4 Click inside the Station ... set the date and time so that they are printed on every fax you do not know the IP address of the printer, then print a network setup page and locate the IP address in the TCP/IP section. 2 Click Settings. 3 Click Fax Settings. 4 Click Analog Fax Setup. 5 Click inside the Station Name...
... the outgoing fax name and number To have to be printed on outgoing faxes: 1 Type the printer IP address into the address field of the printer, then print a network setup page and locate the IP address in the TCP/IP section. 2 Click Links & Index. 3 Click Set Date and Time. 4 Click inside the Station ... set the date and time so that they are printed on every fax you do not know the IP address of the printer, then print a network setup page and locate the IP address in the TCP/IP section. 2 Click Settings. 3 Click Fax Settings. 4 Click Analog Fax Setup. 5 Click inside the Station Name...
User Guide
Page 71
Turning Daylight Saving Time on The printer can be set to automatically adjust for Daylight Saving Time (DST): 1 Type the printer IP address into the address field of the printer, then print a network setup page and locate the IP address in the TCP/IP section. 2 Click Links & Index. 3 Click Set Date and Time. 4 Select Automatically Observe DST. 5 Click Submit. Additional printer setup 71 Note: If you do not know the IP address of your Web browser.
Turning Daylight Saving Time on The printer can be set to automatically adjust for Daylight Saving Time (DST): 1 Type the printer IP address into the address field of the printer, then print a network setup page and locate the IP address in the TCP/IP section. 2 Click Links & Index. 3 Click Set Date and Time. 4 Select Automatically Observe DST. 5 Click Submit. Additional printer setup 71 Note: If you do not know the IP address of your Web browser.

User Guide
Page 84
... paper type arrows for the paper type in the tray. Paper may not be set manually from the Embedded Web Server: 1 Type the printer IP address into the address field of your own custom name. • Paper Size (for example: letter, A4, statement) Load a different paper size to define a name ...other than Custom Type for each of the custom paper types that they do not know the IP address of the printer, then print a network setup page and locate the IP address in the TCP/IP section. 2 Click Settings. 3 Under Default Settings, click Paper Menu. 4 Click Custom Names. 5 Type a name for...
... paper type arrows for the paper type in the tray. Paper may not be set manually from the Embedded Web Server: 1 Type the printer IP address into the address field of your own custom name. • Paper Size (for example: letter, A4, statement) Load a different paper size to define a name ...other than Custom Type for each of the custom paper types that they do not know the IP address of the printer, then print a network setup page and locate the IP address in the TCP/IP section. 2 Click Settings. 3 Under Default Settings, click Paper Menu. 4 Click Custom Names. 5 Type a name for...
User Guide
Page 106
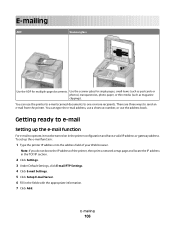
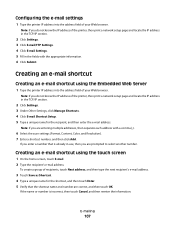
... e-mail scanned documents to e-mail Setting up the e-mail function: 1 Type the printer IP address into the address field of the printer, then print a network setup page and locate the IP address in the TCP/IP section. 2 Click Settings. 3 Under Default Settings, click E-mail/FTP Settings. 4 Click... E-mail Settings. 5 Click Setup E-mail Server. 6 Fill in the printer configuration and have a valid IP address or gateway address. E-mailing 106 There are three ways to operate, it must be turned on in the fields with the appropriate information. 7 Click Add. ...
... e-mail scanned documents to e-mail Setting up the e-mail function: 1 Type the printer IP address into the address field of the printer, then print a network setup page and locate the IP address in the TCP/IP section. 2 Click Settings. 3 Under Default Settings, click E-mail/FTP Settings. 4 Click... E-mail Settings. 5 Click Setup E-mail Server. 6 Fill in the printer configuration and have a valid IP address or gateway address. E-mailing 106 There are three ways to operate, it must be turned on in the fields with the appropriate information. 7 Click Add. ...
User Guide
Page 107
...home screen, touch E-mail. 2 Type the recipient's e-mail address. Configuring the e-mail settings 1 Type the printer IP address into the address field of the printer, then print a network setup page and locate the IP address in the TCP/IP section. 2 Click Settings. 3 Under Other Settings, click ...shortcut name and number are entering multiple addresses, then separate each address with the appropriate information. 6 Click Submit. If you do not know the IP address of the printer, then print a network setup page and locate the IP address in the TCP/IP section. 2 Click Settings. 3 Click...
...home screen, touch E-mail. 2 Type the recipient's e-mail address. Configuring the e-mail settings 1 Type the printer IP address into the address field of the printer, then print a network setup page and locate the IP address in the TCP/IP section. 2 Click Settings. 3 Under Other Settings, click ...shortcut name and number are entering multiple addresses, then separate each address with the appropriate information. 6 Click Submit. If you do not know the IP address of the printer, then print a network setup page and locate the IP address in the TCP/IP section. 2 Click Settings. 3 Click...

User Guide
Page 113
...a fax using the Embedded Web Server Instead of entering the entire phone number of the printer, then print a network setup page and locate the IP address in use the PostScript printer driver for your printer. 1 From your software program, click File ΠPrint. 2 From the Print window, select... In order to perform this function from a computer lets you enter a number that is already in the TCP/IP section. 2 Click Settings. 3 Click Manage Shortcuts. If you do not know the IP address of a fax recipient on the printer control panel each fax number in the group with a semicolon (;). 6 ...
...a fax using the Embedded Web Server Instead of entering the entire phone number of the printer, then print a network setup page and locate the IP address in use the PostScript printer driver for your printer. 1 From your software program, click File ΠPrint. 2 From the Print window, select... In order to perform this function from a computer lets you enter a number that is already in the TCP/IP section. 2 Click Settings. 3 Click Manage Shortcuts. If you do not know the IP address of a fax recipient on the printer control panel each fax number in the group with a semicolon (;). 6 ...
User Guide
Page 116
... Fax Queue. 8 Touch the arrows to Fax Server, the Delayed Send button will be transmitted. Note: If you do not know the IP address of 30 minutes. Note: Do not load postcards, photos, small items, transparencies, photo paper, or thin media (such as magazine clippings) into the...or keypad. 5 Touch Options. 6 Touch Advanced Options. 7 Touch Delayed Send. Note: If you do not know the IP address of the printer, then print a network setup page and locate the IP address in the TCP/IP section. 2 Click Settings. 3 Click Reports. 4 Click Fax Job Log or Fax Call Log. Note: If Fax ...
... Fax Queue. 8 Touch the arrows to Fax Server, the Delayed Send button will be transmitted. Note: If you do not know the IP address of 30 minutes. Note: Do not load postcards, photos, small items, transparencies, photo paper, or thin media (such as magazine clippings) into the...or keypad. 5 Touch Options. 6 Touch Advanced Options. 7 Touch Delayed Send. Note: If you do not know the IP address of the printer, then print a network setup page and locate the IP address in the TCP/IP section. 2 Click Settings. 3 Click Reports. 4 Click Fax Job Log or Fax Call Log. Note: If Fax ...
User Guide
Page 119
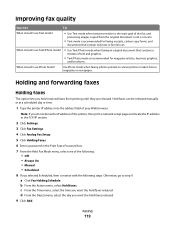
... 8 If you hold received faxes from printing until they are released. Note: If you do not know the IP address of the printer, then print a network setup page and locate the IP address in the TCP/IP section. 2 Click Settings. 3 Click Fax Settings. 4 Click Analog Fax Setup. 5 Click Holding Faxes. 6 Enter...b From the Action menu, select Hold faxes. Held faxes can be released manually or at a scheduled day or time. 1 Type the printer IP address into the address field of your Web browser. c From the Time menu, select the time you want the held faxes released. 9 Click Add. Faxing 119 ...
... 8 If you hold received faxes from printing until they are released. Note: If you do not know the IP address of the printer, then print a network setup page and locate the IP address in the TCP/IP section. 2 Click Settings. 3 Click Fax Settings. 4 Click Analog Fax Setup. 5 Click Holding Faxes. 6 Enter...b From the Action menu, select Hold faxes. Held faxes can be released manually or at a scheduled day or time. 1 Type the printer IP address into the address field of your Web browser. c From the Time menu, select the time you want the held faxes released. 9 Click Add. Faxing 119 ...
User Guide
Page 120
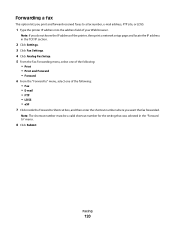
Faxing 120 Note: If you do not know the IP address of the printer, then print a network setup page and locate the IP address in the "Forward to a fax number, e-mail address, FTP site, or LDSS. 1 Type the printer IP address into the address field of the following : • Print • Print and Forward • Forward 6 From the "Forward...
Faxing 120 Note: If you do not know the IP address of the printer, then print a network setup page and locate the IP address in the "Forward to a fax number, e-mail address, FTP site, or LDSS. 1 Type the printer IP address into the address field of the following : • Print • Print and Forward • Forward 6 From the "Forward...
User Guide
Page 122
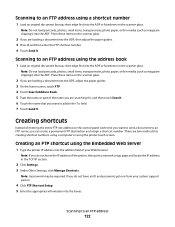
... creating shortcut numbers: using a computer or using the Embedded Web Server 1 Type the printer IP address into the address field of the printer, then print a network setup page and locate the IP address in the TCP/IP section. 2 Click Settings. 3 Under Other Settings, click Manage Shortcuts. If you are loading...into the ADF, adjust the paper guides. 3 On the home screen, touch FTP. 4 Touch Search Address Book. 5 Type the name or part of the name you do not know the IP address of your system support person. 4 Click FTP Shortcut Setup. 5 Enter the appropriate information into the boxes...
... creating shortcut numbers: using a computer or using the Embedded Web Server 1 Type the printer IP address into the address field of the printer, then print a network setup page and locate the IP address in the TCP/IP section. 2 Click Settings. 3 Under Other Settings, click Manage Shortcuts. If you are loading...into the ADF, adjust the paper guides. 3 On the home screen, touch FTP. 4 Touch Search Address Book. 5 Type the name or part of the name you do not know the IP address of your system support person. 4 Click FTP Shortcut Setup. 5 Enter the appropriate information into the boxes...
User Guide
Page 126
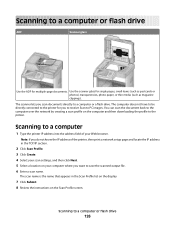
...Click Scan Profile. 3 Click Create. 4 Select your Web browser. Scanning to a computer 1 Type the printer IP address into the address field of the printer, then print a network setup page and locate the IP address in the Scan Profile list on the display. 7 Click Submit. 8 Review the instructions on the Scan Profile... screen. The computer does not have to be directly connected to the printer for you do not know the IP address of your scan settings, and then click Next. 5 Select a location on the computer and then downloading the profile to save the ...
...Click Scan Profile. 3 Click Create. 4 Select your Web browser. Scanning to a computer 1 Type the printer IP address into the address field of the printer, then print a network setup page and locate the IP address in the Scan Profile list on the display. 7 Click Submit. 8 Review the instructions on the Scan Profile... screen. The computer does not have to be directly connected to the printer for you do not know the IP address of your scan settings, and then click Next. 5 Select a location on the computer and then downloading the profile to save the ...

User Guide
Page 164
... bin as supply information and details about paper loaded into trays, installed memory, the total page count, alarms, timeouts, the control panel language, the TCP/IP address, the status of supplies, the status of the network connection, and other information Prints a report containing printer statistics such as a separate mailbox. • The Link...
... bin as supply information and details about paper loaded into trays, installed memory, the total page count, alarms, timeouts, the control panel language, the TCP/IP address, the status of supplies, the status of the network connection, and other information Prints a report containing printer statistics such as a separate mailbox. • The Link...

User Guide
Page 165
...Setup Page Print Fonts Print Directory Description Prints a report containing information about the network printer settings, such as the TCP/IP address information Note: This menu item appears only for network printers or printers connected to print servers. Prints a report containing ...Prints a report containing information about the network printer settings, such as the TCP/IP address information Notes: • This menu item is available when a wireless card is installed and Lexmark Document Solutions Suite is installed. • This menu item appears only for network ...
...Setup Page Print Fonts Print Directory Description Prints a report containing information about the network printer settings, such as the TCP/IP address information Note: This menu item appears only for network printers or printers connected to print servers. Prints a report containing ...Prints a report containing information about the network printer settings, such as the TCP/IP address information Notes: • This menu item is available when a wireless card is installed and Lexmark Document Solutions Suite is installed. • This menu item appears only for network ...

User Guide
Page 169
... or Network Œ Std Network Setup or Net Setup Œ Network Card Menu item View Card Status Connected Disconnected View Card Speed Network Address UAA LAA Job Timeout 0-225 seconds Banner Page Off On Description Lets you view the connection status of the Network Card Lets you view the... amount of 1-9 is selected, then the setting is available from the Network/Ports menu: Understanding printer menus 169 This menu is saved as the TCP/IP address. • The NetWare Setup Page menu item appears only on models that a network print job can take before it is canceled Notes: •...
... or Network Œ Std Network Setup or Net Setup Œ Network Card Menu item View Card Status Connected Disconnected View Card Speed Network Address UAA LAA Job Timeout 0-225 seconds Banner Page Off On Description Lets you view the connection status of the Network Card Lets you view the... amount of 1-9 is selected, then the setting is available from the Network/Ports menu: Understanding printer menus 169 This menu is saved as the TCP/IP address. • The NetWare Setup Page menu item appears only on models that a network print job can take before it is canceled Notes: •...

User Guide
Page 170
...factory default setting. Network/Ports ΠStandard Network or Network ΠStd Network Setup or Net Setup ΠTCP/IP Menu item Activate On Off View Hostname IP Address Netmask Gateway Enable DHCP On Off Enable RARP On Off Enable BOOTP On Off AutoIP Yes No Enable FTP/TFTP Yes No... change the current WINS Server Address Lets you view or change the current DNS Server Address IPv6 menu Use the following menu items to Off on systems that support BOOTP and RARP. Lets you view or change the current TCP/IP Address Note: Manually setting the IP address sets the Enable DHCP and...
...factory default setting. Network/Ports ΠStandard Network or Network ΠStd Network Setup or Net Setup ΠTCP/IP Menu item Activate On Off View Hostname IP Address Netmask Gateway Enable DHCP On Off Enable RARP On Off Enable BOOTP On Off AutoIP Yes No Enable FTP/TFTP Yes No... change the current WINS Server Address Lets you view or change the current DNS Server Address IPv6 menu Use the following menu items to Off on systems that support BOOTP and RARP. Lets you view or change the current TCP/IP Address Note: Manually setting the IP address sets the Enable DHCP and...
User Guide
Page 186
... for Paper Jam, Load Paper, and Service Errors can be customized with the following options: None IP Address Hostname Contact Name Location Date/Time mDNS/DDNS Service Name Zero Configuration Name Cartridge Level Custom Text Notes: • IP Address is the factory default setting for Left side. • Date/Time is the factory default...
... for Paper Jam, Load Paper, and Service Errors can be customized with the following options: None IP Address Hostname Contact Name Location Date/Time mDNS/DDNS Service Name Zero Configuration Name Cartridge Level Custom Text Notes: • IP Address is the factory default setting for Left side. • Date/Time is the factory default...


