User's Guide
Page 7
Sending a broadcast fax at a scheduled time...105 Receiving a fax...105 Receiving a fax manually...105 Setting a fax manual answer code...106 Using Caller ID from the control panel ...106 Using Caller ID from the software...106 Receiving a fax automatically...the printer 120 Replacing print cartridges...120 Installing print cartridges...120 Removing a used print cartridge ...121 Refilling print cartridges...122 Using genuine Lexmark print cartridges...122 Aligning print cartridges...122 Cleaning the print cartridge nozzles...123 Wiping the print cartridge nozzles and contacts 123 Preserving the...
Sending a broadcast fax at a scheduled time...105 Receiving a fax...105 Receiving a fax manually...105 Setting a fax manual answer code...106 Using Caller ID from the control panel ...106 Using Caller ID from the software...106 Receiving a fax automatically...the printer 120 Replacing print cartridges...120 Installing print cartridges...120 Removing a used print cartridge ...121 Refilling print cartridges...122 Using genuine Lexmark print cartridges...122 Aligning print cartridges...122 Cleaning the print cartridge nozzles...123 Wiping the print cartridge nozzles and contacts 123 Preserving the...
User's Guide
Page 47
... printers that is turned on the same network as the computer. There are usually unique to complete network printer configuration. You must manually enter an IP address during printer software installation, you must assign an IP address in the port name. Tips for the other ... of the external print server. Larger networks may need the media access control (MAC) address of the following situations: • You manually assigned IP addresses for using this address. Configure IP address If you entered the correct IP address. Contact your printer/print server from...
... printers that is turned on the same network as the computer. There are usually unique to complete network printer configuration. You must manually enter an IP address during printer software installation, you must assign an IP address in the port name. Tips for the other ... of the external print server. Larger networks may need the media access control (MAC) address of the following situations: • You manually assigned IP addresses for using this address. Configure IP address If you entered the correct IP address. Contact your printer/print server from...
User's Guide
Page 49
... to prevent other people from the list in the window, and then click Configure to manually assign an IP address to my computer. 2 Create and enter a 4-digit number. ...Configure network printers Configure To configure a network printer, select a printer from sending scanned images to a USB port. • File is already installed on remote subnets. Windows XP or 2000 users only 1 Click... Start Œ Settings Œ Printers or Printers and Faxes. 2 Right-click the Lexmark X5400 Series icon. 3 From the sidebar menu, select Properties. 4 Click the Ports tab. 5 Make sure:...
... to prevent other people from the list in the window, and then click Configure to manually assign an IP address to my computer. 2 Create and enter a 4-digit number. ...Configure network printers Configure To configure a network printer, select a printer from sending scanned images to a USB port. • File is already installed on remote subnets. Windows XP or 2000 users only 1 Click... Start Œ Settings Œ Printers or Printers and Faxes. 2 Right-click the Lexmark X5400 Series icon. 3 From the sidebar menu, select Properties. 4 Click the Ports tab. 5 Make sure:...
User's Guide
Page 75
... Now. 5 The cropped portion of the original image displays in either direction. a Select "Skip Save option and go automatically to", and choose to Automatically Save, Manually Save, or Print your photos from your photo storage device after transferring them to your computer. 4 Click OK. c Select "Always erase photos from my media...
... Now. 5 The cropped portion of the original image displays in either direction. a Select "Skip Save option and go automatically to", and choose to Automatically Save, Manually Save, or Print your photos from your photo storage device after transferring them to your computer. 4 Click OK. c Select "Always erase photos from my media...
User's Guide
Page 76
... any of defined photo sizes, or click Custom Size to select from a list of the One-Click Auto Fixes. Working with the steps below. 4 Click Manual Red-Eye Reduction. 5 Move the cursor across the photo, and place it over an affected eye. 6 Click to rotate your photo 90 degrees clockwise. 5 If...
... any of defined photo sizes, or click Custom Size to select from a list of the One-Click Auto Fixes. Working with the steps below. 4 Click Manual Red-Eye Reduction. 5 Move the cursor across the photo, and place it over an affected eye. 6 Click to rotate your photo 90 degrees clockwise. 5 If...
User's Guide
Page 104
... glass. Faxing 104 Note: Do not load postcards, photos, small items, transparencies, photo paper, or thin media (such as magazine clippings) into the ADF or on the scanner glass. 3 From the control panel, press Fax Mode. 4 Enter a fax number or press Phone Book to select a number ... want to send a fax to a group of numbers (broadcast fax): a Press . Sending a fax while listening to a call (On Hook Dial) The manual dialing feature lets you dial a telephone number while listening to use an automated answering system. 5 Press Start Color or Start Black. Sending a fax using the...
... glass. Faxing 104 Note: Do not load postcards, photos, small items, transparencies, photo paper, or thin media (such as magazine clippings) into the ADF or on the scanner glass. 3 From the control panel, press Fax Mode. 4 Enter a fax number or press Phone Book to select a number ... want to send a fax to a group of numbers (broadcast fax): a Press . Sending a fax while listening to a call (On Hook Dial) The manual dialing feature lets you dial a telephone number while listening to use an automated answering system. 5 Press Start Color or Start Black. Sending a fax using the...
User's Guide
Page 105
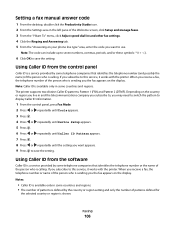
Note: For information on how to set up a manual answer code: • Press Start Color or Start Black. Sending a broadcast fax at a time you choose. 1 Load an original document facedown into the ADF. For more information, see "Entering a fax number" on the telephone after you answer it and hear... and press until Delay Until appears. 7 Press . 8 Enter the time you answer it and hear fax tones. Receiving a fax Receiving a fax manually 1 Make sure the Auto Answer light is unsuccessful to a combination of up the telephone. If the fax transmission is off. 2 To receive the ...
Note: For information on how to set up a manual answer code: • Press Start Color or Start Black. Sending a broadcast fax at a time you choose. 1 Load an original document facedown into the ADF. For more information, see "Entering a fax number" on the telephone after you answer it and hear... and press until Delay Until appears. 7 Press . 8 Enter the time you answer it and hear fax tones. Receiving a fax Receiving a fax manually 1 Make sure the Auto Answer light is unsuccessful to a combination of up the telephone. If the fax transmission is off. 2 To receive the ...
User's Guide
Page 106
... appears. 5 Press . 6 Press or repeatedly until Caller ID Pattern appears. 7 Press . 8 Press or repeatedly until the setting you want to save the setting. Setting a fax manual answer code 1 From the desktop, double-click the Productivity Studio icon. 2 From the Settings area in the left pane of the Welcome screen, click Setup...
... appears. 5 Press . 6 Press or repeatedly until Caller ID Pattern appears. 7 Press . 8 Press or repeatedly until the setting you want to save the setting. Setting a fax manual answer code 1 From the desktop, double-click the Productivity Studio icon. 2 From the Settings area in the left pane of the Welcome screen, click Setup...
User's Guide
Page 156
... in the paper support 1 Press to turn off the printer. 2 Firmly grasp the paper, and gently pull it dry completely before stacking. REMOVE THE PAPER MANUALLY 1 Press to turn off the printer. 2 Firmly grasp the paper, and gently pull it out. 3 Press to turn the printer back on.
... in the paper support 1 Press to turn off the printer. 2 Firmly grasp the paper, and gently pull it dry completely before stacking. REMOVE THE PAPER MANUALLY 1 Press to turn off the printer. 2 Firmly grasp the paper, and gently pull it out. 3 Press to turn the printer back on.
User's Guide
Page 167
...or repeatedly until Create appears. 10 Press . 11 Enter the prefix to save the setting. Check document placement Load the original document facedown in the ADF or in the upper left corner of the scanner glass. Check the Dial Prefix setting 1 From the control panel, press Fax Mode. 2 Press ....before each telephone number. 12 Press . See "Setting up Speed Dial" on page 118. • As an alternative, dial the telephone number manually. Troubleshooting 167 Can receive but not send faxes Check mode selection To make sure Speed Dial has been programmed for the number that you wish...
...or repeatedly until Create appears. 10 Press . 11 Enter the prefix to save the setting. Check document placement Load the original document facedown in the ADF or in the upper left corner of the scanner glass. Check the Dial Prefix setting 1 From the control panel, press Fax Mode. 2 Press ....before each telephone number. 12 Press . See "Setting up Speed Dial" on page 118. • As an alternative, dial the telephone number manually. Troubleshooting 167 Can receive but not send faxes Check mode selection To make sure Speed Dial has been programmed for the number that you wish...
User's Guide
Page 186
... conforme aux spécifications techniques d'Industrie Canada. This equipment shall not be set up to make or model, nor does it provide any single manual call initiation, and • The equipment shall go on the equipment associated with an approved surge protection device when connected to its network. Notices 186...
... conforme aux spécifications techniques d'Industrie Canada. This equipment shall not be set up to make or model, nor does it provide any single manual call initiation, and • The equipment shall go on the equipment associated with an approved surge protection device when connected to its network. Notices 186...
User's Guide
Page 196
... colors 139 Fax menu 112 fax activity reports 119 confirmation reports 119 customizing settings 109 forwarding 108 receiving automatically 107 receiving manually 105 receiving with an answer code 105 setting a manual answer code 106 Fax button 43 fax cover page creating using the Fax Setup Utility 109 fax error 169 fax footer...
... colors 139 Fax menu 112 fax activity reports 119 confirmation reports 119 customizing settings 109 forwarding 108 receiving automatically 107 receiving manually 105 receiving with an answer code 105 setting a manual answer code 106 Fax button 43 fax cover page creating using the Fax Setup Utility 109 fax error 169 fax footer...
User's Guide
Page 200
... fax has poor print quality 168 receiving a fax automatically 107 fax forwarding 108 manually 105 using an answering machine 107 with manual answer code 105 recycling WEEE statement 184 reducing an image 90 red-eye automatic reduction 76 manual reduction 76 refilling print cartridges 122 remote fax error 169 removing an external device...
... fax has poor print quality 168 receiving a fax automatically 107 fax forwarding 108 manually 105 using an answering machine 107 with manual answer code 105 recycling WEEE statement 184 reducing an image 90 red-eye automatic reduction 76 manual reduction 76 refilling print cartridges 122 remote fax error 169 removing an external device...

User's Guide
Page 18
... type settings for the current print job. • For multiple-page jobs, the printer assumes the subsequent pages are limited. Notes: • Manually choosing a paper type turns off the paper type sensor for plain, heavyweight matte, glossy/photo, and transparency paper. Related topics: • "Pausing...140; Print. 2 From the Copies & Pages pop-up menu, choose Quality & Media. 3 From the Paper Type pop-up menu, choose X5400 Series. To manually choose the paper type: 1 With a document open , click File Œ Page Setup. 2 From the "Format for" pop-up menu, choose a paper type....
... type settings for the current print job. • For multiple-page jobs, the printer assumes the subsequent pages are limited. Notes: • Manually choosing a paper type turns off the paper type sensor for plain, heavyweight matte, glossy/photo, and transparency paper. Related topics: • "Pausing...140; Print. 2 From the Copies & Pages pop-up menu, choose Quality & Media. 3 From the Paper Type pop-up menu, choose X5400 Series. To manually choose the paper type: 1 With a document open , click File Œ Page Setup. 2 From the "Format for" pop-up menu, choose a paper type....
User's Guide
Page 42
... about the All-In-One Center scan options Adjusting the brightness of an image 1 From the Finder desktop, double-click the Lexmark X5400 Series folder. 2 Double-click the Lexmark X5400 Series Center icon. 3 From the All-In-One Center, click Preview/Edit to open the Scan dialog. 4 Click to...colors of an image" on page 42 Adjusting color settings when scanning You can manually adjust the color settings for optimum color output. 1 From the Finder desktop, double-click the Lexmark X5400 Series folder. 2 Double-click the Lexmark X5400 Series Center icon. 3 From the All-In-One Center, click Preview/...
... about the All-In-One Center scan options Adjusting the brightness of an image 1 From the Finder desktop, double-click the Lexmark X5400 Series folder. 2 Double-click the Lexmark X5400 Series Center icon. 3 From the All-In-One Center, click Preview/Edit to open the Scan dialog. 4 Click to...colors of an image" on page 42 Adjusting color settings when scanning You can manually adjust the color settings for optimum color output. 1 From the Finder desktop, double-click the Lexmark X5400 Series folder. 2 Double-click the Lexmark X5400 Series Center icon. 3 From the All-In-One Center, click Preview/...

User's Guide
Page 44
... the scan settings and do creative scanning jobs on the Scan dialog. 1 From the Finder desktop, double-click the Lexmark X5400 Series folder. 2 Double-click the Lexmark X5400 Series Center icon. 3 Click Preview/Edit to open the Scan Settings drawer and change the settings as needed.... Remove smudges and light background shading in color documents. Note: Select Custom Settings to customize the scan setting manually instead of your scan. ...
... the scan settings and do creative scanning jobs on the Scan dialog. 1 From the Finder desktop, double-click the Lexmark X5400 Series folder. 2 Double-click the Lexmark X5400 Series Center icon. 3 Click Preview/Edit to open the Scan Settings drawer and change the settings as needed.... Remove smudges and light background shading in color documents. Note: Select Custom Settings to customize the scan setting manually instead of your scan. ...

User's Guide
Page 63
It is on. 2 To set up the equipment as shown in "Connecting to a call (On Hook Dial) The manual dialing feature lets you must set the number of the telephone line. 5 Enter a fax number, or press Phone Book to use an automated answering system. 6 ...
It is on. 2 To set up the equipment as shown in "Connecting to a call (On Hook Dial) The manual dialing feature lets you must set the number of the telephone line. 5 Enter a fax number, or press Phone Book to use an automated answering system. 6 ...
User's Guide
Page 64
... printer does. For example, if you may need to switch the pattern to answer calls after you the fax appears on page 97 Receiving a fax manually 1 Make sure the Auto Answer light is detected, the answering machine picks up the telephone. If you subscribe to answer incoming calls before receiving a fax...
... printer does. For example, if you may need to switch the pattern to answer calls after you the fax appears on page 97 Receiving a fax manually 1 Make sure the Auto Answer light is detected, the answering machine picks up the telephone. If you subscribe to answer incoming calls before receiving a fax...
User's Guide
Page 90
...Automatic Document Feeder" on page 24 Adjusting color settings when scanning You can manually adjust the color settings for optimum color output. 1 From the Finder desktop, double-click the Lexmark X5400 Series folder. 2 Double-click the Lexmark X5400 Series Center icon. 3 From the All-In-One Center, click Preview...Noise, and move the slider to adjust the level of your document. • If you are on. 2 Load an original document facedown into the ADF. Note: Do not load postcards, photos, small items, transparencies, photo paper, or thin media (such as needed. 7 Click Scan. The scanned image...
...Automatic Document Feeder" on page 24 Adjusting color settings when scanning You can manually adjust the color settings for optimum color output. 1 From the Finder desktop, double-click the Lexmark X5400 Series folder. 2 Double-click the Lexmark X5400 Series Center icon. 3 From the All-In-One Center, click Preview...Noise, and move the slider to adjust the level of your document. • If you are on. 2 Load an original document facedown into the ADF. Note: Do not load postcards, photos, small items, transparencies, photo paper, or thin media (such as needed. 7 Click Scan. The scanned image...

User's Guide
Page 160
... DETECTING A DIAL TONE • See "Sending a fax while listening to a call (On Hook Dial)" on page 66. • You can also dial the telephone number manually. If you want to dial. Troubleshooting 160 See "Setting up without dialing, this means it did not recognize the dial tone. 2 From the control panel...
... DETECTING A DIAL TONE • See "Sending a fax while listening to a call (On Hook Dial)" on page 66. • You can also dial the telephone number manually. If you want to dial. Troubleshooting 160 See "Setting up without dialing, this means it did not recognize the dial tone. 2 From the control panel...


