X5150 All-In-One Series User's Guide
Page 3
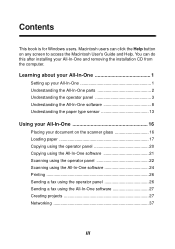
... Help button on the scanner glass 16 Loading paper 17 Copying using the operator panel 20 Copying using the All-In-One software 21 Scanning using the operator panel 22 Scanning using the All-In-One software 24 Printing 26 Sending a fax using the operator panel 26 Sending a fax using the All-In-One software 27 Creating projects 27 Networking 37 iii Learning about your All-In-One 1 Setting up your All-In-One 1 Understanding the All-In-One parts 2 Understanding the operator panel 3 Understanding the All-In-One software 8 Understanding the paper type...
... Help button on the scanner glass 16 Loading paper 17 Copying using the operator panel 20 Copying using the All-In-One software 21 Scanning using the operator panel 22 Scanning using the All-In-One software 24 Printing 26 Sending a fax using the operator panel 26 Sending a fax using the All-In-One software 27 Creating projects 27 Networking 37 iii Learning about your All-In-One 1 Setting up your All-In-One 1 Understanding the All-In-One parts 2 Understanding the operator panel 3 Understanding the All-In-One software 8 Understanding the paper type...
X5150 All-In-One Series User's Guide
Page 4
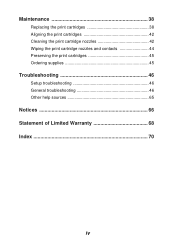
Maintenance 38 Replacing the print cartridges 38 Aligning the print cartridges 42 Cleaning the print cartridge nozzles 42 Wiping the print cartridge nozzles and contacts 44 Preserving the print cartridges 45 Ordering supplies 45 Troubleshooting 46 Setup troubleshooting 46 General troubleshooting 46 Other help sources 65 Notices 66 Statement of Limited Warranty 68 Index 70 iv
Maintenance 38 Replacing the print cartridges 38 Aligning the print cartridges 42 Cleaning the print cartridge nozzles 42 Wiping the print cartridge nozzles and contacts 44 Preserving the print cartridges 45 Ordering supplies 45 Troubleshooting 46 Setup troubleshooting 46 General troubleshooting 46 Other help sources 65 Notices 66 Statement of Limited Warranty 68 Index 70 iv

X5150 All-In-One Series User's Guide
Page 7
... scanner before use. Keep the scanner unit open to do these things. Understanding the operator panel The operator panel buttons help you are disabled during printing, copying, and scanning. 3 The table on or remove an item from the scanner glass. Use the: Display Operator panel Paper exit tray Paper guide Paper support Power supply Scanner lock Scanner support Scanner unit Top cover USB cable When you want to: Check the status of options on the display. Stack paper as it exits the All-In-One. Place an item on page 5 shows what each button...
... scanner before use. Keep the scanner unit open to do these things. Understanding the operator panel The operator panel buttons help you are disabled during printing, copying, and scanning. 3 The table on or remove an item from the scanner glass. Use the: Display Operator panel Paper exit tray Paper guide Paper support Power supply Scanner lock Scanner support Scanner unit Top cover USB cable When you want to: Check the status of options on the display. Stack paper as it exits the All-In-One. Place an item on page 5 shows what each button...
X5150 All-In-One Series User's Guide
Page 9
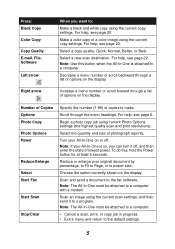
... help , see page 20. Number of Copies Options Photo Copy Photo Options Power Reduce/Enlarge Select Start Fax Start Scan Stop/Clear Specify the number (1-99) of photograph reprints. Select the quantity and size of copies to poster size. To do this button when the All-In-One is on the display. Scan and send a document to a computer with a modem. For help , see page 22. Choose the option currently shown on or off , and then enter the state of a color image using current Photo Options settings...
... help , see page 20. Number of Copies Options Photo Copy Photo Options Power Reduce/Enlarge Select Start Fax Start Scan Stop/Clear Specify the number (1-99) of photograph reprints. Select the quantity and size of copies to poster size. To do this button when the All-In-One is on the display. Scan and send a document to a computer with a modem. For help , see page 22. Choose the option currently shown on or off , and then enter the state of a color image using current Photo Options settings...
X5150 All-In-One Series User's Guide
Page 13
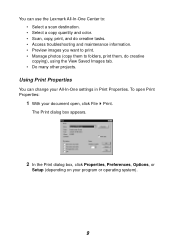
... change your All-In-One settings in Print Properties. To open , click File Print. Using Print Properties You can use the Lexmark All-In-One Center to: • Select a scan destination. • Select a copy quantity and color. • Scan, copy, print, and do creative tasks. • Access troubleshooting and maintenance information. • Preview images you want to print. • Manage photos (copy them to folders, print them, do creative copying), using the View Saved Images tab. • Do many other projects. The Print...
... change your All-In-One settings in Print Properties. To open , click File Print. Using Print Properties You can use the Lexmark All-In-One Center to: • Select a scan destination. • Select a copy quantity and color. • Scan, copy, print, and do creative tasks. • Access troubleshooting and maintenance information. • Preview images you want to print. • Manage photos (copy them to folders, print them, do creative copying), using the View Saved Images tab. • Do many other projects. The Print...
X5150 All-In-One Series User's Guide
Page 16
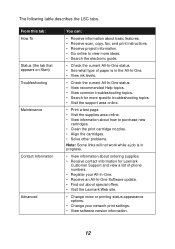
... Start) Troubleshooting Maintenance Contact Information Advanced You can: • Receive information about basic features. • Receive scan, copy, fax, and print instructions. • Receive project information. • Go online to view more ideas. • Search the electronic guide. • Check the current All-In-One status. • See what type of paper is in the All-In-One. • View ink levels. • Check the current All-In-One status. • View recommended Help...
... Start) Troubleshooting Maintenance Contact Information Advanced You can: • Receive information about basic features. • Receive scan, copy, fax, and print instructions. • Receive project information. • Go online to view more ideas. • Search the electronic guide. • Check the current All-In-One status. • See what type of paper is in the All-In-One. • View ink levels. • Check the current All-In-One status. • View recommended Help...
X5150 All-In-One Series User's Guide
Page 17
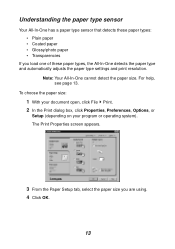
... paper size: 1 With your document open, click File Print. 2 In the Print dialog box, click Properties, Preferences, Options, or Setup (depending on your program or operating system). Note: Your All-In-One cannot detect the paper size. The Print Properties screen appears. 3 From the Paper Setup tab, select the paper size you load one of these paper types: • Plain paper • Coated paper • Glossy/photo paper • Transparencies If you are using. 4 Click OK. 13 For help, see page...
... paper size: 1 With your document open, click File Print. 2 In the Print dialog box, click Properties, Preferences, Options, or Setup (depending on your program or operating system). Note: Your All-In-One cannot detect the paper size. The Print Properties screen appears. 3 From the Paper Setup tab, select the paper size you load one of these paper types: • Plain paper • Coated paper • Glossy/photo paper • Transparencies If you are using. 4 Click OK. 13 For help, see page...
X5150 All-In-One Series User's Guide
Page 18
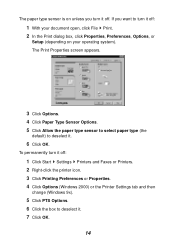
... Start Settings Printers and Faxes or Printers. 2 Right-click the printer icon. 3 Click Printing Preferences or Properties. 4 Click Options (Windows 2000) or the Printer Settings tab and then change (Windows 9x). 5 Click PTS Options. 6 Click the box to turn it . 6 Click OK. The paper type sensor is on unless you want to deselect it off: 1 With your document open, click File Print. 2 In the Print dialog box, click Properties, Preferences, Options, or Setup (depending...
... Start Settings Printers and Faxes or Printers. 2 Right-click the printer icon. 3 Click Printing Preferences or Properties. 4 Click Options (Windows 2000) or the Printer Settings tab and then change (Windows 9x). 5 Click PTS Options. 6 Click the box to turn it . 6 Click OK. The paper type sensor is on unless you want to deselect it off: 1 With your document open, click File Print. 2 In the Print dialog box, click Properties, Preferences, Options, or Setup (depending...

X5150 All-In-One Series User's Guide
Page 36
... Page appears. 5 Select your desktop, double-click the Lexmark X5100 Series All-In-One Center icon. area, click See More Scan Settings, and then click Display Advanced Scan Settings. 7 On the Scan tab, select Scan multiple items before output. 8 Click OK. Make sure the upper left corner of the front of the item aligns with the arrow at the bottom right of your new image. 9 Click Printer Settings to select your paper size...
... Page appears. 5 Select your desktop, double-click the Lexmark X5100 Series All-In-One Center icon. area, click See More Scan Settings, and then click Display Advanced Scan Settings. 7 On the Scan tab, select Scan multiple items before output. 8 Click OK. Make sure the upper left corner of the front of the item aligns with the arrow at the bottom right of your new image. 9 Click Printer Settings to select your paper size...
X5150 All-In-One Series User's Guide
Page 38
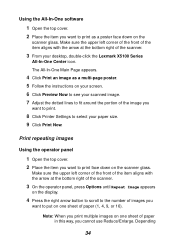
... the scanner. 3 From your paper size. 9 Click Print Now. Print repeating images Using the operator panel 1 Open the top cover. 2 Place the item you cannot use Reduce/Enlarge. Note: When you print multiple images on one sheet of paper (1, 4, 9, or 16). Using the All-In-One software 1 Open the top cover. 2 Place the item you want to print as a multi-page poster. 5 Follow the instructions on your screen. 6 Click Preview Now to see your scanned image. 7 Adjust the dotted lines to...
... the scanner. 3 From your paper size. 9 Click Print Now. Print repeating images Using the operator panel 1 Open the top cover. 2 Place the item you cannot use Reduce/Enlarge. Note: When you print multiple images on one sheet of paper (1, 4, 9, or 16). Using the All-In-One software 1 Open the top cover. 2 Place the item you want to print as a multi-page poster. 5 Follow the instructions on your screen. 6 Click Preview Now to see your scanned image. 7 Adjust the dotted lines to...
X5150 All-In-One Series User's Guide
Page 39
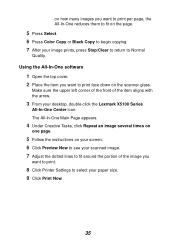
.... 6 Press Color Copy or Black Copy to begin copying. 7 After your image prints, press Stop/Clear to return to select your desktop, double-click the Lexmark X5100 Series All-In-One Center icon. Using the All-In-One software 1 Open the top cover. 2 Place the item you want to print face down on the scanner glass. Make sure the upper left corner of the front of the image you want to print. 8 Click Printer Settings to...
.... 6 Press Color Copy or Black Copy to begin copying. 7 After your image prints, press Stop/Clear to return to select your desktop, double-click the Lexmark X5100 Series All-In-One Center icon. Using the All-In-One software 1 Open the top cover. 2 Place the item you want to print face down on the scanner glass. Make sure the upper left corner of the front of the image you want to print. 8 Click Printer Settings to...
X5150 All-In-One Series User's Guide
Page 51
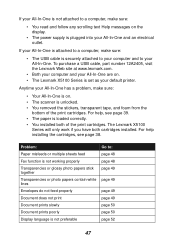
... to a computer, make sure: • Your All-In-One is on. • The scanner is unlocked. • You removed the stickers, transparent tape, and foam from the bottom of the print cartridges. To purchase a USB cable, part number 12A2405, visit the Lexmark Web site at www.lexmark.com. • Both your computer and your default printer. For help installing the cartridges, see page 39. • The paper is set as your...
... to a computer, make sure: • Your All-In-One is on. • The scanner is unlocked. • You removed the stickers, transparent tape, and foam from the bottom of the print cartridges. To purchase a USB cable, part number 12A2405, visit the Lexmark Web site at www.lexmark.com. • Both your computer and your default printer. For help installing the cartridges, see page 39. • The paper is set as your...
X5150 All-In-One Series User's Guide
Page 52
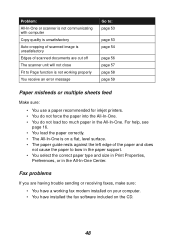
... or multiple sheets feed Make sure: • You use a paper recommended for inkjet printers. • You do not force the paper into the All-In-One. • You do not load too much paper in the All-In-One Center. For help, see page 16. • You load the paper correctly. • The All-In-One is not working fax modem installed on your computer. • You have a working properly You receive an error message...
... or multiple sheets feed Make sure: • You use a paper recommended for inkjet printers. • You do not force the paper into the All-In-One. • You do not load too much paper in the All-In-One Center. For help, see page 16. • You load the paper correctly. • The All-In-One is not working fax modem installed on your computer. • You have a working properly You receive an error message...

X5150 All-In-One Series User's Guide
Page 53
...-One status to make sure: • You load the envelopes correctly. Envelopes do not feed properly If regular paper feeds without problems, make sure your print job. • You have the correct Paper Type and Size selected in the All-In-One Center. For help , see page 51. For help , see page 16. • You use is not being held or paused. Document does not print • Make sure the cartridges are not supported. Transparencies or photo papers contain white lines • Clean...
...-One status to make sure: • You load the envelopes correctly. Envelopes do not feed properly If regular paper feeds without problems, make sure your print job. • You have the correct Paper Type and Size selected in the All-In-One Center. For help , see page 51. For help , see page 16. • You use is not being held or paused. Document does not print • Make sure the cartridges are not supported. Transparencies or photo papers contain white lines • Clean...
X5150 All-In-One Series User's Guide
Page 56
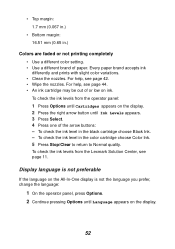
... prints with slight color variations. • Clean the nozzles. For help , see page 44. • An ink cartridge may be out of paper. To check the ink level in the color cartridge choose Color Ink. 5 Press Stop/Clear to return to Normal quality. To check the ink level in the black cartridge choose Black Ink. - Display language is not preferable If the language on the display. 52 To check the ink levels from the operator panel: 1 Press Options until Cartridges...
... prints with slight color variations. • Clean the nozzles. For help , see page 44. • An ink cartridge may be out of paper. To check the ink level in the color cartridge choose Color Ink. 5 Press Stop/Clear to return to Normal quality. To check the ink level in the black cartridge choose Black Ink. - Display language is not preferable If the language on the display. 52 To check the ink levels from the operator panel: 1 Press Options until Cartridges...
X5150 All-In-One Series User's Guide
Page 67
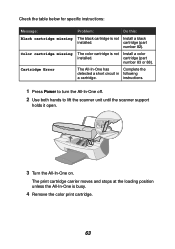
.... instructions. 1 Press Power to turn the All-In-One off. 2 Use both hands to lift the scanner unit until the scanner support holds it open. 3 Turn the All-In-One on. cartridge (part number 83 or 88). The color cartridge is not Install a black installed. Check the table below for specific instructions: Message: Black cartridge missing Color cartridge missing Cartridge Error Problem: Do this: The black cartridge is not Install a color installed. The print cartridge carrier moves and stops at the loading position unless the All-In-One is busy. 4 Remove the color print...
.... instructions. 1 Press Power to turn the All-In-One off. 2 Use both hands to lift the scanner unit until the scanner support holds it open. 3 Turn the All-In-One on. cartridge (part number 83 or 88). The color cartridge is not Install a black installed. Check the table below for specific instructions: Message: Black cartridge missing Color cartridge missing Cartridge Error Problem: Do this: The black cartridge is not Install a color installed. The print cartridge carrier moves and stops at the loading position unless the All-In-One is busy. 4 Remove the color print...
X5150 All-In-One Series User's Guide
Page 72
..., software, or interfaces not furnished by a Lexmark warranty, technical support may be a new or repaired item. You may not be available or only be required to that feature or option is available to present proof of its warranty period. Replacement is not free of original purchase and this statement to the United States. You should transfer proof of all print cartridges, programs, data...
..., software, or interfaces not furnished by a Lexmark warranty, technical support may be a new or repaired item. You may not be available or only be required to that feature or option is available to present proof of its warranty period. Replacement is not free of original purchase and this statement to the United States. You should transfer proof of all print cartridges, programs, data...

X5150 All-In-One Series User's Guide
Page 74
...-One overview 1 B banner paper 18 loading 27, 28 printing 28 Black Copy 5 black print cartridge part number 38 buttons, operator panel 3 Black Copy 5 Color Copy 5 Copy Quality 5 E-mail, File, Software 5 left arrow 5 Number of Copies 5 Options 5 Photo Copy 5 Photo Options 5 Power 5 Reduce/Enlarge 5 right arrow 5 Select 5 Start Fax 5 Start Scan 5 Stop/Clear 5 C cable, part number USB 45 cards loading 17 Cartridge Error 62 cartridges aligning 42 cleaning 42 installing 38 ordering 45 part numbers 38 removing 39 replacing 38 wiping 44 cleaning print cartridge nozzles using operator panel 43 using...
...-One overview 1 B banner paper 18 loading 27, 28 printing 28 Black Copy 5 black print cartridge part number 38 buttons, operator panel 3 Black Copy 5 Color Copy 5 Copy Quality 5 E-mail, File, Software 5 left arrow 5 Number of Copies 5 Options 5 Photo Copy 5 Photo Options 5 Power 5 Reduce/Enlarge 5 right arrow 5 Select 5 Start Fax 5 Start Scan 5 Stop/Clear 5 C cable, part number USB 45 cards loading 17 Cartridge Error 62 cartridges aligning 42 cleaning 42 installing 38 ordering 45 part numbers 38 removing 39 replacing 38 wiping 44 cleaning print cartridge nozzles using operator panel 43 using...
X5150 All-In-One Series User's Guide
Page 75
... light Power 3 loading banner paper 27, 28 cards 17 custom size paper 17 envelopes 17 greeting cards 17 index cards 17 iron-on transfers 18 paper 16 photo cards 17 photo paper 17 postcards 17 specialty paper 19 transparencies 17 M maintenance 38 menu headings 6 messages, error Cartridge 62 Cover Open 60 Ink Low 61 other 64 Paper Jam 59 Paper Out 61 Unlock Scanner 62 mirror images 36 multiple images 34 N networking 37 notices 66 nozzles, print wiping 44 Number of Copies 5 O operator panel 3 copying with 20 scanning with 20 sending a fax...
... light Power 3 loading banner paper 27, 28 cards 17 custom size paper 17 envelopes 17 greeting cards 17 index cards 17 iron-on transfers 18 paper 16 photo cards 17 photo paper 17 postcards 17 specialty paper 19 transparencies 17 M maintenance 38 menu headings 6 messages, error Cartridge 62 Cover Open 60 Ink Low 61 other 64 Paper Jam 59 Paper Out 61 Unlock Scanner 62 mirror images 36 multiple images 34 N networking 37 notices 66 nozzles, print wiping 44 Number of Copies 5 O operator panel 3 copying with 20 scanning with 20 sending a fax...
X5150 All-In-One Series User's Guide
Page 76
... scanner lid 3 scanner lock 3 scanner support 3 scanner unit 3 closing 57 scanning 22 operator panel 22 placing document 16 software 24 scanning multiple images 32 Select 5 setup 1 software 8 Lexmark All-In-One Center 8 Lexmark X5100 Series Photo Editor 10 Lexmark X5100 Series Solution Center 11 Print Properties 9 specialty paper loading 19 specialty papers banner 18 cards 17 custom size paper 17 envelopes 17 greeting cards 17 index cards 17 iron-on transfers 18 photo cards 17 photo paper 17 postcards 17 transparencies 17 Start Fax 5 Start Scan 5 Stop/Clear 5 supplies, ordering 45 T top cover...
... scanner lid 3 scanner lock 3 scanner support 3 scanner unit 3 closing 57 scanning 22 operator panel 22 placing document 16 software 24 scanning multiple images 32 Select 5 setup 1 software 8 Lexmark All-In-One Center 8 Lexmark X5100 Series Photo Editor 10 Lexmark X5100 Series Solution Center 11 Print Properties 9 specialty paper loading 19 specialty papers banner 18 cards 17 custom size paper 17 envelopes 17 greeting cards 17 index cards 17 iron-on transfers 18 photo cards 17 photo paper 17 postcards 17 transparencies 17 Start Fax 5 Start Scan 5 Stop/Clear 5 supplies, ordering 45 T top cover...


