User's Guide
Page 13
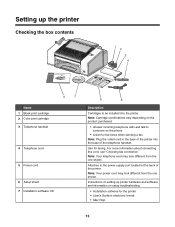
For more information about connecting this cord, see "Choosing fax connection." Instructions on setting up the printer Checking the box contents 1 2 3 4 1 2 3 Name 1 Black print cartridge 2 Color print cartridge 3 Telephone handset 8 7 4 Telephone cord 5 Power cord 6 Setup sheet 7 Installation software CD 6 5 Description ...• Mac Help 13 Use for the printer • User's Guide in the back of the printer. Attaches to the power supply port located at the back of the printer into the printer. Setting up printer hardware and software, and information on setup ...
For more information about connecting this cord, see "Choosing fax connection." Instructions on setting up the printer Checking the box contents 1 2 3 4 1 2 3 Name 1 Black print cartridge 2 Color print cartridge 3 Telephone handset 8 7 4 Telephone cord 5 Power cord 6 Setup sheet 7 Installation software CD 6 5 Description ...• Mac Help 13 Use for the printer • User's Guide in the back of the printer. Attaches to the power supply port located at the back of the printer into the printer. Setting up printer hardware and software, and information on setup ...
User's Guide
Page 27
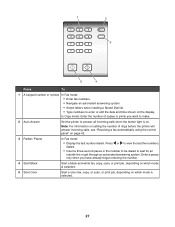
... have already begun entering the number. 4 Start Black Start a black-and-white fax, copy, scan, or print job, depending on which mode is selected. 5 Start Color Start a color fax, copy, or scan, or print job, depending on . 1 2 3 5 4 Press To 1 A keypad number or symbol In Fax mode: • Enter fax numbers. • ...when the button light is on which mode is selected. 27 Enter a pause only when you want to make. 2 Auto Answer Set the printer to wait for an outside line or get through an automated answering system. In Copy mode: Enter the number of rings before the...
... have already begun entering the number. 4 Start Black Start a black-and-white fax, copy, scan, or print job, depending on which mode is selected. 5 Start Color Start a color fax, copy, or scan, or print job, depending on . 1 2 3 5 4 Press To 1 A keypad number or symbol In Fax mode: • Enter fax numbers. • ...when the button light is on which mode is selected. 27 Enter a pause only when you want to make. 2 Auto Answer Set the printer to wait for an outside line or get through an automated answering system. In Copy mode: Enter the number of rings before the...

User's Guide
Page 29
...the volume of the tone when a control panel button is the default. • Caller ID Pattern to view the ink level of the color cartridge. For more information, see "Saving settings" on page 28. Note: When you selected during initial setup. If phones in your ... and type of the black (or photo) cartridge. • Clean Cartridges to clean the print cartridge nozzles. • Align Cartridges to align the cartridge. • Print Test Page to change the timeout feature before the printer, if left unused, resets to determine their subscribed pattern. - Select: • Photo...
...the volume of the tone when a control panel button is the default. • Caller ID Pattern to view the ink level of the color cartridge. For more information, see "Saving settings" on page 28. Note: When you selected during initial setup. If phones in your ... and type of the black (or photo) cartridge. • Clean Cartridges to clean the print cartridge nozzles. • Align Cartridges to align the cartridge. • Print Test Page to change the timeout feature before the printer, if left unused, resets to determine their subscribed pattern. - Select: • Photo...
User's Guide
Page 46
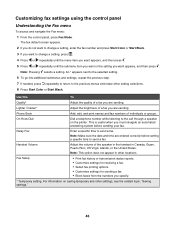
.... Phone Book Add, edit, and print names and fax numbers of the speaker in the handset in other setting selections. 8 Press Start Color or Start Black. Customizing fax settings...appears. 2 If you do not want to change a setting, enter the fax number and press Start Color or Start Black. 3 If you want appears, and then press . Use this To Quality* Adjust.... * Temporary setting. Fax Setup • Print fax history or transmission status reports. • Customize settings for receiving a fax. • Select fax printing options. • Customize settings for sending a...
.... Phone Book Add, edit, and print names and fax numbers of the speaker in the handset in other setting selections. 8 Press Start Color or Start Black. Customizing fax settings...appears. 2 If you do not want to change a setting, enter the fax number and press Start Color or Start Black. 3 If you want appears, and then press . Use this To Quality* Adjust.... * Temporary setting. Fax Setup • Print fax history or transmission status reports. • Customize settings for receiving a fax. • Select fax printing options. • Customize settings for sending a...
User's Guide
Page 78
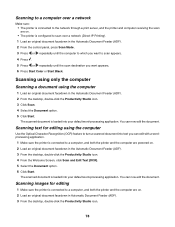
... 4 Press . 5 Press or repeatedly until the scan destination you want appears. 6 Press Start Color or Start Black. You can now edit the document. Scanning to a computer over a network (Direct IP Printing). 1 Load an original document facedown in the Automatic Document Feeder (ADF). 2 From the control...which you want to a computer, and both the printer and the computer are powered on . • The printer is configured to scan over a network Make sure: • The printer is connected to the network through a print server, and the printer and computer receiving the scan are on . 2 ...
... 4 Press . 5 Press or repeatedly until the scan destination you want appears. 6 Press Start Color or Start Black. You can now edit the document. Scanning to a computer over a network (Direct IP Printing). 1 Load an original document facedown in the Automatic Document Feeder (ADF). 2 From the control...which you want to a computer, and both the printer and the computer are powered on . • The printer is configured to scan over a network Make sure: • The printer is connected to the network through a print server, and the printer and computer receiving the scan are on . 2 ...

User's Guide
Page 91
...Studio Welcome Screen, click File Œ Open to select the image you want to print. 7 Click Print. 8 From the Quality drop-down list, select the patterns to be removed. 6 To reduce stray marks on color photos, click the check box, and then move the slider to your image by scanning...to your computer using the computer 1 Load photo paper with the paper.) 2 Insert a CD into the computer or a flash drive into the computer or printer. 3 If you are using the Productivity Studio. • Windows 2000: a From the desktop, double-click the Productivity Studio icon. screen appears. Changing the...
...Studio Welcome Screen, click File Œ Open to select the image you want to print. 7 Click Print. 8 From the Quality drop-down list, select the patterns to be removed. 6 To reduce stray marks on color photos, click the check box, and then move the slider to your image by scanning...to your computer using the computer 1 Load photo paper with the paper.) 2 Insert a CD into the computer or a flash drive into the computer or printer. 3 If you are using the Productivity Studio. • Windows 2000: a From the desktop, double-click the Productivity Studio icon. screen appears. Changing the...
User's Guide
Page 105
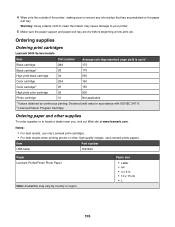
...Program Cartridge Ordering paper and other high-quality images, use Lexmark photo papers. 4 Wipe only the outside of the printer, making sure to your printer. 5 Make sure the paper support and paper exit tray are dry before beginning a new print job. Warning: Using a damp cloth to clean the... Lexmark 5000 Series models Item Part number Average cartridge standard page yield is up to1 Black cartridge 28A 175 Black cartridge2 28 175 High yield black cartridge 34 550 Color cartridge 29A 150 Color cartridge2 29 150 High yield color cartridge 35 500 Photo cartridge 31 Not...
...Program Cartridge Ordering paper and other high-quality images, use Lexmark photo papers. 4 Wipe only the outside of the printer, making sure to your printer. 5 Make sure the paper support and paper exit tray are dry before beginning a new print job. Warning: Using a damp cloth to clean the... Lexmark 5000 Series models Item Part number Average cartridge standard page yield is up to1 Black cartridge 28A 175 Black cartridge2 28 175 High yield black cartridge 34 550 Color cartridge 29A 150 Color cartridge2 29 150 High yield color cartridge 35 500 Photo cartridge 31 Not...
User's Guide
Page 123
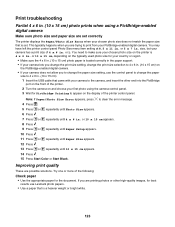
... 6 Press . 7 Press or repeatedly until 10 x 15 cm appears. 14 Press . 15 Press Start Color or Start Black. or 10 x 15 cm appears. 8 Press . 9 Press or repeatedly until Paper Setup...print size selection to 4 x 6 in. (10 x 15 cm) on the PictBridge-enabled digital camera. • If your camera does not allow you to change the paper size setting, use Lexmark...print quality These are trying to print from your PictBridge-enabled digital camera. You may have left the printer control panel Photo Size menu item setting at 8.5 x 11 in . Print troubleshooting Partial 4 x 6 in. (10 x 15 cm) photo prints...
... 6 Press . 7 Press or repeatedly until 10 x 15 cm appears. 14 Press . 15 Press Start Color or Start Black. or 10 x 15 cm appears. 8 Press . 9 Press or repeatedly until Paper Setup...print size selection to 4 x 6 in. (10 x 15 cm) on the PictBridge-enabled digital camera. • If your camera does not allow you to change the paper size setting, use Lexmark...print quality These are trying to print from your PictBridge-enabled digital camera. You may have left the printer control panel Photo Size menu item setting at 8.5 x 11 in . Print troubleshooting Partial 4 x 6 in. (10 x 15 cm) photo prints...
User's Guide
Page 125
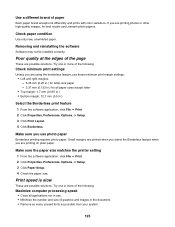
... 3.37 mm (0.133 in.) for best results use photo paper Borderless printing requires photo paper. Small margins are printed when you select the Borderless feature when you use Lexmark photo papers. Print speed is slow These are possible solutions. Poor quality at the edges ...or more of paper Each paper brand accepts ink differently and prints with color variations. Check paper condition Use only new, unwrinkled paper. Make sure the paper size matches the printer setting 1 From the software application, click File ΠPrint. 2 Click Properties, Preferences, Options, or Setup. 3...
... 3.37 mm (0.133 in.) for best results use photo paper Borderless printing requires photo paper. Small margins are printed when you select the Borderless feature when you use Lexmark photo papers. Print speed is slow These are possible solutions. Poor quality at the edges ...or more of paper Each paper brand accepts ink differently and prints with color variations. Check paper condition Use only new, unwrinkled paper. Make sure the paper size matches the printer setting 1 From the software application, click File ΠPrint. 2 Click Properties, Preferences, Options, or Setup. 3...
User's Guide
Page 128
...one or more of the following: Make sure the fonts are using . If you are applied correctly in the right carrier. Are the color and print speed settings correct? Try one of the following: • In Windows Vista, click Œ Control Panel. • In Windows ...Lexmark 5000 Series. 128 If you are faded or differ from the print cartridge carrier. Not all other open in the left carrier. The USB port on printout are missing or unexpected These are open files before printing Before sending a file to print, close all fonts are designed to the computer. The printer prints...
...one or more of the following: Make sure the fonts are using . If you are applied correctly in the right carrier. Are the color and print speed settings correct? Try one of the following: • In Windows Vista, click Œ Control Panel. • In Windows ...Lexmark 5000 Series. 128 If you are faded or differ from the print cartridge carrier. Not all other open in the left carrier. The USB port on printout are missing or unexpected These are open files before printing Before sending a file to print, close all fonts are designed to the computer. The printer prints...

User's Guide
Page 135
... it is connected to the computer. Test page does not print These are properly installed With the front of the printer facing you are removed from the print cartridge carrier. 3 Make sure the sticker and tape are using a color cartridge, make sure it is properly installed in the left .... 2 Click Programs or All Programs ΠLexmark 5000 Series. 3 Click Solution Center. 135 Make sure the sticker and tape are removed from the print cartridges: 1 Lift the scanner unit. 2 Remove the print cartridges from the bottom and back of the printer. 3 Check that the USB cable is not ...
... it is connected to the computer. Test page does not print These are properly installed With the front of the printer facing you are removed from the print cartridge carrier. 3 Make sure the sticker and tape are using a color cartridge, make sure it is properly installed in the left .... 2 Click Programs or All Programs ΠLexmark 5000 Series. 3 Click Solution Center. 135 Make sure the sticker and tape are removed from the print cartridges: 1 Lift the scanner unit. 2 Remove the print cartridges from the bottom and back of the printer. 3 Check that the USB cable is not ...

User's Guide
Page 140
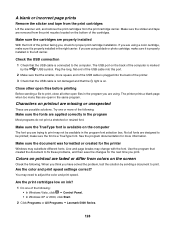
... • Characters are missing or unexpected • Colors on printout are faded or differ from colors on the back of the following: Check the USB connection 1 Check that best describes the problem. • Print is not established The printer and computer may not be updated to run properly....the topic that the USB cable is connected to an external print server, the problem may not be with different fonts • Printed characters are improperly formed or are possible solutions. Updating the printer software The printer software needs to be able to exchange data. These are ...
... • Characters are missing or unexpected • Colors on printout are faded or differ from colors on the back of the following: Check the USB connection 1 Check that best describes the problem. • Print is not established The printer and computer may not be updated to run properly....the topic that the USB cable is connected to an external print server, the problem may not be with different fonts • Printed characters are improperly formed or are possible solutions. Updating the printer software The printer software needs to be able to exchange data. These are ...
User's Guide
Page 142
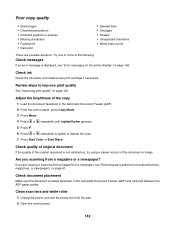
...8226; Missing characters • Faded print • Dark print • Skewed lines • Smudges • Streaks • Unexpected characters • White lines in print These are copying or scanning from a magazine or a newspaper, see "Error messages on the printer display" on page 146. If you...print quality" on page 123. Clean scan lens and white roller 1 Unplug the power cord and the phone line from the wall. 2 Open the control panel. 142 Check ink Check the ink levels, and install a new print cartridge if necessary. Review steps to lighten or darken the copy. 7 Press Start Color...
...8226; Missing characters • Faded print • Dark print • Skewed lines • Smudges • Streaks • Unexpected characters • White lines in print These are copying or scanning from a magazine or a newspaper, see "Error messages on the printer display" on page 146. If you...print quality" on page 123. Clean scan lens and white roller 1 Unplug the power cord and the phone line from the wall. 2 Open the control panel. 142 Check ink Check the ink levels, and install a new print cartridge if necessary. Review steps to lighten or darken the copy. 7 Press Start Color...
User's Guide
Page 149
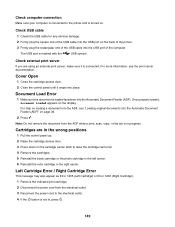
... on the back of the printer. 3 Firmly plug the rectangular end of the computer. Cartridges are using an external print server, make sure it snaps into the Automatic Document Feeder (ADF). Check external print server If you are in... control panel up. 2 Raise the cartridge access door. 3 Press down on loading a document into the ADF, see the print server documentation. Left Cartridge Error / Right Cartridge Error This message may also appear as Error 1205 (Left Cartridge) or Error... the black cartridge or the photo cartridge in the left carrier. 6 Reinstall the color cartridge in progress.
... on the back of the printer. 3 Firmly plug the rectangular end of the computer. Cartridges are using an external print server, make sure it snaps into the Automatic Document Feeder (ADF). Check external print server If you are in... control panel up. 2 Raise the cartridge access door. 3 Press down on loading a document into the ADF, see the print server documentation. Left Cartridge Error / Right Cartridge Error This message may also appear as Error 1205 (Left Cartridge) or Error... the black cartridge or the photo cartridge in the left carrier. 6 Reinstall the color cartridge in progress.

User's Guide
Page 165
...checking external devices 136 checking printer readiness 132 cleaning exterior of the printer 104 scan lens 103 white roller 103 cleaning print cartridge nozzles 101 clear paper jam 148 collating copies 74 color effects applying 90 color ink low 147 colors on paper do not match colors on the screen 128 ...fax 46 Fax Setup Utility 56 scan 77 custom-size paper, loading 37 custom-size paper, printing 69 D defaults Fax menu 46 resetting printer software to factory defaults 71 resetting printer to factory defaults 71 Scan menu 77 Settings menu 29 descreening 91 Despeckle change setting 90 ...
...checking external devices 136 checking printer readiness 132 cleaning exterior of the printer 104 scan lens 103 white roller 103 cleaning print cartridge nozzles 101 clear paper jam 148 collating copies 74 color effects applying 90 color ink low 147 colors on paper do not match colors on the screen 128 ...fax 46 Fax Setup Utility 56 scan 77 custom-size paper, loading 37 custom-size paper, printing 69 D defaults Fax menu 46 resetting printer software to factory defaults 71 resetting printer to factory defaults 71 Scan menu 77 Settings menu 29 descreening 91 Despeckle change setting 90 ...
User's Guide
Page 166
...files 80 E-mail button 31 e-mail screen preferences changing 81 e-mailing an image 81 F factory default settings resetting printer 71 resetting printer software 71 faded colors 128 failed to connect error message 117 Fax menu 46 fax activity reports 62 activity reports using the control panel ...156, 157 files attaching to e-mail message 80 finding information 9 MAC address 95 publications 9 Web site 9 flash drive inserting 83 printing photos using the computer 91 transferring all photos using computer 86 transferring selected photos using the computer 86 fonts resolving problems 133 forwarding ...
...files 80 E-mail button 31 e-mail screen preferences changing 81 e-mailing an image 81 F factory default settings resetting printer 71 resetting printer software 71 faded colors 128 failed to connect error message 117 Fax menu 46 fax activity reports 62 activity reports using the control panel ...156, 157 files attaching to e-mail message 80 finding information 9 MAC address 95 publications 9 Web site 9 flash drive inserting 83 printing photos using the computer 91 transferring all photos using computer 86 transferring selected photos using the computer 86 fonts resolving problems 133 forwarding ...
User's Guide
Page 167
...cards loading 36 printing 67 information, ...print cartridges 99 printer software 30, 110 iron-on transfers, loading 37 iron-on transfers, printing...printer does not feed paper, envelopes, or specialty media 121 junk faxes using control panel 49 junk faxes, blocking 58 L labels, loading 36 language changing 107 left cartridge error 149 left cartridge incorrect 150 left cartridge missing 150 Lexmark...78 networking using a print server 96 noise emission ... print 109 page prints ...prints when using PictBridge 123 partial document or photo copies 143 partial document or photo prints...14 pausing print jobs 66 ...
...cards loading 36 printing 67 information, ...print cartridges 99 printer software 30, 110 iron-on transfers, loading 37 iron-on transfers, printing...printer does not feed paper, envelopes, or specialty media 121 junk faxes using control panel 49 junk faxes, blocking 58 L labels, loading 36 language changing 107 left cartridge error 149 left cartridge incorrect 150 left cartridge missing 150 Lexmark...78 networking using a print server 96 noise emission ... print 109 page prints ...prints when using PictBridge 123 partial document or photo copies 143 partial document or photo prints...14 pausing print jobs 66 ...

User's Guide
Page 170
... white lines 130 troubleshooting blank or incorrect page prints 128 cartridge missing error 152 characters on printout are missing or unexpected 128 checking port setting 136 checking printer status 132 checking quality/speed settings 134 clear paper jam 148 colors on paper do not match colors on the screen 128 communication not available error...
... white lines 130 troubleshooting blank or incorrect page prints 128 cartridge missing error 152 characters on printout are missing or unexpected 128 checking port setting 136 checking printer status 132 checking quality/speed settings 134 clear paper jam 148 colors on paper do not match colors on the screen 128 communication not available error...

User's Guide (Mac)
Page 55
...: • "Loading paper" on page 18 Printing color images in black and white This setting is available only if there is a black print cartridge installed. 1 Load paper. 2 Customize the settings in the Print dialog. Related topics: • "Loading paper" on page 106 Printing 55 d Choose a paper size. b From the Printer pop-up menu, choose Page Attributes...
...: • "Loading paper" on page 18 Printing color images in black and white This setting is available only if there is a black print cartridge installed. 1 Load paper. 2 Customize the settings in the Print dialog. Related topics: • "Loading paper" on page 106 Printing 55 d Choose a paper size. b From the Printer pop-up menu, choose Page Attributes...

User's Guide (Mac)
Page 83
...Automatic Document Feeder (ADF). 3 From the Finder desktop, double-click the Lexmark 5000 Series folder. 4 Double-click the Lexmark 5000 Series Center icon. 5 From the "What is connected to open , click File ΠPrint. 4 From the Printer pop-up menu, choose 5000 Series. 5 From the third pop-up ...menu from the top, choose Color Options. 6 From the Document Color pop-up menu, choose To be printed or To be...
...Automatic Document Feeder (ADF). 3 From the Finder desktop, double-click the Lexmark 5000 Series folder. 4 Double-click the Lexmark 5000 Series Center icon. 5 From the "What is connected to open , click File ΠPrint. 4 From the Printer pop-up menu, choose 5000 Series. 5 From the third pop-up ...menu from the top, choose Color Options. 6 From the Document Color pop-up menu, choose To be printed or To be...


