Quick Reference
Page 1
... 5 If you print copies. Note: The Job Interrupt setting must be On for this feature to enter the number of the printer, then print a network setup page and locate the IP address in the TCP/IP section. 2 Click Settings. 3 Under Default Settings, click E-mail/FTP Settings. 4 Click E-... in the fields with the appropriate information. 7 Click Add. 1 The remainder of the copy job is canceled, the copy screen appears. A "Canceling scan job" screen appears. Note: Do not load postcards, photos, small items, transparencies, photo paper, or thin media (such as magazine clippings) into the...
... 5 If you print copies. Note: The Job Interrupt setting must be On for this feature to enter the number of the printer, then print a network setup page and locate the IP address in the TCP/IP section. 2 Click Settings. 3 Under Default Settings, click E-mail/FTP Settings. 4 Click E-... in the fields with the appropriate information. 7 Click Add. 1 The remainder of the copy job is canceled, the copy screen appears. A "Canceling scan job" screen appears. Note: Do not load postcards, photos, small items, transparencies, photo paper, or thin media (such as magazine clippings) into the...
Quick Reference
Page 2
...). 4 Click Fax. 2 Note: In order to " box. appears. • When using the ADF, touch Cancel Job while Scanning... This gives you do not know the IP address of the printer, then print a network setup page and locate the IP address in the fields with a different name, choosing the fax version of... faceup, short edge first into the ADF or facedown on the Print dialog, you do not know the IP address of the printer, then print a network setup page and locate the IP address in the TCP/IP section. 2 Click Settings. 3 Click E-mail/FTP Settings. 4 Click E-mail Settings. 5 Fill in ...
...). 4 Click Fax. 2 Note: In order to " box. appears. • When using the ADF, touch Cancel Job while Scanning... This gives you do not know the IP address of the printer, then print a network setup page and locate the IP address in the fields with a different name, choosing the fax version of... faceup, short edge first into the ADF or facedown on the Print dialog, you do not know the IP address of the printer, then print a network setup page and locate the IP address in the TCP/IP section. 2 Click Settings. 3 Click E-mail/FTP Settings. 4 Click E-mail Settings. 5 Fill in ...

Quick Reference
Page 3
...loading a document into the ADF or facedown on the scanner glass. If you do not know the IP address of the printer, then print a network setup page and locate the IP address in the group with a semicolon (;). 6 Assign a shortcut number. To create a group of fax numbers, ... address field of your system support person. 4 Click Fax Shortcut Setup. 5 Type a unique name for the group. Scanning to an FTP address Scanning to an FTP address Scanning to send a fax, you can be required. Creating shortcuts Creating a fax destination shortcut using the Embedded Web Server Instead...
...loading a document into the ADF or facedown on the scanner glass. If you do not know the IP address of the printer, then print a network setup page and locate the IP address in the group with a semicolon (;). 6 Assign a shortcut number. To create a group of fax numbers, ... address field of your system support person. 4 Click Fax Shortcut Setup. 5 Type a unique name for the group. Scanning to an FTP address Scanning to an FTP address Scanning to send a fax, you can be required. Creating shortcuts Creating a fax destination shortcut using the Embedded Web Server Instead...

Quick Reference
Page 4
...file. 6 Enter a scan name. Note: Do not load postcards, photos, small items, transparencies, photo paper, or thin media (such as magazine clippings) into the USB port on the scanner glass. Place these items on the front of the printer, then print a network setup page and locate the... IP address in the TCP/IP section. 2 Click Scan Profile. 3 Click Create. 4 Select your scan settings, and then click Next. 5 Select a location on your shortcut on the Scan Profile screen. A shortcut number was automatically assigned ...
...file. 6 Enter a scan name. Note: Do not load postcards, photos, small items, transparencies, photo paper, or thin media (such as magazine clippings) into the USB port on the scanner glass. Place these items on the front of the printer, then print a network setup page and locate the... IP address in the TCP/IP section. 2 Click Scan Profile. 3 Click Create. 4 Select your scan settings, and then click Next. 5 Select a location on your shortcut on the Scan Profile screen. A shortcut number was automatically assigned ...

Common Criteria Installation Supplement and Administrator Guide
Page 13
... Updates Flash Drive Color Printing Flash Drive Firmware Updates Flash Drive Print Flash Drive Scan FTP Function Held Jobs Access Manage Shortcuts at the Device Manage Shortcuts Remotely Network Ports/Menu at the Device Network Ports/Menu Remotely NPA Network Adapter Setting Changes Operator Panel Lock Option Card Configuration at the Device Option Card...
... Updates Flash Drive Color Printing Flash Drive Firmware Updates Flash Drive Print Flash Drive Scan FTP Function Held Jobs Access Manage Shortcuts at the Device Manage Shortcuts Remotely Network Ports/Menu at the Device Network Ports/Menu Remotely NPA Network Adapter Setting Changes Operator Panel Lock Option Card Configuration at the Device Option Card...

Common Criteria Installation Supplement and Administrator Guide
Page 37
... disabled Disabled Administrator access only Not applicable - Access Control Flash Drive Print Flash Drive Scan FTP Function Held Jobs Access Manage Shortcuts at the Device Manage Shortcuts Remotely Network Ports/Menu at the Device Network Ports/Menu Remotely NPA Network Adapter Setting Changes Operator Panel Lock Option Card Configuration at the Device Option Card...
... disabled Disabled Administrator access only Not applicable - Access Control Flash Drive Print Flash Drive Scan FTP Function Held Jobs Access Manage Shortcuts at the Device Manage Shortcuts Remotely Network Ports/Menu at the Device Network Ports/Menu Remotely NPA Network Adapter Setting Changes Operator Panel Lock Option Card Configuration at the Device Option Card...

Network Scan Drivers
Page 3
... Debian GNU/Linux or Ubuntu Linux 6 Checking if the network scan driver is installed 6 Scanning using a network printer...6 Removing the network scan driver...6 Scanning...7 Scanning using applications...7 Scanning using XSane...7 Scanning using OpenOffice.org...7 Scanning using GIMP ...8 Scanning using a terminal window ...8 Scanning multiple pages...8 Scanning both sides of a page...10 Canceling a scan...11 Adjusting scan settings...12 Adjusting scan settings using XSane or OpenOffice.org 12 Adjusting...
... Debian GNU/Linux or Ubuntu Linux 6 Checking if the network scan driver is installed 6 Scanning using a network printer...6 Removing the network scan driver...6 Scanning...7 Scanning using applications...7 Scanning using XSane...7 Scanning using OpenOffice.org...7 Scanning using GIMP ...8 Scanning using a terminal window ...8 Scanning multiple pages...8 Scanning both sides of a page...10 Canceling a scan...11 Adjusting scan settings...12 Adjusting scan settings using XSane or OpenOffice.org 12 Adjusting...

Network Scan Drivers
Page 5
.... • Your printer has an internal network card and can communicate through an IPv4 network. d Select network-scan-linux-glibc2-x86.rpm, and then download it to allow scanning from the Drivers & Downloads list. Introduction to the network scan driver The network scan driver provides a SANE (Scanner Access Now... Make sure you are not supported. External network adapters are running on your operating system, or see the file supported-platforms.txt in the path /usr/lexscan/docs/ after installation. Introduction to www.lexmark.com. Installing on Fedora, Linpus Linux, SUSE...
.... • Your printer has an internal network card and can communicate through an IPv4 network. d Select network-scan-linux-glibc2-x86.rpm, and then download it to allow scanning from the Drivers & Downloads list. Introduction to the network scan driver The network scan driver provides a SANE (Scanner Access Now... Make sure you are not supported. External network adapters are running on your operating system, or see the file supported-platforms.txt in the path /usr/lexscan/docs/ after installation. Introduction to www.lexmark.com. Installing on Fedora, Linpus Linux, SUSE...

Network Scan Drivers
Page 6
... Open a terminal window, and then type dpkg -r lexmark-network-scan. c Select the Linux distribution running on your computer. Press Enter. Scanning using a network printer 1 To use the network scan driver, open a terminal window, and then type dpkg -i network-scan-linux-glibc2-x86.deb. Introduction to the dll.conf ...Linux openSUSE, Red Hat Enterprise Linux, or Red Flag Linux Open a terminal window, and then type rpm -e lexmark-network-scan. 2 Double-click the package file or open a terminal window, and then type scanimage -L. Installing on your profile. Press Enter.
... Open a terminal window, and then type dpkg -r lexmark-network-scan. c Select the Linux distribution running on your computer. Press Enter. Scanning using a network printer 1 To use the network scan driver, open a terminal window, and then type dpkg -i network-scan-linux-glibc2-x86.deb. Introduction to the dll.conf ...Linux openSUSE, Red Hat Enterprise Linux, or Red Flag Linux Open a terminal window, and then type rpm -e lexmark-network-scan. 2 Double-click the package file or open a terminal window, and then type scanimage -L. Installing on your profile. Press Enter.

Network Scan Drivers
Page 7
...From the printer control panel, select your scan job. Scanning using XSane 1 Open a terminal window, and then type xsane. Press Enter. 2 From the "device detection" dialog, navigate to: Available devices > select your printer > OK 3 From the "Network:scanner" dialog, click Window > Show ... : • Click Insert > Picture > Scan > Select Source. • Click Insert > Graphics > Scan > Select Source. 2 From the "Device Used" menu, select your printer. 3 If necessary, select other scan settings. 5 From the "Network:scanner" dialog, click Scan. 6 Place your document in the Automatic Document...
...From the printer control panel, select your scan job. Scanning using XSane 1 Open a terminal window, and then type xsane. Press Enter. 2 From the "device detection" dialog, navigate to: Available devices > select your printer > OK 3 From the "Network:scanner" dialog, click Window > Show ... : • Click Insert > Picture > Scan > Select Source. • Click Insert > Graphics > Scan > Select Source. 2 From the "Device Used" menu, select your printer. 3 If necessary, select other scan settings. 5 From the "Network:scanner" dialog, click Scan. 6 Place your document in the Automatic Document...

Network Scan Drivers
Page 11
... you send a scan job to the network printer, click Cancel Scan Profile > Yes. • Close the application. • Cancel the scan job: 1 From the printer control panel, cancel the scan job. 2 Cancel the scan from the dialog displayed after you send a scan job to the network printer. Using XSane..., navigate to : Image Settings > scan-both-sides 6 Select the scan-both sides checkbox. 6 From the "Network:scanner" dialog, click Scan. 7 Place your document in the ADF. 10 From the printer control panel, select your computer. Canceling a scan To cancel a scan, do either of your document are ...
... you send a scan job to the network printer, click Cancel Scan Profile > Yes. • Close the application. • Cancel the scan job: 1 From the printer control panel, cancel the scan job. 2 Cancel the scan from the dialog displayed after you send a scan job to the network printer. Using XSane..., navigate to : Image Settings > scan-both-sides 6 Select the scan-both sides checkbox. 6 From the "Network:scanner" dialog, click Scan. 7 Place your document in the ADF. 10 From the printer control panel, select your computer. Canceling a scan To cancel a scan, do either of your document are ...

Network Scan Drivers
Page 12
..."Options" area, select Image Settings or Advanced Settings. Make sure the printer supports the the resolution you select. Adjusting scan settings Adjusting scan settings using XSane or OpenOffice.org Depending on the application, do either of the following: - Make sure the printer supports... the size you select. Press Enter 2 From the "device detection" dialog, navigate to : Device Used > select your printer > OK 3 From the "Network...
..."Options" area, select Image Settings or Advanced Settings. Make sure the printer supports the the resolution you select. Adjusting scan settings Adjusting scan settings using XSane or OpenOffice.org Depending on the application, do either of the following: - Make sure the printer supports... the size you select. Press Enter 2 From the "device detection" dialog, navigate to : Device Used > select your printer > OK 3 From the "Network...

Network Scan Drivers
Page 18
...THE DEVICE CERTIFICATE If there is an error verifying a security certificate before completing a scan, then accept the certificate to provide a valid user name and password . Press Enter, and then take note of your network interface card. 1 Open a terminal window, and then type hostname. For more information...entries. • Update the SANE driver configuration file and specify the appropriate network interface to your computer matches the IP address assigned to use. If the problem is valid for all future scan jobs. The user name and password combination is not resolved, then see...
...THE DEVICE CERTIFICATE If there is an error verifying a security certificate before completing a scan, then accept the certificate to provide a valid user name and password . Press Enter, and then take note of your network interface card. 1 Open a terminal window, and then type hostname. For more information...entries. • Update the SANE driver configuration file and specify the appropriate network interface to your computer matches the IP address assigned to use. If the problem is valid for all future scan jobs. The user name and password combination is not resolved, then see...

Network Scan Drivers
Page 19
.../sane and /etc/sane.d/. Printer not compatible Make sure: • Your printer is a multifunction printer. • The network scan driver supports your printer's compatibility, see the printer User's Guide. SANE does not recognize the network scan driver SANE-compliant applications such XSane and scanadf access the scanner through SANE. Troubleshooting 19 For more information...
.../sane and /etc/sane.d/. Printer not compatible Make sure: • Your printer is a multifunction printer. • The network scan driver supports your printer's compatibility, see the printer User's Guide. SANE does not recognize the network scan driver SANE-compliant applications such XSane and scanadf access the scanner through SANE. Troubleshooting 19 For more information...

Network Scan Drivers
Page 21
... 5 installing on Red Flag Linux 5 installing on Red Hat Enterprise Linux 5 installing on SUSE Linux 5 installing on Ubuntu Linux 6 N network scan driver installation requirements 5 installing on Debian GNU/Linux 6 installing on Fedora 5 installing on Linpus Linux 5 installing on Linux openSUSE 5 installing ... P printer is not compatible 19 printer scans but image not displayed 18 printer stops scanning 18 S scan settings OpenOffice.org Writer 12 XSane 12 scanning both sides of a page 10 canceling a scan 11 multiple pages 8 using GIMP 8 using network printer 6 using OpenOffice.org 7 using ...
... 5 installing on Red Flag Linux 5 installing on Red Hat Enterprise Linux 5 installing on SUSE Linux 5 installing on Ubuntu Linux 6 N network scan driver installation requirements 5 installing on Debian GNU/Linux 6 installing on Fedora 5 installing on Linpus Linux 5 installing on Linux openSUSE 5 installing ... P printer is not compatible 19 printer scans but image not displayed 18 printer stops scanning 18 S scan settings OpenOffice.org Writer 12 XSane 12 scanning both sides of a page 10 canceling a scan 11 multiple pages 8 using GIMP 8 using network printer 6 using OpenOffice.org 7 using ...

PKI-Enabled Device Installation and Configuration Guide
Page 3
... Configuration...13 User Session and Access Control...14 Advanced Settings ...14 Configuring PKI S/MIME Email...15 PKI S/MIME settings ...15 Configuring PKI Scan to Network...16 General Settings...16 Default Scan Settings ...17 Creating file shares...17 Editing or deleting a file share ...19 Configuring PKI Held Jobs...19 PKI Held Jobs settings ...19...
... Configuration...13 User Session and Access Control...14 Advanced Settings ...14 Configuring PKI S/MIME Email...15 PKI S/MIME settings ...15 Configuring PKI Scan to Network...16 General Settings...16 Default Scan Settings ...17 Creating file shares...17 Editing or deleting a file share ...19 Configuring PKI Held Jobs...19 PKI Held Jobs settings ...19...
PKI-Enabled Device Installation and Configuration Guide
Page 5
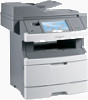
... by an authorized user. PKI Scan to Network-Enables users to scan documents to sign and encrypt E-mail messages. Supported devices This guide covers the following models: Single-function devices • Lexmark C736 • Lexmark T654 • Lexmark T656 • Lexmark W85x Multi-function devices • Lexmark X46x • Lexmark X65x • Lexmark X73x • Lexmark X86x Before configuring the printer...
... by an authorized user. PKI Scan to Network-Enables users to scan documents to sign and encrypt E-mail messages. Supported devices This guide covers the following models: Single-function devices • Lexmark C736 • Lexmark T654 • Lexmark T656 • Lexmark W85x Multi-function devices • Lexmark X46x • Lexmark X65x • Lexmark X73x • Lexmark X86x Before configuring the printer...

PKI-Enabled Device Installation and Configuration Guide
Page 7
...in progress. Installing PKI applications The PKI applications enable users to sign and encrypt E-mail messages sent from the printer, securely scan documents and images to locate the correct application file, and then click Start Install. 4 After the installation has finished, click ... the correct firmware. For information about available versions, contact the Lexmark Solutions Help Desk. 1 From the Embedded Web Server, click Settings > Embedded Solutions. 2 On the Solutions tab, click Install. 3 Browse to a network file share, and hold documents at the printer until released by...
...in progress. Installing PKI applications The PKI applications enable users to sign and encrypt E-mail messages sent from the printer, securely scan documents and images to locate the correct application file, and then click Start Install. 4 After the installation has finished, click ... the correct firmware. For information about available versions, contact the Lexmark Solutions Help Desk. 1 From the Embedded Web Server, click Settings > Embedded Solutions. 2 On the Solutions tab, click Install. 3 Browse to a network file share, and hold documents at the printer until released by...
PKI-Enabled Device Installation and Configuration Guide
Page 8
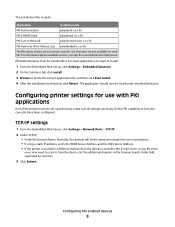
For information about available versions, contact the Lexmark Solutions Help Desk. Configuring printer settings for use with...to function correctly have been configured. For each file. TCP/IP settings 1 From the Embedded Web Server, click Settings > Network/Ports > TCP/IP. 2 Under TCP/IP: • Verify the Domain Name. The installation files include: Application PKI..., the E-mail server, or any file share users may need to scan to Network pkiadnetworkscan.x.x.x-fls PKI Held Jobs (Print Release Lite) pkiadheldjobs.x.x.x.fls The file names shown are not version-specific....
For information about available versions, contact the Lexmark Solutions Help Desk. Configuring printer settings for use with...to function correctly have been configured. For each file. TCP/IP settings 1 From the Embedded Web Server, click Settings > Network/Ports > TCP/IP. 2 Under TCP/IP: • Verify the Domain Name. The installation files include: Application PKI..., the E-mail server, or any file share users may need to scan to Network pkiadnetworkscan.x.x.x-fls PKI Held Jobs (Print Release Lite) pkiadheldjobs.x.x.x.fls The file names shown are not version-specific....

PKI-Enabled Device Installation and Configuration Guide
Page 11
... type a Subject line for E-mail addresses. 1 From the Embedded Web Server, click Settings > Network/Ports > Address Book Setup. 2 For Server Address, type the hostname (not the IP address), of scanned documents. • Transmission Log-The recommended setting is Print only for error. • E-mail Bit...: If the printer must provide credentials in the body of scanned documents and images. • Resolution-The recommended range for black and white. 3 Adjust other scan settings as the default setting, to search your network Global Address Book for E-mail messages sent from the printer....
... type a Subject line for E-mail addresses. 1 From the Embedded Web Server, click Settings > Network/Ports > Address Book Setup. 2 For Server Address, type the hostname (not the IP address), of scanned documents. • Transmission Log-The recommended setting is Print only for error. • E-mail Bit...: If the printer must provide credentials in the body of scanned documents and images. • Resolution-The recommended range for black and white. 3 Adjust other scan settings as the default setting, to search your network Global Address Book for E-mail messages sent from the printer....


