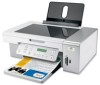

Getting Started
Page 3
...printer for wireless printing 15 Setting up the printer using a USB cable...17 Installing an optional internal wireless print server 17 Configuring the optional internal wireless print server 19 Installing the printer on additional network computers 19 Wireless networking...20 Networking overview...20 Learning about the printer... ...32 Using the Settings menu ...33 Saving settings ...35 Learning about the software 37 Using the printer software...37 Using the Lexmark Imaging Studio...37 Using the Solution Center...38 Using Printing Preferences...40 Opening Printing Preferences ...40 Using ...
...printer for wireless printing 15 Setting up the printer using a USB cable...17 Installing an optional internal wireless print server 17 Configuring the optional internal wireless print server 19 Installing the printer on additional network computers 19 Wireless networking...20 Networking overview...20 Learning about the printer... ...32 Using the Settings menu ...33 Saving settings ...35 Learning about the software 37 Using the printer software...37 Using the Lexmark Imaging Studio...37 Using the Solution Center...38 Using Printing Preferences...40 Opening Printing Preferences ...40 Using ...
Getting Started
Page 4
... light is orange ...53 Wi-Fi indicator light is blinking orange during installation 54 Wireless network printer does not print ...57 Wireless printer is no longer working...58 Photos do not transfer from a memory card across a wireless network 63 Changing wireless settings after installation 64 Finding your MAC address...64 Resetting to factory default settings 65...
... light is orange ...53 Wi-Fi indicator light is blinking orange during installation 54 Wireless network printer does not print ...57 Wireless printer is no longer working...58 Photos do not transfer from a memory card across a wireless network 63 Changing wireless settings after installation 64 Finding your MAC address...64 Resetting to factory default settings 65...
Getting Started
Page 9
... the password that came with a computer and want to know: 1 Make sure your wireless network is set up the printer: • For printing on a Windows operating system using a wireless connection or USB cable , see "Setting up the printer on a Windows operating system" on page 9. • For printing on a Macintosh .... 2 Make sure the computer is also known as security key, WEP key, or WPA key. Note: If you previously set up the printer with the wireless network, or contact the person who set it up on another computer on a Windows operating system 1 Before you do not know . Setting...
... the password that came with a computer and want to know: 1 Make sure your wireless network is set up the printer: • For printing on a Windows operating system using a wireless connection or USB cable , see "Setting up the printer on a Windows operating system" on page 9. • For printing on a Macintosh .... 2 Make sure the computer is also known as security key, WEP key, or WPA key. Note: If you previously set up the printer with the wireless network, or contact the person who set it up on another computer on a Windows operating system 1 Before you do not know . Setting...
Getting Started
Page 15
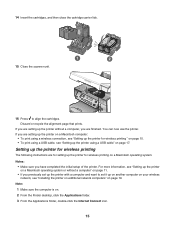
... lids. 15 Close the scanner unit. 16 Press to set it up on another computer on your wireless network, see "Setting up the printer using a USB cable, see "Installing the printer on additional network computers" on . 2 From the Finder desktop, click the Applications folder. 3 From... system. You can now use the printer. If you are setting up the printer on a Macintosh computer: • To print using a wireless connection, see "Setting up the printer for wireless printing on page 17. If you are for setting up the printer for wireless printing The following instructions are setting up...
... lids. 15 Close the scanner unit. 16 Press to set it up on another computer on your wireless network, see "Setting up the printer using a USB cable, see "Installing the printer on additional network computers" on . 2 From the Finder desktop, click the Applications folder. 3 From... system. You can now use the printer. If you are setting up the printer on a Macintosh computer: • To print using a wireless connection, see "Setting up the printer for wireless printing on page 17. If you are for setting up the printer for wireless printing The following instructions are setting up...
Getting Started
Page 16
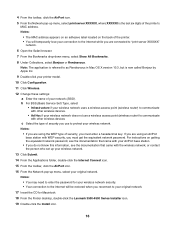
... Bonjour or Rendezvous. Notes: • You may need to enter the password for Macintosh. 18 From the Finder desktop, double-click the Lexmark 3500-4500 Series Installer icon. 19 Double-click the Install icon. 16 4 From the toolbar, click the AirPort icon. 5 From the ...is now called Bonjour by Apple Inc. 9 Double-click your printer model. 10 Click Configuration. 11 Click Wireless. 12 Change these settings: a Enter the name of security you use a wireless access point (wireless router) to communicate with other wireless devices c Select the type of your original network. Note: The...
... Bonjour or Rendezvous. Notes: • You may need to enter the password for Macintosh. 18 From the Finder desktop, double-click the Lexmark 3500-4500 Series Installer icon. 19 Double-click the Install icon. 16 4 From the toolbar, click the AirPort icon. 5 From the ...is now called Bonjour by Apple Inc. 9 Double-click your printer model. 10 Click Configuration. 11 Click Wireless. 12 Change these settings: a Enter the name of security you use a wireless access point (wireless router) to communicate with other wireless devices c Select the type of your original network. Note: The...
Getting Started
Page 17
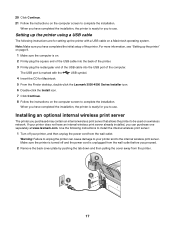
... from the wall outlet. Warning: Failure to unplug the printer can purchase one separately at www.lexmark.com. 20 Click Continue. 21 Follow the instructions on the computer screen to the internal wireless print server. Setting up the printer" on page 9. 1 Make sure the computer is unplugged... Note: Make sure you purchased may contain an internal wireless print server that allows the printer to be used on the computer screen to use . Make sure the printer is ready for Macintosh. 5 From the Finder desktop, double-click the Lexmark 3500-4500 Series Installer icon. 6 Double-click the ...
... from the wall outlet. Warning: Failure to unplug the printer can purchase one separately at www.lexmark.com. 20 Click Continue. 21 Follow the instructions on the computer screen to the internal wireless print server. Setting up the printer" on page 9. 1 Make sure the computer is unplugged... Note: Make sure you purchased may contain an internal wireless print server that allows the printer to be used on the computer screen to use . Make sure the printer is ready for Macintosh. 5 From the Finder desktop, double-click the Lexmark 3500-4500 Series Installer icon. 6 Double-click the ...

Getting Started
Page 18
... this later in order to network the printer. 7 Configure the internal wireless print server to work on your wireless network. • If you purchased the optional internal wireless print server and printer at the same time, see "Setting up the printer" on the left and right, and ...address to the back of the printer. b Click Wireless Setup. Touch something metal such as the printer frame before you purchased the optional internal wireless print server separately and have already installed the printer: a Click Start Œ Programs or All Programs Œ Lexmark 3500-4500 Series. c Follow ...
... this later in order to network the printer. 7 Configure the internal wireless print server to work on your wireless network. • If you purchased the optional internal wireless print server and printer at the same time, see "Setting up the printer" on the left and right, and ...address to the back of the printer. b Click Wireless Setup. Touch something metal such as the printer frame before you purchased the optional internal wireless print server separately and have already installed the printer: a Click Start Œ Programs or All Programs Œ Lexmark 3500-4500 Series. c Follow ...
Getting Started
Page 19
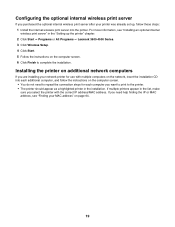
... the network, insert the installation CD into the printer. Configuring the optional internal wireless print server If you purchased the optional internal wireless print server after your printer was already set up the printer" chapter. 2 Click Start ΠPrograms or All Programs ΠLexmark 3500-4500 Series. 3 Click Wireless Setup. 4 Click Start. 5 Follow the instructions on page...
... the network, insert the installation CD into the printer. Configuring the optional internal wireless print server If you purchased the optional internal wireless print server after your printer was already set up the printer" chapter. 2 Click Start ΠPrograms or All Programs ΠLexmark 3500-4500 Series. 3 Click Wireless Setup. 4 Click Start. 5 Follow the instructions on page...
Getting Started
Page 20
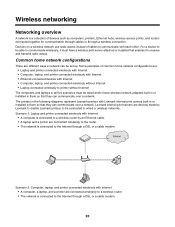
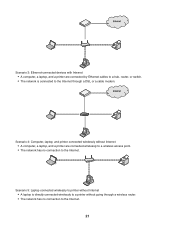
... or wireless networks. Scenario 2: Computer, laptop, and printer connected wirelessly with Internet • A computer, a laptop, and a printer are connected wirelessly to a wireless router. • The network is connected to communicate wirelessly, it to communicate with Internet • Computer, laptop, and printer connected wirelessly without Internet • Laptop connected wirelessly to the Internet through a wireless connection. Lexmark internal print servers are connected wirelessly to...
... or wireless networks. Scenario 2: Computer, laptop, and printer connected wirelessly with Internet • A computer, a laptop, and a printer are connected wirelessly to a wireless router. • The network is connected to communicate wirelessly, it to communicate with Internet • Computer, laptop, and printer connected wirelessly without Internet • Laptop connected wirelessly to the Internet through a wireless connection. Lexmark internal print servers are connected wirelessly to...
Getting Started
Page 21
... the Internet. Scenario 3: Ethernet-connected devices with Internet • A computer, a laptop, and a printer are connected wirelessly to a wireless access point. • The network has no connection to the Internet. 21 Scenario 5: Laptop connected wirelessly to printer without Internet • A computer, a laptop, and a printer are connected by Ethernet cables to a hub, router, or switch. • The network...
... the Internet. Scenario 3: Ethernet-connected devices with Internet • A computer, a laptop, and a printer are connected wirelessly to a wireless access point. • The network has no connection to the Internet. 21 Scenario 5: Laptop connected wirelessly to printer without Internet • A computer, a laptop, and a printer are connected by Ethernet cables to a hub, router, or switch. • The network...
Getting Started
Page 22
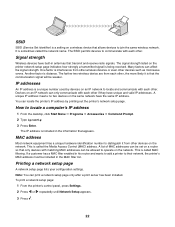
... If a customer has a MAC filter enabled in his router and wants to add a printer to their network, the printer's MAC address must be weaker. SSID SSID (Service Set identifier) is a setting on a wireless device that allows devices to distinguish it is that the communication signal will be included in ...be set on a router so that only devices with matching MAC addresses can locate the printer's IP address by devices on the network. Note: You can affect the signal strength. Signal strength Wireless devices have unique and valid IP addresses. One factor is a unique number used by ...
... If a customer has a MAC filter enabled in his router and wants to add a printer to their network, the printer's MAC address must be weaker. SSID SSID (Service Set identifier) is a setting on a wireless device that allows devices to distinguish it is that the communication signal will be included in ...be set on a router so that only devices with matching MAC addresses can locate the printer's IP address by devices on the network. Note: You can affect the signal strength. Signal strength Wireless devices have unique and valid IP addresses. One factor is a unique number used by ...
Getting Started
Page 23
... two modes: infrastructure or ad hoc. Types of wireless networks Networks can communicate properly with your computer can operate in this type of network must also be set up a network in infrastructure mode. appears. If the printer does not respond: a Print a setup page. Lexmark recommends setting up in infrastructure mode using the installation...
... two modes: infrastructure or ad hoc. Types of wireless networks Networks can communicate properly with your computer can operate in this type of network must also be set up a network in infrastructure mode. appears. If the printer does not respond: a Print a setup page. Lexmark recommends setting up in infrastructure mode using the installation...
Getting Started
Page 25
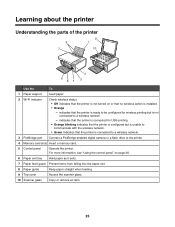
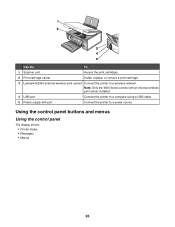
...; Orange blinking indicates that the printer is not connected to the printer. 4 Memory card slots Insert a memory card. 5 Control panel Operate the printer. indicates that the printer is connected for wireless printing but is unable to communicate with the wireless network. • Green indicates that the printer is configured but is connected to a wireless network. 3 PictBridge port Connect...
...; Orange blinking indicates that the printer is not connected to the printer. 4 Memory card slots Insert a memory card. 5 Control panel Operate the printer. indicates that the printer is connected for wireless printing but is unable to communicate with the wireless network. • Green indicates that the printer is configured but is connected to a wireless network. 3 PictBridge port Connect...
Getting Started
Page 26
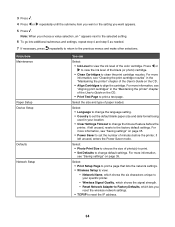
Using the control panel buttons and menus Using the control panel The display shows: • Printer status • Messages • Menus 26 Note: Only the 4500 Series comes with an internal wireless print server installed. 4 USB port Connect the printer to a computer using a USB cable. 5 Power supply with port Connect the printer to a wireless network. Use the To 1 Scanner unit Access the print cartridges. 2 Print cartridge carrier Install, replace, or remove a print cartridge. 3 Lexmark N2050 (internal wireless print server) Connect the printer to a power source.
Using the control panel buttons and menus Using the control panel The display shows: • Printer status • Messages • Menus 26 Note: Only the 4500 Series comes with an internal wireless print server installed. 4 USB port Connect the printer to a computer using a USB cable. 5 Power supply with port Connect the printer to a wireless network. Use the To 1 Scanner unit Access the print cartridges. 2 Print cartridge carrier Install, replace, or remove a print cartridge. 3 Lexmark N2050 (internal wireless print server) Connect the printer to a power source.
Getting Started
Page 34
... to print. • Set Defaults to change the timeout feature before the printer, if left unused, resets to print a test page. Select: • Print Setup Page to print a page that lists the network settings. • Wireless Setup to reset the IP address. 34 For more information, see "Saving settings... and date format being used in the "Maintaining the printer" chapter of paper loaded. Select the size and type of the User's Guide on page 35. • Power Saver to view the ink level of the color cartridge. Wireless Signal Quality, which shows the six characters unique to...
... to print. • Set Defaults to change the timeout feature before the printer, if left unused, resets to print a test page. Select: • Print Setup Page to print a page that lists the network settings. • Wireless Setup to reset the IP address. 34 For more information, see "Saving settings... and date format being used in the "Maintaining the printer" chapter of paper loaded. Select the size and type of the User's Guide on page 35. • Power Saver to view the ink level of the color cartridge. Wireless Signal Quality, which shows the six characters unique to...
Getting Started
Page 45
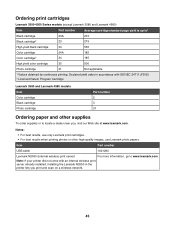
... printing. Item Part number USB cable 1021294 Lexmark N2050 (Internal wireless print server) For more information, go to locate a dealer near you print and scan on a wireless network. 45 Declared yield value in accordance with an internal wireless print server already installed, installing the Lexmark N2050 in the printer lets you , visit our Web site at...
... printing. Item Part number USB cable 1021294 Lexmark N2050 (Internal wireless print server) For more information, go to locate a dealer near you print and scan on a wireless network. 45 Declared yield value in accordance with an internal wireless print server already installed, installing the Lexmark N2050 in the printer lets you , visit our Web site at...
Getting Started
Page 48
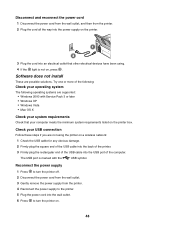
Reconnect the power supply 1 Press to turn the printer on the printer box. The USB port is not on a wireless network: 1 Check the USB cable for any obvious damage. 2 Firmly plug the square end of the USB cable into the back of the printer. 3 Firmly plug the rectangular end of the USB cable ...into the wall outlet. 6 Press to the printer. 5 Plug the power cord into...
Reconnect the power supply 1 Press to turn the printer on the printer box. The USB port is not on a wireless network: 1 Check the USB cable for any obvious damage. 2 Firmly plug the square end of the USB cable into the back of the printer. 3 Firmly plug the rectangular end of the USB cable ...into the wall outlet. 6 Press to the printer. 5 Plug the power cord into...
Getting Started
Page 50
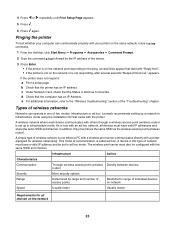
... Make sure the camera is PictBridge-enabled. Reconnect power supply 1 Press to turn the printer on. Remove memory cards Remove any memory cards from the printer. 4 Reconnect the power supply to the printer. 5 Plug the power cord into the wall outlet. 6 Press to the PictBridge port... 3 Gently remove the power supply from the printer. Check messages If an error message appears on the display, see "Uninstalling and reinstalling the software" on page 66. Cannot print from camera Enable PictBridge printing on the CD. Wireless troubleshooting Printing a network setup page A network setup...
... Make sure the camera is PictBridge-enabled. Reconnect power supply 1 Press to turn the printer on. Remove memory cards Remove any memory cards from the printer. 4 Reconnect the power supply to the printer. 5 Plug the power cord into the wall outlet. 6 Press to the PictBridge port... 3 Gently remove the power supply from the printer. Check messages If an error message appears on the display, see "Uninstalling and reinstalling the software" on page 66. Cannot print from camera Enable PictBridge printing on the CD. Wireless troubleshooting Printing a network setup page A network setup...
Getting Started
Page 58
... XXXX Series, where XXXX is the model series number of your wireless access point (wireless router) to these devices. b Click Apply. Move your wireless access point (wireless router) is not positioned too closely to minimize interference There may be temporary interference from step 4. Wireless printer is selected instead: a Select the port name from other devices such...
... XXXX Series, where XXXX is the model series number of your wireless access point (wireless router) to these devices. b Click Apply. Move your wireless access point (wireless router) is not positioned too closely to minimize interference There may be temporary interference from step 4. Wireless printer is selected instead: a Select the port name from other devices such...
Getting Started
Page 63
... a memory card that the type of the following: Select the printer on your wireless network Windows users only If you must select your wireless network printer. 1 Click Start ΠPrograms or All Programs ΠLexmark 3500-4500 Series. 2 From the list shown, select the printer on your wireless network. 3 Insert the memory card in the correct slot...
... a memory card that the type of the following: Select the printer on your wireless network Windows users only If you must select your wireless network printer. 1 Click Start ΠPrograms or All Programs ΠLexmark 3500-4500 Series. 2 From the list shown, select the printer on your wireless network. 3 Insert the memory card in the correct slot...


