
Getting Started
Page 3
... for wireless printing 15 Setting up the printer using a USB cable...17 Installing an optional internal wireless print server 17 Configuring the optional internal wireless print server 19 Installing the printer on additional network computers 19 Wireless networking...20 Networking overview...20 ......31 Using the PictBridge menu ...32 Using the Settings menu ...33 Saving settings ...35 Learning about the software 37 Using the printer software...37 Using the Lexmark Imaging Studio...37 Using the Solution Center...38 Using Printing Preferences...40 Opening Printing Preferences ...40 Using the...
... for wireless printing 15 Setting up the printer using a USB cable...17 Installing an optional internal wireless print server 17 Configuring the optional internal wireless print server 19 Installing the printer on additional network computers 19 Wireless networking...20 Networking overview...20 ......31 Using the PictBridge menu ...32 Using the Settings menu ...33 Saving settings ...35 Learning about the software 37 Using the printer software...37 Using the Lexmark Imaging Studio...37 Using the Solution Center...38 Using Printing Preferences...40 Opening Printing Preferences ...40 Using the...
Getting Started
Page 4
...other supplies...45 Troubleshooting...47 Setup troubleshooting...47 Incorrect language appears on the display 47 Power button is not lit ...47 Software does not install ...48 Page does not print ...49 Cannot print from digital camera using PictBridge 50 Wireless troubleshooting...50 Printing a network ...is no longer working...58 Photos do not transfer from a memory card across a wireless network 63 Changing wireless settings after installation 64 Finding your MAC address...64 Resetting to factory default settings 65 Resetting an internal wireless print server to factory default settings ...
...other supplies...45 Troubleshooting...47 Setup troubleshooting...47 Incorrect language appears on the display 47 Power button is not lit ...47 Software does not install ...48 Page does not print ...49 Cannot print from digital camera using PictBridge 50 Wireless troubleshooting...50 Printing a network ...is no longer working...58 Photos do not transfer from a memory card across a wireless network 63 Changing wireless settings after installation 64 Finding your MAC address...64 Resetting to factory default settings 65 Resetting an internal wireless print server to factory default settings ...
Getting Started
Page 6
...-4500 Series. • Printing 2 Click User's Guide. • Working with the other information such as: will be installed. • Using the software (on the Lexmark Web site at www.lexmark.com. It installs with photos If the link to the User's Guide is not on your desktop, • Scanning (if supported by your printer) follow...
...-4500 Series. • Printing 2 Click User's Guide. • Working with the other information such as: will be installed. • Using the software (on the Lexmark Web site at www.lexmark.com. It installs with photos If the link to the User's Guide is not on your desktop, • Scanning (if supported by your printer) follow...
Getting Started
Page 10
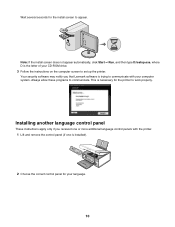
.... 1 Lift and remove the control panel (if one or more additional language control panels with your language. 10 Wait several seconds for your computer system. Installing another language control panel These instructions apply only if you that Lexmark software is installed). 2 Choose the correct control panel for the...
.... 1 Lift and remove the control panel (if one or more additional language control panels with your language. 10 Wait several seconds for your computer system. Installing another language control panel These instructions apply only if you that Lexmark software is installed). 2 Choose the correct control panel for the...
Getting Started
Page 47
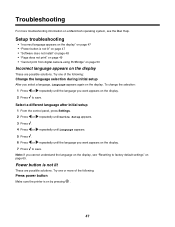
... until the language you cannot understand the language on the display, see the Mac Help. Power button is not lit" on page 47 • "Software does not install" on page 48 • "Page does not print" on page 49 • "Cannot print from digital camera using PictBridge" on page 50 Incorrect language...
... until the language you cannot understand the language on the display, see the Mac Help. Power button is not lit" on page 47 • "Software does not install" on page 48 • "Page does not print" on page 49 • "Cannot print from digital camera using PictBridge" on page 50 Incorrect language...
Getting Started
Page 48
.... 4 Reconnect the power supply to the printer. 5 Plug the power cord into the wall outlet. 6 Press to turn the printer on the printer box. Software does not install These are not using . 4 If the light is marked with Service Pack 3 or later • Windows XP • Windows Vista • Mac OS X Check...
.... 4 Reconnect the power supply to the printer. 5 Plug the power cord into the wall outlet. 6 Press to turn the printer on the printer box. Software does not install These are not using . 4 If the light is marked with Service Pack 3 or later • Windows XP • Windows Vista • Mac OS X Check...
Getting Started
Page 49
... reinstall it. Check power If the light is not on, see "Power button is displayed, see "Uninstalling and reinstalling the software" on page 47. Check ink Check the ink levels, and install new print cartridges if necessary. Page does not print These are possible solutions. For more of the following: Check messages...
... reinstall it. Check power If the light is not on, see "Power button is displayed, see "Uninstalling and reinstalling the software" on page 47. Check ink Check the ink levels, and install new print cartridges if necessary. Page does not print These are possible solutions. For more of the following: Check messages...
Getting Started
Page 50
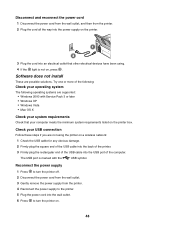
Uninstall and reinstall software Uninstall the printer software, and then reinstall it. Check USB cable Use only the USB cable that came with the camera. For ... on . Cannot print from the printer. Check messages If an error message appears on the display, see "Uninstalling and reinstalling the software" on the CD. For more of the printer, press Settings. 2 Press or repeatedly until Network Setup appears. 50 Remove memory ... correct USB mode. Note: You can print a network setup page only after a print server has been installed. Make sure the camera is PictBridge-enabled.
Uninstall and reinstall software Uninstall the printer software, and then reinstall it. Check USB cable Use only the USB cable that came with the camera. For ... on . Cannot print from the printer. Check messages If an error message appears on the display, see "Uninstalling and reinstalling the software" on the CD. For more of the printer, press Settings. 2 Press or repeatedly until Network Setup appears. 50 Remove memory ... correct USB mode. Note: You can print a network setup page only after a print server has been installed. Make sure the camera is PictBridge-enabled.
Getting Started
Page 51
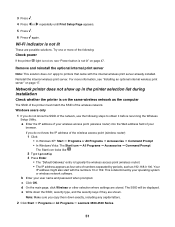
... point (wireless router) into the Web address field of your operating system or wireless network software. Remove and reinstall the optional internal print server Note: This solution does not apply to...down exactly, including any capital letters. 2 Click Start Œ Programs or All Programs Œ Lexmark 3500-4500 Series. 51 Note: Make sure you do not know the SSID of the following ...the wireless network. Network printer does not show up in the printer selection list during installation Check whether the printer is typically the wireless access point (wireless router). • ...
... point (wireless router) into the Web address field of your operating system or wireless network software. Remove and reinstall the optional internal print server Note: This solution does not apply to...down exactly, including any capital letters. 2 Click Start Œ Programs or All Programs Œ Lexmark 3500-4500 Series. 51 Note: Make sure you do not know the SSID of the following ...the wireless network. Network printer does not show up in the printer selection list during installation Check whether the printer is typically the wireless access point (wireless router). • ...
Getting Started
Page 53
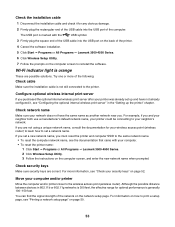
..." chapter. Move your neighbor's network. You can find the signal strength of the following: Check cable Make sure the installation cable is not still connected to reinstall the software. Check network name Make sure your computer. • To reset the printer name: 1 Click Start Œ Programs ...symbol. 3 Firmly plug the square end of the USB cable into the USB port of the printer. 4 Cancel the software installation. 5 Click Start Œ Programs or All Programs Œ Lexmark 3500-4500 Series. 6 Click Wireless Setup Utility. 7 Follow the prompts on page 50. 53 Try one or more ...
..." chapter. Move your neighbor's network. You can find the signal strength of the following: Check cable Make sure the installation cable is not still connected to reinstall the software. Check network name Make sure your computer. • To reset the printer name: 1 Click Start Œ Programs ...symbol. 3 Firmly plug the square end of the USB cable into the USB port of the printer. 4 Cancel the software installation. 5 Click Start Œ Programs or All Programs Œ Lexmark 3500-4500 Series. 6 Click Wireless Setup Utility. 7 Follow the prompts on page 50. 53 Try one or more ...
Getting Started
Page 64
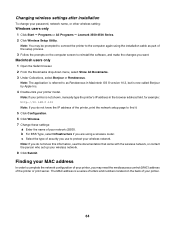
...is referred to as part of the setup process. 3 Follow the prompts on the back of your printer model. Changing wireless settings after installation To change your printer, you may be prompted to connect the printer to the computer again using a wireless router. Finding your MAC address... Windows users only 1 Click Start ΠPrograms or All Programs ΠLexmark 3500-4500 Series. 2 Click Wireless Setup Utility. Note: If you want. c Select the type of security you use to reinstall the software, and make the changes you do not know this information, see the documentation that...
...is referred to as part of the setup process. 3 Follow the prompts on the back of your printer model. Changing wireless settings after installation To change your printer, you may be prompted to connect the printer to the computer again using a wireless router. Finding your MAC address... Windows users only 1 Click Start ΠPrograms or All Programs ΠLexmark 3500-4500 Series. 2 Click Wireless Setup Utility. Note: If you want. c Select the type of security you use to reinstall the software, and make the changes you do not know this information, see the documentation that...
Getting Started
Page 66
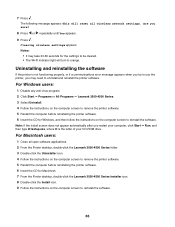
... icon. 4 Follow the instructions on the computer screen to remove the printer software. 5 Restart the computer before reinstalling the printer software. 6 Insert the CD for Macintosh. 7 From the Finder desktop, double-click the Lexmark 3500-4500 Series Installer icon. 8 Double-click the Install icon. 9 Follow the instructions on the computer screen to orange. For Windows...
... icon. 4 Follow the instructions on the computer screen to remove the printer software. 5 Restart the computer before reinstalling the printer software. 6 Insert the CD for Macintosh. 7 From the Finder desktop, double-click the Lexmark 3500-4500 Series Installer icon. 8 Double-click the Install icon. 9 Follow the instructions on the computer screen to orange. For Windows...

Getting Started
Page 67
... Note: If you want to download, and then follow the directions on the computer screen. If the software still does not install correctly, visit our Web site at www.lexmark.com to check for the latest software. 1 In all countries or regions except the United States, select your country or region. 2 Click the links...
... Note: If you want to download, and then follow the directions on the computer screen. If the software still does not install correctly, visit our Web site at www.lexmark.com to check for the latest software. 1 In all countries or regions except the United States, select your country or region. 2 Click the links...
Getting Started
Page 70
...to it when running the wireless setup. For more information about passwords (security keys), see the documentation for your wireless settings. You must use that software to learn how to create an ad hoc network. 7 Select the Use Windows to -computer (ad hoc) network; b Click the Remove button... Lexmark 3500-4500 Series. 22 Click Wireless Setup Utility. a Click the network to be prompted to connect the printer to set up the ad hoc wireless network. wireless access points are not used. Note: You may take a few minutes for that software to the computer again using the installation ...
...to it when running the wireless setup. For more information about passwords (security keys), see the documentation for your wireless settings. You must use that software to learn how to create an ad hoc network. 7 Select the Use Windows to -computer (ad hoc) network; b Click the Remove button... Lexmark 3500-4500 Series. 22 Click Wireless Setup Utility. a Click the network to be prompted to connect the printer to set up the ad hoc wireless network. wireless access points are not used. Note: You may take a few minutes for that software to the computer again using the installation ...
Getting Started
Page 72
...to stop working after delivering a fixed amount of ink. All rights reserved. End-user license agreement* Opening this package, installing the printing device software, or using the print cartridges inside are not subject to this statement may be used cartridge must be made to the information... OR FITNESS FOR A PARTICULAR PURPOSE. Evaluation and verification of operation in the United States and/or other trademarks are periodically made at www.lexmark.com. * Products within the XX80 Series (including but not limited to Models X1380, X1480, X1580, X2580, X3580, and X4580) are...
...to stop working after delivering a fixed amount of ink. All rights reserved. End-user license agreement* Opening this package, installing the printing device software, or using the print cartridges inside are not subject to this statement may be used cartridge must be made to the information... OR FITNESS FOR A PARTICULAR PURPOSE. Evaluation and verification of operation in the United States and/or other trademarks are periodically made at www.lexmark.com. * Products within the XX80 Series (including but not limited to Models X1380, X1480, X1580, X2580, X3580, and X4580) are...

User's Guide
Page 2
... set up this product or the manufacturer's authorized replacement power supply and power supply cord. The safety features of specific Lexmark components. Lexmark is near the product and easily accessible. Operating system notice All features and functions are operating system-dependent. SAVE THESE ... supply and power supply cord provided with the printer software. For complete descriptions: • Windows users-See the User's Guide. • Macintosh users-If your product supports Macintosh, see the Mac Help installed with this product or make any electrical or cabling connections...
... set up this product or the manufacturer's authorized replacement power supply and power supply cord. The safety features of specific Lexmark components. Lexmark is near the product and easily accessible. Operating system notice All features and functions are operating system-dependent. SAVE THESE ... supply and power supply cord provided with the printer software. For complete descriptions: • Windows users-See the User's Guide. • Macintosh users-If your product supports Macintosh, see the Mac Help installed with this product or make any electrical or cabling connections...
User's Guide
Page 3
... about the printer 9 Setting up the printer 12 Checking the box contents...12 Installing another language control panel 13 Networking the printer 14 Installing the printer on a network...14 Installing an internal wireless print server 14 Finding your MAC address...15 Learning about the printer......21 Using the PictBridge menu ...22 Using the Settings menu ...23 Saving settings ...25 Learning about the software 27 Using the printer software...27 Using the Lexmark Imaging Studio...27 Using the Solution Center...28 Using Printing Preferences...30 Opening Printing Preferences ...30 Using the ...
... about the printer 9 Setting up the printer 12 Checking the box contents...12 Installing another language control panel 13 Networking the printer 14 Installing the printer on a network...14 Installing an internal wireless print server 14 Finding your MAC address...15 Learning about the printer......21 Using the PictBridge menu ...22 Using the Settings menu ...23 Saving settings ...25 Learning about the software 27 Using the printer software...27 Using the Lexmark Imaging Studio...27 Using the Solution Center...28 Using Printing Preferences...30 Opening Printing Preferences ...30 Using the ...
User's Guide
Page 5
... newspapers 66 Customizing scan settings using the computer 67 Faxing...68 Sending a fax using the software...68 Receiving a fax automatically...69 Maintaining the printer 70 Changing print cartridges...70 Removing a used print cartridge...70 Installing print cartridges...70 Achieving better print quality...72 Improving print quality ...72 Aligning print cartridges ...... print cartridges...74 Cleaning the scanner glass...74 Ordering supplies...74 Ordering print cartridges...74 Ordering paper and other supplies ...75 Using genuine Lexmark print cartridges 75 Refilling a print cartridge...76 5
... newspapers 66 Customizing scan settings using the computer 67 Faxing...68 Sending a fax using the software...68 Receiving a fax automatically...69 Maintaining the printer 70 Changing print cartridges...70 Removing a used print cartridge...70 Installing print cartridges...70 Achieving better print quality...72 Improving print quality ...72 Aligning print cartridges ...... print cartridges...74 Cleaning the scanner glass...74 Ordering supplies...74 Ordering print cartridges...74 Ordering paper and other supplies ...75 Using genuine Lexmark print cartridges 75 Refilling a print cartridge...76 5
User's Guide
Page 6
Recycling Lexmark products...76 Troubleshooting...77 Setup troubleshooting...77 Incorrect language appears on the display 77 Power button is not lit ...78 Software does not install ...78 Page does not print ...79 Cannot print from digital camera using PictBridge 80 Print troubleshooting...81 Partial 4 x 6 in. (10 x 15 cm) photo prints when ...
Recycling Lexmark products...76 Troubleshooting...77 Setup troubleshooting...77 Incorrect language appears on the display 77 Power button is not lit ...78 Software does not install ...78 Page does not print ...79 Cannot print from digital camera using PictBridge 80 Print troubleshooting...81 Partial 4 x 6 in. (10 x 15 cm) photo prints when ...
User's Guide
Page 12
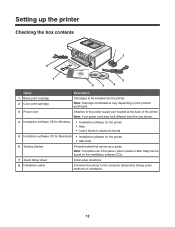
... some methods of the printer. Note: Your power cord may look different from the one shown. 4 Installation software CD for Windows • Installation software for the printer • Help • User's Guide in electronic format 5 Installation software CD for Macintosh • Installation software for the printer • Mac Help 6 Getting Started Printed booklet that serves as a guide. Setting...
... some methods of the printer. Note: Your power cord may look different from the one shown. 4 Installation software CD for Windows • Installation software for the printer • Help • User's Guide in electronic format 5 Installation software CD for Macintosh • Installation software for the printer • Mac Help 6 Getting Started Printed booklet that serves as a guide. Setting...


