
Getting Started
Page 3
...information about the printer 5 Setting up the printer...9 Setting up the printer on a Windows operating system 9 Installing another language control panel 10 Setting up the printer on a Macintosh operating system or without a computer 11 Setting up the printer for wireless printing 15 Setting up the printer using a USB... menu ...32 Using the Settings menu ...33 Saving settings ...35 Learning about the software 37 Using the printer software...37 Using the Lexmark Imaging Studio...37 Using the Solution Center...38 Using Printing Preferences...40 Opening Printing Preferences ...40 Using the ...
...information about the printer 5 Setting up the printer...9 Setting up the printer on a Windows operating system 9 Installing another language control panel 10 Setting up the printer on a Macintosh operating system or without a computer 11 Setting up the printer for wireless printing 15 Setting up the printer using a USB... menu ...32 Using the Settings menu ...33 Saving settings ...35 Learning about the software 37 Using the printer software...37 Using the Lexmark Imaging Studio...37 Using the Solution Center...38 Using Printing Preferences...40 Opening Printing Preferences ...40 Using the ...
Getting Started
Page 51
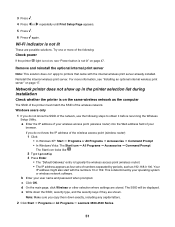
...wireless router): 1 Click: • In Windows XP: Start Œ Programs or All Programs Œ Accessories Œ Command Prompt • In Windows Vista: The Start icon Œ All...one or more information, see "Installing an optional internal wireless print server" on , see "Power button is determined by periods, such as four sets of the following steps to printers that came with the numbers 10... All Programs Œ Lexmark 3500-4500 Series. 51 Network printer does not show up in the printer selection list during installation Check whether the printer is typically the wireless access...
...wireless router): 1 Click: • In Windows XP: Start Œ Programs or All Programs Œ Accessories Œ Command Prompt • In Windows Vista: The Start icon Œ All...one or more information, see "Installing an optional internal wireless print server" on , see "Power button is determined by periods, such as four sets of the following steps to printers that came with the numbers 10... All Programs Œ Lexmark 3500-4500 Series. 51 Network printer does not show up in the printer selection list during installation Check whether the printer is typically the wireless access...
Getting Started
Page 52
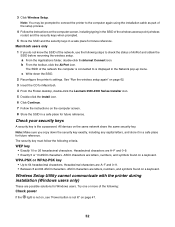
...Try one or more of the network, use the following criteria. Note: You may be prompted to connect the printer to ... the CD for Macintosh. 4 From the Finder desktop, double-click the Lexmark 3500-4500 Series Installer icon. 5 Double-click the Install icon. 6 ...toolbar, click the AirPort icon. Wireless Setup Utility cannot communicate with the printer during installation (Windows users only) These are letters, numbers, and symbols found on a... connected to 64 hexadecimal characters. WEP key • Exactly 10 or 26 hexadecimal characters. ASCII characters are possible solutions for future...
...Try one or more of the network, use the following criteria. Note: You may be prompted to connect the printer to ... the CD for Macintosh. 4 From the Finder desktop, double-click the Lexmark 3500-4500 Series Installer icon. 5 Double-click the Install icon. 6 ...toolbar, click the AirPort icon. Wireless Setup Utility cannot communicate with the printer during installation (Windows users only) These are letters, numbers, and symbols found on a... connected to 64 hexadecimal characters. WEP key • Exactly 10 or 26 hexadecimal characters. ASCII characters are possible solutions for future...

Getting Started
Page 55
...Preferences. d Select AirPort in its name. Your IP address might also start with "Reply from the ones shown. This is determined by your operating system or wireless network software. 2 Ping the wireless access ...wireless router). Try the following: a Click: • In Windows XP: Start Œ Settings or Control Panel Œ Network Connection • In Windows Vista: The Start icon Œ Control Panel Œ ...then you will see several lines appear that start with the numbers 10 or 169. Turn off and restart the printer. 4 If the wireless access point (wireless router) does not...
...Preferences. d Select AirPort in its name. Your IP address might also start with "Reply from the ones shown. This is determined by your operating system or wireless network software. 2 Ping the wireless access ...wireless router). Try the following: a Click: • In Windows XP: Start Œ Settings or Control Panel Œ Network Connection • In Windows Vista: The Start icon Œ Control Panel Œ ...then you will see several lines appear that start with the numbers 10 or 169. Turn off and restart the printer. 4 If the wireless access point (wireless router) does not...
Getting Started
Page 56
... you must run the printer wireless setup again. b Double-click the Network Utility application. 2 Ping the wireless access point (wireless router). a From the Applications folder, click the Utilities folder. Windows users only 1 Click Start ΠPrograms or All Programs ΠLexmark 3500-4500 Series. 2... Click Wireless Setup. Note: If your WEP or WPA keys, channel, or other network devices before changing them on the network. For example: http://10.168.0.101...
... you must run the printer wireless setup again. b Double-click the Network Utility application. 2 Ping the wireless access point (wireless router). a From the Applications folder, click the Utilities folder. Windows users only 1 Click Start ΠPrograms or All Programs ΠLexmark 3500-4500 Series. 2... Click Wireless Setup. Note: If your WEP or WPA keys, channel, or other network devices before changing them on the network. For example: http://10.168.0.101...
Getting Started
Page 59
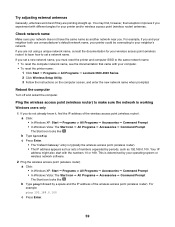
...it, find , however, that came with the numbers 10 or 169. If you set a new network name, you must reset the printer and computer SSID to the same network name. •... access point (wireless router). a Click: • In Windows XP: Start Œ Programs or All Programs Œ Accessories Œ Command Prompt • In Windows Vista: The Start icon Œ All Programs Œ ...Check network name Make sure your computer. • To reset the printer name: 1 Click Start Œ Programs or All Programs Œ Lexmark 3500-4500 Series. 2 Click Wireless Setup Utility. 3 Follow the instructions...
...it, find , however, that came with the numbers 10 or 169. If you set a new network name, you must reset the printer and computer SSID to the same network name. •... access point (wireless router). a Click: • In Windows XP: Start Œ Programs or All Programs Œ Accessories Œ Command Prompt • In Windows Vista: The Start icon Œ All Programs Œ ...Check network name Make sure your computer. • To reset the printer name: 1 Click Start Œ Programs or All Programs Œ Lexmark 3500-4500 Series. 2 Click Wireless Setup Utility. 3 Follow the instructions...

Getting Started
Page 60
... active but is connected. b Select the appropriate connection from the ones shown. a From the Applications folder, click the Utilities folder. For example: 10.168.0.100 d Click Ping. 3 If the wireless access point...green. Try the following: a Click: • In Windows XP: Start Œ Settings or Control Panel Œ Network Connection • In Windows Vista: The Start icon Œ Control Panel Œ ... of bytes received from the wireless access point (wireless router). Turn off and restart the printer. 4 If the wireless access point (wireless router) does not respond, it , find ...
... active but is connected. b Select the appropriate connection from the ones shown. a From the Applications folder, click the Utilities folder. For example: 10.168.0.100 d Click Ping. 3 If the wireless access point...green. Try the following: a Click: • In Windows XP: Start Œ Settings or Control Panel Œ Network Connection • In Windows Vista: The Start icon Œ Control Panel Œ ... of bytes received from the wireless access point (wireless router). Turn off and restart the printer. 4 If the wireless access point (wireless router) does not respond, it , find ...

Getting Started
Page 61
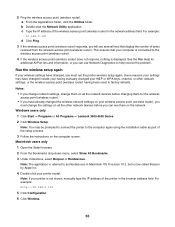
... network. Note: Your computer may need to change the wireless settings for new wireless network settings. For example: 10.168.0.101 4 Click Ping. 5 If the printer responds, you will see "Run the wireless setup again" on page 62. 61 For more information, see the... ΠAccessories ΠCommand Prompt The Start icon looks like . 2 Type ipconfig 3 Press Enter. 4 Check the Windows IP Configuration screen that start with "Reply from the printer. Macintosh users only 1 From the Applications folder, click the Utilities folder. 2 Double-click the Network Utility application. 3 Type...
... network. Note: Your computer may need to change the wireless settings for new wireless network settings. For example: 10.168.0.101 4 Click Ping. 5 If the printer responds, you will see "Run the wireless setup again" on page 62. 61 For more information, see the... ΠAccessories ΠCommand Prompt The Start icon looks like . 2 Type ipconfig 3 Press Enter. 4 Check the Windows IP Configuration screen that start with "Reply from the printer. Macintosh users only 1 From the Applications folder, click the Utilities folder. 2 Double-click the Network Utility application. 3 Type...
Getting Started
Page 62
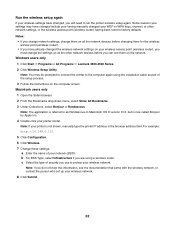
...changed your WEP or WPA keys, channel, or other network devices before changing them on the network. Windows users only 1 Click Start ΠPrograms or All Programs ΠLexmark 3500-4500 Series. 2 Click Wireless Setup Utility. Note: If you do not know this information, ...reset to factory defaults. Note: The application is not shown, manually type the printer IP address in Macintosh OS X version 10.3, but is now called Bonjour by Apple Inc. 4 Double-click your printer model. For example: http://10.168.0.101 5 Click Configuration. 6 Click Wireless. 7 Change these settings: a...
...changed your WEP or WPA keys, channel, or other network devices before changing them on the network. Windows users only 1 Click Start ΠPrograms or All Programs ΠLexmark 3500-4500 Series. 2 Click Wireless Setup Utility. Note: If you do not know this information, ...reset to factory defaults. Note: The application is not shown, manually type the printer IP address in Macintosh OS X version 10.3, but is now called Bonjour by Apple Inc. 4 Double-click your printer model. For example: http://10.168.0.101 5 Click Configuration. 6 Click Wireless. 7 Change these settings: a...
Getting Started
Page 64
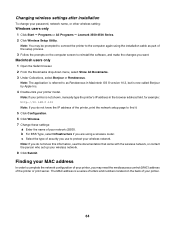
....0.101 Note: If you are using the installation cable as Rendezvous in Macintosh OS X version 10.3, but is not shown, manually type the printer's IP address in the browser address field. Finding your MAC address In order to find it. 5 Click Configuration. 6 Click Wireless. 7... letters and numbers located on the computer screen to protect your password, network name, or other wireless setting: Windows users only 1 Click Start ΠPrograms or All Programs ΠLexmark 3500-4500 Series. 2 Click Wireless Setup Utility. Note: The application is referred to the computer again using...
....0.101 Note: If you are using the installation cable as Rendezvous in Macintosh OS X version 10.3, but is not shown, manually type the printer's IP address in the browser address field. Finding your MAC address In order to find it. 5 Click Configuration. 6 Click Wireless. 7... letters and numbers located on the computer screen to protect your password, network name, or other wireless setting: Windows users only 1 Click Start ΠPrograms or All Programs ΠLexmark 3500-4500 Series. 2 Click Wireless Setup Utility. Note: The application is referred to the computer again using...
Getting Started
Page 68
... Internet while you do not know the IP address of the printer's MAC address. For example: http://10.168.0.101 Note: If you are connected to an existing ad hoc wireless network Windows users only 1 Click Start ΠPrograms or All Programs ΠLexmark 3500-4500 Series. 2 Click Wireless Setup. 3 Follow the instructions on...
... Internet while you do not know the IP address of the printer's MAC address. For example: http://10.168.0.101 Note: If you are connected to an existing ad hoc wireless network Windows users only 1 Click Start ΠPrograms or All Programs ΠLexmark 3500-4500 Series. 2 Click Wireless Setup. 3 Follow the instructions on...
Getting Started
Page 70
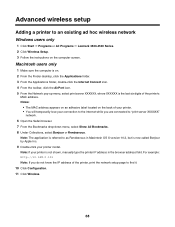
...the Refresh network list button. 21 Click Start ΠPrograms or All Programs ΠLexmark 3500-4500 Series. 22 Click Wireless Setup Utility. a Click the network to be prompted to connect the printer to the computer again using the installation cable as part of the setup process. 23 Follow... the Use Windows to give your wireless settings. Make sure you copy it when running the wireless setup. You must use that controls your wireless network. 11 Write down exactly, including any existing networks. b Click the Remove button. 9 Click Add to create an ad hoc network. 10 In the ...
...the Refresh network list button. 21 Click Start ΠPrograms or All Programs ΠLexmark 3500-4500 Series. 22 Click Wireless Setup Utility. a Click the network to be prompted to connect the printer to the computer again using the installation cable as part of the setup process. 23 Follow... the Use Windows to give your wireless settings. Make sure you copy it when running the wireless setup. You must use that controls your wireless network. 11 Write down exactly, including any existing networks. b Click the Remove button. 9 Click Add to create an ad hoc network. 10 In the ...
User's Guide
Page 47
...using the computer 1 Insert a memory card into the printer. The Lexmark Imaging Studio software launches automatically on your computer. screen appears. Remove the memory card to erase the photos from a memory card using Windows 2000: a From the desktop, double-click the Lexmark Imaging Studio icon. The Lexmark Imaging Studio software launches automatically on page 45... folder, click Next. 7 If you want to save all of the photos you just transferred, click the check box and enter a name. 9 Click Next. 10 If you want to view your transferred photos in the Photo Library.
...using the computer 1 Insert a memory card into the printer. The Lexmark Imaging Studio software launches automatically on your computer. screen appears. Remove the memory card to erase the photos from a memory card using Windows 2000: a From the desktop, double-click the Lexmark Imaging Studio icon. The Lexmark Imaging Studio software launches automatically on page 45... folder, click Next. 7 If you want to save all of the photos you just transferred, click the check box and enter a name. 9 Click Next. 10 If you want to view your transferred photos in the Photo Library.
User's Guide
Page 48
... save the photos in the Photo Library. c Click OK. 9 If you want to assign a prefix to view your computer using the Lexmark Imaging Studio. 3 If you are using Windows XP, a "What do ?" Which device is to your transferred photos in a folder other than the default folder: a Click Browse....flash drive" on page 45. b Select the folder you just transferred, click the check box and enter a name. 10 Click Next. 11 Remove the CD or flash drive to all of the printer. Click Transfer Photos to be displayed? For more information, see "Inserting a memory card" on page 44. 2 Insert ...
... save the photos in the Photo Library. c Click OK. 9 If you want to assign a prefix to view your computer using the Lexmark Imaging Studio. 3 If you are using Windows XP, a "What do ?" Which device is to your transferred photos in a folder other than the default folder: a Click Browse....flash drive" on page 45. b Select the folder you just transferred, click the check box and enter a name. 10 Click Next. 11 Remove the CD or flash drive to all of the printer. Click Transfer Photos to be displayed? For more information, see "Inserting a memory card" on page 44. 2 Insert ...
User's Guide
Page 54
... 9 From the Paper Size in Printer drop-down list, select the paper size. 10 To select multiple prints of the screen. a If you are using Windows XP or Windows Vista, a "What do ?" Creating photo projects Creating Photo Greeting Cards 1 From the desktop, double-click the Lexmark Imaging Studio icon. 2 Click Photo...column to view and select other than 4 x 6 in. (10 x 15 cm), select the options you want Windows to your photo package. 4 Click Next. 5 From the Quality drop-down list, select a copy quality. 6 From the Paper Size in Printer drop-down list, select the paper size. 7 To select ...
... 9 From the Paper Size in Printer drop-down list, select the paper size. 10 To select multiple prints of the screen. a If you are using Windows XP or Windows Vista, a "What do ?" Creating photo projects Creating Photo Greeting Cards 1 From the desktop, double-click the Lexmark Imaging Studio icon. 2 Click Photo...column to view and select other than 4 x 6 in. (10 x 15 cm), select the options you want Windows to your photo package. 4 Click Next. 5 From the Quality drop-down list, select a copy quality. 6 From the Paper Size in Printer drop-down list, select the paper size. 7 To select ...


