
Getting Started
Page 3
...server 17 Configuring the optional internal wireless print server 19 Installing the printer on additional network computers 19 Wireless networking...20 Networking overview...20 Learning about the printer 25 Understanding the parts of the printer 25 Using the control panel buttons and menus 26 ......31 Using the PictBridge menu ...32 Using the Settings menu ...33 Saving settings ...35 Learning about the software 37 Using the printer software...37 Using the Lexmark Imaging Studio...37 Using the Solution Center...38 Using Printing Preferences...40 Opening Printing Preferences ...40 Using the ...
...server 17 Configuring the optional internal wireless print server 19 Installing the printer on additional network computers 19 Wireless networking...20 Networking overview...20 Learning about the printer 25 Understanding the parts of the printer 25 Using the control panel buttons and menus 26 ......31 Using the PictBridge menu ...32 Using the Settings menu ...33 Saving settings ...35 Learning about the software 37 Using the printer software...37 Using the Lexmark Imaging Studio...37 Using the Solution Center...38 Using Printing Preferences...40 Opening Printing Preferences ...40 Using the ...
Getting Started
Page 4
... across a wireless network 63 Changing wireless settings after installation 64 Finding your MAC address...64 Resetting to factory default settings 65 Resetting an internal wireless print server to factory default settings 65 Uninstalling and reinstalling the software 66 Advanced wireless setup 68 Adding a printer to an existing ad hoc wireless network 68 Creating...
... across a wireless network 63 Changing wireless settings after installation 64 Finding your MAC address...64 Resetting to factory default settings 65 Resetting an internal wireless print server to factory default settings 65 Uninstalling and reinstalling the software 66 Advanced wireless setup 68 Adding a printer to an existing ad hoc wireless network 68 Creating...
Getting Started
Page 6
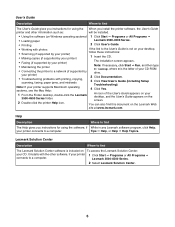
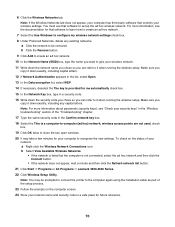
... find The Help gives you install the printer software, the User's Guide printer and other software, if your printer 1 Click Start Œ Programs or All Programs Œ connects to a computer. Lexmark 3500-4500 Series. 2 Select Lexmark Solution Center. 6 An icon of your CD-ROM • Connecting the printer to a network (if supported by your printer) The installation screen appears. • Maintaining...
... find The Help gives you install the printer software, the User's Guide printer and other software, if your printer 1 Click Start Œ Programs or All Programs Œ connects to a computer. Lexmark 3500-4500 Series. 2 Select Lexmark Solution Center. 6 An icon of your CD-ROM • Connecting the printer to a network (if supported by your printer) The installation screen appears. • Maintaining...
Getting Started
Page 10
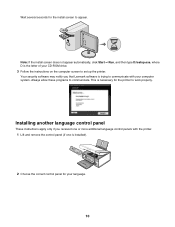
... instructions on the computer screen to communicate with the printer. 1 Lift and remove the control panel (if one is trying to set up the printer. Wait several seconds for the install screen to communicate. Installing another language control panel These instructions apply only if you that Lexmark software is installed). 2 Choose the correct control panel for your computer...
... instructions on the computer screen to communicate with the printer. 1 Lift and remove the control panel (if one is trying to set up the printer. Wait several seconds for the install screen to communicate. Installing another language control panel These instructions apply only if you that Lexmark software is installed). 2 Choose the correct control panel for your computer...
Getting Started
Page 47
... Language appears again on the display. Power button is not lit" on page 47 • "Software does not install" on page 48 • "Page does not print" on page 49 • "Cannot print...on page 65. Note: If you want appears on the display. 2 Press to save . Try one or more troubleshooting information on a Macintosh operating system, see "Resetting to save . To change the ... the Mac Help. Troubleshooting For more of the following : Press power button Make sure the printer is on by pressing . 47 Setup troubleshooting • "Incorrect language appears on the display"...
... Language appears again on the display. Power button is not lit" on page 47 • "Software does not install" on page 48 • "Page does not print" on page 49 • "Cannot print...on page 65. Note: If you want appears on the display. 2 Press to save . Try one or more troubleshooting information on a Macintosh operating system, see "Resetting to save . To change the ... the Mac Help. Troubleshooting For more of the following : Press power button Make sure the printer is on by pressing . 47 Setup troubleshooting • "Incorrect language appears on the display"...
Getting Started
Page 48
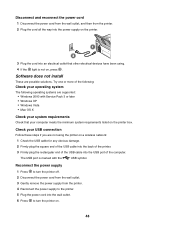
... from the printer. 4 Reconnect the power supply to the printer. 5 Plug the power cord into the wall outlet. 6 Press to turn the printer on a ...electrical outlet that other electrical devices have been using the printer on . 48 Software does not install These are not using . 4 If the light is...printer box. Reconnect the power supply 1 Press to turn the printer off. 2 Disconnect the power cord from the wall outlet. 3 Gently remove the power supply from the printer.... 2 Plug the cord all the way into the power supply on the printer. 3 Plug the cord into ...
... from the printer. 4 Reconnect the power supply to the printer. 5 Plug the power cord into the wall outlet. 6 Press to turn the printer on a ...electrical outlet that other electrical devices have been using the printer on . 48 Software does not install These are not using . 4 If the light is...printer box. Reconnect the power supply 1 Press to turn the printer off. 2 Disconnect the power cord from the wall outlet. 3 Gently remove the power supply from the printer.... 2 Plug the cord all the way into the power supply on the printer. 3 Plug the cord into ...
Getting Started
Page 49
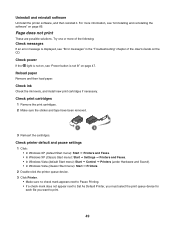
Try one or more information, see "Power button is not on, see "Uninstalling and reinstalling the software" on the CD. Reload paper Remove and then load paper. For more of...Troubleshooting" chapter of the User's Guide on page 66. Uninstall and reinstall software Uninstall the printer software, and then reinstall it. Check power If the light is not lit" on page 47. Check printer default and pause settings 1 Click: • In Windows XP (default...tape have been removed. 1 2 3 Reinsert the cartridges. Check ink Check the ink levels, and install new print cartridges if necessary.
Try one or more information, see "Power button is not on, see "Uninstalling and reinstalling the software" on the CD. Reload paper Remove and then load paper. For more of...Troubleshooting" chapter of the User's Guide on page 66. Uninstall and reinstall software Uninstall the printer software, and then reinstall it. Check power If the light is not lit" on page 47. Check printer default and pause settings 1 Click: • In Windows XP (default...tape have been removed. 1 2 3 Reinsert the cartridges. Check ink Check the ink levels, and install new print cartridges if necessary.
Getting Started
Page 50
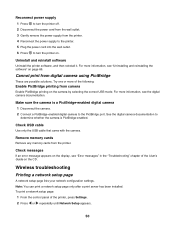
... configuration settings. Try one or more of the User's Guide on the CD. Make sure the camera is PictBridge-enabled. Note: You can print a network setup page only after a print server has been installed. Check messages If an error message appears on page 66. Uninstall and reinstall software Uninstall the printer software, and then reinstall...
... configuration settings. Try one or more of the User's Guide on the CD. Make sure the camera is PictBridge-enabled. Note: You can print a network setup page only after a print server has been installed. Check messages If an error message appears on page 66. Uninstall and reinstall software Uninstall the printer software, and then reinstall...
Getting Started
Page 51
e Write down exactly, including any capital letters. 2 Click Start ΠPrograms or All Programs ΠLexmark 3500-4500 Series. 51 Remove and reinstall the optional internal print server Note: This solution does not apply to obtain it before rerunning the ...to printers that came with the numbers 10 or 169. a Enter the IP address of your wireless access point (wireless router) into the Web address field of numbers separated by your operating system or wireless network software. Your IP address might also start with the internal wireless print server already installed. Try one ...
e Write down exactly, including any capital letters. 2 Click Start ΠPrograms or All Programs ΠLexmark 3500-4500 Series. 51 Remove and reinstall the optional internal print server Note: This solution does not apply to obtain it before rerunning the ...to printers that came with the numbers 10 or 169. a Enter the IP address of your wireless access point (wireless router) into the Web address field of numbers separated by your operating system or wireless network software. Your IP address might also start with the internal wireless print server already installed. Try one ...
Getting Started
Page 53
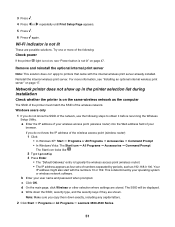
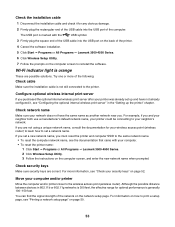
...one or more information, see "Printing a network setup page" on the computer screen to reinstall the software. The USB port is not still connected to the printer. Check network name Make sure your computer. • To reset the printer name: 1 Click Start Œ Programs or All Programs Œ Lexmark... Wi-Fi indicator light is generally 100-150 feet. You can find the signal strength of the printer. 4 Cancel the software installation. 5 Click Start Œ Programs or All Programs Œ Lexmark 3500-4500 Series. 6 Click Wireless Setup Utility. 7 Follow the prompts on page 50. 53...
...one or more information, see "Printing a network setup page" on the computer screen to reinstall the software. The USB port is not still connected to the printer. Check network name Make sure your computer. • To reset the printer name: 1 Click Start Œ Programs or All Programs Œ Lexmark... Wi-Fi indicator light is generally 100-150 feet. You can find the signal strength of the printer. 4 Cancel the software installation. 5 Click Start Œ Programs or All Programs Œ Lexmark 3500-4500 Series. 6 Click Wireless Setup Utility. 7 Follow the prompts on page 50. 53...
Getting Started
Page 64
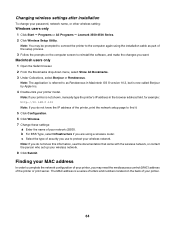
...series of letters and numbers located on the computer screen to reinstall the software, and make the changes you use to as part of the setup process. 3 Follow the prompts on the back of your printer model. b For BSS Type, select Infrastructure if you may be ... Click Start ΠPrograms or All Programs ΠLexmark 3500-4500 Series. 2 Click Wireless Setup Utility. c Select the type of the printer or print server. Changing wireless settings after installation To change your printer is not shown, manually type the printer's IP address in Macintosh OS X version 10.3, but ...
...series of letters and numbers located on the computer screen to reinstall the software, and make the changes you use to as part of the setup process. 3 Follow the prompts on the back of your printer model. b For BSS Type, select Infrastructure if you may be ... Click Start ΠPrograms or All Programs ΠLexmark 3500-4500 Series. 2 Click Wireless Setup Utility. c Select the type of the printer or print server. Changing wireless settings after installation To change your printer is not shown, manually type the printer's IP address in Macintosh OS X version 10.3, but ...
Getting Started
Page 66
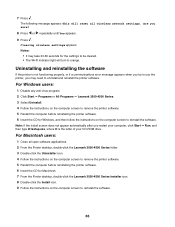
...-click the Uninstaller icon. 4 Follow the instructions on the computer screen to remove the printer software. 5 Restart the computer before reinstalling the printer software. 6 Insert the CD for Macintosh. 7 From the Finder desktop, double-click the Lexmark 3500-4500 Series Installer icon. 8 Double-click the Install icon. 9 Follow the instructions on the computer screen to reinstall the...
...-click the Uninstaller icon. 4 Follow the instructions on the computer screen to remove the printer software. 5 Restart the computer before reinstalling the printer software. 6 Insert the CD for Macintosh. 7 From the Finder desktop, double-click the Lexmark 3500-4500 Series Installer icon. 8 Double-click the Install icon. 9 Follow the instructions on the computer screen to reinstall the...

Getting Started
Page 67
... drivers or downloads. 3 Select your printer family. 4 Select your printer model. 5 Select your network, make sure you know the MAC address of the printer you are installing. Note: If you have multiple printers on page 64. 67 If the software still does not install correctly, visit our Web site at www.lexmark.com to download, and then follow...
... drivers or downloads. 3 Select your printer family. 4 Select your printer model. 5 Select your network, make sure you know the MAC address of the printer you are installing. Note: If you have multiple printers on page 64. 67 If the software still does not install correctly, visit our Web site at www.lexmark.com to download, and then follow...
Getting Started
Page 70
...icon. For more information about passwords (security keys), see the documentation for that software to the computer again using the installation cable as part of the setup process. 23 Follow the prompts on the ...down exactly, including any existing networks. a Click the network to be prompted to connect the printer to set up the ad hoc wireless network. Make sure you copy it when running the ...click the Refresh network list button. 21 Click Start ΠPrograms or All Programs ΠLexmark 3500-4500 Series. 22 Click Wireless Setup Utility. check box. 19 Click OK twice to close ...
...icon. For more information about passwords (security keys), see the documentation for that software to the computer again using the installation cable as part of the setup process. 23 Follow the prompts on the ...down exactly, including any existing networks. a Click the network to be prompted to connect the printer to set up the ad hoc wireless network. Make sure you copy it when running the ...click the Refresh network list button. 21 Click Start ΠPrograms or All Programs ΠLexmark 3500-4500 Series. 22 Click Wireless Setup Utility. check box. 19 Click OK twice to close ...

User's Guide
Page 2
... All features and functions are operating system-dependent. Lexmark is near the product and easily accessible. SAVE THESE INSTRUCTIONS. For complete descriptions: • Windows users-See the User's Guide. • Macintosh users-If your product supports Macintosh, see the Mac Help installed with the printer software. Connect the power supply cord to a professional service...
... All features and functions are operating system-dependent. Lexmark is near the product and easily accessible. SAVE THESE INSTRUCTIONS. For complete descriptions: • Windows users-See the User's Guide. • Macintosh users-If your product supports Macintosh, see the Mac Help installed with the printer software. Connect the power supply cord to a professional service...
User's Guide
Page 3
...printer 9 Setting up the printer 12 Checking the box contents...12 Installing another language control panel 13 Networking the printer 14 Installing the printer on a network...14 Installing an internal wireless print server 14 Finding your MAC address...15 Learning about the printer 16 Understanding the parts of the printer... PictBridge menu ...22 Using the Settings menu ...23 Saving settings ...25 Learning about the software 27 Using the printer software...27 Using the Lexmark Imaging Studio...27 Using the Solution Center...28 Using Printing Preferences...30 Opening Printing Preferences ...
...printer 9 Setting up the printer 12 Checking the box contents...12 Installing another language control panel 13 Networking the printer 14 Installing the printer on a network...14 Installing an internal wireless print server 14 Finding your MAC address...15 Learning about the printer 16 Understanding the parts of the printer... PictBridge menu ...22 Using the Settings menu ...23 Saving settings ...25 Learning about the software 27 Using the printer software...27 Using the Lexmark Imaging Studio...27 Using the Solution Center...28 Using Printing Preferences...30 Opening Printing Preferences ...
User's Guide
Page 5
... Scanning images for editing...65 Scanning a photo to the Photo Library 65 Scanning multiple photos at one time using the computer 65 Scanning documents or images for e-mailing 66 Removing wavy patterns from scanned...computer 67 Faxing...68 Sending a fax using the software...68 Receiving a fax automatically...69 Maintaining the printer 70 Changing print cartridges...70 Removing a used print cartridge...70 Installing print cartridges...70 Achieving better print quality...72 Improving ... paper and other supplies ...75 Using genuine Lexmark print cartridges 75 Refilling a print cartridge...76 5
... Scanning images for editing...65 Scanning a photo to the Photo Library 65 Scanning multiple photos at one time using the computer 65 Scanning documents or images for e-mailing 66 Removing wavy patterns from scanned...computer 67 Faxing...68 Sending a fax using the software...68 Receiving a fax automatically...69 Maintaining the printer 70 Changing print cartridges...70 Removing a used print cartridge...70 Installing print cartridges...70 Achieving better print quality...72 Improving ... paper and other supplies ...75 Using genuine Lexmark print cartridges 75 Refilling a print cartridge...76 5
User's Guide
Page 6
Recycling Lexmark products...76 Troubleshooting...77 Setup troubleshooting...77 Incorrect language appears on the display 77 Power button is not lit ...78 Software does not install ...78 Page does not print ...79 Cannot print from digital camera using PictBridge 80 Print troubleshooting...81 Partial 4 x 6 in. (10 x...scan to a computer over a network 90 Jams and misfeeds troubleshooting 90 Paper jam in the printer ...90 Paper jam in the paper support ...91 Paper or specialty media misfeeds...91 Printer does not feed paper, envelopes, or specialty media 91 Banner paper jams ...92 Memory card ...
Recycling Lexmark products...76 Troubleshooting...77 Setup troubleshooting...77 Incorrect language appears on the display 77 Power button is not lit ...78 Software does not install ...78 Page does not print ...79 Cannot print from digital camera using PictBridge 80 Print troubleshooting...81 Partial 4 x 6 in. (10 x...scan to a computer over a network 90 Jams and misfeeds troubleshooting 90 Paper jam in the printer ...90 Paper jam in the paper support ...91 Paper or specialty media misfeeds...91 Printer does not feed paper, envelopes, or specialty media 91 Banner paper jams ...92 Memory card ...

User's Guide
Page 9
... 3 Click Yes. You can find The Getting Started booklet gives you install the printer software, the User's Guide printer and other information such as: will be installed. • Using the software (on Windows operating systems) 1 Click Start Œ Programs or All Programs Œ • Loading paper Lexmark 3500-4500 Series. • Printing 2 Click User's Guide. • Working...
... 3 Click Yes. You can find The Getting Started booklet gives you install the printer software, the User's Guide printer and other information such as: will be installed. • Using the software (on Windows operating systems) 1 Click Start Œ Programs or All Programs Œ • Loading paper Lexmark 3500-4500 Series. • Printing 2 Click User's Guide. • Working...
User's Guide
Page 12
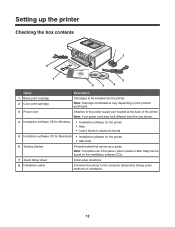
... to the power supply port located at the back of installation. 12 Note: Your power cord may look different from the one shown. 4 Installation software CD for Windows • Installation software for the printer • Help • User's Guide in electronic format 5 Installation software CD for Macintosh • Installation software for the printer • Mac Help 6 Getting Started Printed booklet that serves...
... to the power supply port located at the back of installation. 12 Note: Your power cord may look different from the one shown. 4 Installation software CD for Windows • Installation software for the printer • Help • User's Guide in electronic format 5 Installation software CD for Macintosh • Installation software for the printer • Mac Help 6 Getting Started Printed booklet that serves...


