User's Guide
Page 3
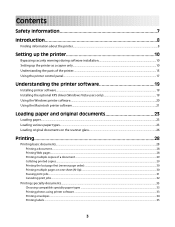
... printer...15 Using the printer control panel...17 Understanding the printer software 19 Installing printer software...19 Installing the optional XPS driver (Windows Vista users only 19 Using the Windows printer software...20 Using the Macintosh printer software...21 Loading paper and original documents 23 Loading paper...23 Loading various paper types...
... printer...15 Using the printer control panel...17 Understanding the printer software 19 Installing printer software...19 Installing the optional XPS driver (Windows Vista users only 19 Using the Windows printer software...20 Using the Macintosh printer software...21 Loading paper and original documents 23 Loading paper...23 Loading various paper types...
User's Guide
Page 4
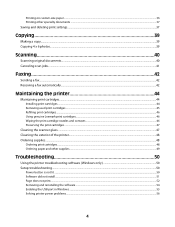
... printer 44 Maintaining print cartridges...44 Installing print cartridges...44 Removing used print cartridges...45 Refilling print cartridges...46 Using genuine Lexmark print cartridges...46 Wiping the print cartridge nozzles and contacts ...46 Preserving the print cartridges ...47 Cleaning the scanner glass...... Ordering supplies...48 Ordering print cartridges ...48 Ordering paper and other supplies...49 Troubleshooting 50 Using the printer troubleshooting software (Windows only 50 Setup troubleshooting...50 Power button is not lit ...50 Software did not install...51 Page does not print...52...
... printer 44 Maintaining print cartridges...44 Installing print cartridges...44 Removing used print cartridges...45 Refilling print cartridges...46 Using genuine Lexmark print cartridges...46 Wiping the print cartridge nozzles and contacts ...46 Preserving the print cartridges ...47 Cleaning the scanner glass...... Ordering supplies...48 Ordering print cartridges ...48 Ordering paper and other supplies...49 Troubleshooting 50 Using the printer troubleshooting software (Windows only 50 Setup troubleshooting...50 Power button is not lit ...50 Software did not install...51 Page does not print...52...

User's Guide
Page 19
... the driver and install the printer software. Installing the optional XPS driver (Windows Vista users only) The XML Paper Specification (XPS) driver is an optional printer driver designed to the Lexmark Web site at www.lexmark.com. 2 From the home page, navigate through the menu selection, and... then click Drivers & Downloads. 3 Choose the printer and the printer driver for Windows Vista users. To install the Microsoft QFE Patch and...
... the driver and install the printer software. Installing the optional XPS driver (Windows Vista users only) The XML Paper Specification (XPS) driver is an optional printer driver designed to the Lexmark Web site at www.lexmark.com. 2 From the home page, navigate through the menu selection, and... then click Drivers & Downloads. 3 Choose the printer and the printer driver for Windows Vista users. To install the Microsoft QFE Patch and...
User's Guide
Page 20
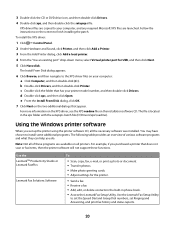
...Utility. For example, if you purchased a printer that appear. d Double-click xps, and then click Open. Using the Windows printer software When you do. Use the LexmarkTM Productivity Studio or Lexmark FastPics Lexmark Fax Solutions Software To • Scan, copy, fax, e-mail, or print a photo or document. • Transfer photos...CD or DVD drive icon, and then double-click Drivers. 4 Double-click xps, and then double-click the setupxps file. Use the Lexmark Fax Setup Utility to finish installing the patch. For more information on the XPS driver, see the XPS readme file on the screen to ...
...Utility. For example, if you purchased a printer that appear. d Double-click xps, and then click Open. Using the Windows printer software When you do. Use the LexmarkTM Productivity Studio or Lexmark FastPics Lexmark Fax Solutions Software To • Scan, copy, fax, e-mail, or print a photo or document. • Transfer photos...CD or DVD drive icon, and then double-click Drivers. 4 Double-click xps, and then double-click the setupxps file. Use the Lexmark Fax Setup Utility to finish installing the patch. For more information on the XPS driver, see the XPS readme file on the screen to ...
User's Guide
Page 28
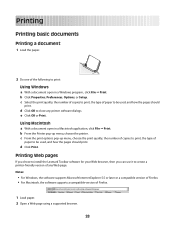
.... Printing Printing basic documents Printing a document 1 Load the paper. 2 Do one of the following to print: Using Windows a With a document open in a Windows program , click File Œ Print. Notes: • For Windows, the software supports Microsoft Internet Explorer 5.5 or later or a compatible version of Firefox. • For Macintosh, the ...printer-friendly version of Firefox. 1 Load paper. 2 Open a Web page using a supported browser. 28 Printing Web pages If you chose to install the Lexmark Toolbar software for your Web browser, then you can use it to close any Web page.
.... Printing Printing basic documents Printing a document 1 Load the paper. 2 Do one of the following to print: Using Windows a With a document open in a Windows program , click File Œ Print. Notes: • For Windows, the software supports Microsoft Internet Explorer 5.5 or later or a compatible version of Firefox. • For Macintosh, the ...printer-friendly version of Firefox. 1 Load paper. 2 Open a Web page using a supported browser. 28 Printing Web pages If you chose to install the Lexmark Toolbar software for your Web browser, then you can use it to close any Web page.

User's Guide
Page 29
... of copies that you want to print. 4 Click OK to close any printer software dialogs. 5 Click OK or Print. Printing multiple copies of a document Using Windows 1 With a document open , click File ΠPrint. 2 From the Printer pop-up menu, choose the printer. 3 In the Copies field, enter the...any printer software dialogs. 5 Click OK or Print. 3 Select a print option to print, and then select Collated. 29 Collated Not collated Using Windows 1 With a document open , click File ΠPrint. 2 In the Copies field, enter the number of copies that you want to print the page.
... of copies that you want to print. 4 Click OK to close any printer software dialogs. 5 Click OK or Print. Printing multiple copies of a document Using Windows 1 With a document open , click File ΠPrint. 2 From the Printer pop-up menu, choose the printer. 3 In the Copies field, enter the...any printer software dialogs. 5 Click OK or Print. 3 Select a print option to print, and then select Collated. 29 Collated Not collated Using Windows 1 With a document open , click File ΠPrint. 2 In the Copies field, enter the number of copies that you want to print the page.

User's Guide
Page 30
... For Mac OS X version 10.3 a From the print options pop-up menu, choose Paper Handling. Printing the last page first (reverse page order) Using Windows 1 With a document open, click File ΠPrint. 2 Click Properties, Preferences, Options, or Setup. 3 From the Copies section of the following: For... Mac OS X version 10.5 a From the print options pop-up menu, choose the printer. 3 Do one sheet (N-Up) Using Windows 1 With a document open , click File ΠPrint. 2 From the Printer pop-up menu, choose Layout. 3 Click Print. b Select Reverse page order...
... For Mac OS X version 10.3 a From the print options pop-up menu, choose Paper Handling. Printing the last page first (reverse page order) Using Windows 1 With a document open, click File ΠPrint. 2 Click Properties, Preferences, Options, or Setup. 3 From the Copies section of the following: For... Mac OS X version 10.5 a From the print options pop-up menu, choose the printer. 3 Do one sheet (N-Up) Using Windows 1 With a document open , click File ΠPrint. 2 From the Printer pop-up menu, choose Layout. 3 Click Print. b Select Reverse page order...
User's Guide
Page 31
... Hardware and Sound, click Printer. b Click Settings ΠPrinters. 2 Right-click the printer, and then select Pause Printing. b Click Control Panel. In Windows XP a Click Start. Pausing print jobs Using the printer folder in the taskbar. 2 Right-click the document name, and then select Pause. 31 b Click ... OK to print a border around each page image, then choose an option from the Border pop-up menu, choose the number of the following: In Windows Vista a Click . Using Macintosh 1 With a document open, click File ΠPrint. 2 From the print options pop-up menu, choose Layout. &#...
... Hardware and Sound, click Printer. b Click Settings ΠPrinters. 2 Right-click the printer, and then select Pause Printing. b Click Control Panel. In Windows XP a Click Start. Pausing print jobs Using the printer folder in the taskbar. 2 Right-click the document name, and then select Pause. 31 b Click ... OK to print a border around each page image, then choose an option from the Border pop-up menu, choose the number of the following: In Windows Vista a Click . Using Macintosh 1 With a document open, click File ΠPrint. 2 From the print options pop-up menu, choose Layout. &#...
User's Guide
Page 32
...Open. 3 Do one of your screen when you are using. c Under Hardware and Sound, click Printer. Using the printing status window of the printer The printing status window automatically opens at the bottom-right part of the following : • If you want to cancel a particular print job, right...-click the document name, and then select Cancel. • If you want to pause all print jobs in Windows 1 Do one of the following : In Windows Vista a Click . Canceling print jobs Using the printer control panel Press . Using Macintosh 1 While the document is printing, click ...
...Open. 3 Do one of your screen when you are using. c Under Hardware and Sound, click Printer. Using the printing status window of the printer The printing status window automatically opens at the bottom-right part of the following : • If you want to cancel a particular print job, right...-click the document name, and then select Cancel. • If you want to pause all print jobs in Windows 1 Do one of the following : In Windows Vista a Click . Canceling print jobs Using the printer control panel Press . Using Macintosh 1 While the document is printing, click ...
User's Guide
Page 33
... used specifically for printing photos with crisp, sharp images. • Lexmark Photo Paper-An outstanding "everyday" heavyweight inkjet photo paper designed for use with Lexmark printers, but compatible with all brands of the following : Using Windows • If you installed Lexmark FastPics or Lexmark Productivity Studio, then the one that are not sure which side...
... used specifically for printing photos with crisp, sharp images. • Lexmark Photo Paper-An outstanding "everyday" heavyweight inkjet photo paper designed for use with Lexmark printers, but compatible with all brands of the following : Using Windows • If you installed Lexmark FastPics or Lexmark Productivity Studio, then the one that are not sure which side...
User's Guide
Page 34
.... e Select Portrait or Landscape orientation. Otherwise, proceed to the next step. 4 From the Copies & Pages pop-up menu, type the number of the following: Using Windows a With a document open, click File ΠPrint. b Click Properties, Preferences, Options, or Setup. f Click OK to be printed in the printer. 2 Do one of copies...
.... e Select Portrait or Landscape orientation. Otherwise, proceed to the next step. 4 From the Copies & Pages pop-up menu, type the number of the following: Using Windows a With a document open, click File ΠPrint. b Click Properties, Preferences, Options, or Setup. f Click OK to be printed in the printer. 2 Do one of copies...
User's Guide
Page 35
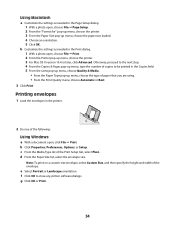
... the Printer pop-up menu, choose the printer that you want to use. 3 Click Print. If no size matches the size of the following: Using Windows a With a document open , click File ΠPage Setup. 2 From the "Format for " pop-up menu, choose the printer that you want to close any printer...
... the Printer pop-up menu, choose the printer that you want to use. 3 Click Print. If no size matches the size of the following: Using Windows a With a document open , click File ΠPage Setup. 2 From the "Format for " pop-up menu, choose the printer that you want to close any printer...
User's Guide
Page 36
Partial sheets (with areas exposed by the printer. Note: Labels require more information, see the "Loading Paper" chapter. Using Windows 1 With a document open . 6 Print the document. The Print Setup tab appears. 3 In the Paper Options section, from the "Paper size" list, select Custom Size. a Click +. ...
Partial sheets (with areas exposed by the printer. Note: Labels require more information, see the "Loading Paper" chapter. Using Windows 1 With a document open . 6 Print the document. The Print Setup tab appears. 3 In the Paper Options section, from the "Paper size" list, select Custom Size. a Click +. ...

User's Guide
Page 37
...adjustments to delete, and then click Delete. 37 Using Macintosh 1 From the Finder desktop, double-click the printer folder. Saving and deleting print settings Using Windows 1 With a document open software dialogs. Notes: • To retrieve your print settings, click Profiles Œ Restore a Profile, and then select ...the printer software was released. 2 Double-click the application that you want to use. b Choose Library Œ Printers Œ YYYY Œ Lexmark, and then select your setting, and then assign a name. YYYY is not found on transfers, transparencies, and banners.
...adjustments to delete, and then click Delete. 37 Using Macintosh 1 From the Finder desktop, double-click the printer folder. Saving and deleting print settings Using Windows 1 With a document open software dialogs. Notes: • To retrieve your print settings, click Profiles Œ Restore a Profile, and then select ...the printer software was released. 2 Double-click the application that you want to use. b Choose Library Œ Printers Œ YYYY Œ Lexmark, and then select your setting, and then assign a name. YYYY is not found on transfers, transparencies, and banners.
User's Guide
Page 40
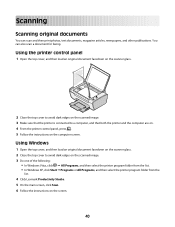
... avoid dark edges on the scanned image. 3 Do one of the following: • In Windows Vista, click Œ All Programs, and then select the printer program folder from the list. • In Windows XP, click Start Œ Programs or All Programs, and then select the printer program folder... from the list. 4 Click Lexmark Productivity Studio. 5 On the main screen, click Scan. 6 Follow the instructions on the ...
... avoid dark edges on the scanned image. 3 Do one of the following: • In Windows Vista, click Œ All Programs, and then select the printer program folder from the list. • In Windows XP, click Start Œ Programs or All Programs, and then select the printer program folder... from the list. 4 Click Lexmark Productivity Studio. 5 On the main screen, click Scan. 6 Follow the instructions on the ...
User's Guide
Page 41
... folder. 4 Double-click the XXXX Series Center, where XXXX is the printer series. 5 From the "What is being scanned?" Using Windows To cancel a scan job started in the Lexmark Productivity Studio or Lexmark FastPics, open the software, and then follow the instructions on the screen. Using Macintosh 1 From the Finder desktop, double-click...
... folder. 4 Double-click the XXXX Series Center, where XXXX is the printer series. 5 From the "What is being scanned?" Using Windows To cancel a scan job started in the Lexmark Productivity Studio or Lexmark FastPics, open the software, and then follow the instructions on the screen. Using Macintosh 1 From the Finder desktop, double-click...
User's Guide
Page 42
...to a computer with your fax, add these programs is applicable for Windows users only. Note: A fax number can include up and manage faxes. 42 Make sure to choose to install the Lexmark Fax Solutions and Lexmark Productivity Studio programs. Sending a fax 1 Load an original document ..., click Œ All Programs, and then select the printer program folder. • In Windows XP, click Start Œ Programs or All Programs, and then select the printer program folder. 3 Click Lexmark Productivity Studio. 4 From the Welcome Screen, click Fax. 5 Select the Document option. 6 Click Start...
...to a computer with your fax, add these programs is applicable for Windows users only. Note: A fax number can include up and manage faxes. 42 Make sure to choose to install the Lexmark Fax Solutions and Lexmark Productivity Studio programs. Sending a fax 1 Load an original document ..., click Œ All Programs, and then select the printer program folder. • In Windows XP, click Start Œ Programs or All Programs, and then select the printer program folder. 3 Click Lexmark Productivity Studio. 4 From the Welcome Screen, click Fax. 5 Select the Document option. 6 Click Start...
User's Guide
Page 50
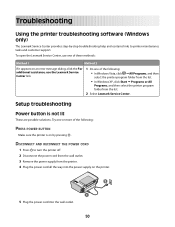
.... DISCONNECT AND RECONNECT THE POWER CORD 1 Press to printer maintenance tasks and customer support. Troubleshooting Using the printer troubleshooting software (Windows only) The Lexmark Service Center provides step-by pressing . Setup troubleshooting Power button is on the printer. 2 1 5 Plug the power cord ...2 Disconnect the power cord from the wall outlet. 3 Remove the power supply from the list. 2 Select Lexmark Service Center. Try one of the following : • In Windows Vista, click Œ All Programs, and then select the printer program folder from the list. • ...
.... DISCONNECT AND RECONNECT THE POWER CORD 1 Press to printer maintenance tasks and customer support. Troubleshooting Using the printer troubleshooting software (Windows only) The Lexmark Service Center provides step-by pressing . Setup troubleshooting Power button is on the printer. 2 1 5 Plug the power cord ...2 Disconnect the power cord from the wall outlet. 3 Remove the power supply from the list. 2 Select Lexmark Service Center. Try one of the following : • In Windows Vista, click Œ All Programs, and then select the printer program folder from the list. • ...
User's Guide
Page 51
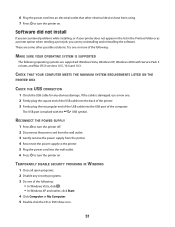
... 3 Gently remove the power supply from the printer. 4 Reconnect the power supply to turn the printer on . These are supported: Windows Vista, Windows XP, Windows 2000 with the USB symbol. Software did not install If you encountered problems while installing, or if your printer does not appear in the... have been using. 7 Press to the printer. 5 Plug the power cord into the USB port of the following: • In Windows Vista, click . • In Windows XP and earlier, click Start. 4 Click Computer or My Computer. 5 Double-click the CD or DVD drive icon. 51 TEMPORARILY DISABLE...
... 3 Gently remove the power supply from the printer. 4 Reconnect the power supply to turn the printer on . These are supported: Windows Vista, Windows XP, Windows 2000 with the USB symbol. Software did not install If you encountered problems while installing, or if your printer does not appear in the... have been using. 7 Press to the printer. 5 Plug the power cord into the USB port of the following: • In Windows Vista, click . • In Windows XP and earlier, click Start. 4 Click Computer or My Computer. 5 Double-click the CD or DVD drive icon. 51 TEMPORARILY DISABLE...
User's Guide
Page 52
... a Click . CHECK CARTRIDGES 1 Remove the print cartridges. 2 Make sure the sticker and tape have been using. CHECK PRINTER DEFAULT AND PAUSE SETTINGS Using Windows 1 Do one or more of the following : CHECK MESSAGES If an error message appears, then resolve the error before trying to print again. CHECK POWER ...
... a Click . CHECK CARTRIDGES 1 Remove the print cartridges. 2 Make sure the sticker and tape have been using. CHECK PRINTER DEFAULT AND PAUSE SETTINGS Using Windows 1 Do one or more of the following : CHECK MESSAGES If an error message appears, then resolve the error before trying to print again. CHECK POWER ...

