
Technical Reference
Page 29
Symbol Set PS Text PS Math Math-8 Pi Font Microsoft Publishing Windows 3.0 Latin 1 Windows Latin 1 Windows Latin 2 Windows Latin 5 Windows Latin 6 (Baltic) ISO 8859-1 Latin 1 (ECMA-94) ISO 8859-2 Latin 2 ISO 8859-9 Latin 5 ISO 8859-10 Latin 6 ISO 8859-15 Latin 9 PC-858 Multilingual Euro Roman-9 Ventura International Ventura US Ventura Math PC-861 Iceland PC-863...
Symbol Set PS Text PS Math Math-8 Pi Font Microsoft Publishing Windows 3.0 Latin 1 Windows Latin 1 Windows Latin 2 Windows Latin 5 Windows Latin 6 (Baltic) ISO 8859-1 Latin 1 (ECMA-94) ISO 8859-2 Latin 2 ISO 8859-9 Latin 5 ISO 8859-10 Latin 6 ISO 8859-15 Latin 9 PC-858 Multilingual Euro Roman-9 Ventura International Ventura US Ventura Math PC-861 Iceland PC-863...
Technical Reference
Page 32
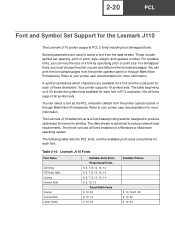
... printer user documentation for each font in PCL emulation. The table beginning on a Windows or Macintosh operating system. Refer to reduce network load requirements. The Lexmark J110 default driver is optimized to your printer user documentation for each of a font... and Symbol Set Support for each font: Table 2-10: Lexmark J110 Fonts Font Name CGTimes CGTimes Italic Univers Univers Italic Courier Courier Italic Letter Gothic Available Point Sizes Proportional Fonts 5, 6, 7, 8, 10, 12, 14 5, 6, 7, 8, 10, 12, 14 5, 6, 7, 8, 10, 12, 14 5, 6, 10, 12 Fixed-Width Fonts 6, 12, 24 6, ...
... printer user documentation for each font in PCL emulation. The table beginning on a Windows or Macintosh operating system. Refer to reduce network load requirements. The Lexmark J110 default driver is optimized to your printer user documentation for each of a font... and Symbol Set Support for each font: Table 2-10: Lexmark J110 Fonts Font Name CGTimes CGTimes Italic Univers Univers Italic Courier Courier Italic Letter Gothic Available Point Sizes Proportional Fonts 5, 6, 7, 8, 10, 12, 14 5, 6, 7, 8, 10, 12, 14 5, 6, 7, 8, 10, 12, 14 5, 6, 10, 12 Fixed-Width Fonts 6, 12, 24 6, ...

Technical Reference
Page 300
...then the Communications Port [COM1] Properties screen displays. 9 Select the Port Settings tab. 10 Fill out the fields for Xon/Xoff protocol. Setting Up the Communications Port Using Windows 95/98/Me In your printer and computer. 8-2 Interfaces Setting Up the Communications Port ...You must establish communication between your Windows 95/98/Me application: 1 On the Menu bar, click Start. 2...
...then the Communications Port [COM1] Properties screen displays. 9 Select the Port Settings tab. 10 Fill out the fields for Xon/Xoff protocol. Setting Up the Communications Port Using Windows 95/98/Me In your printer and computer. 8-2 Interfaces Setting Up the Communications Port ...You must establish communication between your Windows 95/98/Me application: 1 On the Menu bar, click Start. 2...

Technical Reference
Page 302
... double-click. For example, if you select the COM1 port, then the Communications Port [COM1] Properties screen displays. 9 Select the Port Settings tab. 10 Fill out the fields for the following printer settings to expand the list of the Hardware tab screen, click the Device Manager button. The Device... Manager screen displays. 7 Scroll down to Ports and click the + once to make them match your Windows 2000 application: 1 On the Menu bar, click Start. 2 Click Settings. 3 Click Control Panel. 8-4 Interfaces Setting Up the Communications Port Using...
... double-click. For example, if you select the COM1 port, then the Communications Port [COM1] Properties screen displays. 9 Select the Port Settings tab. 10 Fill out the fields for the following printer settings to expand the list of the Hardware tab screen, click the Device Manager button. The Device... Manager screen displays. 7 Scroll down to Ports and click the + once to make them match your Windows 2000 application: 1 On the Menu bar, click Start. 2 Click Settings. 3 Click Control Panel. 8-4 Interfaces Setting Up the Communications Port Using...
Technical Reference
Page 418
...Lexmark C720 2-10 Lexmark J110 2-20 Lexmark T520 2-10 Lexmark T522 2-10 Lexmark T620 2-10 Lexmark T622 2-10 Lexmark W820 2-10 GL/2 Language 2-47 linking commands 2-23 paper and envelope dimensions Lexmark C720 2-4 Lexmark J110 2-5 Lexmark T family 2-6 PCL emulation (continued) paper and envelope dimensions (continued) Lexmark...8-2 OS/2 8-5 Windows 2000 8-4 Windows 95/98/Me 8-2 Windows NT 4.0 8-3 PostScript emulation accessing files 6-9 command format 4-10 device names 6-9 device parameters 4-80 device search order 6-12 envelope size support 4-19 filenames 6-9 fonts Lexmark C720 4-7 interpreter ...
...Lexmark C720 2-10 Lexmark J110 2-20 Lexmark T520 2-10 Lexmark T522 2-10 Lexmark T620 2-10 Lexmark T622 2-10 Lexmark W820 2-10 GL/2 Language 2-47 linking commands 2-23 paper and envelope dimensions Lexmark C720 2-4 Lexmark J110 2-5 Lexmark T family 2-6 PCL emulation (continued) paper and envelope dimensions (continued) Lexmark...8-2 OS/2 8-5 Windows 2000 8-4 Windows 95/98/Me 8-2 Windows NT 4.0 8-3 PostScript emulation accessing files 6-9 command format 4-10 device names 6-9 device parameters 4-80 device search order 6-12 envelope size support 4-19 filenames 6-9 fonts Lexmark C720 4-7 interpreter ...

Service Manual
Page 259
Disconnect the operator panel/cover open switch assembly. 1. Pull the cables through the rectangular window in the hinge pivot arm. 5. Snap the operator panel into the bracket assembly. 6. Cut the black cable tie that holds the operator panel/switch cable ...and front harness. 4. Repair Information 4-49 Be sure the toroid is on the opposite end of the system board shield. 10.Plug the cables into the system board connectors. Plug the new operator panel cable into the operator panel and snap the new cover open switch...
Disconnect the operator panel/cover open switch assembly. 1. Pull the cables through the rectangular window in the hinge pivot arm. 5. Snap the operator panel into the bracket assembly. 6. Cut the black cable tie that holds the operator panel/switch cable ...and front harness. 4. Repair Information 4-49 Be sure the toroid is on the opposite end of the system board shield. 10.Plug the cables into the system board connectors. Plug the new operator panel cable into the operator panel and snap the new cover open switch...


