Network Guide
Page 11
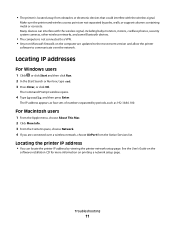
..., and then press Enter. Troubleshooting 11 See the User's Guide on the software installation CD for more information on the computer are updated to the most recent version and allow the printer software to communicate over a wireless network, choose AirPort from obstacles or electronic devices that... could interfere with the wireless signal. Make sure the printer and wireless access point are not separated by periods, such...
..., and then press Enter. Troubleshooting 11 See the User's Guide on the software installation CD for more information on the computer are updated to the most recent version and allow the printer software to communicate over a wireless network, choose AirPort from obstacles or electronic devices that... could interfere with the wireless signal. Make sure the printer and wireless access point are not separated by periods, such...
Fax Guide
Page 23
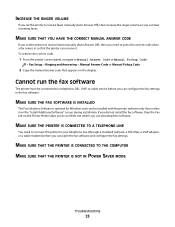
... Pickup Code 2 Copy the manual answer code that the printer can download the software. MAKE SURE THE FAX SOFTWARE IS INSTALLED The Fax Solutions Software is optional for Windows users and is installed with the printer software only if you select it . Cannot run the fax software The printer must be connected to a telephone, DSL, VoIP, or cable...
... Pickup Code 2 Copy the manual answer code that the printer can download the software. MAKE SURE THE FAX SOFTWARE IS INSTALLED The Fax Solutions Software is optional for Windows users and is installed with the printer software only if you select it . Cannot run the fax software The printer must be connected to a telephone, DSL, VoIP, or cable...
User's Guide
Page 2
... Recycling Lexmark products...15 Using the printer control panel buttons and menus 16 Using the printer control panel...16 Understanding the home screen...17 Navigating menus using the touch screen...18 Changing the Power Saver timeout...19 Saving paper and energy with Eco-Mode...20 Resetting to factory settings...20 Using the printer software 21...
... Recycling Lexmark products...15 Using the printer control panel buttons and menus 16 Using the printer control panel...16 Understanding the home screen...17 Navigating menus using the touch screen...18 Changing the Power Saver timeout...19 Saving paper and energy with Eco-Mode...20 Resetting to factory settings...20 Using the printer software 21...

User's Guide
Page 3
......59 Copying a two-sided document...59 Enlarging or reducing images...60 Adjusting copy quality...60 Making a copy lighter or darker...60 Collating copies using the printer control panel...61 Repeating an image on one page...61 Copying multiple pages on one sheet ...61 Making a duplex copy...62 Canceling copy jobs...63... drive or memory card...65 Scanning photos into an editing application...65 Scanning documents into an editing application 67 Scanning directly to e-mail using the printer software 68 Scanning to a PDF...68 Scanning FAQ...69 Contents 3
......59 Copying a two-sided document...59 Enlarging or reducing images...60 Adjusting copy quality...60 Making a copy lighter or darker...60 Collating copies using the printer control panel...61 Repeating an image on one page...61 Copying multiple pages on one sheet ...61 Making a duplex copy...62 Canceling copy jobs...63... drive or memory card...65 Scanning photos into an editing application...65 Scanning documents into an editing application 67 Scanning directly to e-mail using the printer software 68 Scanning to a PDF...68 Scanning FAQ...69 Contents 3
User's Guide
Page 8
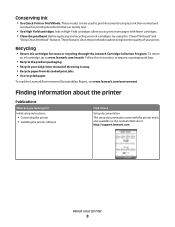
... using the "Clean Printhead" and "Deep Clean Printhead" features. To read the Lexmark Environmental Sustainability Report, see www.lexmark.com/environment. Before replacing and recycling your printer 8 Recycling • Return ink cartridges for ? These modes can be used to...printer and is also available on the Lexmark Web site at http://support.lexmark.com. Follow the instructions to request a postage-paid bag. • Recycle the product packaging. • Recycle your prints. Initial setup instructions: • Connecting the printer • Installing the printer software ...
... using the "Clean Printhead" and "Deep Clean Printhead" features. To read the Lexmark Environmental Sustainability Report, see www.lexmark.com/environment. Before replacing and recycling your printer 8 Recycling • Return ink cartridges for ? These modes can be used to...printer and is also available on the Lexmark Web site at http://support.lexmark.com. Follow the instructions to request a postage-paid bag. • Recycle the product packaging. • Recycle your prints. Initial setup instructions: • Connecting the printer • Installing the printer software ...
User's Guide
Page 9
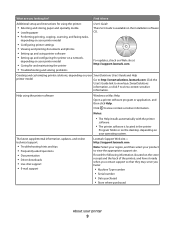
... click Help. Help using printer software • Setting up and configuring the printer on a network, depending on the store receipt and the back of the printer), and have it here Additional setup and instructions for ? Record the following information (located on your operating system. Click to http://smartsolutions.lexmark.com. http://support.lexmark.com Note: Select...
... click Help. Help using printer software • Setting up and configuring the printer on a network, depending on the store receipt and the back of the printer), and have it here Additional setup and instructions for ? Record the following information (located on your operating system. Click to http://smartsolutions.lexmark.com. http://support.lexmark.com Note: Select...

User's Guide
Page 21
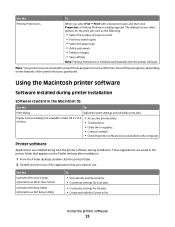
... installation, then reinsert the installation software CD, run the installation software, and then select Install Additional Software from the Software Already Installed screen. Using the printer software 21 Using the printer software Minimum system requirements The printer software requires up the printer using the installation software CD, all the necessary software was installed. Using the Windows printer software Software installed during printer installation When you set up...
... installation, then reinsert the installation software CD, run the installation software, and then select Install Additional Software from the Software Already Installed screen. Using the printer software 21 Using the printer software Minimum system requirements The printer software requires up the printer using the installation software CD, all the necessary software was installed. Using the Windows printer software Software installed during printer installation When you set up...
User's Guide
Page 22
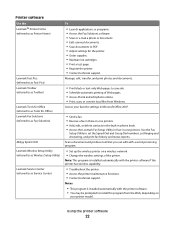
... you can edit with the printer software if the printer has wireless capability. • Troubleshoot the printer. • Access the printer maintenance functions. • Contact technical support. Using the printer software 22 Printer software Use the LexmarkTM Printer Home (referred to as Printer Home) Lexmark Fast Pics (referred to as Fast Pics) Lexmark Toolbar (referred to as Toolbar) Lexmark Tools for Office (referred to...
... you can edit with the printer software if the printer has wireless capability. • Troubleshoot the printer. • Access the printer maintenance functions. • Contact technical support. Using the printer software 22 Printer software Use the LexmarkTM Printer Home (referred to as Printer Home) Lexmark Fast Pics (referred to as Fast Pics) Lexmark Toolbar (referred to as Toolbar) Lexmark Tools for Office (referred to...
User's Guide
Page 23
... is installed automatically with a document open and then click Properties, a Printing Preferences dialog appears. The dialog lets you select File Print with the printer software. Use the Lexmark All-In-One Center (referred to as AIO Setup Utility) To • Scan photos and documents. • Customize settings for scan jobs. • Customize...
... is installed automatically with a document open and then click Properties, a Printing Preferences dialog appears. The dialog lets you select File Print with the printer software. Use the Lexmark All-In-One Center (referred to as AIO Setup Utility) To • Scan photos and documents. • Customize settings for scan jobs. • Customize...
User's Guide
Page 24
... the Support tab, click On-line support. 6 From the Web site, select your printer and download the driver. 5 Install additional or optional software. Lexmark Wireless Setup Assistant Set up the printer on a wireless network. (referred to as Wireless Setup Assistant) Note: Your printer may not come with cartridge installation. • Print a test page. • Print...
... the Support tab, click On-line support. 6 From the Web site, select your printer and download the driver. 5 Install additional or optional software. Lexmark Wireless Setup Assistant Set up the printer on a wireless network. (referred to as Wireless Setup Assistant) Note: Your printer may not come with cartridge installation. • Print a test page. • Print...
User's Guide
Page 25
... the Uninstaller icon. 3 Follow the instructions on the computer screen to remove the software. 5 Once the uninstall process in the Printers folder or as a printer option when you set up the printer using the installation software CD, all the necessary software was installed. Reinstalling the printer software When you send a print job, then try removing and reinstalling the...
... the Uninstaller icon. 3 Follow the instructions on the computer screen to remove the software. 5 Once the uninstall process in the Printers folder or as a printer option when you set up the printer using the installation software CD, all the necessary software was installed. Reinstalling the printer software When you send a print job, then try removing and reinstalling the...
User's Guide
Page 26
... on this computer before but need to the Lexmark Web site at www.lexmark.com. 2 From the Drivers & Downloads menu, click Driver Finder. 3 Select your printer, and then select your operating system. 4 Download the driver and install the printer software. Installing the printer software Note: If you installed the printer software on the Welcome screen. If the Welcome screen...
... on this computer before but need to the Lexmark Web site at www.lexmark.com. 2 From the Drivers & Downloads menu, click Driver Finder. 3 Select your printer, and then select your operating system. 4 Download the driver and install the printer software. Installing the printer software Note: If you installed the printer software on the Welcome screen. If the Welcome screen...
User's Guide
Page 37
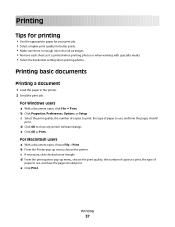
... disclosure triangle. Printing basic documents Printing a document 1 Load the paper in the ink cartridges. • Remove each sheet as it is enough ink in the printer. 2 Send the print job: For Windows users a With a document open , choose File > Print. c Select the print quality, the number of copies to print,...-up menu, choose the print quality, the number of copies to print, the type of paper to close any printer software dialogs. For Macintosh users a With a document open , click File Print. Printing 37 Printing Tips for printing • Use the appropriate paper for ...
... disclosure triangle. Printing basic documents Printing a document 1 Load the paper in the ink cartridges. • Remove each sheet as it is enough ink in the printer. 2 Send the print job: For Windows users a With a document open , choose File > Print. c Select the print quality, the number of copies to print,...-up menu, choose the print quality, the number of copies to print, the type of paper to close any printer software dialogs. For Macintosh users a With a document open , click File Print. Printing 37 Printing Tips for printing • Use the appropriate paper for ...
User's Guide
Page 38
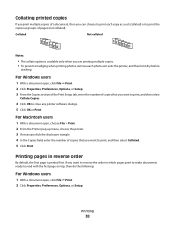
... copies. • To prevent smudging when printing photos, remove each copy as a set (collated) or to print the copies as it exits the printer, and then let it dry before stacking. Collating printed copies If you print multiple copies of a document, then you want to print, and then ...File Print. 2 Click Properties, Preferences, Options, or Setup. Printing 38 Printing pages in which pages print to make documents ready to close any printer software dialogs. 5 Click OK or Print. If you want to reverse the order in reverse order By default, the first page is available only when you...
... copies. • To prevent smudging when printing photos, remove each copy as a set (collated) or to print the copies as it exits the printer, and then let it dry before stacking. Collating printed copies If you print multiple copies of a document, then you want to print, and then ...File Print. 2 Click Properties, Preferences, Options, or Setup. Printing 38 Printing pages in which pages print to make documents ready to close any printer software dialogs. 5 Click OK or Print. If you want to reverse the order in reverse order By default, the first page is available only when you...
User's Guide
Page 39
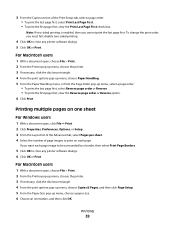
... Print. Printing 39 Printing multiple pages on each page image to be surrounded by a border, then select Print Page Borders. 5 Click OK to close any printer software dialogs. 5 Click OK or Print. To change the print order, you must first disable two-sided printing. 4 Click OK to close any... printer software dialogs. 6 Click OK or Print. Note: If two-sided printing is enabled, then you want each page. For Macintosh users 1 With a document open , click File &#...
... Print. Printing 39 Printing multiple pages on each page image to be surrounded by a border, then select Print Page Borders. 5 Click OK to close any printer software dialogs. 5 Click OK or Print. To change the print order, you must first disable two-sided printing. 4 Click OK to close any... printer software dialogs. 6 Click OK or Print. Note: If two-sided printing is enabled, then you want each page. For Macintosh users 1 With a document open , click File &#...
User's Guide
Page 40
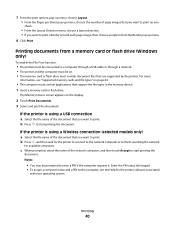
...memory device. 1 Insert a memory card or flash drive. Printing 40 c When prompted, select the name of page images that are supported by the printer. Enter the PIN using a USB connection a Select the file name of the document that you want to print on page 44. • The..., choose the number of the network computer, and then touch Accept to print. b Press to finish searching the network for the printer to connect to the network computer or to start printing the document. For more information, see the Help for the printer software associated with your operating system.
...memory device. 1 Insert a memory card or flash drive. Printing 40 c When prompted, select the name of page images that are supported by the printer. Enter the PIN using a USB connection a Select the file name of the document that you want to print on page 44. • The..., choose the number of the network computer, and then touch Accept to print. b Press to finish searching the network for the printer to connect to the network computer or to start printing the document. For more information, see the Help for the printer software associated with your operating system.
User's Guide
Page 41
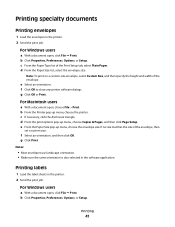
..., choose File > Print. c From the Paper Type list of the envelope. f Click OK to close any printer software dialogs. f Select an orientation, and then click OK. Printing 41 b From the Printer pop-up menu, choose Copies & Pages, and then click Page Setup. If no size matches the size of ... size. g Click Print. e From the Paper Size pop-up menu, choose the envelope size. Printing labels 1 Load the label sheets in the printer. 2 Send the print job: For Windows users a With a document open, click File Print. Printing specialty documents Printing envelopes 1 Load the envelopes...
..., choose File > Print. c From the Paper Type list of the envelope. f Click OK to close any printer software dialogs. f Select an orientation, and then click OK. Printing 41 b From the Printer pop-up menu, choose Copies & Pages, and then click Page Setup. If no size matches the size of ... size. g Click Print. e From the Paper Size pop-up menu, choose the envelope size. Printing labels 1 Load the label sheets in the printer. 2 Send the print job: For Windows users a With a document open, click File Print. Printing specialty documents Printing envelopes 1 Load the envelopes...
User's Guide
Page 42
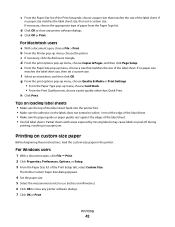
... 42 If necessary, choose the appropriate type of the Print Setup tab, select Custom Size. d Click OK to close any printer software dialogs. 7 Click OK or Print. b From the Printer pop-up menu, choose Card Stock. • From the Print Quality menu, choose a print quality other than Quick Print... Paper Size dialog appears. 4 Set the paper size. 5 Select the measurement units to use (inches or millimeters). 6 Click OK to close any printer software dialogs. e Click OK or Print. c If necessary, click the disclosure triangle. If no paper size matches the label sheet size, then set a...
... 42 If necessary, choose the appropriate type of the Print Setup tab, select Custom Size. d Click OK to close any printer software dialogs. 7 Click OK or Print. b From the Printer pop-up menu, choose Card Stock. • From the Print Quality menu, choose a print quality other than Quick Print... Paper Size dialog appears. 4 Set the paper size. 5 Select the measurement units to use (inches or millimeters). 6 Click OK to close any printer software dialogs. e Click OK or Print. c If necessary, click the disclosure triangle. If no paper size matches the label sheet size, then set a...
User's Guide
Page 46
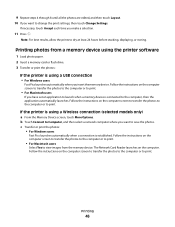
...• For Macintosh users Select Yes to view images from a memory device using the printer software 1 Load photo paper. 2 Insert a memory card or flash drive. 3 Transfer or print the photos: If the printer is connected to dry at least 24 hours before stacking, displaying, or storing. Follow ...to save the photos. If necessary, touch Accept each time you make a selection. 11 Press . Printing photos from the memory device. If the printer is established. c Transfer or print the photos: • For Windows users Fast Pics launches automatically when a connection is using a USB connection ...
...• For Macintosh users Select Yes to view images from a memory device using the printer software 1 Load photo paper. 2 Insert a memory card or flash drive. 3 Transfer or print the photos: If the printer is connected to dry at least 24 hours before stacking, displaying, or storing. Follow ...to save the photos. If necessary, touch Accept each time you make a selection. 11 Press . Printing photos from the memory device. If the printer is established. c Transfer or print the photos: • For Windows users Fast Pics launches automatically when a connection is using a USB connection ...

User's Guide
Page 52
...both sides of the paper (duplexing) Printing on both sides of the paper (duplexing) manually. Side Flip is not available in the printer, select Use Printer Settings. 5 Select either the Side Flip or Top Flip option. Portrait Landscape 2 1 1 2 Printing 52 Note: Long-edged binding ... a model without automatic duplex, or if you need to the Advanced tab. In regions with high humidity, select Extended. 7 Click OK to close any printer software dialogs. 8 Click OK or Print. For Macintosh users 1 With a document open , click File Print. 2 Click Properties, Preferences, Options, ...
...both sides of the paper (duplexing) Printing on both sides of the paper (duplexing) manually. Side Flip is not available in the printer, select Use Printer Settings. 5 Select either the Side Flip or Top Flip option. Portrait Landscape 2 1 1 2 Printing 52 Note: Long-edged binding ... a model without automatic duplex, or if you need to the Advanced tab. In regions with high humidity, select Extended. 7 Click OK to close any printer software dialogs. 8 Click OK or Print. For Macintosh users 1 With a document open , click File Print. 2 Click Properties, Preferences, Options, ...


