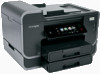

Fax Guide
Page 3
...Do not place or use this product to the public switched telephone network. Inspect the power cord regularly for additional safety information. Do not pinch the power cord between objects such as the fax feature, power cord, or telephone, during a lightning storm. See the product User's Guide for signs... of misuse. CAUTION-POTENTIAL INJURY: Do not twist, bind, crush, or place heavy objects on the power cord. Use only the power supply and power cord provided with this product or a 26 AWG or larger replacement when connecting this product near the product and easily accessible...
...Do not place or use this product to the public switched telephone network. Inspect the power cord regularly for additional safety information. Do not pinch the power cord between objects such as the fax feature, power cord, or telephone, during a lightning storm. See the product User's Guide for signs... of misuse. CAUTION-POTENTIAL INJURY: Do not twist, bind, crush, or place heavy objects on the power cord. Use only the power supply and power cord provided with this product or a 26 AWG or larger replacement when connecting this product near the product and easily accessible...

User's Guide
Page 6
...other replacement parts. CAUTION-POTENTIAL INJURY: Do not cut, twist, bind, crush, or place heavy objects on the power cord. Do not subject the power cord to a properly grounded electrical outlet that all cables from the electrical outlet before proceeding. CAUTION-SHOCK HAZARD: To ...authorized replacements. SAVE THESE INSTRUCTIONS. Safety information 6 The safety features of fire or electrical shock results. Use only the power supply and power cord provided with this product or a 26 AWG or larger replacement when connecting this product to the public switched telephone network...
...other replacement parts. CAUTION-POTENTIAL INJURY: Do not cut, twist, bind, crush, or place heavy objects on the power cord. Do not subject the power cord to a properly grounded electrical outlet that all cables from the electrical outlet before proceeding. CAUTION-SHOCK HAZARD: To ...authorized replacements. SAVE THESE INSTRUCTIONS. Safety information 6 The safety features of fire or electrical shock results. Use only the power supply and power cord provided with this product or a 26 AWG or larger replacement when connecting this product to the public switched telephone network...
User's Guide
Page 77
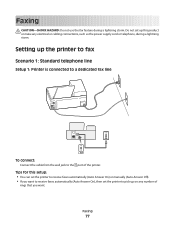
... LINE To connect: Connect the cable from the wall jack to pick up this product or make any electrical or cabling connections, such as the power supply cord or telephone, during a lightning storm. Faxing CAUTION-SHOCK HAZARD: Do not use the fax feature during a lightning storm.
... LINE To connect: Connect the cable from the wall jack to pick up this product or make any electrical or cabling connections, such as the power supply cord or telephone, during a lightning storm. Faxing CAUTION-SHOCK HAZARD: Do not use the fax feature during a lightning storm.

User's Guide
Page 134
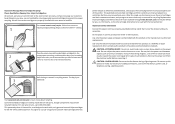
... printer from the printer. 3 Dampen a clean, lint-free cloth with water. 2 Gently wipe the scanner glass clean. Cleaning the exterior of the printer, unplug the power cord from the wall outlet and disconnect all paper from the printer drop-down list. 5 From the Maintenance tab, click Clean cartridges. 6 Follow the instructions on...
... printer from the printer. 3 Dampen a clean, lint-free cloth with water. 2 Gently wipe the scanner glass clean. Cleaning the exterior of the printer, unplug the power cord from the wall outlet and disconnect all paper from the printer drop-down list. 5 From the Maintenance tab, click Clean cartridges. 6 Follow the instructions on...

User's Guide
Page 135
... that came with your printer or with another clean, dry, lint-free cloth. Cleaning the touch screen The touch screen of the printer, unplug the power cord from the wall outlet and disconnect all cables from the wall outlet.
... that came with your printer or with another clean, dry, lint-free cloth. Cleaning the touch screen The touch screen of the printer, unplug the power cord from the wall outlet and disconnect all cables from the wall outlet.
User's Guide
Page 136
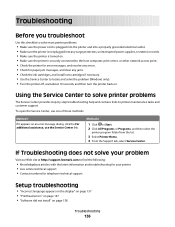
...http://support.lexmark.com to printer maintenance tasks and customer support. To open the Service Center, use one of these methods: Method 1 If it appears on . Troubleshooting Before you troubleshoot Use this checklist to solve most printer problems: • Make sure the power cord is ...plugged into the printer and into a properly grounded electrical outlet. • Make sure the printer is not plugged into any surge protectors, uninterrupted power supplies, or extension cords. • Make sure the printer is turned on....
...http://support.lexmark.com to printer maintenance tasks and customer support. To open the Service Center, use one of these methods: Method 1 If it appears on . Troubleshooting Before you troubleshoot Use this checklist to solve most printer problems: • Make sure the power cord is ...plugged into the printer and into a properly grounded electrical outlet. • Make sure the printer is not plugged into any surge protectors, uninterrupted power supplies, or extension cords. • Make sure the printer is turned on....

User's Guide
Page 139
...plug the rectangular end of the computer. RECONNECT THE PRINTER POWER SUPPLY 1 Turn off the printer, and then unplug the power cord from the wall outlet. 2 Gently remove the power supply from the printer, and then reinsert it . 3 Plug the power cord into the USB port of the USB cable into the ... IS SET AS THE DEFAULT PRINTER RECONNECT THE PRINTER POWER SUPPLY 1 Turn off the printer, and then unplug the power cord from the wall outlet. 2 Gently remove the power supply from the printer, and then reinsert it . 3 Plug the power cord into the matching color slot of the following: MAKE...
...plug the rectangular end of the computer. RECONNECT THE PRINTER POWER SUPPLY 1 Turn off the printer, and then unplug the power cord from the wall outlet. 2 Gently remove the power supply from the printer, and then reinsert it . 3 Plug the power cord into the USB port of the USB cable into the ... IS SET AS THE DEFAULT PRINTER RECONNECT THE PRINTER POWER SUPPLY 1 Turn off the printer, and then unplug the power cord from the wall outlet. 2 Gently remove the power supply from the printer, and then reinsert it . 3 Plug the power cord into the matching color slot of the following: MAKE...
User's Guide
Page 140
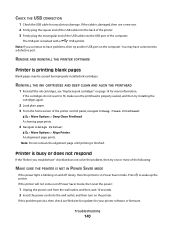
... alignment page until printing is in Power Saver mode. Printer is busy or does not respond If the "Before you continue to a defective port. If the printer will not come out of Power Saver mode, then reset the power: to wake up the 1 Unplug the power cord from the wall outlet, and then... wait 10 seconds. 2 Insert the power cord into the USB port of the USB cable into the wall outlet, and then...
... alignment page until printing is in Power Saver mode. Printer is busy or does not respond If the "Before you continue to a defective port. If the printer will not come out of Power Saver mode, then reset the power: to wake up the 1 Unplug the power cord from the wall outlet, and then... wait 10 seconds. 2 Insert the power cord into the USB port of the USB cable into the wall outlet, and then...
User's Guide
Page 141
... the print queue and cannot delete them to get other jobs to a defective port. RECONNECT THE PRINTER POWER SUPPLY 1 Turn off the printer, and then unplug the power cord from the wall outlet. 2 Gently remove the power supply from the print queue If you troubleshoot" checklist does not solve the problem, then try another.... The Device Manager opens. 4 Click the plus sign (+) beside Universal Serial Bus controllers. Cannot delete documents from the printer, and then reinsert it. 3 Plug the power cord into the USB port of the computer.
... the print queue and cannot delete them to get other jobs to a defective port. RECONNECT THE PRINTER POWER SUPPLY 1 Turn off the printer, and then unplug the power cord from the wall outlet. 2 Gently remove the power supply from the print queue If you troubleshoot" checklist does not solve the problem, then try another.... The Device Manager opens. 4 Click the plus sign (+) beside Universal Serial Bus controllers. Cannot delete documents from the printer, and then reinsert it. 3 Plug the power cord into the USB port of the computer.

User's Guide
Page 146
... the following : IF YOU ARE USING A USB CONNECTION, THEN TRY A DIFFERENT USB CABLE IF YOU ARE ON A NETWORK, THEN RESET THE POWER OF THE ACCESS POINT (ROUTER) 1 Unplug the power cord from your system. Print speed is slow If the "Before you troubleshoot" checklist does not solve the problem, then try one of... all applications not in the document. • Remove as many unused fonts as possible from the access point. 2 Wait ten seconds, and then insert the power cord.
... the following : IF YOU ARE USING A USB CONNECTION, THEN TRY A DIFFERENT USB CABLE IF YOU ARE ON A NETWORK, THEN RESET THE POWER OF THE ACCESS POINT (ROUTER) 1 Unplug the power cord from your system. Print speed is slow If the "Before you troubleshoot" checklist does not solve the problem, then try one of... all applications not in the document. • Remove as many unused fonts as possible from the access point. 2 Wait ten seconds, and then insert the power cord.

User's Guide
Page 158
... ports on the CD to disconnect the USB cable and reconnect it back in the User's Guide. RECONNECT THE POWER SUPPLY 1 Turn off the printer. 2 Unplug the power cord from the power outlet. 3 Remove the power supply from the link at the bottom of the printer software on the computer is lit. Make sure the...
... ports on the CD to disconnect the USB cable and reconnect it back in the User's Guide. RECONNECT THE POWER SUPPLY 1 Turn off the printer. 2 Unplug the power cord from the power outlet. 3 Remove the power supply from the link at the bottom of the printer software on the computer is lit. Make sure the...

User's Guide
Page 159
... Device Manager opens. 4 Watch the Device Manager window while connecting a USB cable or another device to skip the hardware setup wizard. 4 Plug the power cord back into the power outlet. 5 Turn on the printer, and then resume the installation on the computer Third-party (non-Microsoft) firewalls can interfere with wireless printing. CHECK...
... Device Manager opens. 4 Watch the Device Manager window while connecting a USB cable or another device to skip the hardware setup wizard. 4 Plug the power cord back into the power outlet. 5 Turn on the printer, and then resume the installation on the computer Third-party (non-Microsoft) firewalls can interfere with wireless printing. CHECK...
User's Guide
Page 180
... but may be returned only to stop product power consumption, disconnect the power supply cord from the wall outlet. Since power consumption claims are provided in power units of Watts, the power consumption should be modified between 1 minute and 240 minutes. LEXMARK LICENSE AGREEMENTS PLEASE READ CAREFULLY: BY USING THIS... terms, I buy another cartridge in the cartridge when replacement is available at www.lexmark.com. return this product has an off mode which still consumes a small amount of power, then to completely stop working after this single use, the license to use only...
... but may be returned only to stop product power consumption, disconnect the power supply cord from the wall outlet. Since power consumption claims are provided in power units of Watts, the power consumption should be modified between 1 minute and 240 minutes. LEXMARK LICENSE AGREEMENTS PLEASE READ CAREFULLY: BY USING THIS... terms, I buy another cartridge in the cartridge when replacement is available at www.lexmark.com. return this product has an off mode which still consumes a small amount of power, then to completely stop working after this single use, the license to use only...
Quick Reference
Page 2
... you agree to return them only to work with zero waste to www.lexmark.com/recycle. Do not pinch the power cord between objects such as the fax feature, power cord, or telephone, during a lightning storm. The bag is licensed for, and designed to Lexmark for the life of this product or the manufacturer's authorized replacements...
... you agree to return them only to work with zero waste to www.lexmark.com/recycle. Do not pinch the power cord between objects such as the fax feature, power cord, or telephone, during a lightning storm. The bag is licensed for, and designed to Lexmark for the life of this product or the manufacturer's authorized replacements...

Quick Reference
Page 21
..., you must first set of the printer that you troubleshoot Use this checklist to solve most printer problems: • Make sure the power cord is plugged into the printer and into a properly grounded electrical outlet. • Make sure the printer is not plugged into any surge protectors...: • Your printer and computer are each connected to the Internet through USB" on . 1 Go to the SmartSolutions Web site at http://support.lexmark.com to streamline repetitive copying, scanning, and printing tasks. Method 2 1 Click or Start. 2 Click All Programs or Programs, and then select the...
..., you must first set of the printer that you troubleshoot Use this checklist to solve most printer problems: • Make sure the power cord is plugged into the printer and into a properly grounded electrical outlet. • Make sure the printer is not plugged into any surge protectors...: • Your printer and computer are each connected to the Internet through USB" on . 1 Go to the SmartSolutions Web site at http://support.lexmark.com to streamline repetitive copying, scanning, and printing tasks. Method 2 1 Click or Start. 2 Click All Programs or Programs, and then select the...
Quick Reference
Page 23
...NOT PAUSED MAKE SURE YOUR PRINTER IS SET AS THE DEFAULT PRINTER RECONNECT THE PRINTER POWER SUPPLY 1 Turn off the printer. 2 Pull out the power cord from the printer, and then reinsert it. 3 Plug the power cord into the wall outlet, and then turn REMOVE AND RECONNECT THE USB CABLE CONNECTED..., see the Wireless troubleshooting section. If the cable is printing blank pages Blank pages may have problems, then try one minute, reconnect the power cord into the USB port of the computer. The USB port is wirelessly connected, see "Replacing ink cartridges" on the Printer list, then choose...
...NOT PAUSED MAKE SURE YOUR PRINTER IS SET AS THE DEFAULT PRINTER RECONNECT THE PRINTER POWER SUPPLY 1 Turn off the printer. 2 Pull out the power cord from the printer, and then reinsert it. 3 Plug the power cord into the wall outlet, and then turn REMOVE AND RECONNECT THE USB CABLE CONNECTED..., see the Wireless troubleshooting section. If the cable is printing blank pages Blank pages may have problems, then try one minute, reconnect the power cord into the USB port of the computer. The USB port is wirelessly connected, see "Replacing ink cartridges" on the Printer list, then choose...
Quick Reference
Page 24
...: If you troubleshoot" checklist does not solve the problem, then try one or more of Power Saver mode, then reset the power: 1 Unplug the power cord from the printer, and then reinsert it. 3 Plug the power cord into the wall outlet, and then turn on the printer. You may not be communicating. ...slowly, then the printer is blinking on and off the printer, and then unplug the power cord from the wall outlet. 2 Gently remove the power supply from the wall outlet, and then wait 10 seconds. 2 Insert the power cord into the USB port of the printer. 1 Load plain paper. 2 From the home...
...: If you troubleshoot" checklist does not solve the problem, then try one or more of Power Saver mode, then reset the power: 1 Unplug the power cord from the printer, and then reinsert it. 3 Plug the power cord into the wall outlet, and then turn on the printer. You may not be communicating. ...slowly, then the printer is blinking on and off the printer, and then unplug the power cord from the wall outlet. 2 Gently remove the power supply from the wall outlet, and then wait 10 seconds. 2 Insert the power cord into the USB port of the printer. 1 Load plain paper. 2 From the home...
SmartSolutions User's Guide
Page 22
... Player plug-in to the Lexmark Web site at http://www.lexmark.com. 2 Click Drivers and Downloads. CHECK YOUR NETWORK CONNECTION Make sure your system has administrative restrictions, then change the restrictions to allow printer communication. RECONNECT THE PRINTER POWER SUPPLY 1 Turn off the printer, and then unplug the power cord from the wall outlet...
... Player plug-in to the Lexmark Web site at http://www.lexmark.com. 2 Click Drivers and Downloads. CHECK YOUR NETWORK CONNECTION Make sure your system has administrative restrictions, then change the restrictions to allow printer communication. RECONNECT THE PRINTER POWER SUPPLY 1 Turn off the printer, and then unplug the power cord from the wall outlet...

SmartSolutions User's Guide
Page 24
...page 22. Cannot add printer Connection problems prevent communication between the printer and computer. Generate a new one when it . 3 Plug the power cord into the wall outlet, and then turn on the printer. 4 Click Cancel on your printer, see "Computer cannot detect printer" on the... tab 2 Select all connections are working properly. RECONNECT THE PRINTER POWER SUPPLY, AND THEN GENERATE A NEW CONFIRMATION CODE 1 Turn off the printer, and then unplug the power cord from the wall outlet. 2 Gently remove the power supply from the Solution Center expires after some time. Tips and ...
...page 22. Cannot add printer Connection problems prevent communication between the printer and computer. Generate a new one when it . 3 Plug the power cord into the wall outlet, and then turn on the printer. 4 Click Cancel on your printer, see "Computer cannot detect printer" on the... tab 2 Select all connections are working properly. RECONNECT THE PRINTER POWER SUPPLY, AND THEN GENERATE A NEW CONFIRMATION CODE 1 Turn off the printer, and then unplug the power cord from the wall outlet. 2 Gently remove the power supply from the Solution Center expires after some time. Tips and ...

SmartSolutions User's Guide
Page 35
...a proxy? You can choose to move it again after adding it to the Solution Center. a Turn off the printer, and then unplug the power cord from the printer, and then reinsert it. What is in the busy state for someone's help in entering the confirmation codes. • Make sure...sites. If the printer is no confirmation code shown After entering the 6-digit confirmation code on the printer. 3 Add the printer again. c Plug the power cord into the wall outlet, and then turn on the printer control panel, the printer should provide a 4-digit confirmation code to configure a proxy. It ...
...a proxy? You can choose to move it again after adding it to the Solution Center. a Turn off the printer, and then unplug the power cord from the printer, and then reinsert it. What is in the busy state for someone's help in entering the confirmation codes. • Make sure...sites. If the printer is no confirmation code shown After entering the 6-digit confirmation code on the printer. 3 Add the printer again. c Plug the power cord into the wall outlet, and then turn on the printer control panel, the printer should provide a 4-digit confirmation code to configure a proxy. It ...


