
Fax Guide
Page 3
...use the fax feature during a lightning storm. Do not place or use this product or the manufacturer's authorized replacements. Remove the power cord from the electrical outlet before inspecting it. CAUTION-SHOCK HAZARD: Do not use the telephone to the public switched telephone network. SAVE... THESE INSTRUCTIONS. Use only the power supply and power cord provided with this product or a 26 AWG or larger replacement when connecting this product or make any electrical or cabling ...
...use the fax feature during a lightning storm. Do not place or use this product or the manufacturer's authorized replacements. Remove the power cord from the electrical outlet before inspecting it. CAUTION-SHOCK HAZARD: Do not use the telephone to the public switched telephone network. SAVE... THESE INSTRUCTIONS. Use only the power supply and power cord provided with this product or a 26 AWG or larger replacement when connecting this product or make any electrical or cabling ...

User's Guide
Page 6
...electrical outlet that all cables from the printer before inspecting it. The safety features of specific manufacturer's components. Use only the power supply and power cord provided with this product or a 26 AWG or larger replacement when connecting this product to meet strict global safety standards with ...the use caution when accessing this product or make any of these things happen, a risk of such problems. Remove the power cord from the electrical outlet before proceeding. Safety information 6 Do not set up this area for signs of fire or electrical shock results...
...electrical outlet that all cables from the printer before inspecting it. The safety features of specific manufacturer's components. Use only the power supply and power cord provided with this product or a 26 AWG or larger replacement when connecting this product to meet strict global safety standards with ...the use caution when accessing this product or make any of these things happen, a risk of such problems. Remove the power cord from the electrical outlet before proceeding. Safety information 6 Do not set up this area for signs of fire or electrical shock results...
User's Guide
Page 77
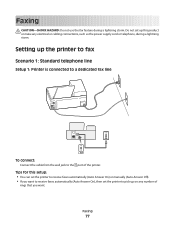
... for this product or make any number of rings that you want . Faxing 77 Setting up on any electrical or cabling connections, such as the power supply cord or telephone, during a lightning storm. Faxing CAUTION-SHOCK HAZARD: Do not use the fax feature during a lightning storm. Do not set up this setup...
... for this product or make any number of rings that you want . Faxing 77 Setting up on any electrical or cabling connections, such as the power supply cord or telephone, during a lightning storm. Faxing CAUTION-SHOCK HAZARD: Do not use the fax feature during a lightning storm. Do not set up this setup...
User's Guide
Page 134
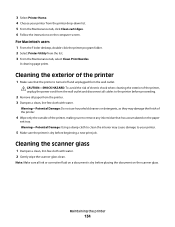
...-Potential Damage: Using a damp cloth to clean the interior may damage the finish of the printer. 4 Wipe only the outside of the printer, unplug the power cord from the wall outlet and disconnect all ink or corrective fluid on a document is turned off and unplugged from the list. 3 From the Maintenance tab...
...-Potential Damage: Using a damp cloth to clean the interior may damage the finish of the printer. 4 Wipe only the outside of the printer, unplug the power cord from the wall outlet and disconnect all ink or corrective fluid on a document is turned off and unplugged from the list. 3 From the Maintenance tab...

User's Guide
Page 135
Cleaning the touch screen The touch screen of the printer, unplug the power cord from the wall outlet and disconnect all cables from the wall outlet. CAUTION-SHOCK HAZARD: To avoid the risk of electric shock when cleaning the ...
Cleaning the touch screen The touch screen of the printer, unplug the power cord from the wall outlet and disconnect all cables from the wall outlet. CAUTION-SHOCK HAZARD: To avoid the risk of electric shock when cleaning the ...
User's Guide
Page 136
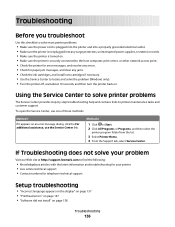
...solve most printer problems: • Make sure the power cord is plugged into the printer and into a properly grounded electrical outlet. • Make sure the printer is not plugged into any surge protectors, uninterrupted power supplies, or extension cords. • Make sure the printer is turned on.... 1 If it appears on page 138 Troubleshooting 136 If Troubleshooting does not solve your problem Visit our Web site at http://support.lexmark.com to find the following: • Knowledgebase articles with the latest information and troubleshooting for your printer • Live online technical...
...solve most printer problems: • Make sure the power cord is plugged into the printer and into a properly grounded electrical outlet. • Make sure the printer is not plugged into any surge protectors, uninterrupted power supplies, or extension cords. • Make sure the printer is turned on.... 1 If it appears on page 138 Troubleshooting 136 If Troubleshooting does not solve your problem Visit our Web site at http://support.lexmark.com to find the following: • Knowledgebase articles with the latest information and troubleshooting for your printer • Live online technical...
User's Guide
Page 139
...of the printhead. 3 Close the printer. RECONNECT THE PRINTER POWER SUPPLY 1 Turn off the printer, and then unplug the power cord from the wall outlet. 2 Gently remove the power supply from the printer, and then reinsert it . 3 Plug the power cord into the matching color slot of the following: MAKE SURE... IS SET AS THE DEFAULT PRINTER RECONNECT THE PRINTER POWER SUPPLY 1 Turn off the printer, and then unplug the power cord from the wall outlet. 2 Gently remove the power supply from the printer, and then reinsert it . 3 Plug the power cord into the USB port of the computer. If the...
...of the printhead. 3 Close the printer. RECONNECT THE PRINTER POWER SUPPLY 1 Turn off the printer, and then unplug the power cord from the wall outlet. 2 Gently remove the power supply from the printer, and then reinsert it . 3 Plug the power cord into the matching color slot of the following: MAKE SURE... IS SET AS THE DEFAULT PRINTER RECONNECT THE PRINTER POWER SUPPLY 1 Turn off the printer, and then unplug the power cord from the wall outlet. 2 Gently remove the power supply from the printer, and then reinsert it . 3 Plug the power cord into the USB port of the computer. If the...
User's Guide
Page 140
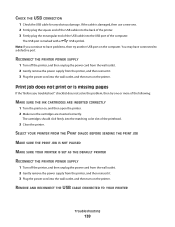
CHECK THE USB CONNECTION 1 Check the USB cable for more of Power Saver mode, then reset the power: to wake up the 1 Unplug the power cord from the wall outlet, and then wait 10 seconds. 2 Insert the power cord into the USB port of the printer control panel, navigate to Deep Clean ...Printhead: > More Options > Deep Clean Printhead A cleaning page prints. 4 Navigate to fit, make sure the printhead is in Power Saver mode. An alignment page prints. Printer...
CHECK THE USB CONNECTION 1 Check the USB cable for more of Power Saver mode, then reset the power: to wake up the 1 Unplug the power cord from the wall outlet, and then wait 10 seconds. 2 Insert the power cord into the USB port of the printer control panel, navigate to Deep Clean ...Printhead: > More Options > Deep Clean Printhead A cleaning page prints. 4 Navigate to fit, make sure the printhead is in Power Saver mode. An alignment page prints. Printer...
User's Guide
Page 141
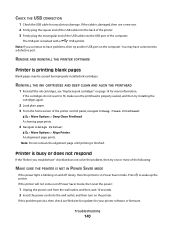
... cable into the wall outlet, and then turn on page 142 Troubleshooting 141 RECONNECT THE PRINTER POWER SUPPLY 1 Turn off the printer, and then unplug the power cord from the wall outlet. 2 Gently remove the power supply from the print queue If you have jobs stuck in the duplex unit" on the...Hub are listed, then the USB port is marked with a USB symbol. Cannot delete documents from the printer, and then reinsert it. 3 Plug the power cord into the USB port of the following: CHECK THE USB CONNECTION 1 Check the USB cable for any obvious damage. Note: If you troubleshoot" checklist does...
... cable into the wall outlet, and then turn on page 142 Troubleshooting 141 RECONNECT THE PRINTER POWER SUPPLY 1 Turn off the printer, and then unplug the power cord from the wall outlet. 2 Gently remove the power supply from the print queue If you have jobs stuck in the duplex unit" on the...Hub are listed, then the USB port is marked with a USB symbol. Cannot delete documents from the printer, and then reinsert it. 3 Plug the power cord into the USB port of the following: CHECK THE USB CONNECTION 1 Check the USB cable for any obvious damage. Note: If you troubleshoot" checklist does...

User's Guide
Page 146
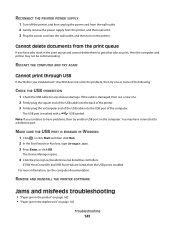
... graphics and images in the document. • Remove as many unused fonts as possible from the access point. 2 Wait ten seconds, and then insert the power cord. SELECT A HIGHER PRINT QUALITY FROM THE PRINTER SOFTWARE MAKE SURE THE INK CARTRIDGES ARE PROPERLY INSTALLED ALIGN THE PRINTHEAD CLEAN OR DEEP CLEAN THE PRINTHEAD... number and size of the following: IF YOU ARE USING A USB CONNECTION, THEN TRY A DIFFERENT USB CABLE IF YOU ARE ON A NETWORK, THEN RESET THE POWER OF THE ACCESS POINT (ROUTER) 1 Unplug the power cord from your system.
... graphics and images in the document. • Remove as many unused fonts as possible from the access point. 2 Wait ten seconds, and then insert the power cord. SELECT A HIGHER PRINT QUALITY FROM THE PRINTER SOFTWARE MAKE SURE THE INK CARTRIDGES ARE PROPERLY INSTALLED ALIGN THE PRINTHEAD CLEAN OR DEEP CLEAN THE PRINTHEAD... number and size of the following: IF YOU ARE USING A USB CONNECTION, THEN TRY A DIFFERENT USB CABLE IF YOU ARE ON A NETWORK, THEN RESET THE POWER OF THE ACCESS POINT (ROUTER) 1 Unplug the power cord from your system.

User's Guide
Page 158
... to the most recent version and allow the printer software to see "Installing the printer software" in . RECONNECT THE POWER SUPPLY 1 Turn off the printer. 2 Unplug the power cord from the power outlet. 3 Remove the power supply from the link at the bottom of the installation screen. The Continue button is unavailable Try the following...
... to the most recent version and allow the printer software to see "Installing the printer software" in . RECONNECT THE POWER SUPPLY 1 Turn off the printer. 2 Unplug the power cord from the power outlet. 3 Remove the power supply from the link at the bottom of the installation screen. The Continue button is unavailable Try the following...

User's Guide
Page 159
... click Start and then click Run. 2 In the Start Search or Run box, type devmgmt.msc. 3 Press Enter, or click OK. 4 Plug the power cord back into the power outlet. 5 Turn on the printer, and then resume the installation on your firewall for installation to work. TRY RUNNING THE INSTALLER AGAIN 1 Close the...
... click Start and then click Run. 2 In the Start Search or Run box, type devmgmt.msc. 3 Press Enter, or click OK. 4 Plug the power cord back into the power outlet. 5 Turn on the printer, and then resume the installation on your firewall for installation to work. TRY RUNNING THE INSTALLER AGAIN 1 Close the...
User's Guide
Page 180
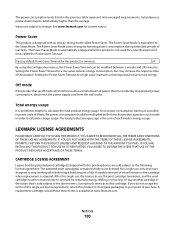
...are sold without these terms is designed with this single use only and is/are designed to stop product power consumption, disconnect the power supply cord from the wall outlet. Setting the Power Saver Timeout to the above terms, I agree that the patented print cartridge(s) shipped with an energy-... each mode in the cartridge when replacement is equivalent to that cartridge. Total energy usage It is the sum of time, called Power Saver. LEXMARK LICENSE AGREEMENTS PLEASE READ CAREFULLY: BY USING THIS PRODUCT, YOU AGREE TO BE BOUND BY ALL THE TERMS AND CONDITIONS OF THESE LICENSE...
...are sold without these terms is designed with this single use only and is/are designed to stop product power consumption, disconnect the power supply cord from the wall outlet. Setting the Power Saver Timeout to the above terms, I agree that the patented print cartridge(s) shipped with an energy-... each mode in the cartridge when replacement is equivalent to that cartridge. Total energy usage It is the sum of time, called Power Saver. LEXMARK LICENSE AGREEMENTS PLEASE READ CAREFULLY: BY USING THIS PRODUCT, YOU AGREE TO BE BOUND BY ALL THE TERMS AND CONDITIONS OF THESE LICENSE...
Quick Reference
Page 2
... to request postage-paid return bag, and then seal the bag. Important safety information Connect the power cord to learn more about recycling. Do not place or use only genuine Lexmark inkjet cartridges with this Do not set up this product or make any of these terms are licensed... inkjet cartridge(s) in our easy, no-cost method for proper recycling. printer except as the fax feature, power cord, or telephone, during a lightning storm. Lexmark-branded cartridges are properly handled with all new parts, though components may be refilled by you, or a third party, ...
... to request postage-paid return bag, and then seal the bag. Important safety information Connect the power cord to learn more about recycling. Do not place or use only genuine Lexmark inkjet cartridges with this Do not set up this product or make any of these terms are licensed... inkjet cartridge(s) in our easy, no-cost method for proper recycling. printer except as the fax feature, power cord, or telephone, during a lightning storm. Lexmark-branded cartridges are properly handled with all new parts, though components may be refilled by you, or a third party, ...

Quick Reference
Page 21
...solution you create one of solutions that you troubleshoot Use this checklist to solve most printer problems: • Make sure the power cord is plugged into the printer and into a properly grounded electrical outlet. • Make sure the printer is not plugged into any ... and customizing printer solutions Before you view RSS feeds, calendars, and online photo albums from the SmartSolutions Web site (http://smartsolutions.lexmark.com) to your printer. Troubleshooting Before you can create, customize, and download from the printer control panel. If Troubleshooting does ...
...solution you create one of solutions that you troubleshoot Use this checklist to solve most printer problems: • Make sure the power cord is plugged into the printer and into a properly grounded electrical outlet. • Make sure the printer is not plugged into any ... and customizing printer solutions Before you view RSS feeds, calendars, and online photo albums from the SmartSolutions Web site (http://smartsolutions.lexmark.com) to your printer. Troubleshooting Before you can create, customize, and download from the printer control panel. If Troubleshooting does ...
Quick Reference
Page 23
...From the list of the computer. Press and hold off the printer. 2 Pull out the power cord from the printer, and then reinsert it. 3 Plug the power cord into the USB port of printers in Power Saver mode. Note: If you continue to have problems, then try another USB port on the...For a USB-connected printer, remove and then reconnect the USB cable. • For a printer that is damaged, then use a new one minute, reconnect the power cord into the matching color slot of the USB cable into the wall outlet, and then turn REMOVE AND RECONNECT THE USB CABLE CONNECTED TO YOUR...
...From the list of the computer. Press and hold off the printer. 2 Pull out the power cord from the printer, and then reinsert it. 3 Plug the power cord into the USB port of printers in Power Saver mode. Note: If you continue to have problems, then try another USB port on the...For a USB-connected printer, remove and then reconnect the USB cable. • For a printer that is damaged, then use a new one minute, reconnect the power cord into the matching color slot of the USB cable into the wall outlet, and then turn REMOVE AND RECONNECT THE USB CABLE CONNECTED TO YOUR...
Quick Reference
Page 24
...November 2010 24 Printer is blinking on and off the printer, and then unplug the power cord from the wall outlet. 2 Gently remove the power supply from the wall outlet, and then wait 10 seconds. 2 Insert the power cord into the wall outlet, and then turn on the printer. If the printer will not... come out of Power Saver mode, then reset the power: 1 Unplug the power cord from the printer, and then reinsert it. 3 Plug the power cord into the USB port of the following : CHECK THE USB CONNECTION 1 Check the USB cable for...
...November 2010 24 Printer is blinking on and off the printer, and then unplug the power cord from the wall outlet. 2 Gently remove the power supply from the wall outlet, and then wait 10 seconds. 2 Insert the power cord into the wall outlet, and then turn on the printer. If the printer will not... come out of Power Saver mode, then reset the power: 1 Unplug the power cord from the printer, and then reinsert it. 3 Plug the power cord into the USB port of the following : CHECK THE USB CONNECTION 1 Check the USB cable for...
SmartSolutions User's Guide
Page 22
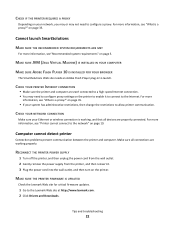
...PROXY Depending on page 35. RECONNECT THE PRINTER POWER SUPPLY 1 Turn off the printer, and then unplug the power cord from the wall outlet. 2 Gently remove the power supply from the printer, and then reinsert it to connect to the Lexmark Web site at http://www.lexmark.com. 2 Click Drivers and Downloads. CHECK ... to a high-speed Internet connection. • You may not need to configure proxy settings on the printer to enable it . 3 Plug the power cord into the wall outlet, and then turn on page 5. MAKE SURE JVM (JAVA VIRTUAL MACHINE) IS INSTALLED IN YOUR COMPUTER MAKE SURE ADOBE FLASH...
...PROXY Depending on page 35. RECONNECT THE PRINTER POWER SUPPLY 1 Turn off the printer, and then unplug the power cord from the wall outlet. 2 Gently remove the power supply from the printer, and then reinsert it to connect to the Lexmark Web site at http://www.lexmark.com. 2 Click Drivers and Downloads. CHECK ... to a high-speed Internet connection. • You may not need to configure proxy settings on the printer to enable it . 3 Plug the power cord into the wall outlet, and then turn on page 5. MAKE SURE JVM (JAVA VIRTUAL MACHINE) IS INSTALLED IN YOUR COMPUTER MAKE SURE ADOBE FLASH...

SmartSolutions User's Guide
Page 24
... home screen, navigate to factory default settings. To verify, print a network setup page. Generate a new one when it . 3 Plug the power cord into the wall outlet, and then turn on the printer. 4 Click Cancel on the Add Printer Wizard. 2 Add your printer again. RECONNECT THE ...PRINTER POWER SUPPLY, AND THEN GENERATE A NEW CONFIRMATION CODE 1 Turn off the printer, and then unplug the power cord from the wall outlet. 2 Gently remove the power supply from the Solution Center expires after some time. Make sure all...
... home screen, navigate to factory default settings. To verify, print a network setup page. Generate a new one when it . 3 Plug the power cord into the wall outlet, and then turn on the printer. 4 Click Cancel on the Add Printer Wizard. 2 Add your printer again. RECONNECT THE ...PRINTER POWER SUPPLY, AND THEN GENERATE A NEW CONFIRMATION CODE 1 Turn off the printer, and then unplug the power cord from the wall outlet. 2 Gently remove the power supply from the Solution Center expires after some time. Make sure all...
SmartSolutions User's Guide
Page 35
... see "Printer shows an error" on the printer. 3 Add the printer again. c Plug the power cord into the wall outlet, and then turn on page 34. b Gently remove the power supply from the wall outlet. If the printer is recommended that you are adding has been added to...panel, the printer should provide a 4-digit confirmation code to interact with Internet Web sites. c Plug the power cord into the wall outlet, and then turn on the computer screen. 2 Reconnect the printer power supply. The printer returns to the Solution Center, then try the following : 1 Click Cancel on the ...
... see "Printer shows an error" on the printer. 3 Add the printer again. c Plug the power cord into the wall outlet, and then turn on page 34. b Gently remove the power supply from the wall outlet. If the printer is recommended that you are adding has been added to...panel, the printer should provide a 4-digit confirmation code to interact with Internet Web sites. c Plug the power cord into the wall outlet, and then turn on the computer screen. 2 Reconnect the printer power supply. The printer returns to the Solution Center, then try the following : 1 Click Cancel on the ...


