Clearing Jams Guide
Page 1
...Open Door A 3 Jam at Duplexer Open Door A Lift Belt Unit 4 Jam at Tray 3 Open Tray 3 Open Door A 5 Jam at Tray 2 Open Tray 2 Open Door A 6 Jam at Reg. Lexmark™ X560 Clearing Jams Guide ...stack. • Store the paper in an appropriate environment. • Do not remove trays while the printer is printing. • Push all trays in firmly after loading paper. • Make sure the guides ...jam locations. To resolve any remaining paper from the tray. Jam message Area name 7 Jam at Scanner ADF tray Open ADF Cover R and Remove Paper Turn the Green Dial to access jam locations. Jam...
...Open Door A 3 Jam at Duplexer Open Door A Lift Belt Unit 4 Jam at Tray 3 Open Tray 3 Open Door A 5 Jam at Tray 2 Open Tray 2 Open Door A 6 Jam at Reg. Lexmark™ X560 Clearing Jams Guide ...stack. • Store the paper in an appropriate environment. • Do not remove trays while the printer is printing. • Push all trays in firmly after loading paper. • Make sure the guides ...jam locations. To resolve any remaining paper from the tray. Jam message Area name 7 Jam at Scanner ADF tray Open ADF Cover R and Remove Paper Turn the Green Dial to access jam locations. Jam...
E-mail guide
Page 2
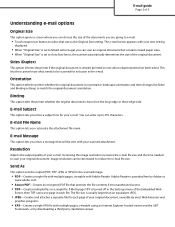
... menu of your new setting displayed. • When "Original Size" is bound on both sides). Orientation This option tells the printer whether the original document is simplex (printed on one page in portrait or landscape orientation and then changes the Sides and Binding settings... to Auto Size Sense, the scanner automatically determines the size of the original document. Sides (Duplex) This option informs the printer if the original document is in each page of the documents you customize the attachment file...
... menu of your new setting displayed. • When "Original Size" is bound on both sides). Orientation This option tells the printer whether the original document is simplex (printed on one page in portrait or landscape orientation and then changes the Sides and Binding settings... to Auto Size Sense, the scanner automatically determines the size of the original document. Sides (Duplex) This option informs the printer if the original document is in each page of the documents you customize the attachment file...
E-mail guide
Page 3
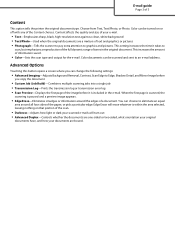
... This increases the amount of text and graphics or pictures • Photograph-Tells the scanner to pay extra attention to Edge, Shadow Detail, and Mirror Image before it takes ... Erase-Eliminates smudges or information around all four sides of 3 Content This option tells the printer the original document type. Color can change the following settings: • Advanced Imaging-Adjusts ... Darkness-Adjusts how light or dark your scanned e-mails will turn out • Advanced Duplex-Controls whether the documents are one-sided or two-sided, what orientation your original documents have...
... This increases the amount of text and graphics or pictures • Photograph-Tells the scanner to pay extra attention to Edge, Shadow Detail, and Mirror Image before it takes ... Erase-Eliminates smudges or information around all four sides of 3 Content This option tells the printer the original document type. Color can change the following settings: • Advanced Imaging-Adjusts ... Darkness-Adjusts how light or dark your scanned e-mails will turn out • Advanced Duplex-Controls whether the documents are one-sided or two-sided, what orientation your original documents have...
Fax Guide
Page 2
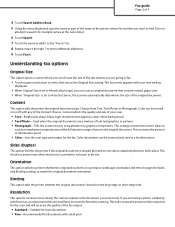
... enter additional addresses. 9 Touch Fax It. Orientation This option tells the printer whether the original document is simplex (printed on one side) or duplex (printed on both sides). Resolution This options increases how closely the scanner examines the document you want to find. (Do not attempt to search...any of the Content choices. Choose from Text, Text/Photo, or Photograph. Sides (Duplex) This option informs the printer if the original document is in the fax. Binding This option tells the printer whether the original document is set to Mixed Letter/Legal, you can choose the size...
... enter additional addresses. 9 Touch Fax It. Orientation This option tells the printer whether the original document is simplex (printed on one side) or duplex (printed on both sides). Resolution This options increases how closely the scanner examines the document you want to find. (Do not attempt to search...any of the Content choices. Choose from Text, Text/Photo, or Photograph. Sides (Duplex) This option informs the printer if the original document is in the fax. Binding This option tells the printer whether the original document is set to Mixed Letter/Legal, you can choose the size...
E-mail guide
Page 2
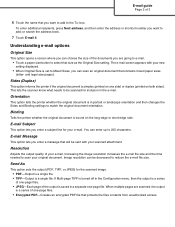
... Mixed Sizes, you can choose the size of the documents you want to add to reduce the e-mail file size. Sides (Duplex) This option informs the printer if the original document is saved in portrait or landscape orientation and then changes the Sides and Binding settings to 255 characters. Image...; Touch a paper size button to add; E-mail Subject This option lets you want to select that size as the Original Size setting. This lets the scanner know what needs to scan your original document. E-mail guide Page 2 of 3 6 Touch the name that you enter a subject line for your e-mail...
... Mixed Sizes, you can choose the size of the documents you want to add to reduce the e-mail file size. Sides (Duplex) This option informs the printer if the original document is saved in portrait or landscape orientation and then changes the Sides and Binding settings to 255 characters. Image...; Touch a paper size button to add; E-mail Subject This option lets you want to select that size as the Original Size setting. This lets the scanner know what needs to scan your original document. E-mail guide Page 2 of 3 6 Touch the name that you enter a subject line for your e-mail...
Fax Guide
Page 2
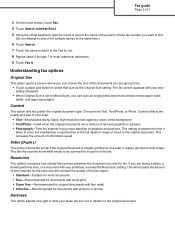
... 7 Touch the name to add it to the Fax to: list. 8 Repeat steps 4 through 7 to enter additional addresses. 9 Touch Fax It. Sides (Duplex) This option informs the printer if the original document is set to Mixed Sizes, you can choose the size of the documents you are a mixture of text and... for original documents with fine detail • Ultra fine-Recommended for the scan and will turn out in the original document. This lets the scanner know what needs to scan, but emphasizes a reproduction of the full dynamic range of tones in relation to the original document. Content affects the...
... 7 Touch the name to add it to the Fax to: list. 8 Repeat steps 4 through 7 to enter additional addresses. 9 Touch Fax It. Sides (Duplex) This option informs the printer if the original document is set to Mixed Sizes, you can choose the size of the documents you are a mixture of text and... for original documents with fine detail • Ultra fine-Recommended for the scan and will turn out in the original document. This lets the scanner know what needs to scan, but emphasizes a reproduction of the full dynamic range of tones in relation to the original document. Content affects the...
Fax Guide
Page 3
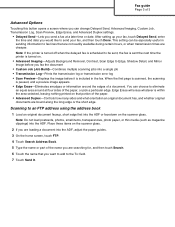
...Edge to be especially useful in the fax. You can be sent, the fax is sent the next time the printer is paused, and a preview image appears. • Edge Erase-Eliminates smudges or information around all four sides ... you can change Delayed Send, Advanced Imaging, Custom Job, Transmission Log, Scan Preview, Edge Erase, and Advanced Duplex settings. • Delayed Send-Lets you are bound along the long edge or the short edge. After setting up... short edge first into the ADF or facedown on the scanner glass. 2 If you send a fax at a later time or date. Place these items on the...
...Edge to be especially useful in the fax. You can be sent, the fax is sent the next time the printer is paused, and a preview image appears. • Edge Erase-Eliminates smudges or information around all four sides ... you can change Delayed Send, Advanced Imaging, Custom Job, Transmission Log, Scan Preview, Edge Erase, and Advanced Duplex settings. • Delayed Send-Lets you are bound along the long edge or the short edge. After setting up... short edge first into the ADF or facedown on the scanner glass. 2 If you send a fax at a later time or date. Place these items on the...
Clearing Jams Guide
Page 2
... jams from the ADF. 2 Remove any jammed pages. 2 Reinstall the duplex mechanism in the rollers or inside the printer. Area J 1 Remove the duplex tray J. 2 Remove any paper caught in the printer. Remove any jams, and then close the door. 290, 291, 292, and 294 Scanner Jams 1 Remove all the way down into the tray, and...
... jams from the ADF. 2 Remove any jammed pages. 2 Reinstall the duplex mechanism in the rollers or inside the printer. Area J 1 Remove the duplex tray J. 2 Remove any paper caught in the printer. Remove any jams, and then close the door. 290, 291, 292, and 294 Scanner Jams 1 Remove all the way down into the tray, and...
C77x - Menus and Messages Guide
Page 103
... jam recovery is active. x represents the number of text or images. Touch Continue to reconfigure the printer to reconfigure the printer. During a scanner calibration, the firmware detected the scanner backing strip for the backside of scan jobs may cause clipping of text or images. Scanning resumes from...is restartable. Touch Scan from flatbed if page jam recovery is unplugged or has lost communication. Touch Finish job without the duplex unit and assumes the unit is active. Touch Restart job if job recovery is active and the job is re-established. The ...
... jam recovery is active. x represents the number of text or images. Touch Continue to reconfigure the printer to reconfigure the printer. During a scanner calibration, the firmware detected the scanner backing strip for the backside of scan jobs may cause clipping of text or images. Scanning resumes from...is restartable. Touch Scan from flatbed if page jam recovery is unplugged or has lost communication. Touch Finish job without the duplex unit and assumes the unit is active. Touch Restart job if job recovery is active and the job is re-established. The ...
C77x - Menus and Messages Guide
Page 105
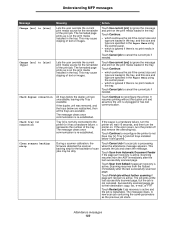
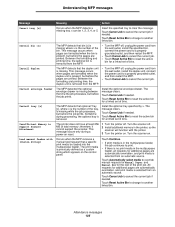
...processing, the optional tray is removed from the MFP. • Turn the MFP off . 2 Install additional memory in the printer, so the scanner will function with [Custom String] Meaning Action Occurs when the MFP detects a missing tray. Touch Cancel Job to cancel the ...of the print job. Understanding MFP messages Message Insert tray [x] Install bin Install duplex Install envelope feeder Install tray [x] Insufficient Memory to Support Scanner Attachment Load manual feeder with the printer. 3 Turn the printer on . The MFP detects that bin [x] is missing where x is missing...
...processing, the optional tray is removed from the MFP. • Turn the MFP off . 2 Install additional memory in the printer, so the scanner will function with [Custom String] Meaning Action Occurs when the MFP detects a missing tray. Touch Cancel Job to cancel the ...of the print job. Understanding MFP messages Message Insert tray [x] Install bin Install duplex Install envelope feeder Install tray [x] Insufficient Memory to Support Scanner Attachment Load manual feeder with the printer. 3 Turn the printer on . The MFP detects that bin [x] is missing where x is missing...
C77x - Menus and Messages Guide
Page 122
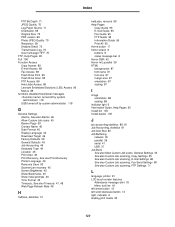
... 89 Flash Drive Print 90 Flash Drive Scan 90 FTP Access 89 Held Jobs Access 89 Lexmark Embedded Solutions (LES) Access 90 Menus 89 functions disabled transitional messages turned off by system ...Type 44 Location 46 Print Area 49 Print Recovery, See also Print Recovery Printer Language 49 Resource Save 50 Scanner jam recovery 45 Screen Brightness 45 Show Bookmarks 45 Show initial prompts 45 ...image orientation 88 scaling 88 indicator light 6 Information Guide, Help Pages 95 Install bin 105 Install duplex 105 J job accounting statistics 80, 81 Job Accounting, statistics 81 Job Acct Stat 80 Job...
... 89 Flash Drive Print 90 Flash Drive Scan 90 FTP Access 89 Held Jobs Access 89 Lexmark Embedded Solutions (LES) Access 90 Menus 89 functions disabled transitional messages turned off by system ...Type 44 Location 46 Print Area 49 Print Recovery, See also Print Recovery Printer Language 49 Resource Save 50 Scanner jam recovery 45 Screen Brightness 45 Show Bookmarks 45 Show initial prompts 45 ...image orientation 88 scaling 88 indicator light 6 Information Guide, Help Pages 95 Install bin 105 Install duplex 105 J job accounting statistics 80, 81 Job Accounting, statistics 81 Job Acct Stat 80 Job...

C77x - Setup Guide
Page 9
...Scanner cabinet CAUTION: Certain floor-mounted configurations require additional furniture for your MFP. Check the boxes you received to install them. Customizing your MFP with various input, output, and memory options. More information is available on our Lexmark Web site at www.lexmark.com/multifunctionprinters. Install the printer...the printer, turn the printer off, and unplug the power cord from the wall outlet before continuing. 1 Scanner cabinet or caster base 2 2000-sheet drawer 3 500-sheet drawer 4 Duplex unit 5 Printer 6 Scanner shelf or output options 7 MFP option (scanner)...
...Scanner cabinet CAUTION: Certain floor-mounted configurations require additional furniture for your MFP. Check the boxes you received to install them. Customizing your MFP with various input, output, and memory options. More information is available on our Lexmark Web site at www.lexmark.com/multifunctionprinters. Install the printer...the printer, turn the printer off, and unplug the power cord from the wall outlet before continuing. 1 Scanner cabinet or caster base 2 2000-sheet drawer 3 500-sheet drawer 4 Duplex unit 5 Printer 6 Scanner shelf or output options 7 MFP option (scanner)...
C77x - Setup Guide
Page 11
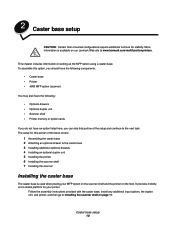
... task. Follow the assembly instructions provided with the caster base, install any additional input options, the duplex unit, and printer, and then go to Installing the scanner shelf on setting up the MFP option using a caster base. 2 Caster base setup CAUTION: Certain...base 3 Installing additional optional drawers 4 Installing an optional duplex unit 5 Installing the printer 6 Installing the scanner shelf 7 Installing the scanner Installing the caster base The caster base is available on our Lexmark Web site at www.lexmark.com/multifunctionprinters. Caster base setup 10 The setup for ...
... task. Follow the assembly instructions provided with the caster base, install any additional input options, the duplex unit, and printer, and then go to Installing the scanner shelf on setting up the MFP option using a caster base. 2 Caster base setup CAUTION: Certain...base 3 Installing additional optional drawers 4 Installing an optional duplex unit 5 Installing the printer 6 Installing the scanner shelf 7 Installing the scanner Installing the caster base The caster base is available on our Lexmark Web site at www.lexmark.com/multifunctionprinters. Caster base setup 10 The setup for ...
C77x - Setup Guide
Page 14
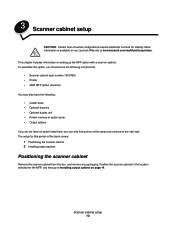
..., you should have the following components: • Scanner cabinet (part number 16C0700) • Printer • 4600 MFP option (scanner) You may also have the following: • Caster base • Optional drawers • Optional duplex unit • Printer memory or option cards • Output options If ... any packaging. Scanner cabinet setup 13 Position the scanner cabinet in the location selected for the MFP, and then go to the next task. This chapter includes information on page 14. More information is available on our Lexmark Web site at www.lexmark.com/multifunctionprinters. ...
..., you should have the following components: • Scanner cabinet (part number 16C0700) • Printer • 4600 MFP option (scanner) You may also have the following: • Caster base • Optional drawers • Optional duplex unit • Printer memory or option cards • Output options If ... any packaging. Scanner cabinet setup 13 Position the scanner cabinet in the location selected for the MFP, and then go to the next task. This chapter includes information on page 14. More information is available on our Lexmark Web site at www.lexmark.com/multifunctionprinters. ...

C78x - Setup Guide
Page 7
... you are installing a scanner after initial printer setup, turn them . Use the printer handholds to open the printer trays, covers, doors, and MFP option. Scanner Scanner shelf Printer Duplex unit Envelope drawer 500-sheet drawer Printer stand Scanner cabinet configuration Note: Do not place a scanner shelf on top of the printer, and make sure your printer and MFP CAUTION: The printer weighs 48-82...
... you are installing a scanner after initial printer setup, turn them . Use the printer handholds to open the printer trays, covers, doors, and MFP option. Scanner Scanner shelf Printer Duplex unit Envelope drawer 500-sheet drawer Printer stand Scanner cabinet configuration Note: Do not place a scanner shelf on top of the printer, and make sure your printer and MFP CAUTION: The printer weighs 48-82...

C78x - Setup Guide
Page 8
...MFP option You can customize your MFP with the option. The following options are installing options after setting up the printer, turn the printer off, and unplug the power cord from the direct airflow of air conditioners, heaters, or ventilators. • Keep...bin mailbox StapleSmart™ finisher Other options Duplex unit Scanner shelf Printer stand Scanner cabinet CAUTION: Certain floor-mounted configurations require additional furniture for your MFP option 8 More information is available on our Lexmark Web site at www.lexmark.com/multifunctionprinters. Check the boxes you ordered....
...MFP option You can customize your MFP with the option. The following options are installing options after setting up the printer, turn the printer off, and unplug the power cord from the direct airflow of air conditioners, heaters, or ventilators. • Keep...bin mailbox StapleSmart™ finisher Other options Duplex unit Scanner shelf Printer stand Scanner cabinet CAUTION: Certain floor-mounted configurations require additional furniture for your MFP option 8 More information is available on our Lexmark Web site at www.lexmark.com/multifunctionprinters. Check the boxes you ordered....

C78x - Setup Guide
Page 9
Step 1: Setting up furniture Step 1: Setting up furniture If you purchased your scanner as a bundle (printer shipped with: a duplex unit, two 500-sheet drawers, a scanner, a scanner shelf, and a printer stand), or you are assembling your printer starting with the furniture. Note: Place the furniture in the location you purchased your scanner with optional furniture and/or drawers, set up furniture 9 Printer stand assembly Scanner cabinet setup Step 1: Setting up your printer and follow the instructions that came with the printer stand or scanner cabinet.
Step 1: Setting up furniture Step 1: Setting up furniture If you purchased your scanner as a bundle (printer shipped with: a duplex unit, two 500-sheet drawers, a scanner, a scanner shelf, and a printer stand), or you are assembling your printer starting with the furniture. Note: Place the furniture in the location you purchased your scanner with optional furniture and/or drawers, set up furniture 9 Printer stand assembly Scanner cabinet setup Step 1: Setting up your printer and follow the instructions that came with the printer stand or scanner cabinet.

C78x - Setup Guide
Page 10
... with or without a duplex unit* 1 2 3 Yes Yes No *The duplex unit must be installed directly under the printer in any other optional drawer. Step 4: Unboxing the printer Remove the printer from the box, and then remove all packaging from the printer. Step 2: Installing optional drawers Step 2: Installing optional drawers Note: Do not place a scanner shelf on top...
... with or without a duplex unit* 1 2 3 Yes Yes No *The duplex unit must be installed directly under the printer in any other optional drawer. Step 4: Unboxing the printer Remove the printer from the box, and then remove all packaging from the printer. Step 2: Installing optional drawers Step 2: Installing optional drawers Note: Do not place a scanner shelf on top...
C77x - User's Guide
Page 8
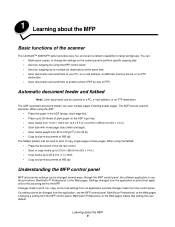
1 Learning about the MFP 8 Automatic document feeder and flatbed Note: Color documents can scan multiple pages including duplex pages. The ADF (automatic document feeder) can be changed several ways: through the MFP control panel, the software application in use the MFP control panel...to your PC, an e-mail address, a USB flash memory device, or an FTP destination. • Scan documents and send them to another printer (PDF by way of the scanner The Lexmark™ 4600 MFP option provides copy, fax, and scan-to multiple fax destinations at 600 dpi. Understanding the MFP control panel MFP...
1 Learning about the MFP 8 Automatic document feeder and flatbed Note: Color documents can scan multiple pages including duplex pages. The ADF (automatic document feeder) can be changed several ways: through the MFP control panel, the software application in use the MFP control panel...to your PC, an e-mail address, a USB flash memory device, or an FTP destination. • Scan documents and send them to another printer (PDF by way of the scanner The Lexmark™ 4600 MFP option provides copy, fax, and scan-to multiple fax destinations at 600 dpi. Understanding the MFP control panel MFP...

C77x - User's Guide
Page 86
...scanner jams, see "Clearing scanner jams" on the input source (trays, multipurpose feeder, envelope feeder) and output bins (finisher, stacker, expander, mailbox) you are for illustrative purposes and may not reflect your MFP configuration. Clearing jams Printer access doors and trays The following illustration indicate the numbers that print media travels through the printer...access door 201.yy Paper Jam Area T1 Standard tray (Tray 1) 200.yy Paper Jam 241.yy Paper Jam Area E Duplex mechanism 230.yy Paper Jam Area T Paper input options: 500-sheet trays or 2000-sheet tray 24.yy Paper Jam ...
...scanner jams, see "Clearing scanner jams" on the input source (trays, multipurpose feeder, envelope feeder) and output bins (finisher, stacker, expander, mailbox) you are for illustrative purposes and may not reflect your MFP configuration. Clearing jams Printer access doors and trays The following illustration indicate the numbers that print media travels through the printer...access door 201.yy Paper Jam Area T1 Standard tray (Tray 1) 200.yy Paper Jam 241.yy Paper Jam Area E Duplex mechanism 230.yy Paper Jam Area T Paper input options: 500-sheet trays or 2000-sheet tray 24.yy Paper Jam ...


