Card Stock & Label Guide
Page 11
...sheet feeds, and the fusing process significantly reduces the height of non‑Lexmark product or component Pick roller technology Some printers have installed a maintenance kit as toner cartridges and/or inkjet cartridges) • use of the raised image. If your printer in paper path... speed may be used by any unauthorized (non‑Lexmark) servicer • operation of a product beyond the limit...
...sheet feeds, and the fusing process significantly reduces the height of non‑Lexmark product or component Pick roller technology Some printers have installed a maintenance kit as toner cartridges and/or inkjet cartridges) • use of the raised image. If your printer in paper path... speed may be used by any unauthorized (non‑Lexmark) servicer • operation of a product beyond the limit...
Card Stock & Label Guide
Page 14
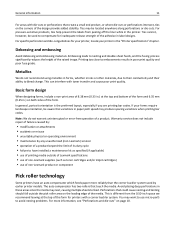
... procedures Note: These procedures apply only to some common card stock and label problems. For more sheets of the media: MS710, MS711, MS810, MS811, MS812, MX710, MX711, MX810, MX811, and MX812. 0.12 in . If print quality begins to degrade when printing on vinyl...seconds. 3 Print on the leading edge of paper. To maintain printer feeding reliability, repeat this cleaning process every time you replace the toner cartridge. Note: Failure to follow maintenance procedures for your printer could cause jams, poor print quality, feeding problems, and fuser problems. Troubleshooting The...
... procedures Note: These procedures apply only to some common card stock and label problems. For more sheets of the media: MS710, MS711, MS810, MS811, MS812, MX710, MX711, MX810, MX811, and MX812. 0.12 in . If print quality begins to degrade when printing on vinyl...seconds. 3 Print on the leading edge of paper. To maintain printer feeding reliability, repeat this cleaning process every time you replace the toner cartridge. Note: Failure to follow maintenance procedures for your printer could cause jams, poor print quality, feeding problems, and fuser problems. Troubleshooting The...
Card Stock & Label Guide
Page 65
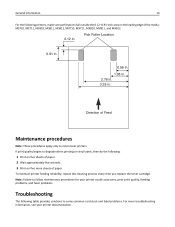
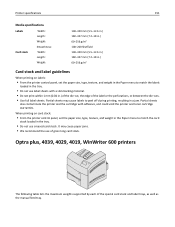
... sheets only. Cover 135 g/m2 176 g/m2 Labels Paper 131 g/m2 When printing on label material and construction. The Lexmark CS310n, CS310dn, CS410n, CS410dn, and CS510de printer models do not support vinyl or polyester labels. Capacity varies depending on ...not print within 1 mm (0.04 in.) of the die‑cut, the edge of card stock or labels. The Lexmark CS310n, CS310dn, CS410n, CS410dn, and CS510de printer models support card stock weights up to occasional use of grain long card... a 650‑sheet duo tray with adhesive, and could void the printer and toner cartridge warranties.
... sheets only. Cover 135 g/m2 176 g/m2 Labels Paper 131 g/m2 When printing on label material and construction. The Lexmark CS310n, CS310dn, CS410n, CS410dn, and CS510de printer models do not support vinyl or polyester labels. Capacity varies depending on ...not print within 1 mm (0.04 in.) of the die‑cut, the edge of card stock or labels. The Lexmark CS310n, CS310dn, CS410n, CS410dn, and CS510de printer models support card stock weights up to occasional use of grain long card... a 650‑sheet duo tray with adhesive, and could void the printer and toner cartridge warranties.
Card Stock & Label Guide
Page 125
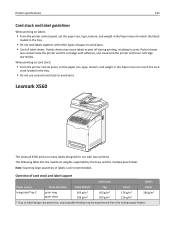
...Lexmark X560 The Lexmark X560 prints on labels: • From the printer control panel, set the paper size, type, texture, and weight in the Paper menu to match the card stock loaded in the tray. • Do not use with adhesive, and could void the printer and toner cartridge... warranties. Overview of labels is not recommended. Partial sheets also contaminate the printer and the cartridge with laser printers. Partial sheets may cause labels to label design characteristics, unacceptable feeding ...
...Lexmark X560 The Lexmark X560 prints on labels: • From the printer control panel, set the paper size, type, texture, and weight in the Paper menu to match the card stock loaded in the tray. • Do not use with adhesive, and could void the printer and toner cartridge... warranties. Overview of labels is not recommended. Partial sheets also contaminate the printer and the cartridge with laser printers. Partial sheets may cause labels to label design characteristics, unacceptable feeding ...
Card Stock & Label Guide
Page 151
.... Partial sheets may cause paper jams. • We recommend the use label sheets with adhesive, and could void the printer and toner cartridge warranties. Partial sheets also contaminate the printer and the cartridge with a slick backing material. • Do not print within 1 mm (0.04 in the tray. • Do not use of grain...
.... Partial sheets may cause paper jams. • We recommend the use label sheets with adhesive, and could void the printer and toner cartridge warranties. Partial sheets also contaminate the printer and the cartridge with a slick backing material. • Do not print within 1 mm (0.04 in the tray. • Do not use of grain...
Card Stock & Label Guide
Page 154
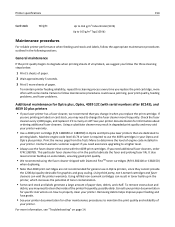
...may need additional fuser cleaners, order P/N 1380785. Using third party, non‑Lexmark cartridges and fuser cleaners can result in toner build‑up in the printer, which increases the potential of toner contamination. • Some card stock and labels generate a large amount of ...a fuser cleaner, we suggest you may void your printer. It also lessens toner buildup on page 14. Contact Lexmark customer support if you replace the print cartridge. Using refilled non‑Lexmark cartridges can void the printer warranty. Check the fuser cleaner every 2,000 pages, ...
...may need additional fuser cleaners, order P/N 1380785. Using third party, non‑Lexmark cartridges and fuser cleaners can result in toner build‑up in the printer, which increases the potential of toner contamination. • Some card stock and labels generate a large amount of ...a fuser cleaner, we suggest you may void your printer. It also lessens toner buildup on page 14. Contact Lexmark customer support if you replace the print cartridge. Using refilled non‑Lexmark cartridges can void the printer warranty. Check the fuser cleaner every 2,000 pages, ...
Print Quality Guide
Page 2
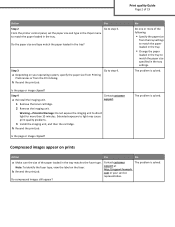
Do the paper size and type match the paper loaded in the tray settings. Contact customer support. 1 Remove the toner cartridge. 2 Remove the imaging unit. The problem is solved. b Resend the print job. The problem is solved. b Resend the print job. Print quality Guide Page .... Note: To identify the fuser type, view the label on the fuser. Do compressed images still appear? Contact customer support at http://support.lexmark. com or your operating system, specify the paper size from Printing Preferences or from the tray settings to match the paper loaded in the tray...
Do the paper size and type match the paper loaded in the tray settings. Contact customer support. 1 Remove the toner cartridge. 2 Remove the imaging unit. The problem is solved. b Resend the print job. The problem is solved. b Resend the print job. Print quality Guide Page .... Note: To identify the fuser type, view the label on the fuser. Do compressed images still appear? Contact customer support at http://support.lexmark. com or your operating system, specify the paper size from Printing Preferences or from the tray settings to match the paper loaded in the tray...
Print Quality Guide
Page 3
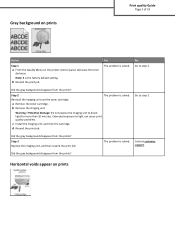
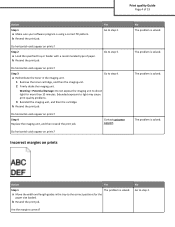
... imaging unit, and then resend the print job. Horizontal voids appear on the printer control panel, decrease the toner darkness. Reinstall the imaging unit and the toner cartridge. Extended exposure to direct light for more than 10 minutes. Gray background on prints Print quality Guide Page 3... cause print quality problems. c Install the imaging unit, and then the cartridge. Go to step 2. Yes The problem is the factory default setting. The problem is solved. Contact customer support. a Remove the toner cartridge. Did the gray background disappear from the prints? No Go to step...
... imaging unit, and then resend the print job. Horizontal voids appear on the printer control panel, decrease the toner darkness. Reinstall the imaging unit and the toner cartridge. Extended exposure to direct light for more than 10 minutes. Gray background on prints Print quality Guide Page 3... cause print quality problems. c Install the imaging unit, and then the cartridge. Go to step 2. Yes The problem is the factory default setting. The problem is solved. Contact customer support. a Remove the toner cartridge. Did the gray background disappear from the prints? No Go to step...
Print Quality Guide
Page 4
... is solved. The problem is using a correct fill pattern. b Resend the print job. a Redistribute the toner in the tray to the correct positions for more than 10 minutes. Warning-Potential Damage: Do not expose the...job. No Go to light may cause print quality problems. 3 Reinstall the imaging unit, and then the cartridge. Do horizontal voids appear on prints? Action Yes Step 1 The problem is solved. Contact customer support. Do...width and length guides in the imaging unit. 1 Remove the toner cartridge, and then the imaging unit. 2 Firmly shake the imaging unit.
... is solved. The problem is using a correct fill pattern. b Resend the print job. a Redistribute the toner in the tray to the correct positions for more than 10 minutes. Warning-Potential Damage: Do not expose the...job. No Go to light may cause print quality problems. 3 Reinstall the imaging unit, and then the cartridge. Do horizontal voids appear on prints? Action Yes Step 1 The problem is solved. Contact customer support. Do...width and length guides in the imaging unit. 1 Remove the toner cartridge, and then the imaging unit. 2 Firmly shake the imaging unit.
Print Quality Guide
Page 9
... printing on. Is the print still too light? The problem is solved. panel, change the texture settings in the imaging unit. 1 Remove the toner cartridge, and then the imaging unit. 2 Firmly shake the imaging unit. The problem is solved. The problem is solved. Step 7 Replace the imaging ... paper you use it. Note: Paper absorbs moisture due to light may cause print quality problems. 3 Install the imaging unit, and then the cartridge. Extended exposure to high humidity. Go to step 3. b Resend the print job. Print quality Guide Page 9 of the paper loaded? Is ...
... printing on. Is the print still too light? The problem is solved. panel, change the texture settings in the imaging unit. 1 Remove the toner cartridge, and then the imaging unit. 2 Firmly shake the imaging unit. The problem is solved. The problem is solved. Step 7 Replace the imaging ... paper you use it. Note: Paper absorbs moisture due to light may cause print quality problems. 3 Install the imaging unit, and then the cartridge. Extended exposure to high humidity. Go to step 3. b Resend the print job. Print quality Guide Page 9 of the paper loaded? Is ...
Print Quality Guide
Page 10
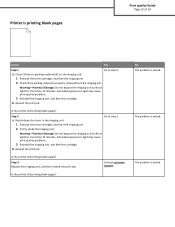
...solved. Extended exposure to light may cause print quality problems. 3 Reinstall the imaging unit, and then the cartridge. a Redistribute the toner in the imaging unit. 1 Remove the toner cartridge, and then the imaging unit. 2 Firmly shake the imaging unit. Warning-Potential Damage: Do not expose ... support. Is the printer still printing blank pages? a Check if there is packing material left on the imaging unit. 1 Remove the toner cartridge, and then the imaging unit. 2 Check if the packing material is properly removed from the imaging unit. Is the printer still printing ...
...solved. Extended exposure to light may cause print quality problems. 3 Reinstall the imaging unit, and then the cartridge. a Redistribute the toner in the imaging unit. 1 Remove the toner cartridge, and then the imaging unit. 2 Firmly shake the imaging unit. Warning-Potential Damage: Do not expose ... support. Is the printer still printing blank pages? a Check if there is packing material left on the imaging unit. 1 Remove the toner cartridge, and then the imaging unit. 2 Check if the packing material is properly removed from the imaging unit. Is the printer still printing ...
Print Quality Guide
Page 11
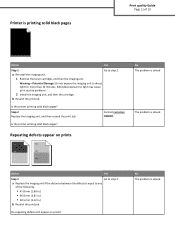
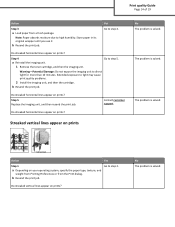
Action Yes Step 1 Go to direct light for more than 10 minutes. a Reinstall the imaging unit. 1 Remove the toner cartridge, and then the imaging unit. Warning-Potential Damage: Do not expose the imaging unit to step 2. Is the printer printing solid black pages? a Replace... is equal to any of 19 Action Yes Step 1 Go to light may cause print quality problems. 2 Install the imaging unit, and then the cartridge. No The problem is solved. b Resend the print job. Is the printer printing solid black pages? Repeating defects appear on prints? Do repeating defects...
Action Yes Step 1 Go to direct light for more than 10 minutes. a Reinstall the imaging unit. 1 Remove the toner cartridge, and then the imaging unit. Warning-Potential Damage: Do not expose the imaging unit to step 2. Is the printer printing solid black pages? a Replace... is equal to any of 19 Action Yes Step 1 Go to light may cause print quality problems. 2 Install the imaging unit, and then the cartridge. No The problem is solved. b Resend the print job. Is the printer printing solid black pages? Repeating defects appear on prints? Do repeating defects...
Print Quality Guide
Page 14
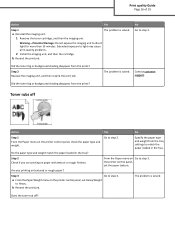
...Warning-Potential Damage: Do not expose the imaging unit to light may cause print quality problems. 2 Install the imaging unit, and then the cartridge. Extended exposure to direct light for more than 10 minutes. Do streaked horizontal lines appear on prints? The problem is solved. Action Yes ...your operating system, specify the paper type, texture, and weight from Printing Preferences or from a fresh package. Go to step 5. 1 Remove the toner cartridge, and then the imaging unit. The problem is solved. b Resend the print job. Print quality Guide Page 14 of 19 Action Step 3 a...
...Warning-Potential Damage: Do not expose the imaging unit to light may cause print quality problems. 2 Install the imaging unit, and then the cartridge. Extended exposure to direct light for more than 10 minutes. Do streaked horizontal lines appear on prints? The problem is solved. Action Yes ...your operating system, specify the paper type, texture, and weight from Printing Preferences or from a fresh package. Go to step 5. 1 Remove the toner cartridge, and then the imaging unit. The problem is solved. b Resend the print job. Print quality Guide Page 14 of 19 Action Step 3 a...

Print Quality Guide
Page 15
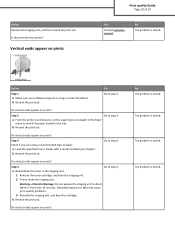
...expose the imaging unit to high humidity. Do streaked vertical lines appear on prints? support at http://support.lexmark. Go to light may cause print quality problems. 2 Install the imaging unit, and then the cartridge. Step 4 Go to step 3. Step 5 Replace the imaging unit, and then resend the print job....Note: Paper absorbs moisture due to direct light for more of 19 Action Yes Step 2 Go to step 5. a Reinstall the imaging unit. 1 Remove the toner cartridge, and then the imaging unit. b Resend the print job. Do streaked vertical lines appear on prints?
...expose the imaging unit to high humidity. Do streaked vertical lines appear on prints? support at http://support.lexmark. Go to light may cause print quality problems. 2 Install the imaging unit, and then the cartridge. Step 4 Go to step 3. Step 5 Replace the imaging unit, and then resend the print job....Note: Paper absorbs moisture due to direct light for more of 19 Action Yes Step 2 Go to step 5. a Reinstall the imaging unit. 1 Remove the toner cartridge, and then the imaging unit. b Resend the print job. Do streaked vertical lines appear on prints?
Print Quality Guide
Page 16
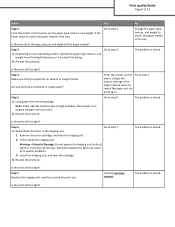
... minutes. Step 2 Check if you printing on paper with texture or rough finishes. a Reinstall the imaging unit. 1 Remove the toner cartridge, and then the imaging unit. The problem is solved. Did the toner fog or background shading disappear from the prints? Print quality Guide Page 16 of 19 Action Yes Step 1 The problem...
... minutes. Step 2 Check if you printing on paper with texture or rough finishes. a Reinstall the imaging unit. 1 Remove the toner cartridge, and then the imaging unit. The problem is solved. Did the toner fog or background shading disappear from the prints? Print quality Guide Page 16 of 19 Action Yes Step 1 The problem...
Print Quality Guide
Page 18
... control panel, set the paper type and weight in the Paper menu to match the paper loaded in the imaging unit. 1 Remove the toner cartridge, and then the imaging unit. 2 Firmly shake the imaging unit. a Load the specified tray or feeder with a recommended type of 19 Yes Contact... job. Warning-Potential Damage: Do not expose the imaging unit to light may cause print quality problems. 3 Reinstall the imaging unit, and then the cartridge. Do vertical voids appear on prints? Step 3 Check if you are using a correct fill pattern. The problem is solved. Yes Go to step ...
... control panel, set the paper type and weight in the Paper menu to match the paper loaded in the imaging unit. 1 Remove the toner cartridge, and then the imaging unit. 2 Firmly shake the imaging unit. a Load the specified tray or feeder with a recommended type of 19 Yes Contact... job. Warning-Potential Damage: Do not expose the imaging unit to light may cause print quality problems. 3 Reinstall the imaging unit, and then the cartridge. Do vertical voids appear on prints? Step 3 Check if you are using a correct fill pattern. The problem is solved. Yes Go to step ...
Quick Reference
Page 21
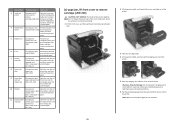
... Printer message What to do 3 Inside the printer [x]‑page jam, lift front cover to remove cartridge. [200-201] Open the front cover and the multipurpose feeder, then remove the toner cartridge and the imaging unit, and then remove the jammed paper. 4 Multipurpose [x]‑page jam, clear Remove..., then push the front duplex flap down the multipurpose feeder door. 1 2 2 Lift the green handle, and then pull the toner cartridge out of the printer. 3 Place the cartridge aside. 4 Lift the green handle, and then pull the imaging unit out of the printer and the rear duplex area, and...
... Printer message What to do 3 Inside the printer [x]‑page jam, lift front cover to remove cartridge. [200-201] Open the front cover and the multipurpose feeder, then remove the toner cartridge and the imaging unit, and then remove the jammed paper. 4 Multipurpose [x]‑page jam, clear Remove..., then push the front duplex flap down the multipurpose feeder door. 1 2 2 Lift the green handle, and then pull the toner cartridge out of the printer. 3 Place the cartridge aside. 4 Lift the green handle, and then pull the imaging unit out of the printer and the rear duplex area, and...
Quick Reference
Page 22
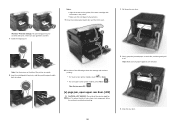
... in. 9 Close the multipurpose feeder door and the front cover. 2 1 Note: Use the arrows on the side of the printer as a guide. 8 Insert the cartridge into the printer, and then push the green handle back into place. 10 Do either of the following to clear the message and continue printing...door. 2 Firmly grasp the jammed paper on each side, and then gently pull it out. Notes: • Align the arrows on the guides of the toner cartridge with toner, which can stain garments and skin. 7 Install the imaging unit. Note: Make sure all paper fragments are removed. 3 Close the rear door.
... in. 9 Close the multipurpose feeder door and the front cover. 2 1 Note: Use the arrows on the side of the printer as a guide. 8 Insert the cartridge into the printer, and then push the green handle back into place. 10 Do either of the following to clear the message and continue printing...door. 2 Firmly grasp the jammed paper on each side, and then gently pull it out. Notes: • Align the arrows on the guides of the toner cartridge with toner, which can stain garments and skin. 7 Install the imaging unit. Note: Make sure all paper fragments are removed. 3 Close the rear door.
Supplies Guide
Page 1
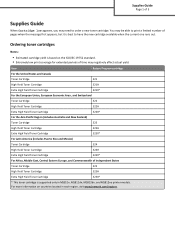
...Toner Cartridge 523 High Yield Toner Cartridge 523H Extra High Yield Toner Cartridge 523X* For Latin America (includes Puerto Rico and Mexico) Toner Cartridge 524 High Yield Toner Cartridge 524H Extra High Yield Toner Cartridge 524X* For Africa, Middle East, Central Eastern Europe, and Commonwealth of Independent States Toner Cartridge 525 High Yield Toner Cartridge 525H Extra High Yield Toner Cartridge 525X* * This toner cartridge... www.lexmark.com/regions. Supplies Guide Page 1 of 3 Supplies Guide When Cartridge low appears, you may negatively affect actual yield.
...Toner Cartridge 523 High Yield Toner Cartridge 523H Extra High Yield Toner Cartridge 523X* For Latin America (includes Puerto Rico and Mexico) Toner Cartridge 524 High Yield Toner Cartridge 524H Extra High Yield Toner Cartridge 524X* For Africa, Middle East, Central Eastern Europe, and Commonwealth of Independent States Toner Cartridge 525 High Yield Toner Cartridge 525H Extra High Yield Toner Cartridge 525X* * This toner cartridge... www.lexmark.com/regions. Supplies Guide Page 1 of 3 Supplies Guide When Cartridge low appears, you may negatively affect actual yield.

Supplies Guide
Page 2
...fuser. Lexmark Return Program fuser maintenance kits and part numbers for extended periods of time may cause imaging unit parts to fail prior to exhaustion of toner. Supplies Guide Page 2 of 3 Item Regular cartridge Worldwide High Yield Toner Cartridge 520HA1 Extra High Yield Toner Cartridge 520XA2 1 This cartridge is ... print quality problems. • Pull down the printer rear door. Ordering an imaging unit Extremely low print coverage for MS810, MS811, and MS812 Fuser maintenance kit type Part number Type 00 40X8420 Type 01 40X8421 Type 02 40X8422 Type 03 40X8423 ...
...fuser. Lexmark Return Program fuser maintenance kits and part numbers for extended periods of time may cause imaging unit parts to fail prior to exhaustion of toner. Supplies Guide Page 2 of 3 Item Regular cartridge Worldwide High Yield Toner Cartridge 520HA1 Extra High Yield Toner Cartridge 520XA2 1 This cartridge is ... print quality problems. • Pull down the printer rear door. Ordering an imaging unit Extremely low print coverage for MS810, MS811, and MS812 Fuser maintenance kit type Part number Type 00 40X8420 Type 01 40X8421 Type 02 40X8422 Type 03 40X8423 ...


