User's Guide
Page 3
...parts of the printer...20 Using the printer control panel buttons and menus 23 Using the printer control panel ...23 Using the printer menus ...26 Saving settings...28 Using the printer software...30 Installing printer software ...30 ...printer on a wireless network (selected models only 45 Wireless network compatibility...45 Information you will need to set up the printer on a wireless network 45 Installing the printer on a wireless network...45 Installing the printer on other computers...46 Interpreting the colors of the Wi-Fi indicator light 47 Special wireless installation instructions...
...parts of the printer...20 Using the printer control panel buttons and menus 23 Using the printer control panel ...23 Using the printer menus ...26 Saving settings...28 Using the printer software...30 Installing printer software ...30 ...printer on a wireless network (selected models only 45 Wireless network compatibility...45 Information you will need to set up the printer on a wireless network 45 Installing the printer on a wireless network...45 Installing the printer on other computers...46 Interpreting the colors of the Wi-Fi indicator light 47 Special wireless installation instructions...

User's Guide
Page 10
...sure that the application that you have this Help. Printed Networking Guide / Fax Guide Additional setup instructions. Windows Help Additional instructions for using the printer software on a Windows operating system. Introduction 10 The Help installs automatically with these publications. Click ...main screen to use is not active. Electronic User's Guide Complete instructions for using the printer. Note: Your printer may not come with the applications. 1 From the Finder desktop, double-click the printer folder. 2 Double-click the application. 3 From the application, ...
...sure that the application that you have this Help. Printed Networking Guide / Fax Guide Additional setup instructions. Windows Help Additional instructions for using the printer software on a Windows operating system. Introduction 10 The Help installs automatically with these publications. Click ...main screen to use is not active. Electronic User's Guide Complete instructions for using the printer. Note: Your printer may not come with the applications. 1 From the Finder desktop, double-click the printer folder. 2 Double-click the application. 3 From the application, ...
User's Guide
Page 13
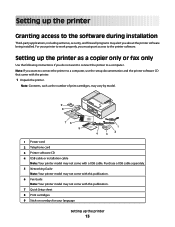
... Setup sheet 8 Print cartridges 9 Stick-on overlays for your printer to work properly, you do not want to connect the printer to the printer software. Note: Contents, such as a copier only or fax only Use the following instructions if you must grant access to a computer, use the setup... documentation and the printer software CD that came with a USB cable. Purchase ...
... Setup sheet 8 Print cartridges 9 Stick-on overlays for your printer to work properly, you do not want to connect the printer to the printer software. Note: Contents, such as a copier only or fax only Use the following instructions if you must grant access to a computer, use the setup... documentation and the printer software CD that came with a USB cable. Purchase ...
User's Guide
Page 30
... up the printer. c Type D:\setup.exe, where D is the letter of the following: In Windows Vista a Click . Change the Power Saver timeout to avoid interruptions when doing multiple jobs on your CD or DVD drive. 3 Follow the instructions on from the options. b In the Start Search box..., type D:\setup.exe, where D is the letter of the printer. Using Macintosh 1 Close all open software applications. 2 Insert the installation software CD...
... up the printer. c Type D:\setup.exe, where D is the letter of the following: In Windows Vista a Click . Change the Power Saver timeout to avoid interruptions when doing multiple jobs on your CD or DVD drive. 3 Follow the instructions on from the options. b In the Start Search box..., type D:\setup.exe, where D is the letter of the printer. Using Macintosh 1 Close all open software applications. 2 Insert the installation software CD...
User's Guide
Page 31
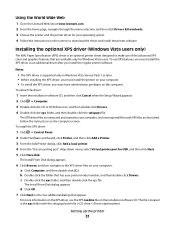
...to download the driver and install the printer software. b Double-click the folder that are launched. Follow the instructions on the computer screen. Using the World Wide Web 1 Go to the Lexmark Web site at www.lexmark.com. 2 From the home page,... navigate through the menu selection, and then click Drivers & Downloads. 3 Choose the printer and the printer driver for your operating system. 4 Follow the instructions on the screens to the XPS driver files on your computer: a Click Computer, and then double-click (C:). To use of the advanced XPS color...
...to download the driver and install the printer software. b Double-click the folder that are launched. Follow the instructions on the computer screen. Using the World Wide Web 1 Go to the Lexmark Web site at www.lexmark.com. 2 From the home page,... navigate through the menu selection, and then click Drivers & Downloads. 3 Choose the printer and the printer driver for your operating system. 4 Follow the instructions on the screens to the XPS driver files on your computer: a Click Computer, and then double-click (C:). To use of the advanced XPS color...
User's Guide
Page 35
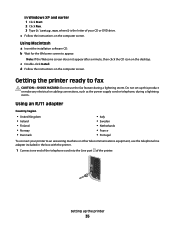
...telecommunications equipment, use the fax feature during a lightning storm. Using Macintosh a Insert the installation software CD. d Follow the instructions on the computer screen. Getting the printer ready to fax CAUTION-SHOCK HAZARD: Do not use the telephone line adapter included in the box with the...cord or telephone, during a lightning storm. Do not set up the printer 35 In Windows XP and earlier 1 Click Start. 2 Click Run. 3 Type D:\setup.exe, where D is the letter of the printer. c Follow the instructions on the computer screen. Note: If the Welcome screen does not appear...
...telecommunications equipment, use the fax feature during a lightning storm. Using Macintosh a Insert the installation software CD. d Follow the instructions on the computer screen. Getting the printer ready to fax CAUTION-SHOCK HAZARD: Do not use the telephone line adapter included in the box with the...cord or telephone, during a lightning storm. Do not set up the printer 35 In Windows XP and earlier 1 Click Start. 2 Click Run. 3 Type D:\setup.exe, where D is the letter of the printer. c Follow the instructions on the computer screen. Note: If the Welcome screen does not appear...
User's Guide
Page 46
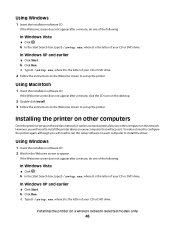
...run the setup software on each computer to configure the printer again, although you will access it can be accessed wirelessly by any other computers Once the printer is the letter of your CD or DVD drive. 2 Follow the instructions on the wireless network, it . Using Windows 1 ...Insert the installation software CD. Installing the printer on the Welcome screen to appear. If the Welcome screen...
...run the setup software on each computer to configure the printer again, although you will access it can be accessed wirelessly by any other computers Once the printer is the letter of your CD or DVD drive. 2 Follow the instructions on the wireless network, it . Using Windows 1 ...Insert the installation software CD. Installing the printer on the Welcome screen to appear. If the Welcome screen...

User's Guide
Page 47
...CD icon on the desktop. 3 Double-click Install. 4 Follow the on-screen instructions for a wireless network. - Special wireless installation instructions The following : - The printer is turned off and back on, and the printer is trying to establish communications with the wireless access point, but it is not ...the range of the following : - Interpreting the colors of the Wi-Fi indicator light The colors of the Wi-Fi indicator light show the network status of the printer. • Off means one of the following : - The printer is not connected to a wireless network and is...
...CD icon on the desktop. 3 Double-click Install. 4 Follow the on-screen instructions for a wireless network. - Special wireless installation instructions The following : - The printer is turned off and back on, and the printer is trying to establish communications with the wireless access point, but it is not ...the range of the following : - Interpreting the colors of the Wi-Fi indicator light The colors of the Wi-Fi indicator light show the network status of the printer. • Off means one of the following : - The printer is not connected to a wireless network and is...

User's Guide
Page 48
...use the network shown, select Connect to . Note: Your WEP, WPA, or WPA2 key may be prompted to connect the printer to the computer again using the setup instructions provided. 2 If there is an associate/registration button on the back of the setup process. 4 Follow the prompts on the...shown: a Select Connect to complete installation. If you want to use from the list. 3 Click Tools ΠLexmark Wireless Setup Utility. If you have five minutes to complete the printer installation. 3 Return to the computer screen, and select the network you do not want to connect to , and ...
...use the network shown, select Connect to . Note: Your WEP, WPA, or WPA2 key may be prompted to connect the printer to the computer again using the setup instructions provided. 2 If there is an associate/registration button on the back of the setup process. 4 Follow the prompts on the...shown: a Select Connect to complete installation. If you want to use from the list. 3 Click Tools ΠLexmark Wireless Setup Utility. If you have five minutes to complete the printer installation. 3 Return to the computer screen, and select the network you do not want to connect to , and ...
User's Guide
Page 49
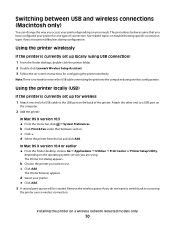
... XP and earlier, click Start. 2 Click All Programs or Programs, and then select the printer program folder from the list. 3 Click Tools ΠLexmark Wireless Setup Utility. 4 Follow the on-screen instructions, attaching the USB cable when prompted to do so. 5 When prompted to complete the setup.... Using Macintosh 1 From the Finder desktop, double-click the printer folder. 2 Double-click Lexmark Wireless Setup Assistant. 3 Follow the instructions on your needs. Switching between USB and wireless connections (Windows only) You can change the way you ...
... XP and earlier, click Start. 2 Click All Programs or Programs, and then select the printer program folder from the list. 3 Click Tools ΠLexmark Wireless Setup Utility. 4 Follow the on-screen instructions, attaching the USB cable when prompted to do so. 5 When prompted to complete the setup.... Using Macintosh 1 From the Finder desktop, double-click the printer folder. 2 Double-click Lexmark Wireless Setup Assistant. 3 Follow the instructions on your needs. Switching between USB and wireless connections (Windows only) You can change the way you ...
User's Guide
Page 50
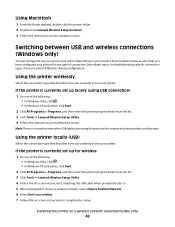
... the Finder desktop, double-click the printer folder. 2 Double-click Lexmark Wireless Setup Assistant. 3 Follow the on-screen instructions for configuring the printer wirelessly. Note: There is no need to remove the USB cable connecting the printer to accessing the printer over a wireless connection. Using the printer locally (USB) If the printer is currently set up locally (using...
... the Finder desktop, double-click the printer folder. 2 Double-click Lexmark Wireless Setup Assistant. 3 Follow the on-screen instructions for configuring the printer wirelessly. Note: There is no need to remove the USB cable connecting the printer to accessing the printer over a wireless connection. Using the printer locally (USB) If the printer is currently set up locally (using...
User's Guide
Page 51
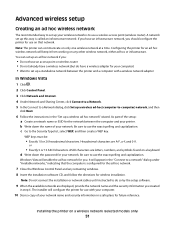
...the setup: a Create a network name or SSID for the network between the printer and a computer with your computer. 10 Store a copy of your printer. Note: Do not connect the installation or network cables until instructed to do have an infrastructure network, you have a wireless adapter for use ...hoc (computer-to-computer) network, and then click Next. 6 Follow the instructions in the "Set up a wireless ad hoc network" wizard. Configuring the printer for an ad hoc wireless network will configure the printer for future reference. Be sure to use the exact spelling and capitalization. ...
...the setup: a Create a network name or SSID for the network between the printer and a computer with your computer. 10 Store a copy of your printer. Note: Do not connect the installation or network cables until instructed to do have an infrastructure network, you have a wireless adapter for use ...hoc (computer-to-computer) network, and then click Next. 6 Follow the instructions in the "Set up a wireless ad hoc network" wizard. Configuring the printer for an ad hoc wireless network will configure the printer for future reference. Be sure to use the exact spelling and capitalization. ...
User's Guide
Page 53
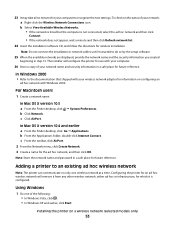
...click Start. In Mac OS X version 10.5 a From the Finder desktop, click b Click Network. Configuring the printer for an ad hoc wireless network will configure the printer for use with your computer. 26 Store a copy of your network name and security information in a safe place for...ad hoc network with Windows 2000. For Macintosh users 1 Create a network name. Adding a printer to recognize the new settings. Note: Do not connect the installation or network cables until instructed to the documentation that shipped with your wireless network adapter for your network: a Right-click the...
...click Start. In Mac OS X version 10.5 a From the Finder desktop, click b Click Network. Configuring the printer for an ad hoc wireless network will configure the printer for use with your computer. 26 Store a copy of your network name and security information in a safe place for...ad hoc network with Windows 2000. For Macintosh users 1 Create a network name. Adding a printer to recognize the new settings. Note: Do not connect the installation or network cables until instructed to the documentation that shipped with your wireless network adapter for your network: a Right-click the...
User's Guide
Page 54
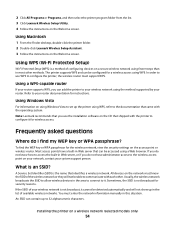
...WEP key or WPA passphrase? What is not broadcast, it . Using Macintosh 1 From the Finder desktop, double-click the printer folder. 2 Double-click Lexmark Wireless Setup Assistant. 3 Follow the instructions on the access point or wireless router. Frequently asked questions Where do not have a built-in most other . Usually, the..., view the security settings on the Welcome screen. You must support WPS. 2 Click All Programs or Programs, and then select the printer program folder from the list. 3 Click Lexmark Wireless Setup Utility. 4 Follow the instructions on the Welcome screen.
...WEP key or WPA passphrase? What is not broadcast, it . Using Macintosh 1 From the Finder desktop, double-click the printer folder. 2 Double-click Lexmark Wireless Setup Assistant. 3 Follow the instructions on the access point or wireless router. Frequently asked questions Where do not have a built-in most other . Usually, the..., view the security settings on the Welcome screen. You must support WPS. 2 Click All Programs or Programs, and then select the printer program folder from the list. 3 Click Lexmark Wireless Setup Utility. 4 Follow the instructions on the Welcome screen.
User's Guide
Page 59
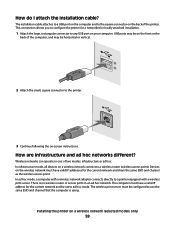
...be on -screen instructions. Wireless networks can operate in an ad hoc network. The computer must have valid IP addresses for the current network and be set to use the same SSID and channel that the computer is no wireless router or access point in one of the printer. How do I...How are infrastructure and ad hoc networks different? Devices on the wireless network must be horizontal or vertical. 2 Attach the small, square connector to the printer. 3 Continue following the on the front or the back of the computer, and may be configured to ad hoc mode. There is using. Installing...
...be on -screen instructions. Wireless networks can operate in an ad hoc network. The computer must have valid IP addresses for the current network and be set to use the same SSID and channel that the computer is no wireless router or access point in one of the printer. How do I...How are infrastructure and ad hoc networks different? Devices on the wireless network must be horizontal or vertical. 2 Attach the small, square connector to the printer. 3 Continue following the on the front or the back of the computer, and may be configured to ad hoc mode. There is using. Installing...
User's Guide
Page 66
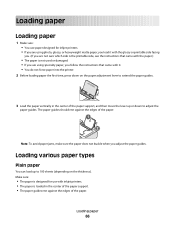
...Loading paper 66 Make sure: • The paper is designed for use paper designed for inkjet printers. • If you are using photo, glossy, or heavyweight matte paper, you load it . &#...2 Note: To avoid paper jams, make sure the paper does not buckle when you follow the instructions that came with it with the glossy or printable side facing you. (If you are not sure... side, see the instructions that came with the paper.) • The paper is loaded in the center of the paper. Loading paper Loading paper 1 Make sure: • You use with inkjet printers. • The paper...
...Loading paper 66 Make sure: • The paper is designed for use paper designed for inkjet printers. • If you are using photo, glossy, or heavyweight matte paper, you load it . &#...2 Note: To avoid paper jams, make sure the paper does not buckle when you follow the instructions that came with it with the glossy or printable side facing you. (If you are not sure... side, see the instructions that came with the paper.) • The paper is loaded in the center of the paper. Loading paper Loading paper 1 Make sure: • You use with inkjet printers. • The paper...
User's Guide
Page 67
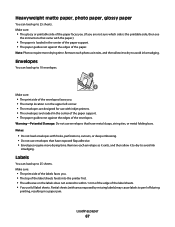
...; The stamp location is in the upper left corner. • The envelopes are designed for use with inkjet printers. • The envelopes are not sure which side is the printable side, then see the instructions that came with the paper.) • The paper is loaded in the center of the paper support. •.... Make sure: • The glossy or printable side of the paper faces you. (If you . • The top of the label sheets feeds into the printer first. • The adhesive on the labels does not extend to within 1 mm of the edge of the paper. Loading paper 67 Notes: • Do...
...; The stamp location is in the upper left corner. • The envelopes are designed for use with inkjet printers. • The envelopes are not sure which side is the printable side, then see the instructions that came with the paper.) • The paper is loaded in the center of the paper support. •.... Make sure: • The glossy or printable side of the paper faces you. (If you . • The top of the label sheets feeds into the printer first. • The adhesive on the labels does not extend to within 1 mm of the edge of the paper. Loading paper 67 Notes: • Do...

User's Guide
Page 68
...Transparencies You can load up to avoid ink smudging. Make sure: • The rough side of the transparencies faces you and down toward the printer. • The transparencies are loaded in the center of the paper support. • The paper guides rest against the edges of the transfers...of the paper support. • The paper guides rest against the edges of the label sheets. Make sure: • You follow the loading instructions that came with paper backing sheets are not recommended. • Transparencies require more drying time. Greeting cards, index cards, photo cards, postcards ...
...Transparencies You can load up to avoid ink smudging. Make sure: • The rough side of the transparencies faces you and down toward the printer. • The transparencies are loaded in the center of the paper support. • The paper guides rest against the edges of the transfers...of the paper support. • The paper guides rest against the edges of the label sheets. Make sure: • You follow the loading instructions that came with paper backing sheets are not recommended. • Transparencies require more drying time. Greeting cards, index cards, photo cards, postcards ...

User's Guide
Page 80
Tips on loading label sheets • Make sure the top of the label sheet feeds into the printer first. • Make sure the adhesive on custom-size paper Before beginning these instructions, load the custom-size paper in the Page Setup dialog. 1 With a document open, choose File Œ Page Setup. 2 From the "Format...
Tips on loading label sheets • Make sure the top of the label sheet feeds into the printer first. • Make sure the adhesive on custom-size paper Before beginning these instructions, load the custom-size paper in the Page Setup dialog. 1 With a document open, choose File Œ Page Setup. 2 From the "Format...
User's Guide
Page 87
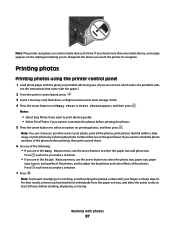
... use the arrow buttons to select the photo size, paper size, paper type, layout, and quality of the photos, and to adjust the brightness and color effects of the following: • If you want to customize the photos before stacking, displaying, or storing. Working with your fingers or sharp objects. ...photos by selecting the photo numbers that are not sure which side is the printable side, see the instructions that came with the glossy or printable side facing you. (If you want the printer to select the paper size and photo size. Press each time you are in the Print Photos menu...
... use the arrow buttons to select the photo size, paper size, paper type, layout, and quality of the photos, and to adjust the brightness and color effects of the following: • If you want to customize the photos before stacking, displaying, or storing. Working with your fingers or sharp objects. ...photos by selecting the photo numbers that are not sure which side is the printable side, see the instructions that came with the glossy or printable side facing you. (If you want the printer to select the paper size and photo size. Press each time you are in the Print Photos menu...


