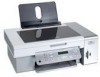
User's Guide
Page 3
...box contents...12 Installing another language control panel 13 Networking the printer 14 Installing the printer on a network...14 Installing an internal wireless print server 14 Finding your MAC address...15 Learning about the printer 16 Understanding the parts of the printer 16 Using the ...menu ...22 Using the Settings menu ...23 Saving settings ...25 Learning about the software 27 Using the printer software...27 Using the Lexmark Imaging Studio...27 Using the Solution Center...28 Using Printing Preferences...30 Opening Printing Preferences ...30 Using the Printing Preferences tabs ...30 ...
...box contents...12 Installing another language control panel 13 Networking the printer 14 Installing the printer on a network...14 Installing an internal wireless print server 14 Finding your MAC address...15 Learning about the printer 16 Understanding the parts of the printer 16 Using the ...menu ...22 Using the Settings menu ...23 Saving settings ...25 Learning about the software 27 Using the printer software...27 Using the Lexmark Imaging Studio...27 Using the Solution Center...28 Using Printing Preferences...30 Opening Printing Preferences ...30 Using the Printing Preferences tabs ...30 ...
User's Guide
Page 14
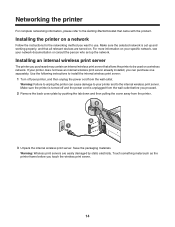
...can purchase one separately. Make sure the selected network is unplugged from the wall outlet. Installing the printer on a wireless network. For more information on . Warning: Wireless print servers are turned on your specific network, see your printer, and then unplug the power cord from the ...wall outlet before you purchased may contain an internal wireless print server that came with the product. Make sure the printer is turned off your network documentation or consult the person who set...
...can purchase one separately. Make sure the selected network is unplugged from the wall outlet. Installing the printer on a wireless network. For more information on . Warning: Wireless print servers are turned on your specific network, see your printer, and then unplug the power cord from the ...wall outlet before you purchased may contain an internal wireless print server that came with the product. Make sure the printer is turned off your network documentation or consult the person who set...
User's Guide
Page 15
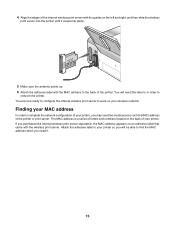
...adhesive label that came with the MAC address to work on the back of your wireless network. 4 Align the edges of the internal wireless print server with the guides on the left and right, and then slide the wireless print server into the printer until it . 15 You are now ready to configure...back of the printer. Finding your printer, you need it snaps into place. 5 Make sure the antenna points up. 6 Attach the adhesive label with the wireless print server. If you will need the media access control (MAC) address of your MAC address In order to network the printer. You will be...
...adhesive label that came with the MAC address to work on the back of your wireless network. 4 Align the edges of the internal wireless print server with the guides on the left and right, and then slide the wireless print server into the printer until it . 15 You are now ready to configure...back of the printer. Finding your printer, you need it snaps into place. 5 Make sure the antenna points up. 6 Attach the adhesive label with the wireless print server. If you will need the media access control (MAC) address of your MAC address In order to network the printer. You will be...
User's Guide
Page 16
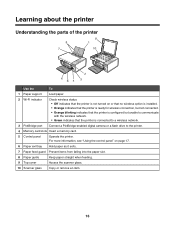
..., but not connected. • Orange blinking indicates that the printer is configured but unable to communicate with the wireless network. • Green indicates that the printer is connected to a wireless network. 3 PictBridge port Connect a PictBridge-enabled digital camera or a flash drive to the printer. 4 Memory ...printer. Learning about the printer Understanding the parts of the printer Use the To 1 Paper support Load paper. 2 Wi-Fi indicator Check wireless status: • Off indicates that the printer is not turned on page 17. 6 Paper exit tray Hold paper as it exits....
..., but not connected. • Orange blinking indicates that the printer is configured but unable to communicate with the wireless network. • Green indicates that the printer is connected to a wireless network. 3 PictBridge port Connect a PictBridge-enabled digital camera or a flash drive to the printer. 4 Memory ...printer. Learning about the printer Understanding the parts of the printer Use the To 1 Paper support Load paper. 2 Wi-Fi indicator Check wireless status: • Off indicates that the printer is not turned on page 17. 6 Paper exit tray Hold paper as it exits....
User's Guide
Page 17
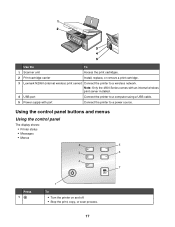
... server installed. 4 USB port Connect the printer to a computer using a USB cable. 5 Power supply with port Connect the printer to a wireless network. Using the control panel buttons and menus Using the control panel The display shows: • Printer status • Messages • Menus 2 5 3 6 4 7 Press 1 1 To • ... the print, copy, or scan process. 17 Use the To 1 Scanner unit Access the print cartridges. 2 Print cartridge carrier Install, replace, or remove a print cartridge. 3 Lexmark N2050 (internal wireless print server) Connect the printer to a power source.
... server installed. 4 USB port Connect the printer to a computer using a USB cable. 5 Power supply with port Connect the printer to a wireless network. Using the control panel buttons and menus Using the control panel The display shows: • Printer status • Messages • Menus 2 5 3 6 4 7 Press 1 1 To • ... the print, copy, or scan process. 17 Use the To 1 Scanner unit Access the print cartridges. 2 Print cartridge carrier Install, replace, or remove a print cartridge. 3 Lexmark N2050 (internal wireless print server) Connect the printer to a power source.
User's Guide
Page 24
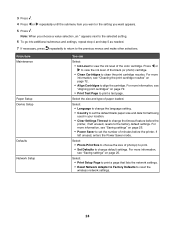
... go into additional submenus and settings, repeat step 4 and step 5 as needed. 7 If necessary, press repeatedly to return to reset the wireless network settings. 24 From here Maintenance Paper Setup Device Setup Defaults Network Setup You can Select: • Ink Level to view the ink level...the factory default settings. For more information, see "Aligning print cartridges" on page 72. • Align Cartridges to choose the size of the color cartridge. Select: • Photo Print Size to align the cartridge. Press or to print a test page. For more information, see "Saving ...
... go into additional submenus and settings, repeat step 4 and step 5 as needed. 7 If necessary, press repeatedly to return to reset the wireless network settings. 24 From here Maintenance Paper Setup Device Setup Defaults Network Setup You can Select: • Ink Level to view the ink level...the factory default settings. For more information, see "Aligning print cartridges" on page 72. • Align Cartridges to choose the size of the color cartridge. Select: • Photo Print Size to align the cartridge. Press or to print a test page. For more information, see "Saving ...
User's Guide
Page 46
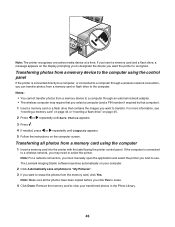
...drive to transfer. If the computer is connected directly to a computer, or connected to a computer through an external network adapter. • The wireless computer may need to view your computer. 2 Click Automatically save all photos to "My Pictures". 3 If you want to erase the photos ...from a memory device to a computer through a wireless network connection, you want the printer to use. The Lexmark Imaging Studio software launches automatically on the display prompting you to designate the device you may require that you select...
...drive to transfer. If the computer is connected directly to a computer, or connected to a computer through an external network adapter. • The wireless computer may need to view your computer. 2 Click Automatically save all photos to "My Pictures". 3 If you want to erase the photos ...from a memory device to a computer through a wireless network connection, you want the printer to use. The Lexmark Imaging Studio software launches automatically on the display prompting you to designate the device you may require that you select...
User's Guide
Page 47
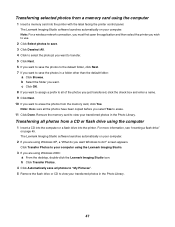
...Yes. b Click Transfer Photos. 4 Click Automatically save the photos in a folder other than the default folder: a Click Browse. Note: For a wireless network connection, you must first open the application and then select the printer you wish to use. 2 Click Select photos to save. 3 Click Deselect... to assign a prefix to all photos from a CD or flash drive using the computer 1 Insert a memory card into the printer. The Lexmark Imaging Studio software launches automatically on page 45. Transferring selected photos from a memory card using the computer 1 Insert a CD into the computer or...
...Yes. b Click Transfer Photos. 4 Click Automatically save the photos in a folder other than the default folder: a Click Browse. Note: For a wireless network connection, you must first open the application and then select the printer you wish to use. 2 Click Select photos to save. 3 Click Deselect... to assign a prefix to all photos from a CD or flash drive using the computer 1 Insert a memory card into the printer. The Lexmark Imaging Studio software launches automatically on page 45. Transferring selected photos from a memory card using the computer 1 Insert a CD into the computer or...
User's Guide
Page 75
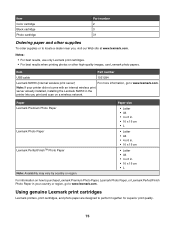
... Paper in the printer lets you , visit our Web site at www.lexmark.com. Notes: • For best results, use Lexmark photo papers. Item Part number USB cable 1021294 Lexmark N2050 (Internal wireless print server) For more information, go to www.lexmark.com. Item Color cartridge Black cartridge Photo cartridge Part number 2 3 31 Ordering paper and...
... Paper in the printer lets you , visit our Web site at www.lexmark.com. Notes: • For best results, use Lexmark photo papers. Item Part number USB cable 1021294 Lexmark N2050 (Internal wireless print server) For more information, go to www.lexmark.com. Item Color cartridge Black cartridge Photo cartridge Part number 2 3 31 Ordering paper and...
User's Guide
Page 78
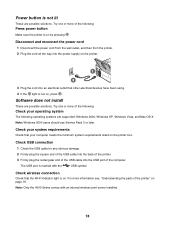
... more information see, "Understanding the parts of the USB cable into an electrical outlet that the Wi-Fi indicator light is marked with an internal wireless print server installed. 78 Software does not install These are possible solutions. Check USB connection 1 Check the USB cable for any obvious damage. 2 Firmly plug... the square end of the USB cable into the back of the printer. 3 Firmly plug the rectangular end of the printer" on , press . Check wireless connection Check that other electrical devices have been using. 4 If the light is on .
... more information see, "Understanding the parts of the USB cable into an electrical outlet that the Wi-Fi indicator light is marked with an internal wireless print server installed. 78 Software does not install These are possible solutions. Check USB connection 1 Check the USB cable for any obvious damage. 2 Firmly plug... the square end of the USB cable into the back of the printer. 3 Firmly plug the rectangular end of the printer" on , press . Check wireless connection Check that other electrical devices have been using. 4 If the light is on .
User's Guide
Page 102
... touch the marked area. Warning: A Warning identifies something that could damage your printer has a wireless network card installed Noise emission levels The following notices are subject to change. CAUTION: This type of our products. See www.lexmark.com for current values. We encourage the recycling of CAUTION indicates a tipping hazard. Note: Some...
... touch the marked area. Warning: A Warning identifies something that could damage your printer has a wireless network card installed Noise emission levels The following notices are subject to change. CAUTION: This type of our products. See www.lexmark.com for current values. We encourage the recycling of CAUTION indicates a tipping hazard. Note: Some...

User's Guide
Page 106
...inserting flash drives 45 memory cards 44 PictBridge-enabled digital camera 52 installing print cartridges 70 printer on a network 14 printer software 100 internal wireless print server installing 14 iron-on transfers, loading 36 J jams and misfeeds troubleshooting banner paper jams 92 paper jam in the paper support... 30 language changing 77 last page first 41 layout, selecting 30 left cartridge error 97 left cartridge incorrect 97 left cartridge missing 97 Lexmark Imaging Studio buttons Copy 27 E-mail 27 Fax 27 Photo Greeting Cards 27 Photo Packages 27 Scan 27 Slideshow 27 Transfer Photos 27 ...
...inserting flash drives 45 memory cards 44 PictBridge-enabled digital camera 52 installing print cartridges 70 printer on a network 14 printer software 100 internal wireless print server installing 14 iron-on transfers, loading 36 J jams and misfeeds troubleshooting banner paper jams 92 paper jam in the paper support... 30 language changing 77 last page first 41 layout, selecting 30 left cartridge error 97 left cartridge incorrect 97 left cartridge missing 97 Lexmark Imaging Studio buttons Copy 27 E-mail 27 Fax 27 Photo Greeting Cards 27 Photo Packages 27 Scan 27 Slideshow 27 Transfer Photos 27 ...
User's Guide
Page 107
...93 memory full error message 97 moire patterns, removing from scanned images 66 N network printer installing 14 network scanning 63 networking installing internal wireless print server 14 installing printer 14 newspapers, loading on the scanner glass 37 no images selected error 98 no photo/paper size error ...from digital camera using DPOF 52 printing from media device using the computer 54 printing from PictBridge-enabled digital camera 52 printing using color effects 51 printing using the proof sheet 49 scanning multiple photos at one time using computer 65 scanning to Photo Library 65 smudges,...
...93 memory full error message 97 moire patterns, removing from scanned images 66 N network printer installing 14 network scanning 63 networking installing internal wireless print server 14 installing printer 14 newspapers, loading on the scanner glass 37 no images selected error 98 no photo/paper size error ...from digital camera using DPOF 52 printing from media device using the computer 54 printing from PictBridge-enabled digital camera 52 printing using color effects 51 printing using the proof sheet 49 scanning multiple photos at one time using computer 65 scanning to Photo Library 65 smudges,...

