
Service Manual
Page 26
Tools Required For Service Flat-blade screwdriver #1 Phillips screwdriver #2 Phillips screwdriver 7.0 mm nut driver 5.5 mm wrench Needlenose pliers Diagonal pliers Spring hook Feeler gauges Analog or digital multimeter Parallel wrap plug 1319128 Serial wrap plug 1329048 Twinax/serial debug ... (FRU) or part. 4059-XXX Maintenance Approach The diagnostic information in this manual leads you complete the repair, perform tests as needed to determine the printer problem and repair the failure.
Tools Required For Service Flat-blade screwdriver #1 Phillips screwdriver #2 Phillips screwdriver 7.0 mm nut driver 5.5 mm wrench Needlenose pliers Diagonal pliers Spring hook Feeler gauges Analog or digital multimeter Parallel wrap plug 1319128 Serial wrap plug 1329048 Twinax/serial debug ... (FRU) or part. 4059-XXX Maintenance Approach The diagnostic information in this manual leads you complete the repair, perform tests as needed to determine the printer problem and repair the failure.

Service Manual
Page 29
... 904 Interface Violation by the controller software 905 Interface Violation by Paperport Device 906 ControllerEngine Link Driver Error Diagnostic Information 2-2 Replace the engine board. 902 General These errors indicate an unrecoverable engine software Engine Software error. Error Code Action 900 RIP Software ... into is bad. 4059-XXX Service Error Codes Service Error Codes are generally non-recoverable except in an intermittent condition when you can POR the printer to temporarily recover from the error condition.
... 904 Interface Violation by the controller software 905 Interface Violation by Paperport Device 906 ControllerEngine Link Driver Error Diagnostic Information 2-2 Replace the engine board. 902 General These errors indicate an unrecoverable engine software Engine Software error. Error Code Action 900 RIP Software ... into is bad. 4059-XXX Service Error Codes Service Error Codes are generally non-recoverable except in an intermittent condition when you can POR the printer to temporarily recover from the error condition.
Service Manual
Page 118
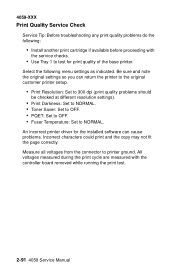
...available before proceeding with the controller board removed while running the print test. 2-91 4059 Service Manual An incorrect printer driver for print quality of the base printer. Measure all voltages from the connector to NORMAL. All voltages measured during the print cycle are measured with the... service checks. • Use Tray 1 to test for the installed software can return the printer to the original customer printer setup. • Print Resolution: Set to 300 dpi (print quality problems should be checked at different resolution settings). •...
...available before proceeding with the controller board removed while running the print test. 2-91 4059 Service Manual An incorrect printer driver for print quality of the base printer. Measure all voltages from the connector to NORMAL. All voltages measured during the print cycle are measured with the... service checks. • Use Tray 1 to test for the installed software can return the printer to the original customer printer setup. • Print Resolution: Set to 300 dpi (print quality problems should be checked at different resolution settings). •...

Service Manual
Page 168
... 4059 Service Manual When replacing the alignment assembly, it touches the back of the reference plate and tighten the nut with a 7 mm nut driver until you obtain the results you check the results of each adjustment on the inside rear of the Quick Test Page and check the margin... before making any adjustments to completely remove the screw. 4. Install the new alignment assembly. The reference adjustment screw can be removed from the printer. Back the reference adjustment screw out far enough to allow the alignment assembly to remove the old assembly and install the new one. Do...
... 4059 Service Manual When replacing the alignment assembly, it touches the back of the reference plate and tighten the nut with a 7 mm nut driver until you obtain the results you check the results of each adjustment on the inside rear of the Quick Test Page and check the margin... before making any adjustments to completely remove the screw. 4. Install the new alignment assembly. The reference adjustment screw can be removed from the printer. Back the reference adjustment screw out far enough to allow the alignment assembly to remove the old assembly and install the new one. Do...

