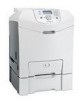
Quick Reference
Page 1
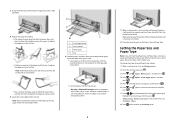
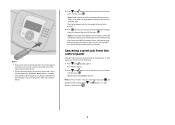
... of the stack. 1 Load lines 2 Length indicator 4 Flex the sheets back and forth to help position the guide. Lexmark™ C53x Quick Reference Loading paper and specialty media Loading the standard tray The printer has two trays to select from: the standard tray (Tray 1), also known as shown. 1 Notice the size indicators...
... of the stack. 1 Load lines 2 Length indicator 4 Flex the sheets back and forth to help position the guide. Lexmark™ C53x Quick Reference Loading paper and specialty media Loading the standard tray The printer has two trays to select from: the standard tray (Tray 1), also known as shown. 1 Notice the size indicators...
Quick Reference
Page 3
...through the list of paper back and forth to the Ready state. 3 To change the Paper Size and Paper Type settings: 1 Make sure the printer is on a level surface. Straighten the edges on a level surface. 5 Locate the stack height limiter and tab. Paper should lie flat in ...will go with very gentle pushing. Warning-Potential Damage: Never use envelopes with matching Paper Size and Paper Type settings are automatically linked by the printer. Setting the Paper Size and Paper Type Note: Trays with stamps, clasps, snaps, windows, coated linings, or self-stick adhesives. Highlight the ...
...through the list of paper back and forth to the Ready state. 3 To change the Paper Size and Paper Type settings: 1 Make sure the printer is on a level surface. Straighten the edges on a level surface. 5 Locate the stack height limiter and tab. Paper should lie flat in ...will go with very gentle pushing. Warning-Potential Damage: Never use envelopes with matching Paper Size and Paper Type settings are automatically linked by the printer. Setting the Paper Size and Paper Type Note: Trays with stamps, clasps, snaps, windows, coated linings, or self-stick adhesives. Highlight the ...
Quick Reference
Page 4
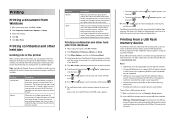
... jobs Holding jobs in the printer When sending a job to the printer, you delete it is held in memory until you can specify in the Print Properties that can print additional copies later. The PIN must be initiated by the user at www.lexmark.com. Job type Reserve Verify.... 2 Insert a USB flash memory device into the USB Direct interface. Notes: • USB devices must create a PIN in the printer until you choose to see the Lexmark Web site at the printer are printed, the job is available only on some models. Printing Printing a document from the control panel.
... jobs Holding jobs in the printer When sending a job to the printer, you delete it is held in memory until you can specify in the Print Properties that can print additional copies later. The PIN must be initiated by the user at www.lexmark.com. Job type Reserve Verify.... 2 Insert a USB flash memory device into the USB Direct interface. Notes: • USB devices must create a PIN in the printer until you choose to see the Lexmark Web site at the printer are printed, the job is available only on some models. Printing Printing a document from the control panel.
Quick Reference
Page 5
... printing, and Cancel a job appears on the flash memory device appear as when a jam has occurred, the printer ignores the memory device. • If you insert the memory device when the printer is busy printing other jobs have finished processing, you may need to the document you can still print PDFs... .jpg). Note: Folders found on the first line of jobs appears. 2 Press until Cancel appears. If you leave the USB flash memory device in the printer after leaving the initial USB menu screen, you want to print only one copy, or enter the number of copies to be printed. 4 Press to...
... printing, and Cancel a job appears on the flash memory device appear as when a jam has occurred, the printer ignores the memory device. • If you insert the memory device when the printer is busy printing other jobs have finished processing, you may need to the document you can still print PDFs... .jpg). Note: Folders found on the first line of jobs appears. 2 Press until Cancel appears. If you leave the USB flash memory device in the printer after leaving the initial USB menu screen, you want to print only one copy, or enter the number of copies to be printed. 4 Press to...

