User's Reference
Page 45
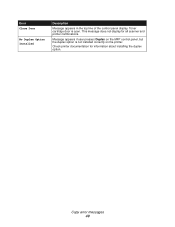
Error Close Door No Duplex Option Installed Description Message appears in the top line of the control panel display. This message does not display for information about installing the duplex option. Toner cartridge door is not installed correctly on the MFP control panel, but the duplex option is open. Check printer documentation for all scanner and printer combinations. Copy error messages 40 Message appears if user presses Duplex on the printer.
Error Close Door No Duplex Option Installed Description Message appears in the top line of the control panel display. This message does not display for information about installing the duplex option. Toner cartridge door is not installed correctly on the MFP control panel, but the duplex option is open. Check printer documentation for all scanner and printer combinations. Copy error messages 40 Message appears if user presses Duplex on the printer.

Setup Guide
Page 18
...top of the stabilizer screws that were previously installed in the optional drawer. CAUTION: The printer weighs 20.4 kg (45 lb) and requires at least two people to lift it safely. 9 Lower the printer onto the duplex unit, optional drawer, table, or printer cabinet. 10 Make sure the ...printer and duplex unit lock together securely. 11 If you have memory or network options to install, go to "Installing printer memory and network options" on page 14 otherwise, go to "Removing the print cartridge packaging" on page 17. b Tighten the posts securely. 8 Complete steps a and b if ...
...top of the stabilizer screws that were previously installed in the optional drawer. CAUTION: The printer weighs 20.4 kg (45 lb) and requires at least two people to lift it safely. 9 Lower the printer onto the duplex unit, optional drawer, table, or printer cabinet. 10 Make sure the ...printer and duplex unit lock together securely. 11 If you have memory or network options to install, go to "Installing printer memory and network options" on page 14 otherwise, go to "Removing the print cartridge packaging" on page 17. b Tighten the posts securely. 8 Complete steps a and b if ...

Setup Guide
Page 22
Step 3: Set up the printer Removing the print cartridge packaging 1 Open the printer upper front door. 2 Pull the print cartridge up the printer 17 The print cartridge will drop down and snap into the printer. Set up and out. 3 Remove the tabs and packaging from the cartridge. 4 Reinsert the print cartridge into place. 5 Close the upper front door.
Step 3: Set up the printer Removing the print cartridge packaging 1 Open the printer upper front door. 2 Pull the print cartridge up the printer 17 The print cartridge will drop down and snap into the printer. Set up and out. 3 Remove the tabs and packaging from the cartridge. 4 Reinsert the print cartridge into place. 5 Close the upper front door.

