Getting Started
Page 1
... - Error messages troubleshooting • Notices Contents Setup troubleshooting 3 Removing and reinstalling the software 3 Checking the printer status 3 Using the control panel 4 Printing 4 Printing a document 4 Printing other projects 4 Copying 4 Making a copy 4 Scanning 5 Scanning an item 5 Working with photos • Copying • Scanning • Faxing • Networking the printer • Maintaining the printer - Recycling Lexmark products • Troubleshooting - Ordering supplies - Changing a print cartridge - Jams and misfeeds troubleshooting - 2400 Series...
... - Error messages troubleshooting • Notices Contents Setup troubleshooting 3 Removing and reinstalling the software 3 Checking the printer status 3 Using the control panel 4 Printing 4 Printing a document 4 Printing other projects 4 Copying 4 Making a copy 4 Scanning 5 Scanning an item 5 Working with photos • Copying • Scanning • Faxing • Networking the printer • Maintaining the printer - Recycling Lexmark products • Troubleshooting - Ordering supplies - Changing a print cartridge - Jams and misfeeds troubleshooting - 2400 Series...
Getting Started
Page 4
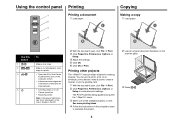
... seconds. • Turn the printer on the CD. 2 With the document open , click File Æ Print. 2 Click Properties, Preferences, Options, or Setup to preview the scan on the computer screen. • Initiate scan-back alignment if the button is held down for creating projects. You can print a photo, print on the scanner glass. 3 Press . Using the control panel Printing Printing a document 1 Load paper. 1 Copying Making a copy 1 Load paper. 1 2 2 Use this button 1 2 3 4 To Make a color copy. Note: If the power light blinks, see "Error messages" in the User's Guide on or off...
... seconds. • Turn the printer on the CD. 2 With the document open , click File Æ Print. 2 Click Properties, Preferences, Options, or Setup to preview the scan on the computer screen. • Initiate scan-back alignment if the button is held down for creating projects. You can print a photo, print on the scanner glass. 3 Press . Using the control panel Printing Printing a document 1 Load paper. 1 Copying Making a copy 1 Load paper. 1 2 2 Use this button 1 2 3 4 To Make a color copy. Note: If the power light blinks, see "Error messages" in the User's Guide on or off...

Getting Started
Page 5
... User's Guide on the camera to select and print your photos. Working with photos For more information. 5 The Imaging Studio buttons link to software and information that help you want to scan only a portion of the document, click and drag the dotted line box to select a specific area of the preview image to scan. 5 From the "Send scanned image to:" menu, select a program. 6 Click Scan Now. 2 Load 4 x 6 photo paper. 3 Press . Method 2 1 Click Start Æ Programs or All programs...
... User's Guide on the camera to select and print your photos. Working with photos For more information. 5 The Imaging Studio buttons link to software and information that help you want to scan only a portion of the document, click and drag the dotted line box to select a specific area of the preview image to scan. 5 From the "Send scanned image to:" menu, select a program. 6 Click Scan Now. 2 Load 4 x 6 photo paper. 3 Press . Method 2 1 Click Start Æ Programs or All programs...
Getting Started
Page 6
... the desktop, double-click the Imaging Studio icon, and then click the Maintain/ Troubleshoot button. Using the Solution Center The Solution Center provides help, as well as . 6 Enter a file name and file type, and then click Save. Using Print Properties Print Properties is the software that controls the printing function when the printer is connected to dry. Using the Photo Editor Use the Photo Editor software to print printer-friendly Web pages. See "Improving print quality" in this booklet. Use Lexmark Premium Photo Paper if you...
... the desktop, double-click the Imaging Studio icon, and then click the Maintain/ Troubleshoot button. Using the Solution Center The Solution Center provides help, as well as . 6 Enter a file name and file type, and then click Save. Using Print Properties Print Properties is the software that controls the printing function when the printer is connected to dry. Using the Photo Editor Use the Photo Editor software to print printer-friendly Web pages. See "Improving print quality" in this booklet. Use Lexmark Premium Photo Paper if you...
Getting Started
Page 8
... Lexmark. Limited warranty service The warranty period starts on the date of original purchase as warranted during normal use , and not for warranty service, remove all legal obligations, restrictions, liens, and encumbrances. The replacement may be a new or repaired item...Lexmark warrants that caused the damages. When warranty service involves the exchange of a product or part, the item replaced becomes the property of liability will be required to deliver your product to the United States. ALL INFORMATION, SPECIFICATIONS, PRICES, AND SERVICES ARE SUBJECT TO CHANGE AT ANY TIME...
... Lexmark. Limited warranty service The warranty period starts on the date of original purchase as warranted during normal use , and not for warranty service, remove all legal obligations, restrictions, liens, and encumbrances. The replacement may be a new or repaired item...Lexmark warrants that caused the damages. When warranty service involves the exchange of a product or part, the item replaced becomes the property of liability will be required to deliver your product to the United States. ALL INFORMATION, SPECIFICATIONS, PRICES, AND SERVICES ARE SUBJECT TO CHANGE AT ANY TIME...
Getting Started
Page 9
... new parts, or new and serviceable used with your province or territory. Lexmark is provided for which perform like new parts • Is, during the warranty period, contact a Remarketer or Lexmark for resale, from Lexmark Canada, Inc. ("Lexmark") or a Lexmark remarketer, referred to the Remarketer or the designated location. If this product is a feature or option (e.g., additional paper tray, envelope feeder, scanner, etc.), this statement applies only when that user...
... new parts, or new and serviceable used with your province or territory. Lexmark is provided for which perform like new parts • Is, during the warranty period, contact a Remarketer or Lexmark for resale, from Lexmark Canada, Inc. ("Lexmark") or a Lexmark remarketer, referred to the Remarketer or the designated location. If this product is a feature or option (e.g., additional paper tray, envelope feeder, scanner, etc.), this statement applies only when that user...
User's Guide
Page 7
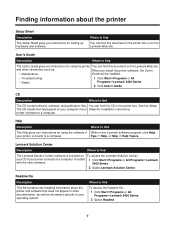
... Œ Help, or Help Œ Help Topics. Where to find The Help gives you install the printer software, the User's • Maintenance Guide will be installed. • Troubleshooting • Safety 1 Click StartŒPrograms or All ProgramsŒLexmark 2400 Series. 2 Click User's Guide. You can find this document in any Lexmark software program, click Help, your operating system. Readme file Description This file contains late-breaking information about the printer Setup Sheet Description The Setup Sheet gives you instructions for using the software if...
... Œ Help, or Help Œ Help Topics. Where to find The Help gives you install the printer software, the User's • Maintenance Guide will be installed. • Troubleshooting • Safety 1 Click StartŒPrograms or All ProgramsŒLexmark 2400 Series. 2 Click User's Guide. You can find this document in any Lexmark software program, click Help, your operating system. Readme file Description This file contains late-breaking information about the printer Setup Sheet Description The Setup Sheet gives you instructions for using the software if...

User's Guide
Page 10
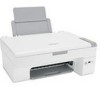
Learning about the printer Understanding the parts of the printer 6 1 5 7 4 Use the 1 Paper support 2 Control panel 3 PictBridge port 4 Paper exit tray 5 Top cover 6 Paper guide 7 Scanner glass 32 To Load paper. Access the scanner glass. Align paper when feeding. Operate the printer. Stack paper as it exits. Connect a PictBridge-enabled digital camera to the printer. Install or replace a print cartridge. 10 Scan, copy, or remove an item. 3 Use the 1 Scanner support 2 Print cartridge carrier 1 2 4 5 To Hold up the scanner unit.
Learning about the printer Understanding the parts of the printer 6 1 5 7 4 Use the 1 Paper support 2 Control panel 3 PictBridge port 4 Paper exit tray 5 Top cover 6 Paper guide 7 Scanner glass 32 To Load paper. Access the scanner glass. Align paper when feeding. Operate the printer. Stack paper as it exits. Connect a PictBridge-enabled digital camera to the printer. Install or replace a print cartridge. 10 Scan, copy, or remove an item. 3 Use the 1 Scanner support 2 Print cartridge carrier 1 2 4 5 To Hold up the scanner unit.

User's Guide
Page 11
... printer to access the print cartridge carrier. Note: If the power light blinks, see "Error messages" on and off. • Cancel a copy, scan, or print job. • Reset the printer. • Feed or eject paper. Using the control panel Press 1 2 3 4 To Make a color copy. or 10 x 15 cm borderless, color copy of a photo. • Open the All-In-One Center and preview the scan on the computer screen. • Print an alignment page if the button is held down for three seconds. Use the 3 Scanner unit 4 Power supply port 5 USB port...
... printer to access the print cartridge carrier. Note: If the power light blinks, see "Error messages" on and off. • Cancel a copy, scan, or print job. • Reset the printer. • Feed or eject paper. Using the control panel Press 1 2 3 4 To Make a color copy. or 10 x 15 cm borderless, color copy of a photo. • Open the All-In-One Center and preview the scan on the computer screen. • Print an alignment page if the button is held down for three seconds. Use the 3 Scanner unit 4 Power supply port 5 USB port...

User's Guide
Page 16
... shopping options for a new cartridge. • Print a test page. • Clean to fix horizontal streaks. • Align to fix blurry edges. • Troubleshoot other ink problems. Learn how to : • Print, scan, copy, and fax. • Find and change settings. • Use basic features. • Print projects such as banners, photos, envelopes, cards, iron-on transfers, and transparencies. • Find the electronic guide for more information, click Help in the lower right corner of the Printing Status window. • Turn printing...
... shopping options for a new cartridge. • Print a test page. • Clean to fix horizontal streaks. • Align to fix blurry edges. • Troubleshoot other ink problems. Learn how to : • Print, scan, copy, and fax. • Find and change settings. • Use basic features. • Print projects such as banners, photos, envelopes, cards, iron-on transfers, and transparencies. • Find the electronic guide for more information, click Help in the lower right corner of the Printing Status window. • Turn printing...
User's Guide
Page 18
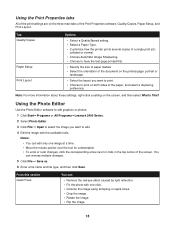
... the last page printed first. • Specify the size of paper loaded. • Select the orientation of the document on the printed page: portrait or landscape. • Select the layout you want to print. • Choose to Undo in the top center of the screen. From this section Quick Fixes You can • Remove the red-eye effect caused by light reflection. • Fix the photo with...
... the last page printed first. • Specify the size of paper loaded. • Select the orientation of the document on the printed page: portrait or landscape. • Select the layout you want to print. • Choose to Undo in the top center of the screen. From this section Quick Fixes You can • Remove the red-eye effect caused by light reflection. • Fix the photo with...

User's Guide
Page 41
network option. c Right-click the printer icon, and select Open or e From the "Networking Setup" dialog, select Connect. Peer-to a common printer. Networking the printer Installing a network printer lets users at different workstations print to -Peer. b Insert the printer CD. A printer object will copy a subset of the printer software from f Enter the shared names of both the printer and the network computer you find c Click Install. h Follow the instructions on page 41. the name of the client...
network option. c Right-click the printer icon, and select Open or e From the "Networking Setup" dialog, select Connect. Peer-to a common printer. Networking the printer Installing a network printer lets users at different workstations print to -Peer. b Insert the printer CD. A printer object will copy a subset of the printer software from f Enter the shared names of both the printer and the network computer you find c Click Install. h Follow the instructions on page 41. the name of the client...
User's Guide
Page 48
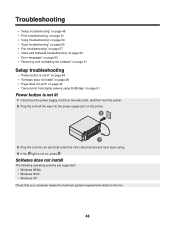
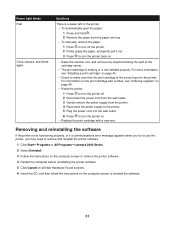
Troubleshooting • "Setup troubleshooting" on page 48 • "Print troubleshooting" on page 51 • "Copy troubleshooting" on page 54 • "Scan troubleshooting" on page 55 • "Fax troubleshooting" on page 57 • "Jams and misfeeds troubleshooting" on page 59 • "Error messages" on page 60 • "Removing and reinstalling the software" on page 61 Setup troubleshooting • "Power button is not lit" on page 48 • "Software does not install" on page 48 • "Page does not print" on page 49 • "Cannot print from digital camera using . 4 If...
Troubleshooting • "Setup troubleshooting" on page 48 • "Print troubleshooting" on page 51 • "Copy troubleshooting" on page 54 • "Scan troubleshooting" on page 55 • "Fax troubleshooting" on page 57 • "Jams and misfeeds troubleshooting" on page 59 • "Error messages" on page 60 • "Removing and reinstalling the software" on page 61 Setup troubleshooting • "Power button is not lit" on page 48 • "Software does not install" on page 48 • "Page does not print" on page 49 • "Cannot print from digital camera using . 4 If...
User's Guide
Page 54
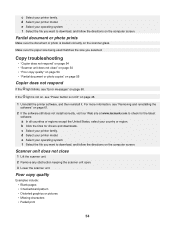
.... c Select your operating system. d Select your printer model. If the light is not on, see "Power button is loaded correctly on page 60. f Select the file you want to check for drivers and downloads. Scanner unit does not close " on page 54 • "Poor copy quality" on page 54 • "Partial document or photo copies" on page 55 Copier does not respond If the light blinks, see "Removing and reinstalling the software" on the computer screen.
.... c Select your operating system. d Select your printer model. If the light is not on, see "Power button is loaded correctly on page 60. f Select the file you want to check for drivers and downloads. Scanner unit does not close " on page 54 • "Poor copy quality" on page 54 • "Partial document or photo copies" on page 55 Copier does not respond If the light blinks, see "Removing and reinstalling the software" on the computer screen.

User's Guide
Page 55
... image. If the scanner glass is not satisfactory, try using a clearer version of the original document is dirty, gently wipe it with a clean, lint-free cloth dampened with water. Place the document facedown on page 60. Partial document or photo copies Make sure the document or photo is not lit" on the scanner glass. Check the ink level, and install a new print cartridge if necessary. If the light is not on, see "Power button...
... image. If the scanner glass is not satisfactory, try using a clearer version of the original document is dirty, gently wipe it with a clean, lint-free cloth dampened with water. Place the document facedown on page 60. Partial document or photo copies Make sure the document or photo is not lit" on the scanner glass. Check the ink level, and install a new print cartridge if necessary. If the light is not on, see "Power button...
User's Guide
Page 57
... photo scans Make sure the document or photo is blank" on the scanner glass. 2 From the control panel, press . 3 From the "Send scanned image to download, and follow the directions on page 60. Fax troubleshooting • "Tips for faxing using a clearer version of the document or image. f Select the file you selected. If the quality of a scan: 1 Load the document facedown on page 58 57 Make sure the paper size being used matches the size you want to :" menu, select a program. 4 Click Display...
... photo scans Make sure the document or photo is blank" on the scanner glass. 2 From the control panel, press . 3 From the "Send scanned image to download, and follow the directions on page 60. Fax troubleshooting • "Tips for faxing using a clearer version of the document or image. f Select the file you selected. If the quality of a scan: 1 Load the document facedown on page 58 57 Make sure the paper size being used matches the size you want to :" menu, select a program. 4 Click Display...
User's Guide
Page 58
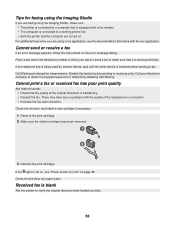
.... Check for and clear any paper jams. Received fax is blank Ask the sender to obtain the keypad sequence for faxing using the Imaging Studio If you are faxing using a fax application, see "Power button is not lit" on the error message dialog. Check the ink level, and install a new cartridge if necessary. 1 Remove the print cartridge. 2 Make sure the sticker and tape have been a problem with the quality of the original document is finished before sending or receiving a fax. Place a test...
.... Check for and clear any paper jams. Received fax is blank Ask the sender to obtain the keypad sequence for faxing using the Imaging Studio If you are faxing using a fax application, see "Power button is not lit" on the error message dialog. Check the ink level, and install a new cartridge if necessary. 1 Remove the print cartridge. 2 Make sure the sticker and tape have been a problem with the quality of the original document is finished before sending or receiving a fax. Place a test...
User's Guide
Page 61
... printer software. 1 Click StartŒPrograms or All ProgramsŒLexmark 2400 Series. 2 Select Uninstall. 3 Follow the instructions on the computer screen to remove the printer software. 4 Restart the computer before reinstalling the printer software. 5 Click Cancel on all New Hardware Found screens. 6 Insert the CD, and then follow the instructions on . • Replace the print cartridge with a new one. For more information, see "Ordering supplies" on page 46. • Reset the printer. 1 Press to turn...
... printer software. 1 Click StartŒPrograms or All ProgramsŒLexmark 2400 Series. 2 Select Uninstall. 3 Follow the instructions on the computer screen to remove the printer software. 4 Restart the computer before reinstalling the printer software. 5 Click Cancel on all New Hardware Found screens. 6 Insert the CD, and then follow the instructions on . • Replace the print cartridge with a new one. For more information, see "Ordering supplies" on page 46. • Reset the printer. 1 Press to turn...

User's Guide
Page 68
... settings copy 33 scan 35 custom-size paper, loading 23 D digital camera (PictBridge-enabled) 31 documents faxing using the software 39 loading on scanner glass 24 printing 26 scanning images for editing 37 scanning text for editing (OCR) 37 scanning to e-mail 37 E editing document text (OCR) 37 photos 18 scanned images 37 emission notices 62, 63 envelopes loading 22 printing 28 error messages 60 F Fax button 13 fax troubleshooting cannot print a fax or received fax has poor print quality 58 cannot send or receive fax 58 received fax is blank 58 faxing receiving using the software 40 sending...
... settings copy 33 scan 35 custom-size paper, loading 23 D digital camera (PictBridge-enabled) 31 documents faxing using the software 39 loading on scanner glass 24 printing 26 scanning images for editing 37 scanning text for editing (OCR) 37 scanning to e-mail 37 E editing document text (OCR) 37 photos 18 scanned images 37 emission notices 62, 63 envelopes loading 22 printing 28 error messages 60 F Fax button 13 fax troubleshooting cannot print a fax or received fax has poor print quality 58 cannot send or receive fax 58 received fax is blank 58 faxing receiving using the software 40 sending...

User's Guide
Page 69
...print 49 paper exit tray 10 paper guide 10 paper jam in paper support 59 paper jam in printer 59 paper or specialty media misfeeds 59 Paper Setup tab changing orientation 18 changing paper size 18 paper sizes, specifying 18 paper support 10 paper type, changing 26 paper, loading 21 partial document or photo copies 55 partial document or photo prints 54 partial document or photo scans 57 parts control panel 10 paper exit tray 10 paper guide 10 paper support 10 PictBridge port 10 power supply port 11 print cartridge carrier 10 scanner glass 10 scanner support 10 scanner unit 11 top cover 10 USB...
...print 49 paper exit tray 10 paper guide 10 paper jam in paper support 59 paper jam in printer 59 paper or specialty media misfeeds 59 Paper Setup tab changing orientation 18 changing paper size 18 paper sizes, specifying 18 paper support 10 paper type, changing 26 paper, loading 21 partial document or photo copies 55 partial document or photo prints 54 partial document or photo scans 57 parts control panel 10 paper exit tray 10 paper guide 10 paper support 10 PictBridge port 10 power supply port 11 print cartridge carrier 10 scanner glass 10 scanner support 10 scanner unit 11 top cover 10 USB...


