

Getting Started
Page 5
Setting up your All-In-One 1 Unpack your All-In-One. 2 Connect the telephone cord to your wall jack and to your phone line for a dial tone. 3 Connect the power cord to check your All-In-One. Warning: Do not connect the USB cable at this time. 4 Extend the paper exit tray and the paper support. 3 Push the Speaker button to a properly grounded electrical outlet.
Setting up your All-In-One 1 Unpack your All-In-One. 2 Connect the telephone cord to your wall jack and to your phone line for a dial tone. 3 Connect the power cord to check your All-In-One. Warning: Do not connect the USB cable at this time. 4 Extend the paper exit tray and the paper support. 3 Push the Speaker button to a properly grounded electrical outlet.

Getting Started
Page 6
Warning: Do not touch the gold contact area of the paper. 6 Attach the document exit tray, and then extend the document support. 7 Pull the operator panel toward you, and then open the cartridge access door. 8 Remove the sticker and transparent tape from the cartridges. 5 Load paper in the paper support. Squeeze and slide the paper guide to the left edge of the cartridges. 4
Warning: Do not touch the gold contact area of the paper. 6 Attach the document exit tray, and then extend the document support. 7 Pull the operator panel toward you, and then open the cartridge access door. 8 Remove the sticker and transparent tape from the cartridges. 5 Load paper in the paper support. Squeeze and slide the paper guide to the left edge of the cartridges. 4

Getting Started
Page 11
For help, see page 7. 2 Click Start Programs Lexmark X63 Scan & Copy Control Program. 3 Select the number of copies. 4 Click the button that matches your document. DOCUMENT LOADED appears on the operator panel display. &#... installed the All-In-One software. Using the operator panel: 1 Press COPY. 2 Press the keypad buttons to select the number of your desired copy mode (Color, Gray, B/W, Text). 5 Click Copy. 9 Copying To copy a document: • Place your document face down and top down in the document...
For help, see page 7. 2 Click Start Programs Lexmark X63 Scan & Copy Control Program. 3 Select the number of copies. 4 Click the button that matches your document. DOCUMENT LOADED appears on the operator panel display. &#... installed the All-In-One software. Using the operator panel: 1 Press COPY. 2 Press the keypad buttons to select the number of your desired copy mode (Color, Gray, B/W, Text). 5 Click Copy. 9 Copying To copy a document: • Place your document face down and top down in the document...

Getting Started
Page 12
... LOADED appears on the operator panel display. Slide the document guide until it rests against both edges of the online User's Guide. Click Start Programs Lexmark X63 Fax Setup Utility to program fax numbers for your document. 2 Press FAX. 3 Press the keypad buttons to enter a fax number. 4 Press Start. To send... number using a programmed speed dial number: 1 Press Speed Dial, and then press the number that corresponds with your programmed speed dial number in the document support.
... LOADED appears on the operator panel display. Slide the document guide until it rests against both edges of the online User's Guide. Click Start Programs Lexmark X63 Fax Setup Utility to program fax numbers for your document. 2 Press FAX. 3 Press the keypad buttons to enter a fax number. 4 Press Start. To send... number using a programmed speed dial number: 1 Press Speed Dial, and then press the number that corresponds with your programmed speed dial number in the document support.

Getting Started
Page 15
... LOADED appears on your computer. The Scan & Copy Control Program appears. 2 Click the button that matches your document. For help, see page 7. 2 Click Start Programs Lexmark X63 Scan & Copy Control Program. 3 Click the button that matches your scan destination (Scan to Application, Scan to File, or Scan and E-mail). 3 Click Send... scan a document: • Make sure you have installed the All-In-One software. • Place your document face down and top down in the document support.
... LOADED appears on your computer. The Scan & Copy Control Program appears. 2 Click the button that matches your document. For help, see page 7. 2 Click Start Programs Lexmark X63 Scan & Copy Control Program. 3 Click the button that matches your scan destination (Scan to Application, Scan to File, or Scan and E-mail). 3 Click Send... scan a document: • Make sure you have installed the All-In-One software. • Place your document face down and top down in the document support.

Getting Started
Page 20
... liability will be provided at a Remarketer or a Lexmark designated location. This limitation of remedies also applies to any claim by a Lexmark warranty, technical support may not apply to you present this statement as "Remarketer." Lexmark™X63 All-In-One This Statement of materials ...forth in this product for which perform like new parts • Is free from state to a Lexmark designated location. You may also have installed a maintenance kit as toner cartridges, inkjet cartridges, and ribbons) • Use of , or damage to, a product in this Statement ...
... liability will be provided at a Remarketer or a Lexmark designated location. This limitation of remedies also applies to any claim by a Lexmark warranty, technical support may not apply to you present this statement as "Remarketer." Lexmark™X63 All-In-One This Statement of materials ...forth in this product for which perform like new parts • Is free from state to a Lexmark designated location. You may also have installed a maintenance kit as toner cartridges, inkjet cartridges, and ribbons) • Use of , or damage to, a product in this Statement ...

User's Guide for Windows 98, Me, and 2000
Page 20
Lexmark X63 Note: Do not force the paper into the printer. Basics Copying Printing Scanning Faxing Troubleshooting Index Basics 12 Loading the paper Load up to 100 sheets of plain paper. 1 Place the paper against the right side of the paper support with the print side facing you. 2 Squeeze and slide the paper guide to the right until it rests against the left edge of the paper.
Lexmark X63 Note: Do not force the paper into the printer. Basics Copying Printing Scanning Faxing Troubleshooting Index Basics 12 Loading the paper Load up to 100 sheets of plain paper. 1 Place the paper against the right side of the paper support with the print side facing you. 2 Squeeze and slide the paper guide to the right until it rests against the left edge of the paper.

User's Guide for Windows 98, Me, and 2000
Page 21
Lexmark X63 Basics Copying Printing Scanning Faxing Troubleshooting Index Basics 13 Loading specialty paper Follow these guidelines when loading specialty paper: Load up to: 100 sheets of inkjet paper (depending on thickness) 10 envelopes Make sure: • The print side is facing you. • The paper is ...against the right side of the paper support. • The print side is facing you. • ...
Lexmark X63 Basics Copying Printing Scanning Faxing Troubleshooting Index Basics 13 Loading specialty paper Follow these guidelines when loading specialty paper: Load up to: 100 sheets of inkjet paper (depending on thickness) 10 envelopes Make sure: • The print side is facing you. • The paper is ...against the right side of the paper support. • The print side is facing you. • ...

User's Guide for Windows 98, Me, and 2000
Page 30
... it rests against both edges of your document. 3 When copying, scanning, or faxing documents using your document face down and top down in the document support. You remove all staples and paper clips. - Basics Copying Printing Scanning Faxing Troubleshooting Index Copying 22 Loading a document To load documents for copying, scanning, and... faxing: 1 Place your All-In-One, make sure: - You let ink and correction fluid dry completely. long and 5.5 in . Your document is at least 3.0 in . Lexmark X63
... it rests against both edges of your document. 3 When copying, scanning, or faxing documents using your document face down and top down in the document support. You remove all staples and paper clips. - Basics Copying Printing Scanning Faxing Troubleshooting Index Copying 22 Loading a document To load documents for copying, scanning, and... faxing: 1 Place your All-In-One, make sure: - You let ink and correction fluid dry completely. long and 5.5 in . Your document is at least 3.0 in . Lexmark X63

User's Guide for Windows 98, Me, and 2000
Page 52
... personalize other items suitable for your document. 8 From the Paper tab, select the Paper Size and orientation for iron-on transfers. Lexmark X63 Basics Copying Printing Scanning Faxing Troubleshooting Index Printing 44 Customizing T-shirts 1 Load iron-on transfer paper with the blank side facing... you in the paper support. 2 Open the image editing program supplied with the printer. 3 Create or select the image of your choice. 4 Select the mirror ...
... personalize other items suitable for your document. 8 From the Paper tab, select the Paper Size and orientation for iron-on transfers. Lexmark X63 Basics Copying Printing Scanning Faxing Troubleshooting Index Printing 44 Customizing T-shirts 1 Load iron-on transfer paper with the blank side facing... you in the paper support. 2 Open the image editing program supplied with the printer. 3 Create or select the image of your choice. 4 Select the mirror ...
User's Guide for Windows 98, Me, and 2000
Page 59
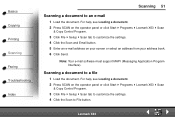
...Scan tab to customize the settings. 4 Click the Scan and Email button. 5 Enter an e-mail address on the operator panel or click Start Programs Lexmark X63 Scan & Copy Control Program. 3 Click File Setup Scan tab to customize the settings. 4 Click the Scan to File button. For help ,... from your address book. 6 Click Send. Scanning a document to an e-mail 1 Load the document. Note: Your e-mail software must support MAPI (Messaging Application Program Interface). Basics Copying Printing Scanning Faxing Troubleshooting Index Scanning 51 Scanning a document to a file 1 Load the document.
...Scan tab to customize the settings. 4 Click the Scan and Email button. 5 Enter an e-mail address on the operator panel or click Start Programs Lexmark X63 Scan & Copy Control Program. 3 Click File Setup Scan tab to customize the settings. 4 Click the Scan to File button. For help ,... from your address book. 6 Click Send. Scanning a document to an e-mail 1 Load the document. Note: Your e-mail software must support MAPI (Messaging Application Program Interface). Basics Copying Printing Scanning Faxing Troubleshooting Index Scanning 51 Scanning a document to a file 1 Load the document.

User's Guide for Windows 98, Me, and 2000
Page 62
... business cards, letterhead, and envelopes 1 Load the business cards, plain paper, or envelopes in the paper support. 2 Load the document containing the company logo into the document support. Lexmark X63 For help, see Loading a document. 3 Press SCAN on the operator panel or click Start Programs... Lexmark X63 Scan & Copy Control Program. 4 Select a size from the Fit to Page area. 5 Click the Scan to Application button...
... business cards, letterhead, and envelopes 1 Load the business cards, plain paper, or envelopes in the paper support. 2 Load the document containing the company logo into the document support. Lexmark X63 For help, see Loading a document. 3 Press SCAN on the operator panel or click Start Programs... Lexmark X63 Scan & Copy Control Program. 4 Select a size from the Fit to Page area. 5 Click the Scan to Application button...

User's Guide for Windows 98, Me, and 2000
Page 63
Note: The initializing of the display. 4 Press Options until MAINTENANCE appears on the bottom line. 5 Press Start. To re-initialize the scanner calibration: 1 Place a clean, white sheet of paper in your scan or copied images, you see streaks in the document support. 2 Press Setup on the operator panel. 3 Press Menu until SCANNER INIT appears on the top line of the scanner calibration takes approximately one minute. Lexmark X63 Basics Copying Printing Scanning Faxing Troubleshooting Index Scanning 55 Calibrating the scanner If you may need to calibrate the scanner.
Note: The initializing of the display. 4 Press Options until MAINTENANCE appears on the bottom line. 5 Press Start. To re-initialize the scanner calibration: 1 Place a clean, white sheet of paper in your scan or copied images, you see streaks in the document support. 2 Press Setup on the operator panel. 3 Press Menu until SCANNER INIT appears on the top line of the scanner calibration takes approximately one minute. Lexmark X63 Basics Copying Printing Scanning Faxing Troubleshooting Index Scanning 55 Calibrating the scanner If you may need to calibrate the scanner.

User's Guide for Windows 98, Me, and 2000
Page 83
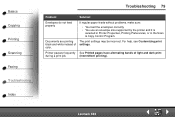
Lexmark X63 Basics Copying Printing Scanning Faxing Troubleshooting Index Troubleshooting 75 Problem: Paper misfeeds or multiple sheets feed Vertical, straight lines are not smooth Solution: Make sure: • You use a paper recommended for inkjet printers. • You do not force the paper into the printer. • You do...8226; Select Photo or Max Photo from the Document/Quality tab of the paper and does not cause the paper to bow in the paper support. • You select the correct paper type and size in Printer Properties, Printing Preferences, or in the printer. • You load the...
Lexmark X63 Basics Copying Printing Scanning Faxing Troubleshooting Index Troubleshooting 75 Problem: Paper misfeeds or multiple sheets feed Vertical, straight lines are not smooth Solution: Make sure: • You use a paper recommended for inkjet printers. • You do not force the paper into the printer. • You do...8226; Select Photo or Max Photo from the Document/Quality tab of the paper and does not cause the paper to bow in the paper support. • You select the correct paper type and size in Printer Properties, Printing Preferences, or in the printer. • You load the...

User's Guide for Windows 98, Me, and 2000
Page 84
... at a time. • Make sure you select the All-In-One as the default printer from the Scan & Copy Control Program. • The paper is a supported type. Basics Copying Printing Scanning Faxing Troubleshooting Index Troubleshooting 76 Problem: Solution: Characters are missing or unexpected. • Make sure the paper is loaded correctly.... • You may need to clean the cartridge nozzles. For help , see Cleaning the cartridge nozzles. • You may need to clean the cartridge nozzles. Lexmark X63
... at a time. • Make sure you select the All-In-One as the default printer from the Scan & Copy Control Program. • The paper is a supported type. Basics Copying Printing Scanning Faxing Troubleshooting Index Troubleshooting 76 Problem: Solution: Characters are missing or unexpected. • Make sure the paper is loaded correctly.... • You may need to clean the cartridge nozzles. For help , see Cleaning the cartridge nozzles. • You may need to clean the cartridge nozzles. Lexmark X63
User's Guide for Windows 98, Me, and 2000
Page 87
Documents are printing The print settings may be incorrect. Lexmark X63 For help, see Customizing print black and white instead of light and dark print during a print job. (intermittent printing). Basics Copying Printing Scanning Faxing ...: Envelopes do not feed properly If regular paper feeds without problems, make sure: • You load the envelopes correctly. • You use an envelope size supported by the printer and it is selected in Printer Properties, Printing Preferences, or in the Scan & Copy Control Program...
Documents are printing The print settings may be incorrect. Lexmark X63 For help, see Customizing print black and white instead of light and dark print during a print job. (intermittent printing). Basics Copying Printing Scanning Faxing ...: Envelopes do not feed properly If regular paper feeds without problems, make sure: • You load the envelopes correctly. • You use an envelope size supported by the printer and it is selected in Printer Properties, Printing Preferences, or in the Scan & Copy Control Program...

User's Guide for Windows 98, Me, and 2000
Page 89
... scanner bed. • Check the telephone line for line noise. • Make a copy to be received manually. The current receive mode is in the paper support. • Wait for line noise. • Run a printer self test to check your machine. • Check your telephone handset, and then hang up. Faxes cannot... Faxing Troubleshooting Index Troubleshooting 81 Problem: Solution: Incoming faxes are not received automatically. • Make sure the fax receive mode is set to become available. Lexmark X63
... scanner bed. • Check the telephone line for line noise. • Make a copy to be received manually. The current receive mode is in the paper support. • Wait for line noise. • Run a printer self test to check your machine. • Check your telephone handset, and then hang up. Faxes cannot... Faxing Troubleshooting Index Troubleshooting 81 Problem: Solution: Incoming faxes are not received automatically. • Make sure the fax receive mode is set to become available. Lexmark X63

User's Guide for Windows 98, Me, and 2000
Page 91
... paper in memory. Install or reinstall the indicated cartridge. Open the operator panel and remove the jam. Lexmark X63 This resets the monitoring system and prints any faxes in the paper support. Open the operator panel and the cartridge access door. CHANGE BLACK INK CLR DOCUMENT JAM Solution: Load paper... in the paper support, and then press Paper Feed. Press Options until the correct cartridge displays, and then press Start. Replace the black cartridge and select NEW ...
... paper in memory. Install or reinstall the indicated cartridge. Open the operator panel and remove the jam. Lexmark X63 This resets the monitoring system and prints any faxes in the paper support. Open the operator panel and the cartridge access door. CHANGE BLACK INK CLR DOCUMENT JAM Solution: Load paper... in the paper support, and then press Paper Feed. Press Options until the correct cartridge displays, and then press Start. Replace the black cartridge and select NEW ...

User's Guide for Windows 98, Me, and 2000
Page 92
...and send your telephone line connection. Wait for all documents in the document support, and then press Start. Check your job again, or turn Memory XMIT off from the Setup menu or the Settings Utility. Lexmark X63 UNDEFINED LEARNING DRPD FAILED LOAD DOCUMENT (with beep warning) FAX SPEED... #? MEMORY FULL and returns to READY state Solution: Wait for memory to send your document in the document support to be printed and sent to set ...
...and send your telephone line connection. Wait for all documents in the document support, and then press Start. Check your job again, or turn Memory XMIT off from the Setup menu or the Settings Utility. Lexmark X63 UNDEFINED LEARNING DRPD FAILED LOAD DOCUMENT (with beep warning) FAX SPEED... #? MEMORY FULL and returns to READY state Solution: Wait for memory to send your document in the document support to be printed and sent to set ...


