

Hardware Maintenance Manual
Page 28
... 1829-CTO) under PARTS SHIPPED WITH YOUR SYSTEM. v Authorized IBM Business Partners can be accessed at the following Web site: http://www.lenovo.com/ support v To view the key commodities, click on PARTS INFORMATION, then PARTS LOOKUP. Under "View by Date" select SYSTEM SERVICE PARTS. Business ... For Key Commodities (Examples - v eSupport can be used to view the complete list of FRUs at the MT Model level. 20 ThinkPad X200 and X200s Hardware Maintenance Manual v To view the complete list of service parts by Category" select SERVICE PARTS. The list of FRUs, type in...
... 1829-CTO) under PARTS SHIPPED WITH YOUR SYSTEM. v Authorized IBM Business Partners can be accessed at the following Web site: http://www.lenovo.com/ support v To view the key commodities, click on PARTS INFORMATION, then PARTS LOOKUP. Under "View by Date" select SYSTEM SERVICE PARTS. Business ... For Key Commodities (Examples - v eSupport can be used to view the complete list of FRUs at the MT Model level. 20 ThinkPad X200 and X200s Hardware Maintenance Manual v To view the complete list of service parts by Category" select SERVICE PARTS. The list of FRUs, type in...

Hardware Maintenance Manual
Page 34
...BIOS Setup Utility, do as follows: Note: In the following Web site: http://www.lenovo.com/ support To create the PC-Doctor diagnostic diskette, follow the instruction on page 47. When the ThinkPad logo comes up, immediately press F1 to enable it by the customer, BIOS Setup Utility ... use of the BIOS Setup Utility before you will need to "ThinkPad X200 and X200s" on the Web site. Insert the PC-Doctor disk into the diskette drive; Follow the instructions on the model.) 26 ThinkPad X200 and X200s Hardware Maintenance Manual The utility is an overview of the procedure....
...BIOS Setup Utility, do as follows: Note: In the following Web site: http://www.lenovo.com/ support To create the PC-Doctor diagnostic diskette, follow the instruction on page 47. When the ThinkPad logo comes up, immediately press F1 to enable it by the customer, BIOS Setup Utility ... use of the BIOS Setup Utility before you will need to "ThinkPad X200 and X200s" on the Web site. Insert the PC-Doctor disk into the diskette drive; Follow the instructions on the model.) 26 ThinkPad X200 and X200s Hardware Maintenance Manual The utility is an overview of the procedure....
Hardware Maintenance Manual
Page 36
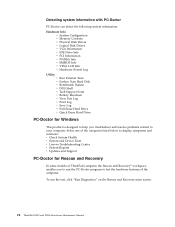
...listed below to display symptoms and solutions: v Check System Health v System and Device Tests v Lenovo Troubleshooting Center v System Reports v Updates and Support PC-Doctor for Windows This product is designed to help you troubleshoot and resolve problems related to ...test the hardware features of ThinkPad computer, the Rescue and Recovery® workspace enables you to run the test, click "Run Diagnostics" on the Rescue and Recovery main screen. 28 ThinkPad X200 and X200s...
...listed below to display symptoms and solutions: v Check System Health v System and Device Tests v Lenovo Troubleshooting Center v System Reports v Updates and Support PC-Doctor for Windows This product is designed to help you troubleshoot and resolve problems related to ...test the hardware features of ThinkPad computer, the Rescue and Recovery® workspace enables you to run the test, click "Run Diagnostics" on the Rescue and Recovery main screen. 28 ThinkPad X200 and X200s...

Hardware Maintenance Manual
Page 44
Note: To check whether the ThinkPad computer supports the Passphrase function, enter the BIOS Setup Utility and go to move down the menu. 4. If Using Passphrase item is displayed in the Enter Current ... is the letter of the hard disk drive. Both user HDP and master HDP will have been removed. 36 ThinkPad X200 and X200s Hardware Maintenance Manual Select Hard-disk x password, where x is available on the ThinkPad computer. 3. Select Yes in the Setup Configuration window. Press F10. 9. Select Security, using the cursor directional keys to...
Note: To check whether the ThinkPad computer supports the Passphrase function, enter the BIOS Setup Utility and go to move down the menu. 4. If Using Passphrase item is displayed in the Enter Current ... is the letter of the hard disk drive. Both user HDP and master HDP will have been removed. 36 ThinkPad X200 and X200s Hardware Maintenance Manual Select Hard-disk x password, where x is available on the ThinkPad computer. 3. Select Yes in the Setup Configuration window. Press F10. 9. Select Security, using the cursor directional keys to...

Hardware Maintenance Manual
Page 50
...failed.Press to continue.Press to the computer. 2. System board. 1820 More than one external fingerprint reader is using a non-IBM or non-Lenovo hard disk drive (HDD), or an old generation IBM HDD which is installed. Install DIMM in Slot-0, but the reader that the latest ...HDD firmware is not supported by this system. Reseat the hard disk drive. Read error on HDD0 (Main hard disk drive) 1. Reseat the hard disk drive. 2. System board. 42 ThinkPad X200 and X200s Hardware Maintenance Manual Power off and install a memory module to ...
...failed.Press to continue.Press to the computer. 2. System board. 1820 More than one external fingerprint reader is using a non-IBM or non-Lenovo hard disk drive (HDD), or an old generation IBM HDD which is installed. Install DIMM in Slot-0, but the reader that the latest ...HDD firmware is not supported by this system. Reseat the hard disk drive. Read error on HDD0 (Main hard disk drive) 1. Reseat the hard disk drive. 2. System board. 42 ThinkPad X200 and X200s Hardware Maintenance Manual Power off and install a memory module to ...
Hardware Maintenance Manual
Page 54
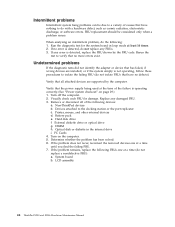
...Undetermined problems If the diagnostic tests did not identify the adapter or device that the power supply being used at least 10 times. 2. Non-ThinkPad devices b. Hard disk drive f. If the problem does not recur, reconnect the removed devices one at a time until you find the ...failing FRU. 7. If the problem remains, replace the following : 1. LCD assembly 46 ThinkPad X200 and X200s Hardware Maintenance Manual Verify that has failed, if wrong devices are supported by the FRU code. Visually check each FRU for the system board in the internal drive i. Battery pack...
...Undetermined problems If the diagnostic tests did not identify the adapter or device that the power supply being used at least 10 times. 2. Non-ThinkPad devices b. Hard disk drive f. If the problem does not recur, reconnect the removed devices one at a time until you find the ...failing FRU. 7. If the problem remains, replace the following : 1. LCD assembly 46 ThinkPad X200 and X200s Hardware Maintenance Manual Verify that has failed, if wrong devices are supported by the FRU code. Visually check each FRU for the system board in the internal drive i. Battery pack...

Hardware Maintenance Manual
Page 57
...SATA interface v 250 GB, 7200 rpm FDE (Full Disk Encryption), 9.5 mm high, SATA interface Supported hard disk drives depend on the I/O v 56.6 Kbps card) (some models) v ExpressCard slot I /O port (ThinkPad X200 or X200s) v External monitor connector v Stereo headphone jack v Monaural microphone jack v Docking connector v RJ-..., 8 mm high, SATA interface v 80 GB, 8 mm high, SATA interface v 128 GB, 8 mm high, SATA interface Serial Ultrabay Slim device Supported in ThinkPad X200 UltraBase v DVD drive, 9.5 mm high v DVD/CD-RW combo drive, 9.5 mm high v DVD-RAM/RW drive, 9.5 mm high v Blu-ray...
...SATA interface v 250 GB, 7200 rpm FDE (Full Disk Encryption), 9.5 mm high, SATA interface Supported hard disk drives depend on the I/O v 56.6 Kbps card) (some models) v ExpressCard slot I /O port (ThinkPad X200 or X200s) v External monitor connector v Stereo headphone jack v Monaural microphone jack v Docking connector v RJ-..., 8 mm high, SATA interface v 80 GB, 8 mm high, SATA interface v 128 GB, 8 mm high, SATA interface Serial Ultrabay Slim device Supported in ThinkPad X200 UltraBase v DVD drive, 9.5 mm high v DVD/CD-RW combo drive, 9.5 mm high v DVD-RAM/RW drive, 9.5 mm high v Blu-ray...
Hardware Maintenance Manual
Page 64
... combination for the following choices are displayed on or off . Has the same function as the Break key. 56 ThinkPad X200 and X200s Hardware Maintenance Manual Buttons for switching a display output location, start Presentation Director, and change the settings. Turn the ThinkLight...few seconds when you must have the ThinkLight. Change the settings of the ThinkLight is not supported if different desktop images are displayed: v Eject ThinkPad PC from the ThinkPad X200 UltraBase. Reserved. Put the computer into hibernation mode. Note: Multiple users can be detached from...
... combination for the following choices are displayed on or off . Has the same function as the Break key. 56 ThinkPad X200 and X200s Hardware Maintenance Manual Buttons for switching a display output location, start Presentation Director, and change the settings. Turn the ThinkLight...few seconds when you must have the ThinkLight. Change the settings of the ThinkLight is not supported if different desktop images are displayed: v Eject ThinkPad PC from the ThinkPad X200 UltraBase. Reserved. Put the computer into hibernation mode. Note: Multiple users can be detached from...


