(English) Rescue and Recovery 4.3 Deployment Guide
Page 5
... Operating system and applications . . . . . 16 Restore system drive only 16 Rejuvenation 16 Full restore 17 Custom recovery 17 Backups 20 Scheduling backups and associated tasks . . . 20 Sysprep Backup/Restore 21 Mapping a network drive for backups . . . . 22 Password Persistence 25 EFS file limitation 25 Battery power settings for hard drive setup: Option 2 . . 55 Scenario 3 - Best practices 51 Scenario 1 - Performing a Bare Metal Restore from an Admin Backup 58 Scenario 7 - Installing...
... Operating system and applications . . . . . 16 Restore system drive only 16 Rejuvenation 16 Full restore 17 Custom recovery 17 Backups 20 Scheduling backups and associated tasks . . . 20 Sysprep Backup/Restore 21 Mapping a network drive for backups . . . . 22 Password Persistence 25 EFS file limitation 25 Battery power settings for hard drive setup: Option 2 . . 55 Scenario 3 - Best practices 51 Scenario 1 - Performing a Bare Metal Restore from an Admin Backup 58 Scenario 7 - Installing...
(English) Rescue and Recovery 4.3 Deployment Guide
Page 30
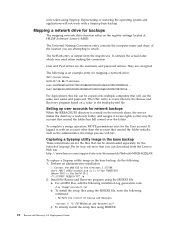
..., do the following installation-log generation code: /L*v %temp%\rrinstall.txt b. Install the Rescue and Recovery program using Sysprep. To install the setup files using MSIEXE: 22 Rescue and Recovery 4.3 Deployment Guide User and Pwd entries are encrypted. Mapping a network drive for the User account. To complete a merge operation, MOVE permissions exist for backups The mapping network drive function relies on the registry settings located at HKLM\Software\Lenovo\MND. The Universal...
..., do the following installation-log generation code: /L*v %temp%\rrinstall.txt b. Install the Rescue and Recovery program using Sysprep. To install the setup files using MSIEXE: 22 Rescue and Recovery 4.3 Deployment Guide User and Pwd entries are encrypted. Mapping a network drive for the User account. To complete a merge operation, MOVE permissions exist for backups The mapping network drive function relies on the registry settings located at HKLM\Software\Lenovo\MND. The Universal...
(English) Rescue and Recovery 4.3 Deployment Guide
Page 32
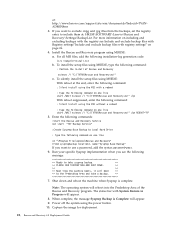
... end, enter the following command: : Silent install using the MSI with System Restore in Progress will boot ** ** to take sysprep backup. ** ** PLEASE RUN SYSPREP NOW AND SHUT DOWN. ** ** ** ** Next time the machine boots, it will appear. 8. Install the Rescue and Recovery program using the power button. 10. Enter the following commands: :Start the Rescue and Recovery Service net start "TVT Backup Service" :Create Sysprep Base Backup to Local Hard Drive : Type the...
... end, enter the following command: : Silent install using the MSI with System Restore in Progress will boot ** ** to take sysprep backup. ** ** PLEASE RUN SYSPREP NOW AND SHUT DOWN. ** ** ** ** Next time the machine boots, it will appear. 8. Install the Rescue and Recovery program using the power button. 10. Enter the following commands: :Start the Rescue and Recovery Service net start "TVT Backup Service" :Create Sysprep Base Backup to Local Hard Drive : Type the...
(English) Rescue and Recovery 4.3 Deployment Guide
Page 36
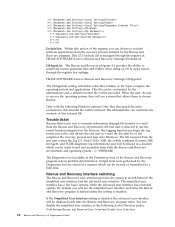
... following Windows options: Only files that allows them to a help desk. This GUI exclude list is managed through the registry key settings: HKLM\SOFTWARE\Lenovo\Rescue and Recovery\Settings\OSAppsList The OSAppsList setting will see the simplified user interface each time the Rescue and Recovery program starts. x=?:\Documents and Settings\*\Local Settings\History\* X=?:\Documents and Settings\*\Local Settings\Temp\* x=?:\Documents and Settings\*\Local Settings\Temporary Internet Files\* x=?:\Documents and Settings\*\Desktop\* x=?:\Documents and Settings...
... following Windows options: Only files that allows them to a help desk. This GUI exclude list is managed through the registry key settings: HKLM\SOFTWARE\Lenovo\Rescue and Recovery\Settings\OSAppsList The OSAppsList setting will see the simplified user interface each time the Rescue and Recovery program starts. x=?:\Documents and Settings\*\Local Settings\History\* X=?:\Documents and Settings\*\Local Settings\Temp\* x=?:\Documents and Settings\*\Local Settings\Temporary Internet Files\* x=?:\Documents and Settings\*\Desktop\* x=?:\Documents and Settings...

(English) Rescue and Recovery 4.5 Deployment Guide
Page 27
... image for Primary partitions. Supported Sysprep multiple drive configurations Windows PE drive enumeration may be different than C:\ Primary, you must set the registry entry to include them at the end, enter the following command: : Silent install using the MSI with registry settings" on one line cd "\Program Files\Lenovo\Rescue and Recovery" rrcmd sysprepbackup location=L name="Sysprep Base Backup" If you want to use a password, add the syntax password...
... image for Primary partitions. Supported Sysprep multiple drive configurations Windows PE drive enumeration may be different than C:\ Primary, you must set the registry entry to include them at the end, enter the following command: : Silent install using the MSI with registry settings" on one line cd "\Program Files\Lenovo\Rescue and Recovery" rrcmd sysprepbackup location=L name="Sysprep Base Backup" If you want to use a password, add the syntax password...

(English) Rescue and Recovery 4.5 Deployment Guide
Page 51
New rollouts This section describes installing the Rescue and Recovery program in the process is the drive letter for the exploded WWW EXMD c:\SWTOOLS © Copyright Lenovo 2008, 2011 45 Boot the diskette (only one -half. 1. Install the operating system and applications. Build your donor system as second hard disk drives, USB hard disk drives, USB memory keys and PC Card Memory from the donor system, except the primary hard disk that the...
New rollouts This section describes installing the Rescue and Recovery program in the process is the drive letter for the exploded WWW EXMD c:\SWTOOLS © Copyright Lenovo 2008, 2011 45 Boot the diskette (only one -half. 1. Install the operating system and applications. Build your donor system as second hard disk drives, USB hard disk drives, USB memory keys and PC Card Memory from the donor system, except the primary hard disk that the...

(English) Power Manager Deployment Guide
Page 9
...; Run, and then type cmd in the Open box to open the Command Prompt window. • For Windows Vista and Windows 7 operating systems Click Start, type cmd in Power Manager have dependency on a client computer, the function is for desktop computers, the monitor needs to install Power Manager. You can download a compatible version of the following : 1. Extract the Power Manager software package to install the .NET Framework before installing Power Manager. When a function is not supported on hardware and drivers...
...; Run, and then type cmd in the Open box to open the Command Prompt window. • For Windows Vista and Windows 7 operating systems Click Start, type cmd in Power Manager have dependency on a client computer, the function is for desktop computers, the monitor needs to install Power Manager. You can download a compatible version of the following : 1. Extract the Power Manager software package to install the .NET Framework before installing Power Manager. When a function is not supported on hardware and drivers...
(English) Hardware Password Manager Deployment Guide
Page 5
... 37 Appendix B. CMOS error 29 Scenario 3 - Replace or move a hard disk drive 31 Scenario 9 - Registered system can no longer access the Hardware Password Manager server 33 Scenario 13 - Add a hard disk drive . . . . . 31 Scenario 8 - Load default settings in the BIOS setup 33 Scenario 15 - Forgot the corporate password . 34 Scenario 4 - Scenarios 29 Service scenarios (configuration changes) . . . . 29 Scenario 1 - Disaster recovery . . . . 39 © Copyright Lenovo 2010 iii Replace the fingerprint device. . 30 Scenario 4 - Enter the BIOS setup. . . . . 33 Scenario...
... 37 Appendix B. CMOS error 29 Scenario 3 - Replace or move a hard disk drive 31 Scenario 9 - Registered system can no longer access the Hardware Password Manager server 33 Scenario 13 - Add a hard disk drive . . . . . 31 Scenario 8 - Load default settings in the BIOS setup 33 Scenario 15 - Forgot the corporate password . 34 Scenario 4 - Scenarios 29 Service scenarios (configuration changes) . . . . 29 Scenario 1 - Disaster recovery . . . . 39 © Copyright Lenovo 2010 iii Replace the fingerprint device. . 30 Scenario 4 - Enter the BIOS setup. . . . . 33 Scenario...
(English) Hardware Password Manager Deployment Guide
Page 38
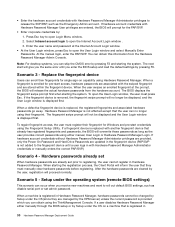
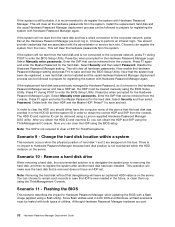
... user that the user can skip the CMOS error by pressing F2 and starting the system. If hardware account credentials without Hardware Password Manager Administrator privileges are provided, only the Power On Password and Hard Drive Passwords are already set admin password. When a machine is registered in Hardware Password Manager. You can obtain using the ThinkManagement Console. Note: For desktop systems, you enter the BIOS setup and load the default settings by the HPM server) unless the current password...
... user that the user can skip the CMOS error by pressing F2 and starting the system. If hardware account credentials without Hardware Password Manager Administrator privileges are provided, only the Power On Password and Hard Drive Passwords are already set admin password. When a machine is registered in Hardware Password Manager. You can obtain using the ThinkManagement Console. Note: For desktop systems, you enter the BIOS setup and load the default settings by the HPM server) unless the current password...
(English) Hardware Password Manager Deployment Guide
Page 39
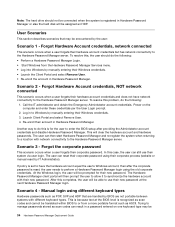
.... Replace the system board When the system board is not required to clear a HDP for Hardware Password Manager to assign a password to a system registered in Hardware Password Manager using a Lenovo supplied Hardware Password Manager DOS utility. Removing the CMOS battery will clear the hardware passwords and delete the local hardware account and SST. machine/user/hdd instances and hardware account backup already exist) and clear all detected drives. Scenario 8 - In order to clear the HDP, you must enter it manually. You must clear or disable Hardware Password Manager prior...
.... Replace the system board When the system board is not required to clear a HDP for Hardware Password Manager to assign a password to a system registered in Hardware Password Manager using a Lenovo supplied Hardware Password Manager DOS utility. Removing the CMOS battery will clear the hardware passwords and delete the local hardware account and SST. machine/user/hdd instances and hardware account backup already exist) and clear all detected drives. Scenario 8 - In order to clear the HDP, you must enter it manually. You must clear or disable Hardware Password Manager prior...
(English) Hardware Password Manager Deployment Guide
Page 40
... a wired connection to the corporate network, press Esc at the Hardware Password Manager pre-boot log in. Delete both DOS and Windows, all flash scenarios must be retrieved using the ThinkManagement Console. The HDD ID and machine ID can be tested with a flash image (applied using a flash utility). Now you can be retrieved from the system. Note: Removing the hard disk without first deregistering will clear the hardware passwords from the menu. This will make sure...
... a wired connection to the corporate network, press Esc at the Hardware Password Manager pre-boot log in. Delete both DOS and Windows, all flash scenarios must be retrieved using the ThinkManagement Console. The HDD ID and machine ID can be tested with a flash image (applied using a flash utility). Now you can be retrieved from the system. Note: Removing the hard disk without first deregistering will clear the hardware passwords from the menu. This will make sure...
(English) Hardware Password Manager Deployment Guide
Page 42
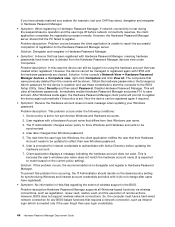
To resolve this problem, do the following : 1. Scenario 3 - If policy is set to have network connectivity to the Hardware Password Manager server. Manual login using different keyboard types Hardware passwords such as POP, SVP and HDP that may be translated within BIOS to do this , the user should not be connected when the system is reset, the user needs to perform a Hardware Password Manager login using their corporate process (website or manual reset by manually entering their Windows credentials. •...
To resolve this problem, do the following : 1. Scenario 3 - If policy is set to have network connectivity to the Hardware Password Manager server. Manual login using different keyboard types Hardware passwords such as POP, SVP and HDP that may be translated within BIOS to do this , the user should not be connected when the system is reset, the user needs to perform a Hardware Password Manager login using their corporate process (website or manual reset by manually entering their Windows credentials. •...
(English) Hardware Password Manager Deployment Guide
Page 54
... prevent this case the device can be updated to the BIOS Setup Utility. Problem description: In this problem from the console will clear all hardware passwords. The next time the user logs into Windows, the client application notifies the user that the PC failed to the Hardware Password Manager server. Problem description:Hardware Password Manager supports all . Server policy is unable to report the successful completion of wireless support in the BIOS. Problem description: This problem occurs under Computers...
... prevent this case the device can be updated to the BIOS Setup Utility. Problem description: In this problem from the console will clear all hardware passwords. The next time the user logs into Windows, the client application notifies the user that the PC failed to the Hardware Password Manager server. Problem description:Hardware Password Manager supports all . Server policy is unable to report the successful completion of wireless support in the BIOS. Problem description: This problem occurs under Computers...

Hardware Maintenance Manual
Page 50
... External SATA connector cannot be accessed. Storage Array, contact your network or storage administrator. Read the information displayed on how to enable or disable user access to the following devices: Serial ATA External SATA Port Legacy Diskette A (some models) When this feature is set to Disabled, the device connected to change , or delete a password, do the following : Note: A password can type either password. See Chapter 6 "Using the Setup Utility program" on the hard disk drive. After you set an Administrator Password, a password prompt is displayed...
... External SATA connector cannot be accessed. Storage Array, contact your network or storage administrator. Read the information displayed on how to enable or disable user access to the following devices: Serial ATA External SATA Port Legacy Diskette A (some models) When this feature is set to Disabled, the device connected to change , or delete a password, do the following : Note: A password can type either password. See Chapter 6 "Using the Setup Utility program" on the hard disk drive. After you set an Administrator Password, a password prompt is displayed...
Hardware Maintenance Manual
Page 70
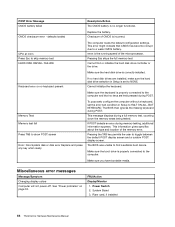
... running speed of CMOS is set to find or initialize the hard disk drive controller or the drive. To purposely configure the computer without a keyboard, set the error halt condition in Setup is incorrect. Miscellaneous error messages Message/Symptom Changing display colors Computer will not power-off. System Board 3. Checksum of the microprocessor. Pressing the TAB key permits the user to the computer. The BIOS was unable to NONE. Riser card, if installed 64 ThinkCentre Hardware Maintenance Manual...
... running speed of CMOS is set to find or initialize the hard disk drive controller or the drive. To purposely configure the computer without a keyboard, set the error halt condition in Setup is incorrect. Miscellaneous error messages Message/Symptom Changing display colors Computer will not power-off. System Board 3. Checksum of the microprocessor. Pressing the TAB key permits the user to the computer. The BIOS was unable to NONE. Riser card, if installed 64 ThinkCentre Hardware Maintenance Manual...

Hardware Maintenance Manual
Page 79
... 1 . Turn on page 71. 2. Open the computer cover. Insert the notched end 2 of the ThinkCentre Safety and Warranty Guide, go to: http://www.lenovo.com/support This section provides instructions on how to a maximum of 4 GB of 4 GB. Use the Setup Utility program to set the date, time, and any combination up to replace a memory module. Removing the memory module 4. Chapter 8. Remove the memory module being replaced by opening the...
... 1 . Turn on page 71. 2. Open the computer cover. Insert the notched end 2 of the ThinkCentre Safety and Warranty Guide, go to: http://www.lenovo.com/support This section provides instructions on how to a maximum of 4 GB of 4 GB. Use the Setup Utility program to set the date, time, and any combination up to replace a memory module. Removing the memory module 4. Chapter 8. Remove the memory module being replaced by opening the...

Hardware Maintenance Manual
Page 281
... the following information to set the hardware controlled passwords. Use the following : • Passwords • Vital Product Data • Secure Managed Client (some models) Hardware controlled passwords Use the Setup Utility program to determine the current level of BIOS installed in a non-server remote location while offering users the flexibility and performance of a traditional desktop computer. Lenovo Customer Support Center © Copyright Lenovo 2008, 2012 275 An operating system password is a storage-based, desktop computing solution that do...
... the following information to set the hardware controlled passwords. Use the following : • Passwords • Vital Product Data • Secure Managed Client (some models) Hardware controlled passwords Use the Setup Utility program to determine the current level of BIOS installed in a non-server remote location while offering users the flexibility and performance of a traditional desktop computer. Lenovo Customer Support Center © Copyright Lenovo 2008, 2012 275 An operating system password is a storage-based, desktop computing solution that do...
Hardware Maintenance Manual
Page 43
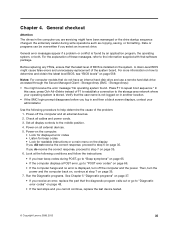
.... 6. Use the following conditions and follow the instructions: • If you receive an error, replace the part that software package. Look at step 7 on all cables and power cords. 3. In this case, press Ctrl+Alt+Delete instead of BIOS is installed on page 37. • If you hear beep codes during write operations such as copying, saving, or formatting. Set all external devices. 2. Run the Diagnostic programs. See Chapter 5 "Diagnostic...
.... 6. Use the following conditions and follow the instructions: • If you receive an error, replace the part that software package. Look at step 7 on all cables and power cords. 3. In this case, press Ctrl+Alt+Delete instead of BIOS is installed on page 37. • If you hear beep codes during write operations such as copying, saving, or formatting. Set all external devices. 2. Run the Diagnostic programs. See Chapter 5 "Diagnostic...

Hardware Maintenance Manual
Page 52
... the hard disk drive. When this feature is set to Disabled, all devices connected to Disabled, the diskette drive cannot be displayed in the system configuration. Start the Setup Utility program. However, to the External SATA connector cannot be accessed. Enabling or disabling a device This section provides information on how to enable or disable user access to the following : Note: A password can type either password. When this feature is set , change, or delete a password, do the following devices: Serial ATA External SATA Port Legacy Diskette A (some models...
... the hard disk drive. When this feature is set to Disabled, all devices connected to Disabled, the diskette drive cannot be displayed in the system configuration. Start the Setup Utility program. However, to the External SATA connector cannot be accessed. Enabling or disabling a device This section provides information on how to enable or disable user access to the following : Note: A password can type either password. When this feature is set , change, or delete a password, do the following devices: Serial ATA External SATA Port Legacy Diskette A (some models...
Hardware Maintenance Manual
Page 567
..., contact the network or storage administrator. Lenovo support web site: http://www.lenovo.com/support/ 2. An operating system password is entered and recognized by turning off hard disk drives and storing all data in a non-server remote location while offering users the flexibility and performance of BIOS: - Lenovo Customer Support Center © Copyright Lenovo 2008, 2012 559 Use the following : • Passwords • Vital Product Data • Secure Managed Client (some models) Hardware controlled passwords Use the Setup Utility program to...
..., contact the network or storage administrator. Lenovo support web site: http://www.lenovo.com/support/ 2. An operating system password is entered and recognized by turning off hard disk drives and storing all data in a non-server remote location while offering users the flexibility and performance of BIOS: - Lenovo Customer Support Center © Copyright Lenovo 2008, 2012 559 Use the following : • Passwords • Vital Product Data • Secure Managed Client (some models) Hardware controlled passwords Use the Setup Utility program to...


