
User Guide
Page 4
... Discs (selected models only 9 Wired keyboard (selected models only 9 Connecting to the Internet 10 Using Windows 8 11 Switching between the main Windows 8 interfaces 12 The Charms Bar 12 Shutting down the computer 12 Switching between apps 12 Closing an app 13 Opening other system programs 13 Windows Help and Support 13 Using the Rescue System 15 OneKey Recovery 16 Driver and Application Installation 17 Troubleshooting and Confirming Setup 19 Troubleshooting Display Problems 20 Troubleshooting Audio Problems 21 Troubleshooting Software Problems...
... Discs (selected models only 9 Wired keyboard (selected models only 9 Connecting to the Internet 10 Using Windows 8 11 Switching between the main Windows 8 interfaces 12 The Charms Bar 12 Shutting down the computer 12 Switching between apps 12 Closing an app 13 Opening other system programs 13 Windows Help and Support 13 Using the Rescue System 15 OneKey Recovery 16 Driver and Application Installation 17 Troubleshooting and Confirming Setup 19 Troubleshooting Display Problems 20 Troubleshooting Audio Problems 21 Troubleshooting Software Problems...

User Guide
Page 11
... device, a cable is equipped with an optional TV tuner card. Note: If your display or TV. TV-Tuner connector (optional) Only supported on your computer is connected between the audio line-out connector of the device and the audio line-in connector of the computer. DVI connector Used to attach a DVI monitor or other devices that requires a USB connection. HDMI connector (optional) Connects to the HDMI connector on systems with a wireless keyboard or mouse, follow the installation instructions for those devices. 6 User Guide Basic connector instructions Connector...
... device, a cable is equipped with an optional TV tuner card. Note: If your display or TV. TV-Tuner connector (optional) Only supported on your computer is connected between the audio line-out connector of the device and the audio line-in connector of the computer. DVI connector Used to attach a DVI monitor or other devices that requires a USB connection. HDMI connector (optional) Connects to the HDMI connector on systems with a wireless keyboard or mouse, follow the installation instructions for those devices. 6 User Guide Basic connector instructions Connector...
User Guide
Page 14
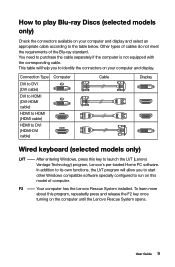
... Discs (selected models only) Check the connectors available on your computer and display and select an appropriate cable according to launch the LVT (Lenovo Vantage Technology) program, Lenovo's pre-loaded Home PC software. In addition to its own functions, the LVT program will help you to start other Windows compatible software specially configured to run on the computer until the Lenovo Rescue System opens. F2 -- Connection Type...
... Discs (selected models only) Check the connectors available on your computer and display and select an appropriate cable according to launch the LVT (Lenovo Vantage Technology) program, Lenovo's pre-loaded Home PC software. In addition to its own functions, the LVT program will help you to start other Windows compatible software specially configured to run on the computer until the Lenovo Rescue System opens. F2 -- Connection Type...

User Guide
Page 15
... ISP for detailed setup instructions. Wired network connection For wired networks, connect one end of an Ethernet cable (purchased separately) to the Ethernet connector on the screen. Follow the manufacturer's instructions. Swipe in wireless LAN antenna to access your router. Tap or click Connect, then follow the steps on your Web browser and accessing any Web site. 10 User Guide Your computer is designed to support a wireless (selected models only) or wired network that connects your country...
... ISP for detailed setup instructions. Wired network connection For wired networks, connect one end of an Ethernet cable (purchased separately) to the Ethernet connector on the screen. Follow the manufacturer's instructions. Swipe in wireless LAN antenna to access your router. Tap or click Connect, then follow the steps on your Web browser and accessing any Web site. 10 User Guide Your computer is designed to support a wireless (selected models only) or wired network that connects your country...
User Guide
Page 21
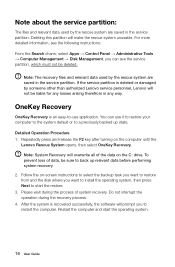
... following instructions: From the Search charm, select Apps → Control Panel → Administrative Tools → Computer Management → Disk Management, you want to install the operating system, then press Next to restart the computer. Note: System Recovery will make the rescue system unusable. Follow the on-screen instructions to select the backup task you want to restore from and the disk where you can use...
... following instructions: From the Search charm, select Apps → Control Panel → Administrative Tools → Computer Management → Disk Management, you want to install the operating system, then press Next to restart the computer. Note: System Recovery will make the rescue system unusable. Follow the on-screen instructions to select the backup task you want to restore from and the disk where you can use...
User Guide
Page 22
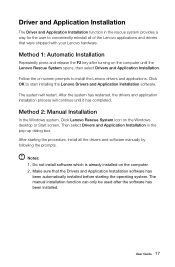
... 2: Manual Installation In the Windows system, Click Lenovo Rescue System icon on the computer. 2. After starting the operating system. The manual installation function can only be used after turning on -screen prompts to install the Lenovo drivers and applications. Then select Drivers and Application Installation in the rescue system provides a way for the user to start installing the Lenovo Drivers and Application Installation software. Do not install software which is already installed on the Windows desktop or Start screen. Make sure...
... 2: Manual Installation In the Windows system, Click Lenovo Rescue System icon on the computer. 2. After starting the operating system. The manual installation function can only be used after turning on -screen prompts to install the Lenovo drivers and applications. Then select Drivers and Application Installation in the rescue system provides a way for the user to start installing the Lenovo Drivers and Application Installation software. Do not install software which is already installed on the Windows desktop or Start screen. Make sure...
User Guide
Page 25
... change the display property settings. Troubleshooting and problem resolution: 1. if so, plug the power cord securely into the monitor. 3. Solving Problems Follow these tips when troubleshooting your computer: • If you added or removed a part before the problem started, review the installation procedures to ensure that the part is correctly installed. • If a peripheral device does not work, ensure that the device is properly connected. • If an error message appears on the computer graphics card...
... change the display property settings. Troubleshooting and problem resolution: 1. if so, plug the power cord securely into the monitor. 3. Solving Problems Follow these tips when troubleshooting your computer: • If you added or removed a part before the problem started, review the installation procedures to ensure that the part is correctly installed. • If a peripheral device does not work, ensure that the device is properly connected. • If an error message appears on the computer graphics card...
User Guide
Page 26
... in Windows desktop mode, then click the speaker icon. If the problem persists, contact Lenovo Service. Troubleshooting and problem resolution: • Adjust the Windows volume control - Problem: No sound from the Settings Charm or click the arrow on taskbar to show the hidden icons in Windows desktop mode, then click the speaker icon. Ensure that may be generating magnetic interference. 2. Troubleshooting and problem resolution: 1. sound from the computer: refrigerators, electric fans, electric...
... in Windows desktop mode, then click the speaker icon. If the problem persists, contact Lenovo Service. Troubleshooting and problem resolution: • Adjust the Windows volume control - Problem: No sound from the Settings Charm or click the arrow on taskbar to show the hidden icons in Windows desktop mode, then click the speaker icon. Ensure that may be generating magnetic interference. 2. Troubleshooting and problem resolution: 1. sound from the computer: refrigerators, electric fans, electric...
User Guide
Page 27
... the program does not have its own uninstaller, run it . 2. Perform the instructions displayed to uninstall the program. 3. Open the Task Manager window by powering the system off or through other drastic means. If the program has its own uninstaller, then select Apps → Control Panel from the Programs and Features dialog box and then select Uninstall/Change. 6. Troubleshooting and problem resolution: 1.
... the program does not have its own uninstaller, run it . 2. Perform the instructions displayed to uninstall the program. 3. Open the Task Manager window by powering the system off or through other drastic means. If the program has its own uninstaller, then select Apps → Control Panel from the Programs and Features dialog box and then select Uninstall/Change. 6. Troubleshooting and problem resolution: 1.
User Guide
Page 30
... the product. The cleaning supplies you don't change the boot mode? Do not use products specifically designed for setting boot devices, security, hardware mode, and other preferences. Only use liquid or aerosol cleaners, which may contain flammable substances. The BIOS setup utility is the UEFI mode. To start the BIOS setup utility and set boot mode to UEFI or Legacy support on the boot menu. Clean your computer is ROM-based software. Performing Daily Maintenance Tasks Cleaning the computer...
... the product. The cleaning supplies you don't change the boot mode? Do not use products specifically designed for setting boot devices, security, hardware mode, and other preferences. Only use liquid or aerosol cleaners, which may contain flammable substances. The BIOS setup utility is the UEFI mode. To start the BIOS setup utility and set boot mode to UEFI or Legacy support on the boot menu. Clean your computer is ROM-based software. Performing Daily Maintenance Tasks Cleaning the computer...
User Guide
Page 33
...-Tuner card installed. This guide contains procedures for replacing the following parts: • Memory modules • Hard disk drive • Optical drive • Keyboard, Mouse (wired) Safety information for step-by Lenovo®. In this copy of the TV-Tuner card in the Safety and Warranty Guide that do not have this guide, CRUs and FRUs will often be referred to as trained service personnel who are replacing Field Replaceable Units...
...-Tuner card installed. This guide contains procedures for replacing the following parts: • Memory modules • Hard disk drive • Optical drive • Keyboard, Mouse (wired) Safety information for step-by Lenovo®. In this copy of the TV-Tuner card in the Safety and Warranty Guide that do not have this guide, CRUs and FRUs will often be referred to as trained service personnel who are replacing Field Replaceable Units...

User Guide
Page 36
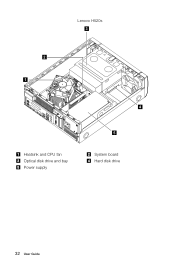
Lenovo H505s 3 2 1 4 Heatsink and CPU fan Optical disk drive and bay System board Hard disk drive User Guide 31 Internal components The following illustrations show the components inside your computer.
Lenovo H505s 3 2 1 4 Heatsink and CPU fan Optical disk drive and bay System board Hard disk drive User Guide 31 Internal components The following illustrations show the components inside your computer.
User Guide
Page 37
Lenovo H520s 3 2 1 Heatsink and CPU fan Optical disk drive and bay Power supply 4 5 System board Hard disk drive 32 User Guide
Lenovo H520s 3 2 1 Heatsink and CPU fan Optical disk drive and bay Power supply 4 5 System board Hard disk drive 32 User Guide

User Guide
Page 38
... system board The system board (sometimes called the planar or motherboard) is the main circuit board in your computer. It provides basic computer functions and supports a variety of devices that are factory-installed or that you can install later. Lenovo H505s 12 3 4 5 6 13 12 11 10 9 8 7 Microprocessor and heat sink Memory slots (2) Thermal sensor header Battery Mini PCI-E slot Clear CMOS jumper Front audio connector Microprocessor fan header Power connector Front panel connector SATA connectors (2) Front USB connectors (2) PCI express X 1 adapter slot User Guide 33...
... system board The system board (sometimes called the planar or motherboard) is the main circuit board in your computer. It provides basic computer functions and supports a variety of devices that are factory-installed or that you can install later. Lenovo H505s 12 3 4 5 6 13 12 11 10 9 8 7 Microprocessor and heat sink Memory slots (2) Thermal sensor header Battery Mini PCI-E slot Clear CMOS jumper Front audio connector Microprocessor fan header Power connector Front panel connector SATA connectors (2) Front USB connectors (2) PCI express X 1 adapter slot User Guide 33...
User Guide
Page 40
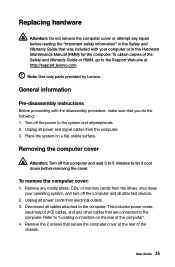
... attached devices. 2. Remove any media (disks, CDs, or memory cards) from the drives, shut down before reading the "Important safety information" in the Hardware Maintenance Manual (HMM) for the computer. User Guide 35 Unplug all power and signal cables from electrical outlets. 3. Place the system on the rear of the chassis. Replacing hardware Attention: Do not remove the computer cover or attempt any repair before removing the cover. Refer to the Support Web...
... attached devices. 2. Remove any media (disks, CDs, or memory cards) from the drives, shut down before reading the "Important safety information" in the Hardware Maintenance Manual (HMM) for the computer. User Guide 35 Unplug all power and signal cables from electrical outlets. 3. Place the system on the rear of the chassis. Replacing hardware Attention: Do not remove the computer cover or attempt any repair before removing the cover. Refer to the Support Web...

User Guide
Page 44
... data and power cables from the front, then attach it to "Removing the front bezel". 11. Reattach the front bezel. Refer to the new optical drive. 9. Remove the 2 screws that secure the optical drive to the drive bay with the screws. 10. Slide the new optical drive into the bay from the rear of the drive bay. 5 3 4 7. Refer to the chassis with the screws. 8. User Guide 39 5.
... data and power cables from the front, then attach it to "Removing the front bezel". 11. Reattach the front bezel. Refer to the new optical drive. 9. Remove the 2 screws that secure the optical drive to the drive bay with the screws. 10. Slide the new optical drive into the bay from the rear of the drive bay. 5 3 4 7. Refer to the chassis with the screws. 8. User Guide 39 5.
User Guide
Page 46
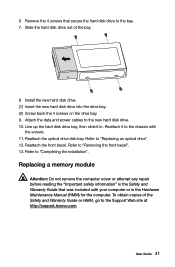
... the hard disk drive out of the Safety and Warranty Guide or HMM, go to the Support Web site at http://support.lenovo.com. Line up the hard disk drive bay, then slide it to the new hard disk drive. 10. Refer to "Replacing an optical drive" 12. Replacing a memory module Attention: Do not remove the computer cover or attempt any repair before reading the "Important safety information" in . Install the new hard disk drive. (1) Insert the new hard disk drive...
... the hard disk drive out of the Safety and Warranty Guide or HMM, go to the Support Web site at http://support.lenovo.com. Line up the hard disk drive bay, then slide it to the new hard disk drive. 10. Refer to "Replacing an optical drive" 12. Replacing a memory module Attention: Do not remove the computer cover or attempt any repair before reading the "Important safety information" in . Install the new hard disk drive. (1) Insert the new hard disk drive...
User Guide
Page 48
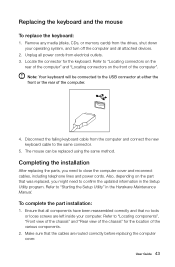
... updated information in the Hardware Maintenance Manual. Refer to the same connector. 5. Replacing the keyboard and the mouse To replace the keyboard: 1. Note: Your keyboard will be replaced using the same method. Make sure that no tools or loose screws are routed correctly before replacing the computer cover. Also, depending on the front of the computer. 4. Remove any media (disks, CDs, or memory cards) from the drives, shut down your operating system, and turn...
... updated information in the Hardware Maintenance Manual. Refer to the same connector. 5. Replacing the keyboard and the mouse To replace the keyboard: 1. Note: Your keyboard will be replaced using the same method. Make sure that no tools or loose screws are routed correctly before replacing the computer cover. Also, depending on the front of the computer. 4. Remove any media (disks, CDs, or memory cards) from the drives, shut down your operating system, and turn...
User Guide
Page 50
... computer before you use the product for using Lenovo products. Appendix. The software interface and function and hardware configuration described in new editions of the computer that you for the first time. For the latest information or any loss except when caused by installation and operations performed by Lenovo professional service personnel. these changes will be incorporated in the manuals included with your...
... computer before you use the product for using Lenovo products. Appendix. The software interface and function and hardware configuration described in new editions of the computer that you for the first time. For the latest information or any loss except when caused by installation and operations performed by Lenovo professional service personnel. these changes will be incorporated in the manuals included with your...
User Guide
Page 52
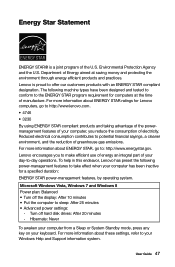
... U.S. Department of greenhouse gas emissions. Reduced electrical consumption contributes to make efficient use of energy an integral part of the U.S. Lenovo is a joint program of your computer, you to potential financial sayings, a cleaner environment, and the reduction of Energy aimed at the time of electricity. Microsoft Windows Vista, Windows 7 and Windows 8 Power plan: Balanced • Turn off hard disk drives: After 20 minutes -
... U.S. Department of greenhouse gas emissions. Reduced electrical consumption contributes to make efficient use of energy an integral part of the U.S. Lenovo is a joint program of your computer, you to potential financial sayings, a cleaner environment, and the reduction of Energy aimed at the time of electricity. Microsoft Windows Vista, Windows 7 and Windows 8 Power plan: Balanced • Turn off hard disk drives: After 20 minutes -


