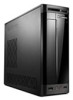
Lenovo H3 Series Hardware Maintenance Manual V2.0
Page 2
... sink 41 Replacing the CPU 42 Replacing the graphic card 45 Replacing the audio & USB connectors 46 Replacing the card reader module 46 Replacing the motherboard 47 Replacing the Power supply 48 Replacing the keyboard 50 Replacing the mouse 51 Chapter 9. Statement 53 ii Locations 24 Locating components and connectors 24...
Lenovo H3 Series Hardware Maintenance Manual V2.0
Page 30
... basic computer functions and supports a variety of parts on the system board The system board (sometimes called the planar or motherboard) is the main circuit board in your computer. Hardware Maintenance Manual Microphone connector Audio line-out connector Audio line-in connector PCI Express x1 adapter connector PCI Express x16 graphics adpter...
Lenovo H3 Series Hardware Maintenance Manual V2.0
Page 42
Hardware Maintenance Manual To replace the system fan: 1. Remove the computer cover. Lift up the system fan. 7. Remove the optical disk drive. Disconnect the power cable from the motherboard. 6. Refer to the motherboard, align and then screw back the new system fan. 8. Connect the new fan power cable to "Removing the front bezel". 3. Install...
Lenovo H3 Series Hardware Maintenance Manual V2.0
Page 43
Remove the system fan. Align then screw in the Hardware Maintenance Manual (HMM) for the computer. Install back the system fan back. 9. ...information" in the Safety and Warranty Guide that secure the heatsink to the Support Web site at http://consumersupport.lenovo.com To replace the heatsink: 1. Remove the optical disk drive. Refer to "Replacing the system fan". ...in the new heatsink. 8. To obtain copies of the Safety and Warranty Guide or HMM, go to the motherboard. 6. Replacing the heat sink Attention Chapter 8. Refer to the chassis. 10. Screw back the optical disk drive...
Lenovo H3 Series Hardware Maintenance Manual V2.0
Page 48
... the card reader module to "Removing the computer cover". 2. Install the graphic card back. 10. Remove the front bezel. Remove the data cables from the motherboard. 6. Refer to the chassis. 46 Slide the audio & USB connectors out of chassis. 7. Remove the screw that secures the audio & USB connectors to .... Reconnect the data cables to "Replacing the graphic card". 4. Refer to "Removing the computer cover". 2. Refer to "Removing the front bezel". 3. Hardware Maintenance Manual Replacing the audio & USB connectors To replace the audio & USB connectors: 1.
Lenovo H3 Series Hardware Maintenance Manual V2.0
Page 50
...Manual 6. Remove the system fan. Remove the heatsink. Install all the cables from the motherboard. 12. Remove the front bezel. Refer to "Replacing the system fan". 7. Refer to "Removing the front bezel". 3. Refer to the chassis. 11. Remove the CPU. Remove the optical disk drive. Remove the 6 screws that secure the motherboard... Refer to "Replacing the hard disk drive". 48 Refer to "Replacing the optical disk drive". 4. Slide then lift the motherboard out of chassis. 13. Reconnect all the cables to "Replacing the graphic card". 9. Install the front bezel and side cover...