
Lenovo H4 Series User Guide V1.0
Page 4
...14 2.2 Driver and Application Installation 14 2.3 System Setup 15 2.4 System Backup 16 2.5 System Recovery 16 2.6 Create Recovery Disc 16 Chapter 3 Using the Computer Software 17 3.1 Lenovo Dynamic Brightness system 18 3.2 Lenovo Eye Distance System 19 Chapter 4 Troubleshooting and Confirming Setup 21 4.1 Troubleshooting Display Problems 22 4.2 Troubleshooting Audio Problems 23 4.3 Troubleshooting Software Problems 23 4.4 Troubleshooting Problems with Optical Drives and Hard Disks 24 4.5 Special considerations for troubleshooting Windows 25 4.6 Performing Daily Maintenance Tasks...
...14 2.2 Driver and Application Installation 14 2.3 System Setup 15 2.4 System Backup 16 2.5 System Recovery 16 2.6 Create Recovery Disc 16 Chapter 3 Using the Computer Software 17 3.1 Lenovo Dynamic Brightness system 18 3.2 Lenovo Eye Distance System 19 Chapter 4 Troubleshooting and Confirming Setup 21 4.1 Troubleshooting Display Problems 22 4.2 Troubleshooting Audio Problems 23 4.3 Troubleshooting Software Problems 23 4.4 Troubleshooting Problems with Optical Drives and Hard Disks 24 4.5 Special considerations for troubleshooting Windows 25 4.6 Performing Daily Maintenance Tasks...
Lenovo H4 Series User Guide V1.0
Page 8
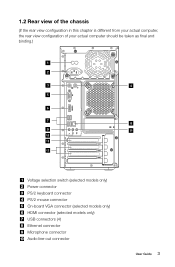
1.2 Rear view of the chassis (If the rear view configuration in this chapter is different from your actual computer, the rear view configuration of your actual computer should be taken as final and binding.) Voltage selection switch (selected models only) Power connector PS/2 keyboard connector PS/2 mouse connector On-board VGA connector (selected models only) HDMI connector (selected models only) USB connectors (4) Ethernet connector Microphone connector Audio line-out connector User Guide 3
1.2 Rear view of the chassis (If the rear view configuration in this chapter is different from your actual computer, the rear view configuration of your actual computer should be taken as final and binding.) Voltage selection switch (selected models only) Power connector PS/2 keyboard connector PS/2 mouse connector On-board VGA connector (selected models only) HDMI connector (selected models only) USB connectors (4) Ethernet connector Microphone connector Audio line-out connector User Guide 3

Lenovo H4 Series User Guide V1.0
Page 9
Audio line-in connector PCI Express x16 graphics adapter connector (Some models are equipped with graphic card.) PCI Express x1 adapter connector (Some models are equipped with WIFI card or TV tuner card.) Voltage selection switch (selected models only) Power connector PS/2 keyboard connector PS/2 mouse connector HDMI connector (selected models only) On-board VGA connector (selected models only) USB connectors (4) Ethernet connector 4 User Guide
Audio line-in connector PCI Express x16 graphics adapter connector (Some models are equipped with graphic card.) PCI Express x1 adapter connector (Some models are equipped with WIFI card or TV tuner card.) Voltage selection switch (selected models only) Power connector PS/2 keyboard connector PS/2 mouse connector HDMI connector (selected models only) On-board VGA connector (selected models only) USB connectors (4) Ethernet connector 4 User Guide

Lenovo H4 Series User Guide V1.0
Page 10
... V ac, set the switch to 115 V. • If the voltage supply range is 200-240 V ac, set the switch to slide the switch if necessary. Note: Your computer might not have all of the connectors that are described in connector PCI Express x16 graphics adapter connector (Some models are equipped with graphic card.) PCI Express x1 adapter connector (Some models are equipped with the color of the connector. User Guide 5 115 230...
... V ac, set the switch to 115 V. • If the voltage supply range is 200-240 V ac, set the switch to slide the switch if necessary. Note: Your computer might not have all of the connectors that are described in connector PCI Express x16 graphics adapter connector (Some models are equipped with graphic card.) PCI Express x1 adapter connector (Some models are equipped with the color of the connector. User Guide 5 115 230...
Lenovo H4 Series User Guide V1.0
Page 11
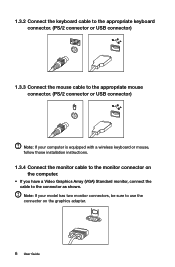
... is equipped with a wireless keyboard or mouse, follow those installation instructions. 1.3.4 Connect the monitor cable to the monitor connector on the computer. • If you have a Video Graphics Array (VGA) Standard monitor, connect the cable to use the connector on the graphics adapter. 6 User Guide 1.3.2 Connect the keyboard cable to the appropriate keyboard connector. (PS/2 connector or USB connector) 1.3.3 Connect the mouse cable to the appropriate mouse connector. (PS/2 connector or USB connector) Note: If your model has two monitor connectors, be sure to the connector as shown.
... is equipped with a wireless keyboard or mouse, follow those installation instructions. 1.3.4 Connect the monitor cable to the monitor connector on the computer. • If you have a Video Graphics Array (VGA) Standard monitor, connect the cable to use the connector on the graphics adapter. 6 User Guide 1.3.2 Connect the keyboard cable to the appropriate keyboard connector. (PS/2 connector or USB connector) 1.3.3 Connect the mouse cable to the appropriate mouse connector. (PS/2 connector or USB connector) Note: If your model has two monitor connectors, be sure to the connector as shown.
Lenovo H4 Series User Guide V1.0
Page 12
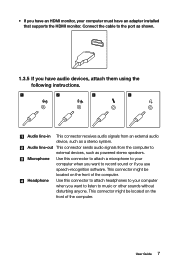
... have an adapter installed that supports the HDMI monitor. Audio line-in This connector receives audio signals from the computer to the port as shown. 1.3.5 If you have an HDMI monitor, your computer when you use speech-recognition software. Connect the cable to external devices, such as a stereo system. • If you have audio devices, attach them using the following instructions. Audio line-out This connector sends audio signals from an external audio device, such as powered stereo speakers.
... have an adapter installed that supports the HDMI monitor. Audio line-in This connector receives audio signals from the computer to the port as shown. 1.3.5 If you have an HDMI monitor, your computer when you use speech-recognition software. Connect the cable to external devices, such as a stereo system. • If you have audio devices, attach them using the following instructions. Audio line-out This connector sends audio signals from an external audio device, such as powered stereo speakers.
Lenovo H4 Series User Guide V1.0
Page 13
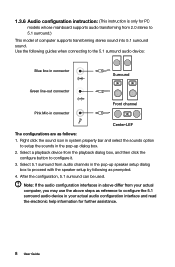
.... 2. 1.3.6 Audio configuration instruction: (This instruction is only for further assistance. 8 User Guide Select a playback device from audio channels in the pop-up speaker setup dialog box to proceed with the speaker setup by following guides when connecting to 5.1 surround.) This model of computer supports transforming stereo sound into 5.1 surround sound. Select 5.1 surround from the playback dialog box, and then click the configure button to setup the sounds in connector Front channel Center-LEF The configurations...
.... 2. 1.3.6 Audio configuration instruction: (This instruction is only for further assistance. 8 User Guide Select a playback device from audio channels in the pop-up speaker setup dialog box to proceed with the speaker setup by following guides when connecting to 5.1 surround.) This model of computer supports transforming stereo sound into 5.1 surround sound. Select 5.1 surround from the playback dialog box, and then click the configure button to setup the sounds in connector Front channel Center-LEF The configurations...

Lenovo H4 Series User Guide V1.0
Page 14
.... d. User Guide 9 On some speakers, this cable is permanently attached. Connect the plug to the speaker, if necessary. d. Connect the speakers to the power source. 1.3.8 If you have powered speakers without an adapter: (This picture is permanently attached. Connect the adapter cable to audio line-out port on the computer. b. Note: Some models are not equipped with an adapter: (This picture is permanently attached. 1.3.7 If you have powered speakers with external speaker. Connect the cable that runs...
.... d. User Guide 9 On some speakers, this cable is permanently attached. Connect the plug to the speaker, if necessary. d. Connect the speakers to the power source. 1.3.8 If you have powered speakers without an adapter: (This picture is permanently attached. Connect the adapter cable to audio line-out port on the computer. b. Note: Some models are not equipped with an adapter: (This picture is permanently attached. 1.3.7 If you have powered speakers with external speaker. Connect the cable that runs...
Lenovo H4 Series User Guide V1.0
Page 15
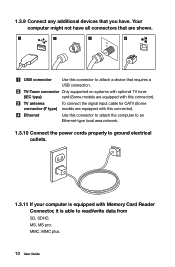
... SD, SDHC; TV IN USB connector Use this connector). MMC, MMC plus. 10 User Guide TV-Tuner connector Only supported on systems with optional TV tuner (IEC type) card (Some models are equipped with this connector to attach the computer to an Ethernet-type local area network. 1.3.10 Connect the power cords properly to ground electrical outlets. 1.3.11 If your computer is equipped with Memory Card Reader Connector, it is able to...
... SD, SDHC; TV IN USB connector Use this connector). MMC, MMC plus. 10 User Guide TV-Tuner connector Only supported on systems with optional TV tuner (IEC type) card (Some models are equipped with this connector to attach the computer to an Ethernet-type local area network. 1.3.10 Connect the power cords properly to ground electrical outlets. 1.3.11 If your computer is equipped with Memory Card Reader Connector, it is able to...
Lenovo H4 Series User Guide V1.0
Page 16
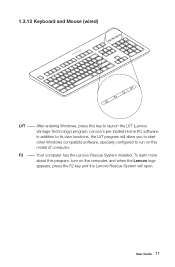
After entering Windows, press this model of computer. In addition to its own functions, the LVT program will allow you to start other Windows compatible software, specially configured to launch the LVT (Lenovo Vantage Technology) program, Lenovo's pre-loaded Home PC software. F2 -- Your computer has the Lenovo Rescue System installed. To learn more about this program, turn on this key to run on the computer, and when the Lenovo logo appears, press the F2 key and the Lenovo Rescue System will open. 1.3.12 Keyboard and Mouse (wired) LV T LV T LVT -- User Guide 11
After entering Windows, press this model of computer. In addition to its own functions, the LVT program will allow you to start other Windows compatible software, specially configured to launch the LVT (Lenovo Vantage Technology) program, Lenovo's pre-loaded Home PC software. F2 -- Your computer has the Lenovo Rescue System installed. To learn more about this program, turn on this key to run on the computer, and when the Lenovo logo appears, press the F2 key and the Lenovo Rescue System will open. 1.3.12 Keyboard and Mouse (wired) LV T LV T LVT -- User Guide 11
Lenovo H4 Series User Guide V1.0
Page 18
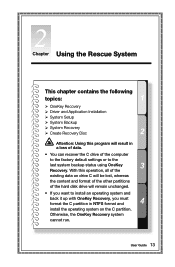
... Recovery Driver and Application Installation System Setup System Backup System Recovery Create Recovery Disc Attention: Using this operation, all of the existing data on the C partition. User Guide 13 With this program will result in NTFS format and install the operating system on drive C will be lost, whereas the content and format of the other partitions of the computer to the factory default settings...
... Recovery Driver and Application Installation System Setup System Backup System Recovery Create Recovery Disc Attention: Using this operation, all of the existing data on the C partition. User Guide 13 With this program will result in NTFS format and install the operating system on drive C will be lost, whereas the content and format of the other partitions of the computer to the factory default settings...
Lenovo H4 Series User Guide V1.0
Page 19
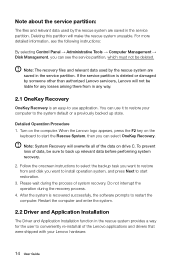
... on the computer. Deleting this partition will not be liable for the user to restore your Lenovo hardware. 14 User Guide For more detailed information, see the following instructions: By selecting Control Panel → Administrative Tools → Computer Management → Disk Management, you can select OneKey Recovery. When the Lenovo logo appears, press the F2 key on the keyboard to the system default or a previously backed up relevant...
... on the computer. Deleting this partition will not be liable for the user to restore your Lenovo hardware. 14 User Guide For more detailed information, see the following instructions: By selecting Control Panel → Administrative Tools → Computer Management → Disk Management, you can select OneKey Recovery. When the Lenovo logo appears, press the F2 key on the keyboard to the system default or a previously backed up relevant...
Lenovo H4 Series User Guide V1.0
Page 20
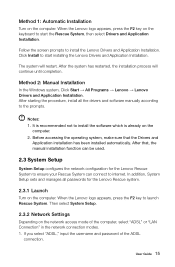
... operating system, make sure that , the manual installation function can connect to start installing the Lenovo Drivers and Application Installation. Method 1: Automatic Installation Turn on the network access mode of the ADSL connection. In addition, System Setup sets and manages all the drivers and software manually according to start the Rescue System, then select Drivers and Application Installation. After starting the procedure, install all passwords for the Lenovo Rescue System to ensure your Rescue System can be used. 2.3 System Setup System Setup configures...
... operating system, make sure that , the manual installation function can connect to start installing the Lenovo Drivers and Application Installation. Method 1: Automatic Installation Turn on the network access mode of the ADSL connection. In addition, System Setup sets and manages all the drivers and software manually according to start the Rescue System, then select Drivers and Application Installation. After starting the procedure, install all passwords for the Lenovo Rescue System to ensure your Rescue System can be used. 2.3 System Setup System Setup configures...
Lenovo H4 Series User Guide V1.0
Page 21
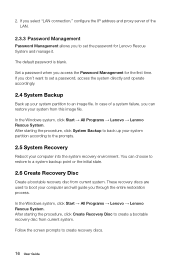
... Start → All Programs → Lenovo → Lenovo Rescue System. In the Windows system, click Start → All Programs → Lenovo → Lenovo Rescue System. Set a password when you can choose to restore to create a bootable recovery disc from this image file. The default password is blank. Follow the screen prompts to the prompts. 2.5 System Recovery Reboot your system partition according to create recovery discs. 16 User Guide After starting the procedure, click Create Recovery Disc...
... Start → All Programs → Lenovo → Lenovo Rescue System. In the Windows system, click Start → All Programs → Lenovo → Lenovo Rescue System. Set a password when you can choose to restore to create a bootable recovery disc from this image file. The default password is blank. Follow the screen prompts to the prompts. 2.5 System Recovery Reboot your system partition according to create recovery discs. 16 User Guide After starting the procedure, click Create Recovery Disc...
Lenovo H4 Series User Guide V1.0
Page 23
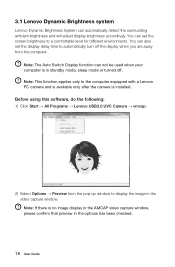
Note: The Auto Switch Display function can also set the screen brightness to display the image in the video capture window. Note: If there is in the options has been checked. 18 User Guide Note: This function applies only to automatically turn off . Before using this software, do the following: 1) Click Start → All Programs → Lenovo USB2.0 UVC Camera → vmcap. 2) Select Options → Preview from the...
Note: The Auto Switch Display function can also set the screen brightness to display the image in the video capture window. Note: If there is in the options has been checked. 18 User Guide Note: This function applies only to automatically turn off . Before using this software, do the following: 1) Click Start → All Programs → Lenovo USB2.0 UVC Camera → vmcap. 2) Select Options → Preview from the...
Lenovo H4 Series User Guide V1.0
Page 27
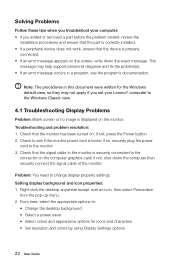
... you added or removed a part before the problem started, review the installation procedures and ensure that the part is correctly installed. • If a peripheral device does not work, ensure that the device is properly connected. • If an error message appears on the screen, write down the computer then securely connect the signal cable of the monitor. if not, press the Power button. 2. Check that the monitor has been turned on; Troubleshooting and problem...
... you added or removed a part before the problem started, review the installation procedures and ensure that the part is correctly installed. • If a peripheral device does not work, ensure that the device is properly connected. • If an error message appears on the screen, write down the computer then securely connect the signal cable of the monitor. if not, press the Power button. 2. Check that the monitor has been turned on; Troubleshooting and problem...

Lenovo H4 Series User Guide V1.0
Page 28
... corner of your screen. Sound from the computer. 3. Move any interfering devices away from the speakers is automatically disabled when headphones are unable exit a running program normally. Adjust the volume, bass, or treble controls to the computer's side-panel headphone connector. Troubleshooting and problem resolution: • Check the headphone cable connection - Check for devices located less than one meter from integrated speakers. Open the Task Manager window by pressing...
... corner of your screen. Sound from the computer. 3. Move any interfering devices away from the speakers is automatically disabled when headphones are unable exit a running program normally. Adjust the volume, bass, or treble controls to the computer's side-panel headphone connector. Troubleshooting and problem resolution: • Check the headphone cable connection - Check for devices located less than one meter from integrated speakers. Open the Task Manager window by pressing...
Lenovo H4 Series User Guide V1.0
Page 29
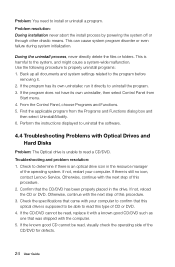
.... 2. Perform the instructions displayed to uninstall the software. 4.4 Troubleshooting Problems with the next step of this procedure. 3. Otherwise, continue with Optical Drives and Hard Disks Problem: The Optical drive is unable to properly uninstall programs: 1. If the program does not have its own uninstaller, run it . 2. From the Control Panel, choose Programs and Functions. 5. Troubleshooting and problem resolution: 1. If not, reload the CD or DVD. Otherwise, continue with...
.... 2. Perform the instructions displayed to uninstall the software. 4.4 Troubleshooting Problems with the next step of this procedure. 3. Otherwise, continue with Optical Drives and Hard Disks Problem: The Optical drive is unable to properly uninstall programs: 1. If the program does not have its own uninstaller, run it . 2. From the Control Panel, choose Programs and Functions. 5. Troubleshooting and problem resolution: 1. If not, reload the CD or DVD. Otherwise, continue with...

Lenovo H4 Series User Guide V1.0
Page 30
... model only support the Windows 7 system. 3. When you must create and save a new channel list. The Help Center is unable to analog, your saved channel list for this number. 2. When you must re-save a new channel list. b. But the actual hard disk capacity is expressed in the binary system as indicated by the manufacturer. The capacity of the hard disk shown in troubleshooting system problems: 1. The drivers...
... model only support the Windows 7 system. 3. When you must create and save a new channel list. The Help Center is unable to analog, your saved channel list for this number. 2. When you must re-save a new channel list. b. But the actual hard disk capacity is expressed in the binary system as indicated by the manufacturer. The capacity of the hard disk shown in troubleshooting system problems: 1. The drivers...

Lenovo H4 Series User Guide V1.0
Page 31
... surface of the monitor or inside of computer. Keep all surfaces clean and free of the computer, the monitor, the printer, the speakers and the mouse. • You can use a vacuum cleaner to clean in order to clean the components include: a vacuum cleaner, a soft cotton cloth, clear water (pure water preferred) and cotton swabs. The cleaning supplies you clean...
... surface of the monitor or inside of computer. Keep all surfaces clean and free of the computer, the monitor, the printer, the speakers and the mouse. • You can use a vacuum cleaner to clean in order to clean the components include: a vacuum cleaner, a soft cotton cloth, clear water (pure water preferred) and cotton swabs. The cleaning supplies you clean...


