Lenovo IdeaCentre A600 Hardware Maintenance Manual
Page 1
Using the Setup Utility 16 Starting the Setup Utility program 16 Viewing and changing settings 16 Using passwords 17 Using Device...19 Selecting a startup device 20 Exiting from the Setup Utility program 21 Chapter 6. General Checkout 13 Problem determination tips 14 Chapter 5. Safety information 4 General safety...4 Electrical safety...5 Safety inspection guide 7 Handling electrostatic discharge-sensitive devices 8 Grounding requirements 8 Safety notices...9 Chapter 3. Symptom-to-FRU Index 22 Hard disk drive boot error 22 i About this manual 1 Important...
Using the Setup Utility 16 Starting the Setup Utility program 16 Viewing and changing settings 16 Using passwords 17 Using Device...19 Selecting a startup device 20 Exiting from the Setup Utility program 21 Chapter 6. General Checkout 13 Problem determination tips 14 Chapter 5. Safety information 4 General safety...4 Electrical safety...5 Safety inspection guide 7 Handling electrostatic discharge-sensitive devices 8 Grounding requirements 8 Safety notices...9 Chapter 3. Symptom-to-FRU Index 22 Hard disk drive boot error 22 i About this manual 1 Important...
Lenovo IdeaCentre A600 Hardware Maintenance Manual
Page 2
... speaker system 63 Replacing the camera 67 Replacing the inverter board 70 Replacing the touch sensor board 72 Replacing the LCD panel 75 Replacing the system board 77 Replacing the base stand 79 Replacing the keyboard and Mouse (Only some models are equipped with wired Keyboard and Mouse 81 Replacing the power cord or power adapter 82 Replacing the remote control 82 Completing the installation 83 Chapter 8. Additional Service Information 87 Power management 87 Appendix. Hardware Maintenance Manual Power Supply Problems 23 Beep symptoms 24 POST error codes...
... speaker system 63 Replacing the camera 67 Replacing the inverter board 70 Replacing the touch sensor board 72 Replacing the LCD panel 75 Replacing the system board 77 Replacing the base stand 79 Replacing the keyboard and Mouse (Only some models are equipped with wired Keyboard and Mouse 81 Replacing the power cord or power adapter 82 Replacing the remote control 82 Completing the installation 83 Chapter 8. Additional Service Information 87 Power management 87 Appendix. Hardware Maintenance Manual Power Supply Problems 23 Beep symptoms 24 POST error codes...

Lenovo IdeaCentre A600 Hardware Maintenance Manual
Page 9
... features or options not covered by this inspection guide is to the safety of any obvious unsafe conditions, such as loose or missing hardware The guide consists of a series of this inspection guide. Begin the checks with . 7 Check for 0.1 ohm or less between the external ground pin and frame ground. Use a meter to protect users and service personnel from injury. Each machine, as...
... features or options not covered by this inspection guide is to the safety of any obvious unsafe conditions, such as loose or missing hardware The guide consists of a series of this inspection guide. Begin the checks with . 7 Check for 0.1 ohm or less between the external ground pin and frame ground. Use a meter to protect users and service personnel from injury. Each machine, as...

Lenovo IdeaCentre A600 Hardware Maintenance Manual
Page 10
... braid, or green-wire ground. - Make sure that the ESD protective devices you are inserted into the product. •• Avoid contact with other people. •• Wear a grounded wrist strap against ESD damage. - Note: The use of the ac plug on a double-insulated or battery-operated system. Hardware Maintenance Manual Handling electrostatic discharge-sensitive devices Any computer part containing transistors or...
... braid, or green-wire ground. - Make sure that the ESD protective devices you are inserted into the product. •• Avoid contact with other people. •• Wear a grounded wrist strap against ESD damage. - Note: The use of the ac plug on a double-insulated or battery-operated system. Hardware Maintenance Manual Handling electrostatic discharge-sensitive devices Any computer part containing transistors or...

Lenovo IdeaCentre A600 Hardware Maintenance Manual
Page 12
There are installed, note the following : Laser radiation when open. CAUTION: When laser products (such as CD-ROMs, DVD-ROM drives, fiber optic devices, or transmitters) are no serviceable parts inside the device. •• Use of controls or adjustments or performance of procedures other than 100°C (212°F) •• Repair or disassemble Dispose of the battery as required by local ordinances or regulations. DANGER: Some...
There are installed, note the following : Laser radiation when open. CAUTION: When laser products (such as CD-ROMs, DVD-ROM drives, fiber optic devices, or transmitters) are no serviceable parts inside the device. •• Use of controls or adjustments or performance of procedures other than 100°C (212°F) •• Repair or disassemble Dispose of the battery as required by local ordinances or regulations. DANGER: Some...

Lenovo IdeaCentre A600 Hardware Maintenance Manual
Page 15
... incorrect drive. General Checkout Attention The drives in quiet mode (no beep, no memory count and checkpoint code display) when no errors are servicing might cause false errors and unnecessary replacement of the system board. Select Start Options. 3. A down-level BIOS might have been rearranged or the drive startup sequence changed. Power-off the computer and all display controls to the information supplied with that the latest level of the problem: 1. Start the Setup Utility program...
... incorrect drive. General Checkout Attention The drives in quiet mode (no beep, no memory count and checkpoint code display) when no errors are servicing might cause false errors and unnecessary replacement of the system board. Select Start Options. 3. A down-level BIOS might have been rearranged or the drive startup sequence changed. Power-off the computer and all display controls to the information supplied with that the latest level of the problem: 1. Start the Setup Utility program...
Lenovo IdeaCentre A600 Hardware Maintenance Manual
Page 16
... the same BIOS level 3. If you do receive the correct response, proceed to step 7. 6. If possible, have this information available when requesting assistance from Service Support and Engineering functions. •• Machine type and model •• Processor or hard disk upgrades •• Failure symptom - Hardware Maintenance Manual 5. Power-on the computer. • Look for displayed error codes • Listen for beep codes • Look for the operation system control files...
... the same BIOS level 3. If you do receive the correct response, proceed to step 7. 6. If possible, have this information available when requesting assistance from Service Support and Engineering functions. •• Machine type and model •• Processor or hard disk upgrades •• Failure symptom - Hardware Maintenance Manual 5. Power-on the computer. • Look for displayed error codes • Listen for beep codes • Look for the operation system control files...

Lenovo IdeaCentre A600 Hardware Maintenance Manual
Page 18
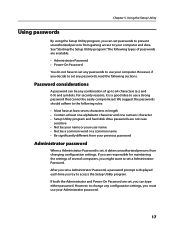
... must use the keyboard. If you are using a USB keyboard and the Setup Utility program does not display using . To view or change the configuration settings of your password. Notes: a. When working with the Setup Utility program menu, you hear multiple beeps, release the F1 key. The keys used to perform various tasks are displayed on the right side of which operating system you are using this procedure, shut down the operating system and turn on...
... must use the keyboard. If you are using a USB keyboard and the Setup Utility program does not display using . To view or change the configuration settings of your password. Notes: a. When working with the Setup Utility program menu, you hear multiple beeps, release the F1 key. The keys used to perform various tasks are displayed on the right side of which operating system you are using this procedure, shut down the operating system and turn on...
Lenovo IdeaCentre A600 Hardware Maintenance Manual
Page 19
... not case sensitive • Not be your name or your user name • Not be any passwords to change any passwords, read the following types of passwords are available: • Administrator Password • Power-On Password You do not have at least seven characters in length • Contain at least one alphabetic character and one numeric character • Setup Utility program and hard disk drive passwords...
... not case sensitive • Not be your name or your user name • Not be any passwords to change any passwords, read the following types of passwords are available: • Administrator Password • Power-On Password You do not have at least seven characters in length • Contain at least one alphabetic character and one numeric character • Setup Utility program and hard disk drive passwords...

Lenovo IdeaCentre A600 Hardware Maintenance Manual
Page 21
... Audio Setup and Network Setup. Using the Setup Utility 3. Enter Current Password and press Enter. Note If you type the password correctly, the password will not be displayed. To delete a previously set Device, do the following : 1. A setup notice will be displayed in New Password and confirm New Password dialog. From the Security menu, select Set Power-On Password and press Enter. 2. From the Setup Utility program menu, select Devices. 3. Select USB Setup. 4. Return to the Setup Utility program menu and press F10 to save configuration changes and exit setup...
... Audio Setup and Network Setup. Using the Setup Utility 3. Enter Current Password and press Enter. Note If you type the password correctly, the password will not be displayed. To delete a previously set Device, do the following : 1. A setup notice will be displayed in New Password and confirm New Password dialog. From the Security menu, select Set Power-On Password and press Enter. 2. From the Setup Utility program menu, select Devices. 3. Select USB Setup. 4. Return to the Setup Utility program menu and press F10 to save configuration changes and exit setup...
Lenovo IdeaCentre A600 Hardware Maintenance Manual
Page 22
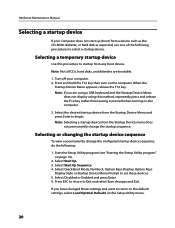
... turning on the Setup Utility menu. 20 If you are bootable. 1. Turn off your computer does not start up (boot) from the Startup Device menu does not permanently change the configured startup device sequence, do the following procedures to select a startup device. Note: Selecting a startup device from a device such as the CD-ROM, diskette, or hard disk as expected, use one of the following : 1. Hardware Maintenance Manual Selecting a startup device If your computer. 2. Select Quick Boot Mode, Numlock, Option Keys Display, Option Keys Display Style or Startup Device Menu...
... turning on the Setup Utility menu. 20 If you are bootable. 1. Turn off your computer does not start up (boot) from the Startup Device menu does not permanently change the configured startup device sequence, do the following procedures to select a startup device. Note: Selecting a startup device from a device such as the CD-ROM, diskette, or hard disk as expected, use one of the following : 1. Hardware Maintenance Manual Selecting a startup device If your computer. 2. Select Quick Boot Mode, Numlock, Option Keys Display, Option Keys Display Style or Startup Device Menu...

Lenovo IdeaCentre A600 Hardware Maintenance Manual
Page 26
... card. 8 beeps If the system video adapter is an Display memory error (system video add-in base memory (first 64KB block) 3 beeps Base memory read/write test error 4 beeps Fatal error indicating a serious Motherboard timer not operational problem with known good modules. 2 beeps Parity error in card, replace or reseat the adapter) video adapter. Before declaring the motherboard beyond all hope, eliminate the possibility 5 beeps of interference by pauses (intervals without sound) during POST. If the video adapter is an integrated part...
... card. 8 beeps If the system video adapter is an Display memory error (system video add-in base memory (first 64KB block) 3 beeps Base memory read/write test error 4 beeps Fatal error indicating a serious Motherboard timer not operational problem with known good modules. 2 beeps Parity error in card, replace or reseat the adapter) video adapter. Before declaring the motherboard beyond all hope, eliminate the possibility 5 beeps of interference by pauses (intervals without sound) during POST. If the video adapter is an integrated part...

Lenovo IdeaCentre A600 Hardware Maintenance Manual
Page 27
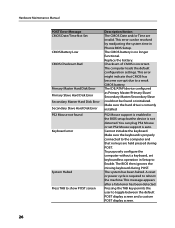
... time you power-on the screen. CMOS shutdown register read/write • If beep codes are generated error when all hope, eliminate the possibility of tests is working If the POST detects a problem, an error message appears on the system, it performs a series of tests that the boot drive is called the Power-On Self-Test, or POST. POST does the following operations. • Checks some options. When...
... time you power-on the screen. CMOS shutdown register read/write • If beep codes are generated error when all hope, eliminate the possibility of tests is working If the POST detects a problem, an error message appears on the system, it performs a series of tests that the boot drive is called the Power-On Self-Test, or POST. POST does the following operations. • Checks some options. When...
Lenovo IdeaCentre A600 Hardware Maintenance Manual
Page 28
... BIOS setup butthe device is enabled in Phenix BIOS Setup. PS2 Mouse support is not detected. This message appears after a fatal error has been detected. Replace the battery. This error can plug PS2 Mouse or set keyboardless operation in Setup to a weak CMOS battery. Cannot initialize the keyboard. You can be found Keyboard error System Halted Press TAB to toggle between the default POST display screen and a custom POST display screen. 26 Hardware Maintenance Manual POST Error Message CMOS Date/Time Not Set CMOS Battery...
... BIOS setup butthe device is enabled in Phenix BIOS Setup. PS2 Mouse support is not detected. This message appears after a fatal error has been detected. Replace the battery. This error can plug PS2 Mouse or set keyboardless operation in Setup to a weak CMOS battery. Cannot initialize the keyboard. You can be found Keyboard error System Halted Press TAB to toggle between the default POST display screen and a custom POST display screen. 26 Hardware Maintenance Manual POST Error Message CMOS Date/Time Not Set CMOS Battery...

Lenovo IdeaCentre A600 Hardware Maintenance Manual
Page 29
... boot drive is jumpered as a master and the optical drive is properly connected to the computer. Undetermined problems If this computer has a parallel ATA hard disk drive, make sure that the hard disk drive is jumpered as a slave. 1. Memory modules d. Hard disk drive h. Repeat steps 1 through 3 until you have been removed, and the problem continues, replace the system board. 27 Remove or disconnect the following components (if installed) one at a time. Extended video memory e. Any adapters c. External Cache RAM g. Chapter 6. External devices...
... boot drive is jumpered as a master and the optical drive is properly connected to the computer. Undetermined problems If this computer has a parallel ATA hard disk drive, make sure that the hard disk drive is jumpered as a slave. 1. Memory modules d. Hard disk drive h. Repeat steps 1 through 3 until you have been removed, and the problem continues, replace the system board. 27 Remove or disconnect the following components (if installed) one at a time. Extended video memory e. Any adapters c. External Cache RAM g. Chapter 6. External devices...

Lenovo IdeaCentre A600 Hardware Maintenance Manual
Page 74
... the board to "Removing the computer cover". 2. Remove the wireless keyboard and mouse receiver module. Replacing the touch sensor board To replace the touch sensor board 1. Hardware Maintenance Manual 8. Screw back the two screws on the metal bracket. 13. Set the new inverter board on the bracket, aligning the two screw holes on the bracket. 9. Refer to step 2 of the "Replacing the hard disk drive" section. 3. Disconnect the touch sensor board cable from...
... the board to "Removing the computer cover". 2. Remove the wireless keyboard and mouse receiver module. Replacing the touch sensor board To replace the touch sensor board 1. Hardware Maintenance Manual 8. Screw back the two screws on the metal bracket. 13. Set the new inverter board on the bracket, aligning the two screw holes on the bracket. 9. Refer to step 2 of the "Replacing the hard disk drive" section. 3. Disconnect the touch sensor board cable from...

Lenovo IdeaCentre A600 Hardware Maintenance Manual
Page 79
.... Remove the CPU fan. Remove the TV tuner card. Remove the optical drive. Refer to "Replacing the hard disk drive". 4. Remove the touch sensor board. Refer to "Replacing the MXM graphics card". 16. Refer to "Replacing the CPU". 14. Refer to "Replacing the wireless keyboard and mouse receiver module". 9. Remove the speaker system. Refer to the system board. 19. Disconnect all cables connected to "Replacing the Bluetooth module". 10. Remove the computer cover. Refer to "Replacing the touch sensor board". 18. Remove the wireless card. Chapter 7. Replacing hardware Replacing...
.... Remove the CPU fan. Remove the TV tuner card. Remove the optical drive. Refer to "Replacing the hard disk drive". 4. Remove the touch sensor board. Refer to "Replacing the MXM graphics card". 16. Refer to "Replacing the CPU". 14. Refer to "Replacing the wireless keyboard and mouse receiver module". 9. Remove the speaker system. Refer to the system board. 19. Disconnect all cables connected to "Replacing the Bluetooth module". 10. Remove the computer cover. Refer to "Replacing the touch sensor board". 18. Remove the wireless card. Chapter 7. Replacing hardware Replacing...

Lenovo IdeaCentre A600 Hardware Maintenance Manual
Page 81
.... Remove the computer cover. Refer to "Replacing the wireless receiver module". 9. Remove the CPU fan. Refer to "Replacing the hard disk drive". 4. Refer to "Replacing an optical drive". 5. Refer to "Completing the installation". Remove the TV tuner card. Refer to the system board. 24. Remove the touch sensor board. Screw back the six screws on the chassis. 22. Connect all components, boards, and cables to "Replacing the TV tuner card". 11. Remove the memory module. Remove the MXM fan. Remove...
.... Remove the computer cover. Refer to "Replacing the wireless receiver module". 9. Remove the CPU fan. Refer to "Replacing the hard disk drive". 4. Refer to "Replacing an optical drive". 5. Refer to "Completing the installation". Remove the TV tuner card. Refer to the system board. 24. Remove the touch sensor board. Screw back the six screws on the chassis. 22. Connect all components, boards, and cables to "Replacing the TV tuner card". 11. Remove the memory module. Remove the MXM fan. Remove...
Lenovo IdeaCentre A600 Hardware Maintenance Manual
Page 84
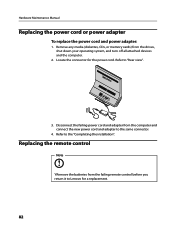
... same connector. 4. Refer to the "Completing the installation". Replacing the remote control Note YRemove the batteries from the computer and connect the new power cord and adapter to Lenovo for the power cord. Hardware Maintenance Manual Replacing the power cord or power adapter To replace the power cord and power adapter: 1. Remove any media (diskettes, CDs, or memory cards) from the drives, shut down your operating system, and turn off all attached devices and the computer. 2. Refer to "Rear view". 3. Locate the connector for a replacement...
... same connector. 4. Refer to the "Completing the installation". Replacing the remote control Note YRemove the batteries from the computer and connect the new power cord and adapter to Lenovo for the power cord. Hardware Maintenance Manual Replacing the power cord or power adapter To replace the power cord and power adapter: 1. Remove any media (diskettes, CDs, or memory cards) from the drives, shut down your operating system, and turn off all attached devices and the computer. 2. Refer to "Rear view". 3. Locate the connector for a replacement...

Lenovo IdeaCentre A600 Hardware Maintenance Manual
Page 85
..., depending on the parts replaced, you need to _Starting the Setup Utility_ in the User Guide or in the Setup Utility program. Refer to confirm the updated information in the Hardware Maintenance Manual. 1. Replacing hardware Completing the installation After replacing the parts, you might need to "Locating components and connectors" for the location of the computer chassis, and system bay. 83 Refer to install the computer cover and reconnect cables, including wired internet and power cords. Chapter 7.
..., depending on the parts replaced, you need to _Starting the Setup Utility_ in the User Guide or in the Setup Utility program. Refer to confirm the updated information in the Hardware Maintenance Manual. 1. Replacing hardware Completing the installation After replacing the parts, you might need to "Locating components and connectors" for the location of the computer chassis, and system bay. 83 Refer to install the computer cover and reconnect cables, including wired internet and power cords. Chapter 7.


