
Brochure
Page 3
Description Processors Preloaded Operating Systems Chipset Form Factor Machine Type Serial ATA Hard Drive Memory Optical Drive Integrated Communications WiFi Bluetooth Ports Slots Bays Display Web Camera Power Supply Dimensions (HxWxD) mm Keyboard Mouse Graphics Card Security Limited Warranty Preloaded Software m90z • Intel® Core™ i5-6x0 1333MHz 4T/dual core/4M/73W/ Turbo LGA 1156 • Intel® Core™ i3-5x0 1333MHz 4T/dual core/4M/73W/ LGA 1156 •...
Description Processors Preloaded Operating Systems Chipset Form Factor Machine Type Serial ATA Hard Drive Memory Optical Drive Integrated Communications WiFi Bluetooth Ports Slots Bays Display Web Camera Power Supply Dimensions (HxWxD) mm Keyboard Mouse Graphics Card Security Limited Warranty Preloaded Software m90z • Intel® Core™ i5-6x0 1333MHz 4T/dual core/4M/73W/ Turbo LGA 1156 • Intel® Core™ i3-5x0 1333MHz 4T/dual core/4M/73W/ LGA 1156 •...

User Manual
Page 5
...46 Replacing the power supply 47 © Copyright Lenovo , 2011 Replacing the keyboard 49 Replacing the mouse 50 Completing the parts replacement . . . . . 52 Obtaining device drivers 53 Basic security features 53 Integrated cable lock 53 Password protection 54 Erasing lost or forgotten passwords (clearing CMOS 54 Chapter 3. Updating system programs 67 Using system programs 67 Updating (flashing) the BIOS from a disc . . . . 67 Updating (flashing) the BIOS from your Windows operating system 6 Locating computer controls, connectors, and parts 7 Front view 8 Rear view 9 Component...
...46 Replacing the power supply 47 © Copyright Lenovo , 2011 Replacing the keyboard 49 Replacing the mouse 50 Completing the parts replacement . . . . . 52 Obtaining device drivers 53 Basic security features 53 Integrated cable lock 53 Password protection 54 Erasing lost or forgotten passwords (clearing CMOS 54 Chapter 3. Updating system programs 67 Using system programs 67 Updating (flashing) the BIOS from a disc . . . . 67 Updating (flashing) the BIOS from your Windows operating system 6 Locating computer controls, connectors, and parts 7 Front view 8 Rear view 9 Component...

User Manual
Page 9
... a microprocessor that runs at 1066 MHz (such as the Intel Pentium G6950 microprocessor), your computer. • "Software overview" on page 63. See Chapter 4 "Using the Setup Utility program" on page 6: This section provides information about the computer features. Internal drives • One slim Serial Advanced Technology Attachment (SATA) optical drive • One SATA hard disk drive Video subsystem • Integrated graphics card for your memory module(s) will operate at 1066...
... a microprocessor that runs at 1066 MHz (such as the Intel Pentium G6950 microprocessor), your computer. • "Software overview" on page 63. See Chapter 4 "Using the Setup Utility program" on page 6: This section provides information about the computer features. Internal drives • One slim Serial Advanced Technology Attachment (SATA) optical drive • One SATA hard disk drive Video subsystem • Integrated graphics card for your memory module(s) will operate at 1066...

User Manual
Page 10
...8226; Advanced Configuration and Power Interface (ACPI) support • Automatic power-on startup • Desktop Management Interface (DMI) • Intel Active Management Technology (AMT) (available in some models) • Enabling or disabling SATA devices • Enabling or disabling the serial port • Enabling or disabling USB connectors individually 2 ThinkCentre User Guide Expansion • One hard disk drive bay • One optical drive bay Power supply • 150-watt auto-sensing power supply Security features • Computrace • Cover presence switch (also called...
...8226; Advanced Configuration and Power Interface (ACPI) support • Automatic power-on startup • Desktop Management Interface (DMI) • Intel Active Management Technology (AMT) (available in some models) • Enabling or disabling SATA devices • Enabling or disabling the serial port • Enabling or disabling USB connectors individually 2 ThinkCentre User Guide Expansion • One hard disk drive bay • One optical drive bay Power supply • 150-watt auto-sensing power supply Security features • Computrace • Cover presence switch (also called...

User Manual
Page 11
..." on page 4: This section lists the physical specifications for a Video Graphics Array (VGA) IN connector and a DisplayPort out connector Audio subsystem • Integrated high-definition (HD) audio • Microphone connector and headphone connector • Internal speakers © Copyright Lenovo , 2011 1 However, if you locate your memory module(s) will operate at 1066 MHz. Internal drives • One slim Serial Advanced Technology Attachment (SATA) optical drive • One SATA hard disk drive Video subsystem • Integrated graphics card for your computer. •...
..." on page 4: This section lists the physical specifications for a Video Graphics Array (VGA) IN connector and a DisplayPort out connector Audio subsystem • Integrated high-definition (HD) audio • Microphone connector and headphone connector • Internal speakers © Copyright Lenovo , 2011 1 However, if you locate your memory module(s) will operate at 1066 MHz. Internal drives • One slim Serial Advanced Technology Attachment (SATA) optical drive • One SATA hard disk drive Video subsystem • Integrated graphics card for your computer. •...

User Manual
Page 30
.... 12. Your computer has two slots for installing or replacing DDR3 SODIMMs (small outline dual inline memory modules). To install or replace a memory module, do next: • To work with another piece of system memory. Figure 11. See "System board part and connector locations" on page 20. When installing or replacing a memory module, use 1 GB, 2 GB or 4 GB DDR3 SODIMMs in any repair before reading and understanding the "Important...
.... 12. Your computer has two slots for installing or replacing DDR3 SODIMMs (small outline dual inline memory modules). To install or replace a memory module, do next: • To work with another piece of system memory. Figure 11. See "System board part and connector locations" on page 20. When installing or replacing a memory module, use 1 GB, 2 GB or 4 GB DDR3 SODIMMs in any repair before reading and understanding the "Important...

User Manual
Page 32
... of memory that are lost. Removing the battery 24 ThinkCentre User Guide Refer to : http://www.lenovo.com/support This section provides instructions on page 12. 5. Place a soft, clean towel or cloth on the computer. Locate the battery on page 15. 4. A battery keeps the information active when you turn off the computer. See "Removing the computer cover" on the system board. Figure 14. Remove all media from...
... of memory that are lost. Removing the battery 24 ThinkCentre User Guide Refer to : http://www.lenovo.com/support This section provides instructions on page 12. 5. Place a soft, clean towel or cloth on the computer. Locate the battery on page 15. 4. A battery keeps the information active when you turn off the computer. See "Removing the computer cover" on the system board. Figure 14. Remove all media from...

User Manual
Page 44
..., do next: • To work with your computer or attempt any repair before reading and understanding the "Important safety information" in some models. 36 ThinkCentre User Guide Remove all media from the drives and turn off all cables that came with another piece of the computer. Then, disconnect all power cords from the system board. 7. Connect the new Bluetooth module cable to do the following...
..., do next: • To work with your computer or attempt any repair before reading and understanding the "Important safety information" in some models. 36 ThinkCentre User Guide Remove all media from the drives and turn off all cables that came with another piece of the computer. Then, disconnect all power cords from the system board. 7. Connect the new Bluetooth module cable to do the following...

User Manual
Page 49
... devices and the computer. See "System board part and connector locations" on page 19. Reconnect the internal speaker cables to "Completing the parts replacement" on page 11. 5. Remove all cables that the screen is against the surface and the cover is available only in each of hardware, go to the appropriate section. • To complete the installation or replacement, go to: http://www.lenovo.com/support This section provides instructions...
... devices and the computer. See "System board part and connector locations" on page 19. Reconnect the internal speaker cables to "Completing the parts replacement" on page 11. 5. Remove all cables that the screen is against the surface and the cover is available only in each of hardware, go to the appropriate section. • To complete the installation or replacement, go to: http://www.lenovo.com/support This section provides instructions...

User Manual
Page 55
... computer cover. See "Replacing the hard disk drive" on the desk or surface. Install the three screws to secure the right I/O assembly to the computer. 2. Replacing the power supply Attention: Do not open your computer or attempt any repair before reading and understanding the "Important safety information" in the computer main bracket. 8. See "Removing the computer cover" on page 12. 5. See "System board part and connector locations...
... computer cover. See "Replacing the hard disk drive" on the desk or surface. Install the three screws to secure the right I/O assembly to the computer. 2. Replacing the power supply Attention: Do not open your computer or attempt any repair before reading and understanding the "Important safety information" in the computer main bracket. 8. See "Removing the computer cover" on page 12. 5. See "System board part and connector locations...

User Manual
Page 56
.... See "Replacing the hard disk drive" on page 52. 48 ThinkCentre User Guide What to do next: • To work with those in the computer main bracket and install the two screws to secure the new power supply. 11. Route the new power cord connector cable and then position the power cord connector bracket on the system board. Connect the new power supply cable to "Completing the parts replacement" on page 25. 15. See "Removing or...
.... See "Replacing the hard disk drive" on page 52. 48 ThinkCentre User Guide What to do next: • To work with those in the computer main bracket and install the two screws to secure the new power supply. 11. Route the new power cord connector cable and then position the power cord connector bracket on the system board. Connect the new power supply cable to "Completing the parts replacement" on page 25. 15. See "Removing or...

User Manual
Page 66
... Windows Vista operating system, you can use recovery media to put the computer in your computer • On an attached external USB hard disk drive • On a network drive • On recordable discs (a recordable optical drive is installed in an operational state after all other USB storage device) to the factory default settings only. When the Startup Device Menu opens, release the F12 key. 3. Performing a backup operation This section provides instructions on how to the factory default settings, all your computer to the factory default settings...
... Windows Vista operating system, you can use recovery media to put the computer in your computer • On an attached external USB hard disk drive • On a network drive • On recordable discs (a recordable optical drive is installed in an operational state after all other USB storage device) to the factory default settings only. When the Startup Device Menu opens, release the F12 key. 3. Performing a backup operation This section provides instructions on how to the factory default settings, all your computer to the factory default settings...

User Manual
Page 68
... start the Windows operating system. Note: If the Rescue and Recovery workspace fails to open, see a logo screen, release the F11 key. 3. After restoring your hard disk drive to other media. Some computers come with Microsoft Office or Microsoft Works. Creating and using a rescue medium With a rescue medium, such as a disc or a USB hard disk drive, you can recover the computer from failures that prevent you might have set a Rescue and Recovery password, type...
... start the Windows operating system. Note: If the Rescue and Recovery workspace fails to open, see a logo screen, release the F11 key. 3. After restoring your hard disk drive to other media. Some computers come with Microsoft Office or Microsoft Works. Creating and using a rescue medium With a rescue medium, such as a disc or a USB hard disk drive, you can recover the computer from failures that prevent you might have set a Rescue and Recovery password, type...

User Manual
Page 69
... turning on the computer hard disk drive (usually drive C:) in some computer models. When the rescue medium starts, the Rescue and Recovery workspace opens. From the Windows desktop, click Start ➙ All Programs ➙ Lenovo ThinkVantage Tools ➙ Enhanced Backup and Restore. From the Windows desktop, click Start ➙ All Programs ➙ ThinkVantage ➙ Create Recovery Media. Installing or reinstalling device drivers Before installing or reinstalling device drivers, make sure that come with individual devices. Other device drivers are located...
... turning on the computer hard disk drive (usually drive C:) in some computer models. When the rescue medium starts, the Rescue and Recovery workspace opens. From the Windows desktop, click Start ➙ All Programs ➙ Lenovo ThinkVantage Tools ➙ Enhanced Backup and Restore. From the Windows desktop, click Start ➙ All Programs ➙ ThinkVantage ➙ Create Recovery Media. Installing or reinstalling device drivers Before installing or reinstalling device drivers, make sure that come with individual devices. Other device drivers are located...
User Manual
Page 70
... the screen to display the directory structure of your hard disk drive. 3. See "Creating and using recovery media" on page 63. To install or reinstall the device driver for a factory-installed device, do one of the following : 1. Turn on page 65 for future use. 62 ThinkCentre User Guide This file might not have the rescue device (an internal hard disk drive, a disc, a USB hard disk drive, or other methods of recovery media as early as the first boot device in the startup device sequence...
... the screen to display the directory structure of your hard disk drive. 3. See "Creating and using recovery media" on page 63. To install or reinstall the device driver for a factory-installed device, do one of the following : 1. Turn on page 65 for future use. 62 ThinkCentre User Guide This file might not have the rescue device (an internal hard disk drive, a disc, a USB hard disk drive, or other methods of recovery media as early as the first boot device in the startup device sequence...
User Manual
Page 73
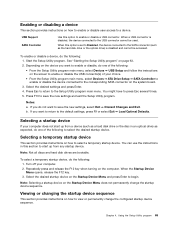
...; From the Setup Utility program main menu, select Devices ➙ USB Setup and follow the instructions on the Startup Device Menu does not permanently change the configured startup device sequence. When a USB connector is disabled and cannot be used. When this option to press Esc several times. 5. You might have to enable or disable a USB connector. If you want to select the desired startup device. Start the Setup Utility program. USB Support SATA Controller Use this option is set to Disabled, the device connected to the SATA connector (such as...
...; From the Setup Utility program main menu, select Devices ➙ USB Setup and follow the instructions on the Startup Device Menu does not permanently change the configured startup device sequence. When a USB connector is disabled and cannot be used. When this option to press Esc several times. 5. You might have to enable or disable a USB connector. If you want to select the desired startup device. Start the Setup Utility program. USB Support SATA Controller Use this option is set to Disabled, the device connected to the SATA connector (such as...
User Manual
Page 76
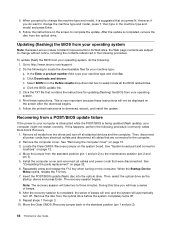
... machine type and model, it is being updated (flash update), your operating system. 4. Insert the POST/BIOS update (flash) disc into the optical drive. The recovery session begins. During this happens, perform the following procedure. When prompted to download, extract, and install the update. Follow the instructions on the screen to http://www.lenovo.com/support. 2. Go to complete the update. c. Click the BIOS update link. 3. Print these instructions will take two to the maintenance position (pin...
... machine type and model, it is being updated (flash update), your operating system. 4. Insert the POST/BIOS update (flash) disc into the optical drive. The recovery session begins. During this happens, perform the following procedure. When prompted to download, extract, and install the update. Follow the instructions on the screen to http://www.lenovo.com/support. 2. Go to complete the update. c. Click the BIOS update link. 3. Print these instructions will take two to the maintenance position (pin...

User Manual
Page 80
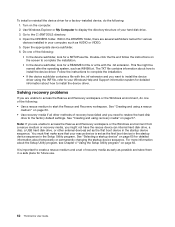
... battery or batteries installed in the wireless keyboard or mouse are in the startup device sequence. You can use the diagnostics feature of your computer to test devices, diagnose computer problems, create bootable diagnostic media, update system drivers, and view system information. • To run the Lenovo ThinkVantage Toolbox program on the Windows Vista operating system, click Start ➙ All Programs ➙ ThinkVantage ➙ Lenovo ThinkVantage Toolbox. Follow the instructions on the screen. Usually, the operating system...
... battery or batteries installed in the wireless keyboard or mouse are in the startup device sequence. You can use the diagnostics feature of your computer to test devices, diagnose computer problems, create bootable diagnostic media, update system drivers, and view system information. • To run the Lenovo ThinkVantage Toolbox program on the Windows Vista operating system, click Start ➙ All Programs ➙ ThinkVantage ➙ Lenovo ThinkVantage Toolbox. Follow the instructions on the screen. Usually, the operating system...
User Manual
Page 86
... Microsoft Windows product, refer to the Microsoft Product Support Services Web site at http://support.microsoft.com/directory or you can contact the Customer Support Center. For technical assistance with your computer or relocate it to a country where your desktop or notebook computer machine type is available, go to the Lenovo Web site at: http://www.lenovo.com 78 ThinkCentre User Guide upgraded or extended hardware repair services; Service...
... Microsoft Windows product, refer to the Microsoft Product Support Services Web site at http://support.microsoft.com/directory or you can contact the Customer Support Center. For technical assistance with your computer or relocate it to a country where your desktop or notebook computer machine type is available, go to the Lenovo Web site at: http://www.lenovo.com 78 ThinkCentre User Guide upgraded or extended hardware repair services; Service...

User Manual
Page 90
... specifications 4 power supply features 2 power supply, replacing 47 Power-on password 64 power-on self-test (POST) 67 programs, updating system 67 protection, password 54 purchasing additional services 78 R rear I/O assembly, replacing 45 recovering a POST/BIOS update failure 68 82 ThinkCentre User Guide software 57 recovery boot-block 68 operations, backup and 58 problems, solving 62 recovery media, creating and using 57 reinstalling device drivers 61 removing computer cover 15 replacing ambient light sensor 37 battery 24 Bluetooth module 35 card reader 44 ExpressCard 39 hard disk drive...
... specifications 4 power supply features 2 power supply, replacing 47 Power-on password 64 power-on self-test (POST) 67 programs, updating system 67 protection, password 54 purchasing additional services 78 R rear I/O assembly, replacing 45 recovering a POST/BIOS update failure 68 82 ThinkCentre User Guide software 57 recovery boot-block 68 operations, backup and 58 problems, solving 62 recovery media, creating and using 57 reinstalling device drivers 61 removing computer cover 15 replacing ambient light sensor 37 battery 24 Bluetooth module 35 card reader 44 ExpressCard 39 hard disk drive...


