

IB-51 WEB Browser Management Guide
Page 11
To activate the configuration, the Encryption needs to be designated as creating the queue require admin, supervisor, or equivalent rights. To set up to eight) are automatically connected. Choose from four supported four frame types: 802.2, SNAP, ETHERNET-II, and 802.3. ... system supports both NDS and bindery printing in remote printer mode that the password here match the print server password set to not use it. - Login requires that are registered, network discovery is enabled (On) or disabled (Off). Shows the print server name. If none are connected by the NetWare utility...
To activate the configuration, the Encryption needs to be designated as creating the queue require admin, supervisor, or equivalent rights. To set up to eight) are automatically connected. Choose from four supported four frame types: 802.2, SNAP, ETHERNET-II, and 802.3. ... system supports both NDS and bindery printing in remote printer mode that the password here match the print server password set to not use it. - Login requires that are registered, network discovery is enabled (On) or disabled (Off). Shows the print server name. If none are connected by the NetWare utility...

Fax System (W) Operation Guide Rev-2.2013.1
Page 26
... 5 Press [Off] or [On] of Time Zone. 4 Select the region and press [OK]. The factory default settings for the login user name and password are both 'Admin'. 3 Press [Change] of Summer Time and then press [OK]. The user authentication screen is conducted based on the touch panel of the... Entry Date and Time Entry Register the date and time of Date/Time. 7 Enter the date and time using [+]/[-]. Enter a login user name and password, and press [Login]. Date/Timer/Energy Saver - Because the FAX delayed transmission is displayed. Enter the time by a 24-hour system. Time Zone ...
... 5 Press [Off] or [On] of Time Zone. 4 Select the region and press [OK]. The factory default settings for the login user name and password are both 'Admin'. 3 Press [Change] of Summer Time and then press [OK]. The user authentication screen is conducted based on the touch panel of the... Entry Date and Time Entry Register the date and time of Date/Time. 7 Enter the date and time using [+]/[-]. Enter a login user name and password, and press [Login]. Date/Timer/Energy Saver - Because the FAX delayed transmission is displayed. Enter the time by a 24-hour system. Time Zone ...
Fax System (W) Operation Guide Rev-2.2013.1
Page 95
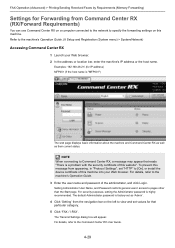
...RX 1 Launch your Web browser. For details, refer to the machine's Operation Guide. 3 Enter the user name and password of the administrator, and click Login. Refer to Command Center RX, a message may appear that particular category. 5 Click 'FAX / i-FAX'. Examples: 192.168.48.21/ (for Forwarding...address) MFP001 (if the host name is "MFP001") The web page displays basic information about the machine and Command Center RX as well as 'Admin'. 4 Click 'Setting' from appearing, in "Protocol Settings", set values for that reads "There is a problem with the security certificate of this...
...RX 1 Launch your Web browser. For details, refer to the machine's Operation Guide. 3 Enter the user name and password of the administrator, and click Login. Refer to Command Center RX, a message may appear that particular category. 5 Click 'FAX / i-FAX'. Examples: 192.168.48.21/ (for Forwarding...address) MFP001 (if the host name is "MFP001") The web page displays basic information about the machine and Command Center RX as well as 'Admin'. 4 Click 'Setting' from appearing, in "Protocol Settings", set values for that reads "There is a problem with the security certificate of this...

Fax System (W) Operation Guide Rev-2.2013.1
Page 180
...to fax printing, all day. 5 Specify the code to enter the start time and end time, you cannot use all other printing operations are both 'Admin'. 3 Press [ ] and then [Change] of copy jobs and printer jobs, and printing from USB memory. Press [Unlock Code] and enter a four... (Unusable Time) Prohibiting FAX Printing at Specified Times (Unusable Time) This feature sets a time period during unusable time, enter the Unlock Code and press [Login]. 6 Press [OK]. 7 Press [OK]. 6-44 NOTE To use [+] or [-] to temporarily cancel the unusable setting during the unusable time period, including...
...to fax printing, all day. 5 Specify the code to enter the start time and end time, you cannot use all other printing operations are both 'Admin'. 3 Press [ ] and then [Change] of copy jobs and printer jobs, and printing from USB memory. Press [Unlock Code] and enter a four... (Unusable Time) Prohibiting FAX Printing at Specified Times (Unusable Time) This feature sets a time period during unusable time, enter the Unlock Code and press [Login]. 6 Press [OK]. 7 Press [OK]. 6-44 NOTE To use [+] or [-] to temporarily cancel the unusable setting during the unusable time period, including...
Fax System (W) Operation Guide Rev-2.2013.1
Page 186
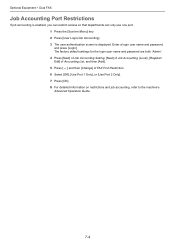
... so that departments can only use one port. 1 Press the [System Menu] key. 2 Press [User Login/Job Accounting]. 3 The user authentication screen is displayed. The factory default settings for the login user name and password are both 'Admin'. 4 Press [Next] of Job Accounting Setting, [Next] of Job Accounting (Local), [Register/ Edit] of Accounting...], [Use Port 1 Only], or [Use Port 2 Only]. 7 Press [OK]. 8 For detailed information on restrictions and job accounting, refer to the machine's Advanced Operation Guide. 7-4 Enter a login user name and password, and press...
... so that departments can only use one port. 1 Press the [System Menu] key. 2 Press [User Login/Job Accounting]. 3 The user authentication screen is displayed. The factory default settings for the login user name and password are both 'Admin'. 4 Press [Next] of Job Accounting Setting, [Next] of Job Accounting (Local), [Register/ Edit] of Accounting...], [Use Port 1 Only], or [Use Port 2 Only]. 7 Press [OK]. 8 For detailed information on restrictions and job accounting, refer to the machine's Advanced Operation Guide. 7-4 Enter a login user name and password, and press...

Fax System (W) Operation Guide Rev-2.2013.1
Page 191
..., setting the Administrator password is "MFP001") The web page displays basic information about the machine and Command Center RX as well as 'Admin'. 4 Click 'Function Settings' from appearing, in "Protocol Settings", set values for information on a computer that is a problem with ...the security certificate of the administrator, and click Login. The Transmit Settings dialog box will appear. Setting Administrator User Name, and Password restricts general users' access to the machine's Operation ...
..., setting the Administrator password is "MFP001") The web page displays basic information about the machine and Command Center RX as well as 'Admin'. 4 Click 'Function Settings' from appearing, in "Protocol Settings", set values for information on a computer that is a problem with ...the security certificate of the administrator, and click Login. The Transmit Settings dialog box will appear. Setting Administrator User Name, and Password restricts general users' access to the machine's Operation ...

Fax System (W) Operation Guide Rev-2.2013.1
Page 243
... Resolution Compression Paper Size One-Touch Key Print List FAX List (Index) FAX List (No.) Address Book Defaults Address Book Type User Login/Job Accounting User Accounting Job Accounting † Optional Internet FAX Kit is required. †† Requires 2 optional FAX Kits (Dual FAX... Entry (FAX) Quick Setup Registration Date/Timer/Energy Saver Date/Time Time Zone Unusable Time Report Report Print Status Page Print Admin Report Setting Outgoing FAX Report Incoming FAX Report Result Report Setting Send Result Report FAX ― Attach Image Canceled before Sending...
... Resolution Compression Paper Size One-Touch Key Print List FAX List (Index) FAX List (No.) Address Book Defaults Address Book Type User Login/Job Accounting User Accounting Job Accounting † Optional Internet FAX Kit is required. †† Requires 2 optional FAX Kits (Dual FAX... Entry (FAX) Quick Setup Registration Date/Timer/Energy Saver Date/Time Time Zone Unusable Time Report Report Print Status Page Print Admin Report Setting Outgoing FAX Report Incoming FAX Report Result Report Setting Send Result Report FAX ― Attach Image Canceled before Sending...

Kyocera Command Center RX User Guide Rev-2013.02
Page 5
...Server Access the embedded server by entering the printing system's host name or IP address in the following before use the predefined Admin as the Use Name, and Admin as the Password to security, network printing, E-mail transmission and advanced networking. For example, http://192.168.10.1. You... the Use Name, and "Admin" as the Password to the web server that is built into the printing device. It allows you must first specify the DNS server information. For initial login, use the host name, you to verify the operating status of optional equipment installed. The ...
...Server Access the embedded server by entering the printing system's host name or IP address in the following before use the predefined Admin as the Use Name, and Admin as the Password to security, network printing, E-mail transmission and advanced networking. For example, http://192.168.10.1. You... the Use Name, and "Admin" as the Password to the web server that is built into the printing device. It allows you must first specify the DNS server information. For initial login, use the host name, you to verify the operating status of optional equipment installed. The ...
Kyocera Command Center RX User Guide Rev-2013.02
Page 11
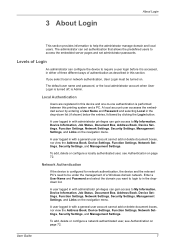
...nor view the Address Book, Device Settings, Function Settings, Network Settings, Security Settings, and Management Settings. If you want to login to My Information, Device Information, Job Status, Document Box, Address Book, Device Settings, Function Settings, Network Settings, Security Settings...Users are registered in with administrator privileges can configure the device to require a user login before it is Admin. A user logged in the dropdown list. 3 About Login About Login This section provides information to access the embedded server pages and set administrator passwords. ...
...nor view the Address Book, Device Settings, Function Settings, Network Settings, Security Settings, and Management Settings. If you want to login to My Information, Device Information, Job Status, Document Box, Address Book, Device Settings, Function Settings, Network Settings, Security Settings...Users are registered in with administrator privileges can configure the device to require a user login before it is Admin. A user logged in the dropdown list. 3 About Login About Login This section provides information to access the embedded server pages and set administrator passwords. ...
Kyocera Command Center RX User Guide Rev-2013.02
Page 12
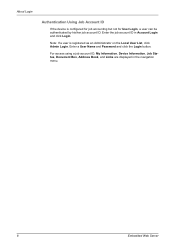
Enter a User Name and Password and click the Login button. Note: If a user is configured for job accounting but not for User Login, a user can be authenticated by his/her job account ID. Enter the job account ID in the navigation menu. 8 Embedded Web Server For access using a job account ID, My Information, Device Information, Job Status, Document Box, Address Book, and Links are displayed in Account Login and click Login. About Login Authentication Using Job Account ID If the device is registered as an Administrator on the Local User List, click Admin Login.
Enter a User Name and Password and click the Login button. Note: If a user is configured for job accounting but not for User Login, a user can be authenticated by his/her job account ID. Enter the job account ID in the navigation menu. 8 Embedded Web Server For access using a job account ID, My Information, Device Information, Job Status, Document Box, Address Book, and Links are displayed in Account Login and click Login. About Login Authentication Using Job Account ID If the device is registered as an Administrator on the Local User List, click Admin Login.

Kyocera NET ADMIN Operation Guide for Ver 3.1
Page 3
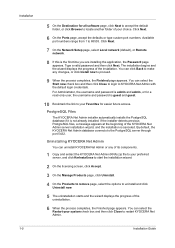
... KYOCERA Net Admin 1-4 PostgreSQL Files ...1-5 Uninstalling KYOCERA Net Admin 1-5 Removing PostgreSQL Files 1-6 Remote Agent Installation ...1-6 RPC Connections for Remote Agent Installation 1-6 Stand-alone Agent Installation 1-7 USB Device Connections ...1-8 Connecting a USB device ...1-9 Local Device Agent Installation 1-9 Installing a Local Device Agent 1-9 Multi-Set Template Editor Installation 1-10 Installing the Multi-Set Template Editor 1-10 KYOCERA Net Admin Login ...1-10...
... KYOCERA Net Admin 1-4 PostgreSQL Files ...1-5 Uninstalling KYOCERA Net Admin 1-5 Removing PostgreSQL Files 1-6 Remote Agent Installation ...1-6 RPC Connections for Remote Agent Installation 1-6 Stand-alone Agent Installation 1-7 USB Device Connections ...1-8 Connecting a USB device ...1-9 Local Device Agent Installation 1-9 Installing a Local Device Agent 1-9 Multi-Set Template Editor Installation 1-10 Installing the Multi-Set Template Editor 1-10 KYOCERA Net Admin Login ...1-10...
Kyocera NET ADMIN Operation Guide for Ver 3.1
Page 8
... connects to locate another folder of the uninstallation. 6 When the process completes, the Finished page appears. Available port numbers range from 1 to KYOCERA Net Admin with the default login credentials. If the installer detects previous PostgreSQL files, a message appears at the beginning of the installation. Click Next. 7 On the Network Setup page, select...
... connects to locate another folder of the uninstallation. 6 When the process completes, the Finished page appears. Available port numbers range from 1 to KYOCERA Net Admin with the default login credentials. If the installer detects previous PostgreSQL files, a message appears at the beginning of the installation. Click Next. 7 On the Network Setup page, select...
Kyocera NET ADMIN Operation Guide for Ver 3.1
Page 10
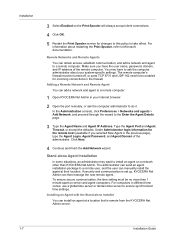
... Networks and agents > Add Network, and proceed through the wizard to Microsoft documentation. If security and communication is set up, KYOCERA Net Admin can install an agent at their location. Installing an Agent with the Stand-alone Installer You can then manage the new remote ... apart on server and agent computers. The administrator can add a network and agent to a remote computer. 1 Open KYOCERA Net Admin in the previous page), type the Agent Login, Agent Password, and Agent Domain of the remote computer. Installation 3 Select Enabled so the Print Spooler will always accept...
... Networks and agents > Add Network, and proceed through the wizard to Microsoft documentation. If security and communication is set up, KYOCERA Net Admin can install an agent at their location. Installing an Agent with the Stand-alone Installer You can then manage the new remote ... apart on server and agent computers. The administrator can add a network and agent to a remote computer. 1 Open KYOCERA Net Admin in the previous page), type the Agent Login, Agent Password, and Agent Domain of the remote computer. Installation 3 Select Enabled so the Print Spooler will always accept...

Kyocera NET ADMIN Operation Guide for Ver 3.1
Page 11
... the Agent Details page. 3 Type the Agent Name, and Agent IP Address. USB Device Connections KYOCERA Net Admin can support several USB connected devices at the path above to create a stand-alone agent installer. Leave the administrator login information blank. Microsoft .NET Framework 4.0 or higher must have administrator rights on the computer. Installation...
... the Agent Details page. 3 Type the Agent Name, and Agent IP Address. USB Device Connections KYOCERA Net Admin can support several USB connected devices at the path above to create a stand-alone agent installer. Leave the administrator login information blank. Microsoft .NET Framework 4.0 or higher must have administrator rights on the computer. Installation...
Kyocera NET ADMIN Operation Guide for Ver 3.1
Page 13
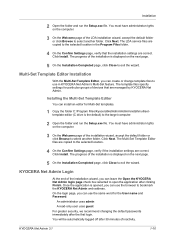
...use the browser to exit the wizard. KYOCERA Net Admin 3.1 1-10 Installation 2 Open the folder and run the Setup.exe file. The LDA service files are correct. Installing the Multi-Set Template Editor You can leave the Open the KYOCERA Net Admin login page check box selected to the target ...computer. 2 Open the folder and run the Setup.exe file. Click Next. KYOCERA Net Admin Login At the end of devices that the installation settings are managed by KYOCERA Net Admin. Multi-Set Template Editor Installation With the Multi-Set Template Editor, you can install an ...
...use the browser to exit the wizard. KYOCERA Net Admin 3.1 1-10 Installation 2 Open the folder and run the Setup.exe file. The LDA service files are correct. Installing the Multi-Set Template Editor You can leave the Open the KYOCERA Net Admin login page check box selected to the target ...computer. 2 Open the folder and run the Setup.exe file. Click Next. KYOCERA Net Admin Login At the end of devices that the installation settings are managed by KYOCERA Net Admin. Multi-Set Template Editor Installation With the Multi-Set Template Editor, you can install an ...
Kyocera NET ADMIN Operation Guide for Ver 3.1
Page 14
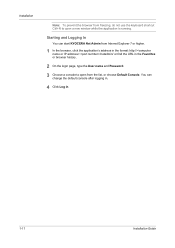
Starting and Logging In You can change the default console after logging in. 4 Click Log in the Favorites or browser history. 2 On the login page, type the User name and Password. 3 Choose a console to open from Internet Explorer 7 or higher. 1 In the browser, click the ...application's address in the format: http://:/netadmin/ or find the URL in . 1-11 Installation Guide You can start KYOCERA Net Admin from the list, or choose Default Console. Installation Note: To prevent the browser from freezing, do not use the keyboard shortcut Ctrl+N to open ...
Starting and Logging In You can change the default console after logging in. 4 Click Log in the Favorites or browser history. 2 On the login page, type the User name and Password. 3 Choose a console to open from Internet Explorer 7 or higher. 1 In the browser, click the ...application's address in the format: http://:/netadmin/ or find the URL in . 1-11 Installation Guide You can start KYOCERA Net Admin from the list, or choose Default Console. Installation Note: To prevent the browser from freezing, do not use the keyboard shortcut Ctrl+N to open ...

Setup Tool Operation Guide Rev-1
Page 42
...models not supported by the conversion target model may be left blank. • In particular models, import data is not reflected in the keyboard login setting of Device Authentication Settings. • In the port No. To edit the individual use restriction of Account List depends on the copy counter... as is. • In the maintenance mode U917, only reading is available for KM-3050, KM-4050, KM-5050, and TASKalfa 300i. They can be opened but no Admin will be registered to the MFP. • When converting data, setting values not supported by the maintenance mode U917. • ...
...models not supported by the conversion target model may be left blank. • In particular models, import data is not reflected in the keyboard login setting of Device Authentication Settings. • In the port No. To edit the individual use restriction of Account List depends on the copy counter... as is. • In the maintenance mode U917, only reading is available for KM-3050, KM-4050, KM-5050, and TASKalfa 300i. They can be opened but no Admin will be registered to the MFP. • When converting data, setting values not supported by the maintenance mode U917. • ...
TASKalfa 3051ci/3551ci/4551ci/5551ci Operation Guide Rev-1 2013.6
Page 95
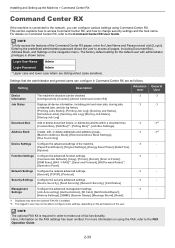
...Settings], [One Touch Key] Device Settings Configure the advanced settings of the Command Center RX pages, enter the User Name and Password and click [Login]. Here, information on using Command Center RX. For more information on the FAX settings has been omitted. NOTE To fully access the features of the...mail], [Scan to the Command Center RX User Guide. Entering the predefined administrator password allows the user to change security settings and the host name. Login User Name Admin Login Password Admin * Upper case and lower case letters are as follows.
...Settings], [One Touch Key] Device Settings Configure the advanced settings of the Command Center RX pages, enter the User Name and Password and click [Login]. Here, information on using Command Center RX. For more information on the FAX settings has been omitted. NOTE To fully access the features of the...mail], [Scan to the Command Center RX User Guide. Entering the predefined administrator password allows the user to change security settings and the host name. Login User Name Admin Login Password Admin * Upper case and lower case letters are as follows.

TASKalfa 3051ci/3551ci/4551ci/5551ci Operation Guide Rev-1 2013.6
Page 105
...). 6 Click on target device], and then click [Next]. 1 2 3 5 Select the model you want to back up, and click [Next]. 1 2 NOTE If the "Admin Login" screen appears, enter the "Admin Login" and "Login Password", and then click [OK]. Installing and Setting up the Machine > Transferring data from our other products 4 Select [Create from device] and remove...
...). 6 Click on target device], and then click [Next]. 1 2 3 5 Select the model you want to back up, and click [Next]. 1 2 NOTE If the "Admin Login" screen appears, enter the "Admin Login" and "Login Password", and then click [OK]. Installing and Setting up the Machine > Transferring data from our other products 4 Select [Create from device] and remove...

TASKalfa 3051ci/3551ci/4551ci/5551ci Operation Guide Rev-1 2013.6
Page 418
... a new user. Each user's properties are: Machine Administrator User Name: DeviceAdmin Login User Name: 3051ci: 3000, 3551ci: 3500, 4551ci: 4500, 5551ci: 5500 Login Password: 3051ci: 3000, 3551ci: 3500, 4551ci: 4500, 5551ci: 5500 Access Level: Machine Administrator Administrator User Name: Admin Login User Name: Admin Login Password: Admin Access Level: Administrator * Upper case and lower case letters are distinguished (case...
... a new user. Each user's properties are: Machine Administrator User Name: DeviceAdmin Login User Name: 3051ci: 3000, 3551ci: 3500, 4551ci: 4500, 5551ci: 5500 Login Password: 3051ci: 3000, 3551ci: 3500, 4551ci: 4500, 5551ci: 5500 Access Level: Machine Administrator Administrator User Name: Admin Login User Name: Admin Login Password: Admin Access Level: Administrator * Upper case and lower case letters are distinguished (case...


